Good morning Tobias. Wow. I would never have thought a waterway would be so much work. As always beautifully done. Cheers GrantGood evening everyone, it's been a while since there was an update, in my defense, the Admiralty wanted a new wall color in the living room and dining room, the end result was that all the rooms got a new coat of paint. Furthermore, spring is just around the corner and so I've spent the last few nice days in the garden.
Now for the important thing. Thank you all for your comments and the likes you have received.
The next step was to make the waterway. This is not easy, it has to be adapted to the curvature of the inside, which at first doesn't seem that difficult, but the curvature is not consistent along the whole length. Unfortunately I am unable to take pictures of this process as you need both hands to work.
View attachment 440854
A quick explanation:
You determine the measurement from the plan, copy the sides with the waterway and cut it out of a board of the right thickness. Then hold it to the inside, take a fine pencil and transfer the slope to the profile of the waterway (front and back). I carefully sanded it down along the whole length and finally adjusted it with a scraper. Then mark the beams, mill them and adjust them again.
View attachment 440853
View attachment 440859
View attachment 440857
View attachment 440858
Now for the slope of the waterway on the inside:
You need two measurements for this, the thickness of the planks on the bulwark and the thickness of the deck boards. The waterway is already in place, now I took a sample of the plank on the bulwark and positioned it and then transferred it to the entire length of the waterway with a pencil, the same applies to the deck boards. Sand again and scrape off a little to get a fairly straight surface.
View attachment 440855
View attachment 440856
The advantage of scraping is that the pores in the wood do not get clogged and you get a much better finish when you finish the surface with oil or varnish.
-

Win a Free Custom Engraved Brass Coin!!!
As a way to introduce our brass coins to the community, we will raffle off a free coin during the month of August. Follow link ABOVE for instructions for entering.
-

PRE-ORDER SHIPS IN SCALE TODAY!
The beloved Ships in Scale Magazine is back and charting a new course for 2026!
Discover new skills, new techniques, and new inspirations in every issue.
NOTE THAT OUR FIRST ISSUE WILL BE JAN/FEB 2026
You are using an out of date browser. It may not display this or other websites correctly.
You should upgrade or use an alternative browser.
You should upgrade or use an alternative browser.
LE ROCHEFORT - Harbour yacht from 1787 1:36 by Tobias (Monograph by ANCRE)
- Thread starter Tobias
- Start date
- Watchers 71
-
- Tags
- ancre group build le rochefort
Hello everyone, @AnobiumPunctatum @Mirek @Peter Voogt @Titoneri @Jimsky @GrantTyler thank you for your comments and all the likes you received.
Not only was the waterway a lot of work, the adjacent row of planks and the slightly offset row of planks are also milled in; they engage in the dovetails and the groove of the deck beams.
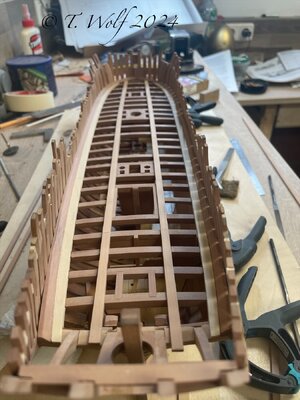
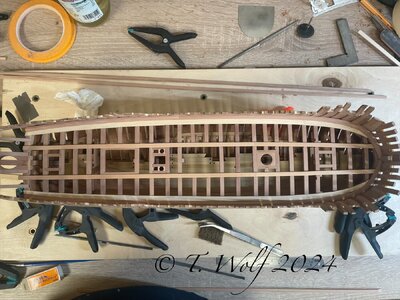
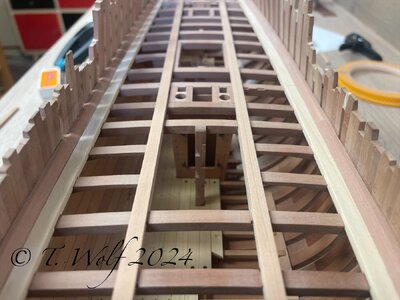
The next step is the outer decorative strip, for this I measured the height and marked the course with the help of adhesive tape.
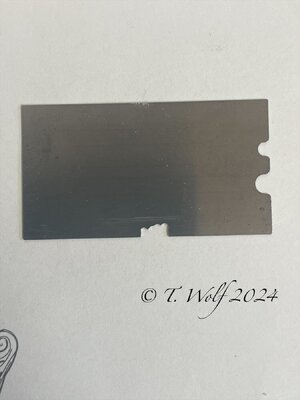
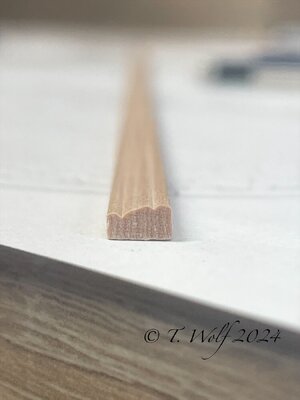
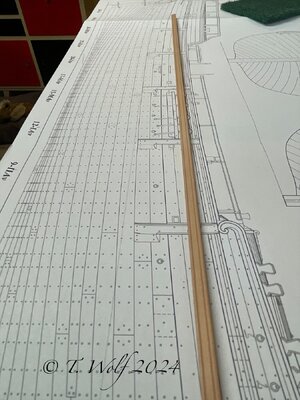
Making the decorative strip: For this I cut and filed the shape into a piece of sheet metal, then the strip is shaped.
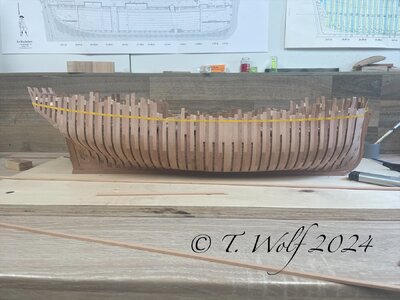
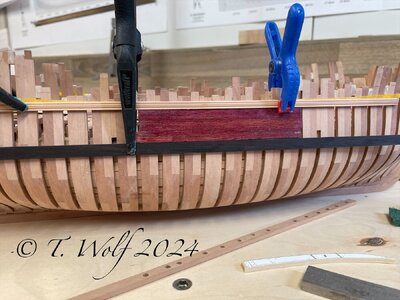
And here's a little trick, unfortunately this color scheme is not common on service ships like Le Rochefort. Yellow, ochre yellow or ochre red would be okay. Well, at some point I'll use the amaranth wood, it has a wonderful purple tone.
That's it for today, have a nice day and thank you for visiting.
Not only was the waterway a lot of work, the adjacent row of planks and the slightly offset row of planks are also milled in; they engage in the dovetails and the groove of the deck beams.


The next step is the outer decorative strip, for this I measured the height and marked the course with the help of adhesive tape.
Making the decorative strip: For this I cut and filed the shape into a piece of sheet metal, then the strip is shaped.


And here's a little trick, unfortunately this color scheme is not common on service ships like Le Rochefort. Yellow, ochre yellow or ochre red would be okay. Well, at some point I'll use the amaranth wood, it has a wonderful purple tone.

That's it for today, have a nice day and thank you for visiting.
- Joined
- Dec 9, 2019
- Messages
- 964
- Points
- 403

Witaj
Pięknie zrobiłeś tą blaszkę do listwy ozdobnej ,praca na najwyższym poziomie Tobiaszu. Pozdrawiam Mirek
Hello
You made this plate for the decorative strip beautifully, the work is of the highest standard, Tobiasz. Regards, Mirek
Pięknie zrobiłeś tą blaszkę do listwy ozdobnej ,praca na najwyższym poziomie Tobiaszu. Pozdrawiam Mirek
Hello
You made this plate for the decorative strip beautifully, the work is of the highest standard, Tobiasz. Regards, Mirek
Last edited by a moderator:
Such impressive work Tobias, you are truly a master shipwright.
Masterful work! Bravo!
- Joined
- Aug 8, 2019
- Messages
- 5,573
- Points
- 738

And of course, as we have come to expect from your work, very nicely and accurately executed.they engage in the dovetails and the groove of the deck beams.
I never use this method, I see this often in a buildlog. Till now I did the shape by hand. Much more work I think. I will give it a try next time. The strip looks very good over the whole lenght.For this I cut and filed the shape into a piece of sheet metal,
Just a small update:
Regarding the trim, two things I want to share with you.
1. Bending the strip in the bow area. Boil the strip as it is almost a 90 degree angle here and pay attention to the wood grain. On the starboard side, it took me 3 attempts before it worked reasonably well. On the port side, I gave up after the 7th attempt. Here I was able to repair it reasonably well.
The entire strip consists of four sections and is connected with a toothing. Since the strip is very thin at 3mm, it is difficult to manufacture this, so I only milled slight bevels in the area.
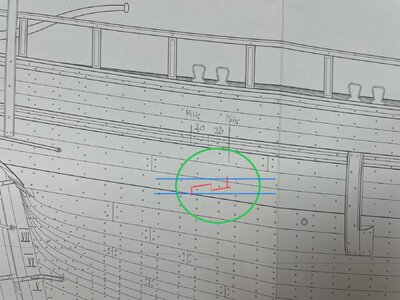
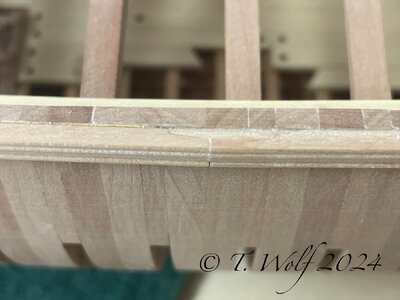
On the starboard side, I glued the two front and two rear strips together. This was a small mistake, because when gluing the two strips together, the curvature of the strip is not exactly right and a kink forms. To prevent this from happening again, I glued all the strips together on the port side and glued them all to the hull. This works great with the help of the adhesive tape I had previously applied.
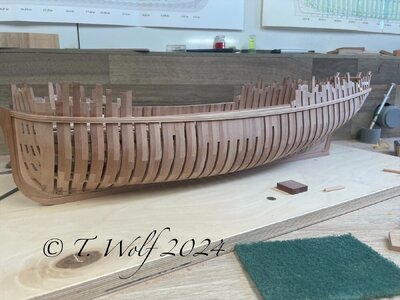
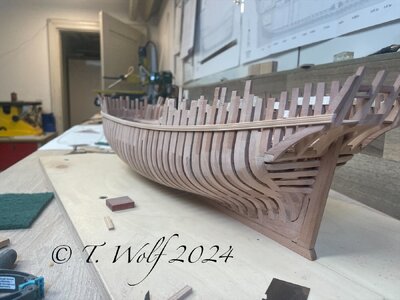
Regarding the trim, two things I want to share with you.
1. Bending the strip in the bow area. Boil the strip as it is almost a 90 degree angle here and pay attention to the wood grain. On the starboard side, it took me 3 attempts before it worked reasonably well. On the port side, I gave up after the 7th attempt. Here I was able to repair it reasonably well.
The entire strip consists of four sections and is connected with a toothing. Since the strip is very thin at 3mm, it is difficult to manufacture this, so I only milled slight bevels in the area.


On the starboard side, I glued the two front and two rear strips together. This was a small mistake, because when gluing the two strips together, the curvature of the strip is not exactly right and a kink forms. To prevent this from happening again, I glued all the strips together on the port side and glued them all to the hull. This works great with the help of the adhesive tape I had previously applied.


Nice Tobias. A suggestion: when bending severe curves I have found steam works better than boiling water (it is hotter). Maybe this will help you or others???
Last edited:
Nice Tobias. A suggestion: when bending severe curves I have found steam works better than boiling water (it is far hotter). Maybe this will help you or others???
Hello Paul, thank you for your help, although I don't think it can be the temperature. Water that boils is 100 degrees and evaporates, so the steam is also 100 degrees. But I could imagine that it is the length of time it is in the water bath or in the steam and that the steam process is gentler.
I was thinking about steam coming from a pressure cooker (kettle) which will be hotter than steam coming from a boiling open pot. But even ordinary steam burns skin more readily than boiling water because it has a higher heat content per unit mass (it is thus effectively hotter). Try it!Hello Paul, thank you for your help, although I don't think it can be the temperature. Water that boils is 100 degrees and evaporates, so the steam is also 100 degrees. But I could imagine that it is the length of time it is in the water bath or in the steam and that the steam process is gentler.
Your work is an absolute feast for the eyes. Beautiful to look at. I agree with Paul and Steef66 on the bending issue.I agree with Paul, stemming works better by bending wood. It's the heat combined with air what does the job with more effect. Watering the wood and a hot airgun gives the same effect.
- Joined
- Dec 9, 2019
- Messages
- 964
- Points
- 403

Witaj
Tobiaszu z jakiego drzewa robiłeś listwę ozdobną z gruszy czy bukszpanu? Jeśli chodzi o gruszę jeśli mam więcej czasu to ją moczę około 30 minut w zimnej wodzie i doskonale się wygina w ten sposób robiłem całe poszycie w mojej la belle a zaczynałem od 4mm listewek. Pozdrawiam Mirek
Hello
Tobias, what tree did you use to make the decorative strip, pear or boxwood? As for the pear tree, if I have more time, I soak it in cold water for about 30 minutes and it bends perfectly. This is how I did the entire sheathing in my la belle and I started with 4 mm strips. Regards, Mirek
Last edited by a moderator:
A difficult bending job, Tobias. The result lays very nice against the frames.Just a small update:
Regarding the trim, two things I want to share with you.
1. Bending the strip in the bow area. Boil the strip as it is almost a 90 degree angle here and pay attention to the wood grain. On the starboard side, it took me 3 attempts before it worked reasonably well. On the port side, I gave up after the 7th attempt. Here I was able to repair it reasonably well.
The entire strip consists of four sections and is connected with a toothing. Since the strip is very thin at 3mm, it is difficult to manufacture this, so I only milled slight bevels in the area.
View attachment 442090
View attachment 442091
On the starboard side, I glued the two front and two rear strips together. This was a small mistake, because when gluing the two strips together, the curvature of the strip is not exactly right and a kink forms. To prevent this from happening again, I glued all the strips together on the port side and glued them all to the hull. This works great with the help of the adhesive tape I had previously applied.
View attachment 442092
View attachment 442093
Regards, Peter
Hello everyone, thank you very much for all the good advice, I really appreciate it. @dockattner I hope I haven't misunderstood it. Yes, I know the feeling of burning yourself with water and also the feeling of hot steam and believe me, I don't want to try it again. You are of course absolutely right, it is much more painful, if we compress the steam it gets hotter than boiling water, and I would like to apologize for not reading correctly. Now what is on the agenda next time I bend wood, right, the steamer in my kitchen.
.
Last edited:
.
Last edited:
No worries, Tobias. I was not clear in my original posting. As Stephan mentioned you can create 'steam' a number of ways: from a teapot, pressure cooker, hot air gun on water-soaked wood, plank bender on water-soaked wood, enclosed steam box, etc. I broke a lot of strakes on the Vasa before I figured this out... I hope it helps you and others!Hello everyone, thank you very much for all the good advice, I really appreciate it. @dockattner I hope I haven't misunderstood it. Yes, I know the feeling of burning yourself with water and also the feeling of hot steam and believe me, I don't want to try it again. You are of course absolutely right, it is much more painful, if we compress the steam it gets hotter than boiling water, and I would like to apologize for not reading correctly. Now what is on the agenda next time I bend wood, right, the steamer in my kitchen.


