MarisStella Ragusian Carrack by Signet [COMPLETED BUILD]

I'll be happy to help in any way I can, Michel. Just to clarify, HiS is the company that helped determine all the blocks necessary, and they make excellent parts, plus spent a huge amount of time with me. I assume you're referring to my rigging spreadsheets and pics, when you ask about sharing the files, to assist in your own model? I'd be happy to do that, but the pics are done in PaintShop Pro (old version 9, I think), with separate layers for each sail. And they can be a bit sloppy, but still have been a big help to me, mostly, I think, to just think long and hard about each line, what it does, where it goes, what size it should be, etc. But sure, I can make them available.

Maybe PM me, as much of that won't be of interest to anyone not building the model.
Thanks you , it is really appreciate. I email inside SoS and gives you my real e-mail. Thanks you.

I assume you're referring to my rigging spreadsheets and pics,
Yes.
 
Continuing on with the deck detail, I next worked on the cargo hatch and its details. As shown previously, the hatch on this ship (less the decking surround) looks like this:
1698633964359.png
These ships used individual planks, with holes at the end and ropes inserted in them, so as to be handled with two crewmen, without using a tackle of any kind. There are/were moldings on the inside that help to locate them in place.

These planks were then held in place by longitudinal beams, which were tied down to the deck at each end. Oftentimes, as with this model, a cradle for the ship's boat was integrated with these beam:
1698634047907.png
The beam and cradle assembly has been glued to the hatch on the model.

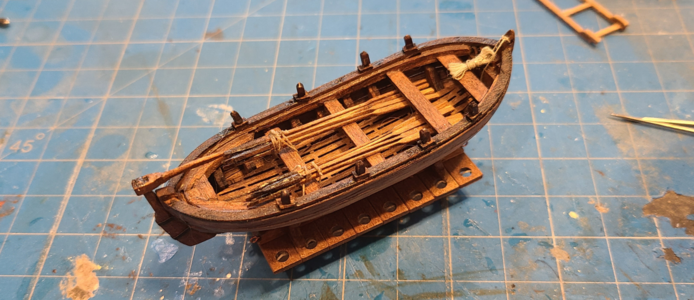
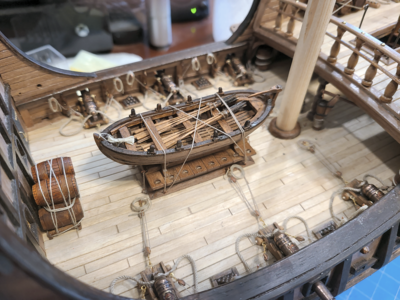
Finally, the boat will be placed into the cradle:
1698634159207.png

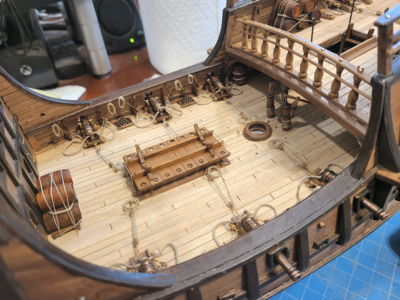
Here, the hatch and cradle assembly have been glued in place, and ropes are used to tie down the ends to the deck:
1698634180361.png
You may notice I made the hatch slightly narrower than on the plans, so as to allow more room for the tackles that retract the guns, the short length of which was notice/criticized in another build.

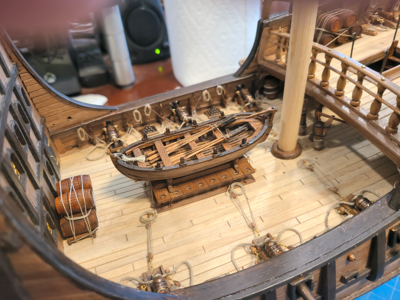
Then the boat is placed and glued:
1698634247915.png
The mast blank has been temporarily inserted to insure enough clearance.

Finally, the boat is held in place by rope connected to eyes on the deck:
1698634319039.png

Meanwhile, the crewmen have added ropes to the standards around the quarterdeck ladder opening, per the Captain's orders after the doctor had to treat so many broken or sprained limbs:
1698634402305.png
A bit of thinned white glue will hopefully keep a realistic slight sag in the ropes.

On to locate and glue the bits in place. Until next time.....
 
Signet, your 80 year old eyes and fingers are working nicely! Beautiful work!! Magic Mike
Thank you, much appreciated. I mostly have to buy extra. I just finished rigging my guns on this model, which took 48 blocks (I didn't put tackles on the guns under the quarterdeck). I felt pretty good, as I had a couple left from the 50 I thought I'd ordered, until I checked and found I had ordered 75 of them! I need a wood magnet (brass one, too) to pick them all up from the carpet under my desk!
Hi Signet, you made an astonishing work of preparation on the overall rigging accessories.
I think it was mostly just stalling from actually working on the rigging. That, and I didn't want to order more rope and blocks than I needed. Hope I have enough, based on how many of the gun tackle blocks I lost. :rolleyes:
 
According to one source (I don’t remember which one), the train rigging didn’t have to be incredibly long. The crewmen were practically leaning out the portholes to swab and load the guns.
I had seen videos and articles that mentioned crew having to lean out the gun ports to clean and load the guns, so I agree.
 
Continuing on with the deck detail, I next worked on the cargo hatch and its details. As shown previously, the hatch on this ship (less the decking surround) looks like this:
View attachment 403449
These ships used individual planks, with holes at the end and ropes inserted in them, so as to be handled with two crewmen, without using a tackle of any kind. There are/were moldings on the inside that help to locate them in place.

These planks were then held in place by longitudinal beams, which were tied down to the deck at each end. Oftentimes, as with this model, a cradle for the ship's boat was integrated with these beam:
View attachment 403450
The beam and cradle assembly has been glued to the hatch on the model.

Finally, the boat will be placed into the cradle:
View attachment 403451

Here, the hatch and cradle assembly have been glued in place, and ropes are used to tie down the ends to the deck:
View attachment 403452
You may notice I made the hatch slightly narrower than on the plans, so as to allow more room for the tackles that retract the guns, the short length of which was notice/criticized in another build.

Then the boat is placed and glued:
View attachment 403453
The mast blank has been temporarily inserted to insure enough clearance.

Finally, the boat is held in place by rope connected to eyes on the deck:
View attachment 403454

Meanwhile, the crewmen have added ropes to the standards around the quarterdeck ladder opening, per the Captain's orders after the doctor had to treat so many broken or sprained limbs:
View attachment 403455
A bit of thinned white glue will hopefully keep a realistic slight sag in the ropes.

On to locate and glue the bits in place. Until next time.....
Good morning. Lovely work all round. I have noticed on most kits the inhaul tackle on the cannons is too short. Awesome accuracy to those tiny details. Cheers Grant
 
Continuing on with the hull details, I painted the decorative shields, but left the brass on them natural, as well as the scroll details:
1699412449080.png
I feel the brass color is better than the recommended yellow color. Here they are receiving a coat of clear to protect them. I did not bend the shields like Olha did (and the instructions showed), feeling that wasn't necessary here and that they would be more secure glued to a flat surface.

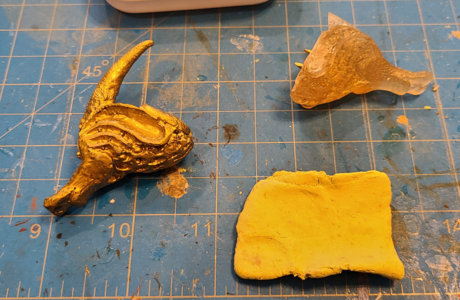
The plastic figurehead I received with the kit was partly broken, and MarisStella sent me a replacement. No way was I going to carve a figurehead out of walnut; while I've done wood carving, it's only been relief carving, not full 3D, and I knew if I tried it would be unrecognizable (although I'm still not sure what the figurehead is supposed to be). I used the broken one to experiment adding "horns" to the creature, to be more like the photos and drawings, and painted it with gold paint as a test. The yellowish blob is Milliput epoxy putty, which I used to construct the horns:
1699412655464.png

Here, I've added the horns to the new figurehead to be used (maybe a bit thicker than I had intended) and have also made several mice (mouses?) for use on the rigging by forming a shape around a piece of wire and removing the wire. I'll need five in undetermined sizes, so just made several different sizes. I can sand and finish them, or use something else to construct the mice, depending on how they work out:
1699412866264.png
The texture on the "horns" is intentional, trying to give them some texture.

Here I've added all the decoration to the stern except for the "curtain" to be placed above the ship name, which I think I will try making in air-dry modeling clay:
1699412959086.png
Again, my carving skills are not good enough to use here, so I cheated by using some of my wife's jewelry beads for the brass balls, made the brass twisted rope per Olha's instructions, added a bit more of the brass rope, and used Etsy-purchased decorations for the sun and mermaids (which appear to be playing ping-pong with each other!), again because I knew my carving would not work out well.

The resultant stern portion of the ship, showing stern and side decoration and shields:
1699413210435.png
I see some glue "strings" I have yet to remove. Funny how all this stuff shows up while posting, but I don't see it prior to that.
1699413232663.png
You may notice that the aft-most shield has its different colors than specified. Turns out the original version was the arms for the Captain's uncle, so the Captain had it repainted in his family colors. :cool: He (and I) thought the alternating colors look better anyhow.
 
I love this model. This ship has two faces, it looks extremely beautiful and on the other side it looks extremely artificial, which makes it unique.
 
I love this model. This ship has two faces, it looks extremely beautiful and on the other side it looks extremely artificial, which makes it unique.
I think I know what you mean by extremely artificial. I always thought these ships looked like caricatures, overly rounded and turned up on each end, and never really had a desire to build one. Then I saw Olha's wonderful build, and somehow, I was hooked.
 
After the "horns" on the "whatever it is" figurehead were dry
1699894660113.png
I sprayed it black first, then put 3 coats of what I think is the best brass paint (CraftSmart Premium Guilding Paint, Brass):
1699894788406.png
Man, my workmanship looks bad when it's viewed this closely! :oops:

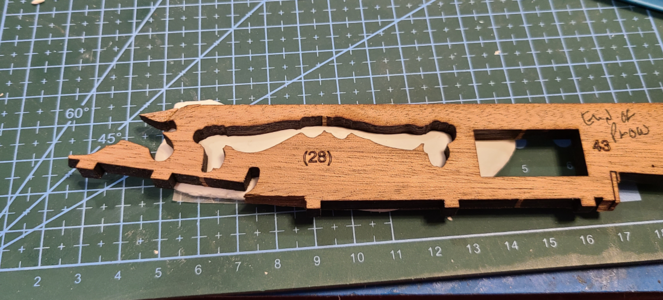
As you will know, if you are following this thread, I don't do carvings. So, in addition to not carving the figurehead, I also did not carve the red curtain shape above the stern nameplate. Instead, I decided to model it out of air-dry clay:
1699895368905.png
My original thought was to trace around the laser-cut walnut part to create the clay part, but when I placed the stock from which it was cut
1699895431969.png
I decided to press down to see hot it marked the clay:
1699895461396.png
Wow, that kinda worked. So I cut away most of the scrap area:
1699895496651.png
After which I pressed the "form" over it again to better outline the clay:
1699895537735.png
I then cleaned it up a bit, trimming off the extra, and placed it in position on the model, to help it conform to the ship's curves:
1699895673681.png
The next day, the clay was dry, and I sanded and cleaned it up a bit more prior to painting:
1699895716917.png
After painting a spray coat of white and a few of red, I glued in it place with E-6000 glue. This pretty much completes the the hull (except for the rudder which is completed but will be mounted later as it interferes with the building stand). I've taken some overall photos of it at this stage to show my progress:
1699895761592.png1699895926726.png
1699896067698.png
1699896086214.png
1699896097664.png
1699896109791.png
1699896130599.png
1699896145564.png
Next, I will add the deadeyes to the channels, then begin the masts and such. I /think/ I'm looking forward to it, as it will be quite different work than I've been doing thus far.
 
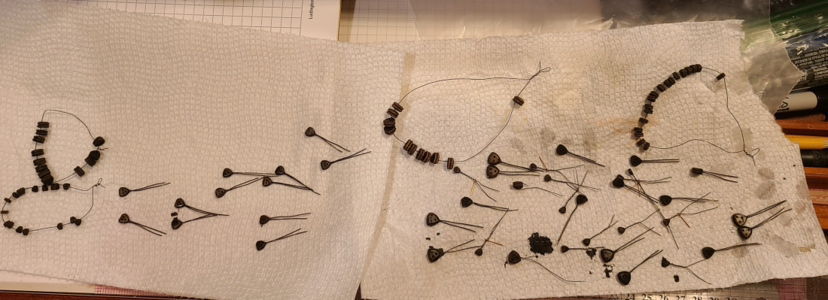
I wanted to work on the deadeyes next, and since I had bought them from 3 different sources, and they came in colors from dark walnut to almost white, I had to stain them all dark. The ones that mount by wire to the channels, I went ahead and added wires to them, although I'll probably twist them differently later. The rest, I just strung on wire and dipped them in dark stain to normalize the colors:
1700100591617.png
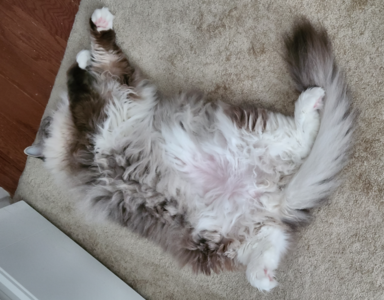
At this point I found out that my supervisor had gone on a break:
1700100628729.png
so decided to work on the rudder a bit. I won't be mounting it until much later, but wanted to work out a few things.

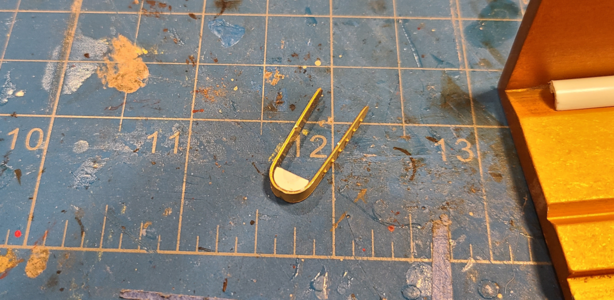
The rudder hinges are thick photo-etched brass, and look pretty good. However, the hinge centers/pivots are etched circles, which must be bent in half, and half-circles, which are placed in the rounded areas of the hinges:
1700100772498.png
MarisStella suggests soldering them, or gluing them in place, without much added information. It looks like the recessed outlines of the half-circles are intended to sit down into the hinge straps, but I found doing that quite difficult. I felt there should be a better way, for me.

I found some plastic tubing and smaller plastic rod, drilled out the tubing to fit the rod into, and CA glued it in place about 2" or solid rod. My intent is to make my own half-circles for the hinges, which could then be glued in place.
1700100953568.png

After the glue dried, I split the rod/tube combination to leave a half round portion to form the hinge pivots:
1700101005209.png
Due to the melted plastic, it looks worse than it actually was (so what else is new?).

Exposing the half portion:
1700101064580.png

After a bit of cleanup, I tested the piece for fit with a hinge strap:
1700101099722.png

I used the straps to set the length of the cut half-rounds:
1700101160041.png

Looked to me like they will work:
1700101206828.png

Half rounds are cut and ready to install into the hinge straps:
1700101241306.png

I used CA glue and clamped them tight:
1700101273018.png

All half rounds glued into place:
1700101308055.png

I made a simple jig to hold the hinges in place while I drilled holes for the pins. These holes need to be offset toward the outside of the round, to have clearance when they are assembled:
1700101376473.png

I used #18 x 1/2" brass plated steel escutcheon pins (1.2mm in diameter) for the pivots. Each hinge fits together like this:
1700101477337.png

After gluing the rudder-portion hinge straps in place, and temporarily mounting the mating parts we have:
1700101522928.png
I have some cleanup to do before it's finished, I'll cut the pins shorter, of course, and also paint the exposed portions of the white plastic brass. This will be set aside until later, so that I can continue to use the working cradle for the hull for the remainder of the build.

Now back to thinking about the links for the deadeyes...
 
Since apparently so little is known about this ship, I decided to make a small simplification to the masts and rigging:
1700603855554.png
After all, no one can prove me wrong, right?

A closer look at the mast shrouds:
1700603906779.png
An unexpected advantage of this method is the labor savings due to not doing any ratlines! :)
 
O kay, well I might add a bit more detail, as I only have room for this one ship model.

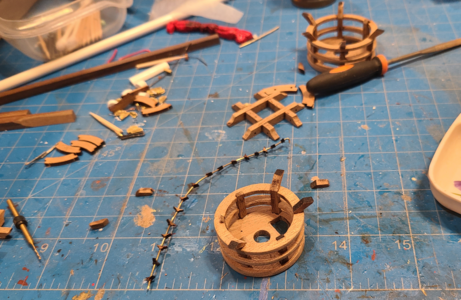
The parts for the tops are VERY fragile. I broke 1 out of 6 on the large one, and 3 out of 6 on the smaller:
1700604166263.png
I added quite a few cleats to the Main Top, which are shown on the brass wire. Afterwards, I realized I'd previously used smaller black wire, which worked out better and looked better, but these are already done, so will be used. They won't show up inside the top structure anyhow.

I glued the circular tops to the top (yeah, terminology), then added the broken pieces. The result doesn't look very smooth, but it will work, I think:
1700604232611.png

I used annealed blackened steel wire for mounting the lower deadeyes:
1700604345394.png
I twisted the wires at the bottom of the deadeyes, so they better fit in the channel holes. Yeah, I know this is supposed to be the worst way of doing it. But I then bent the twisted wire into a U-shape, after cutting them short, and think they will be okay once the links are added.

I bought small jewelry connections in brass to use to connect the deadeye chains to the hull, and have used them elsewhere in brass (as stated previously, I don't intend the model to be completely authentic as to materials - and again, who's to argue with my material choice?). But against the black steel chains, they brass looked too bright, so I darkened them with JAX Pewter Black:
1700604545080.png
They didn't darken completely (but better than Casey Brass Black, for some reason), but they are dulled enough that I think they will work out.

I'm now going over the walnut dowels included with the kit, as well as others I bought to not have to remove as much, and for the Bonaventure mast and spar. I may not post much about that, but just show the results, as I don't think I can post much of interest there. But we'll see.

It's a bit of a pleasure to get through most of the hull/wood/larger work on the model, and start to concentrate on the rigging. Expect for shaping the masts and spars, most all the woodwork is done, and my den/workshop can hopefully rid itself of many of the tools that will no longer be required. I've never done a proper, rigged ship, but I've done a lot of planning, and intend to just work slowly at it, trusting that it will work out.
 
Back
Top