MarisStella Ragusian Carrack by Signet [COMPLETED BUILD]

Continuing on with the deck detail, I next worked on the cargo hatch and its details. As shown previously, the hatch on this ship (less the decking surround) looks like this:
View attachment 403449
These ships used individual planks, with holes at the end and ropes inserted in them, so as to be handled with two crewmen, without using a tackle of any kind. There are/were moldings on the inside that help to locate them in place.

These planks were then held in place by longitudinal beams, which were tied down to the deck at each end. Oftentimes, as with this model, a cradle for the ship's boat was integrated with these beam:
View attachment 403450
The beam and cradle assembly has been glued to the hatch on the model.

Finally, the boat will be placed into the cradle:
View attachment 403451

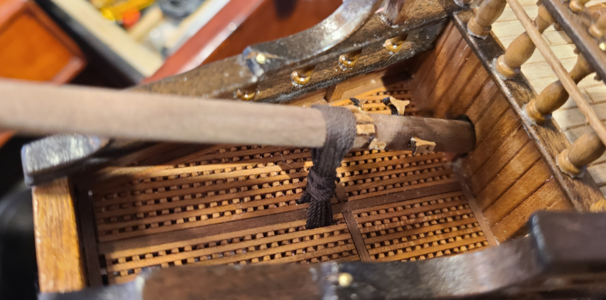
Here, the hatch and cradle assembly have been glued in place, and ropes are used to tie down the ends to the deck:
View attachment 403452
You may notice I made the hatch slightly narrower than on the plans, so as to allow more room for the tackles that retract the guns, the short length of which was notice/criticized in another build.

Then the boat is placed and glued:
View attachment 403453
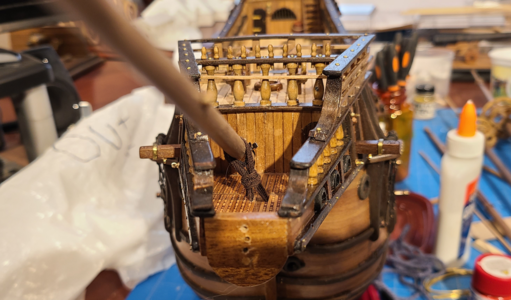
The mast blank has been temporarily inserted to insure enough clearance.

Finally, the boat is held in place by rope connected to eyes on the deck:
View attachment 403454

Meanwhile, the crewmen have added ropes to the standards around the quarterdeck ladder opening, per the Captain's orders after the doctor had to treat so many broken or sprained limbs:
View attachment 403455
A bit of thinned white glue will hopefully keep a realistic slight sag in the ropes.

On to locate and glue the bits in place. Until next time.....
I got the wrong picture here, but I LOVE the ship's boat!
 
When I made the reply, a different picture appeared other than the really nice one of the little boat which is a little treasure of a model in itself. Okay :D
 
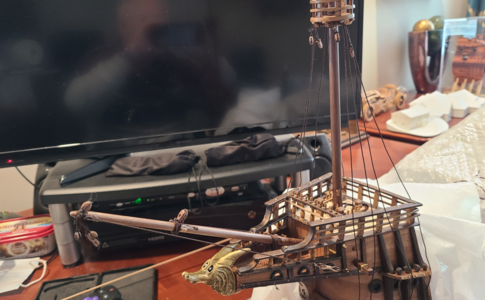
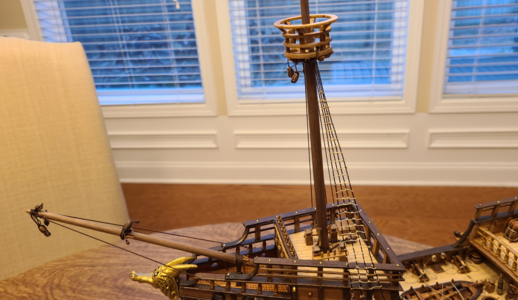
Starting to work on the rigging, so started with the bowsprit. Gammoning went okay:
1701568369464.png
As the bowsprit is mounted off-center, to clear and pass by the foremast, the gammoning is off center a bit as well:
1701568416763.png
The bowsprit points inward to end up close to the ship's centerline.

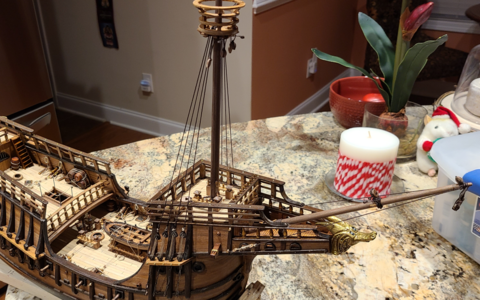
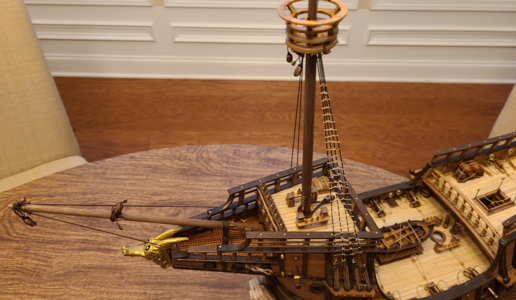
The bowsprit in place with most blocks attached to it:
1701568529176.png
Also in place are the foremast shrouds (unrigged) and the blocks located under the Top.

Next was rigging the shrouds. I think the shroud lanyards came out okay:
1701568782335.png
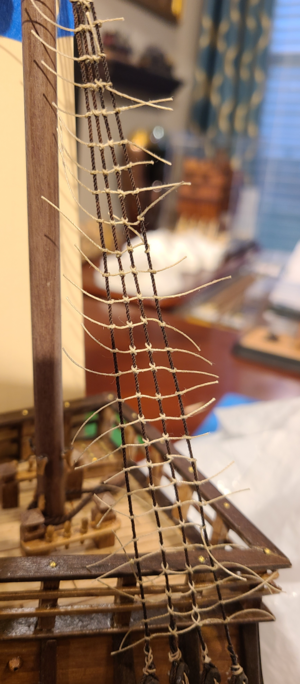
Next I worked on the ratlines:
1701568648557.png
A better view of the ratlines, after trimming:
1701568827622.png
1701568857266.png

No, I'm not happy with the ratlines. This is my first real ratline job, and really don't like the result. Yet I'm afraid it's about as good as I can do; this took me a day. I'm trying to decide what to do. The ratlines look even worse IMHO because they appear large (even though they are scale at 0.58" in 1:59 scale, and my poor knots show up with the tan thread.

Yet I believe tan is the appropriate color, and know the ropes are sized correctly, I'm thinking smaller thread in black or dark brown would certainly hide my knots better, at least not bring attention to them. So wondering what to do next: keep going with my sloppy ratlines, or cut them all off (partly CA glued, unfortunately) and try again with darker thread. Or maybe try the other side with darker, maybe smaller) thread and see which is better. Opinions?
 
No, I'm not happy with the ratlines. This is my first real ratline job, and really don't like the result. Yet I'm afraid it's about as good as I can do; this took me a day. I'm trying to decide what to do. The ratlines look even worse IMHO because they appear large (even though they are scale at 0.58" in 1:59 scale, and my poor knots show up with the tan thread.
I just realized while looking at thread alternatives that I didn't use the thread I'd bought for the ratlines; I used a larger size, closer to a scale 0.7", which is one reason it looks too large: it is. I can try again with the intended size, in either tan or dark brown, or go a bit smaller in tan (unless I buy more). Trying to decide. Opinions always welcome!
 
I still love the model.Okay
Fixing that stuff can be discouraging Cautious , but doable. Hopefully you didn't use any CA on the knots, but even that, given the right debonder is reversable.
A darker tan would be nice for the ratlines, which would have some tar to stave off rot and certainly be discolored by the sailor's tarry hands and feet.
Story has it (this is no s**+) that British sailors in the age of sail acquired the custom of saluting palm in (unlike the army: palm out) to hide their tar-stained palms.:cool:.

Pete
 
If you have to remove the existing ratlines, using a scalpel with a fresh, sharp blade will work. Care needs to be taken but even CA glued knots can be CAREFULLY cut away. Cutting through a shroud will be painful....
I used pretty sharp flush cut pliers, and that worked pretty well. Only left one or two tiny bits left.
 
Deleted. I see that you discovered your error (I was going to make the same observation).
Surprisingly, under a strong magnifier, I see almost no difference in what I used versus what I will use. Theoretically, the one I used is 0.3mm, while I wanted 0.25mm, but it's very hard to see a difference. There is a huge difference in the appearance of brown vs tan thread, though. It really hides my poor nots.
 
Not to mention that thread (not scale rope) is difficult to find in the right size. I've bought about $30 worth of thread (not scale rope) for this project, and still don't seem to have the right stuff. For example, Coats & Clark Dual Duty XP Heavy Thread (polyester), 15WT thread, which I bought for major ratlines, is supposed to be 0.25mm in diameter, while Gutermann Top Stitch Heavy Duty Thread, 30Wt, which I bought for minor ratlines, is supposed to be 0.25mm in diameter. But when looking at them under a 10X magnifier, the Guterman looks slightly larger than the C&C. And the next smaller thread that I can find (and I've really looked) is much smaller. And it doesn't help that while online descriptions of thread may mention weight, the spools you buy in the store are almost never marked with weight or anything else indicating actual size.

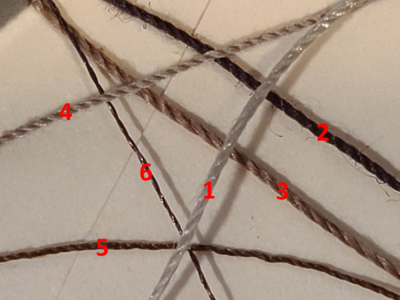
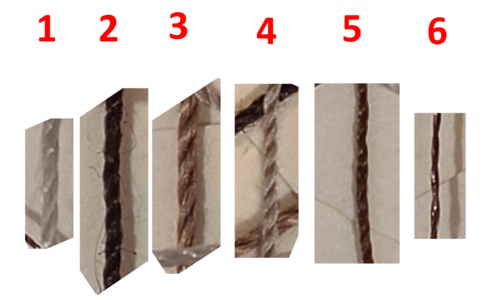
I've taken some photos of the threads I've looked at lately:
1701625688752.png
Below are what each thread is, the Wt given for each, the calculated diameter based on Wt and what I estimate the apparent diameter is:

#DescriptionWtCalculated Diameter, mmMeasured Diameter, mm
1Coats & Clark Dual Duty Plus Button & Craft100.30.31
2Coats & Clark Dual Duty XP Heavy Thread (polyester)150.250.33
3Gutermann Top Stitch Heavy Duty Thread300.180.38
40.3mm Polyester Rope from Modellbau Takelgarn(10)0.30.30
5Metrosene Plus500.140.20
6Sulky Polylite600.120.15

#1 is what I used in the above pics, that looks (and is) too large. #2 is what I intend(ed) to replace them with, which is supposed to be smaller, but actually measures larger. #3 is an alternate, which is supposed to be much smaller, but again, actually is larger, in fact the largest of the group. I may have to go down to #5 to get something that is actually smaller.

Reference:
To "measure" the diameter of the threads, I oriented them all vertically, and used the diameter of the 0.3mm scale rope as an actual 0.3mm, and measured the others in comparison to it:
1701626886385.png
#4 is the 0.3mm scale rope, which you can easily see looks the most like highly-twisted real rope.

Thread is confusing. But scale rope, for things like this, is really expensive, and is not usually made small enough. Bummer.
 
Last edited:
After all the measuring and microscopy, I'd say go the Modeler's version of Occam's Razor: "What looks right probably is" Trust your eye.;)
Lovely model altogether and I like your imaginative personalized touches!

Pete
 
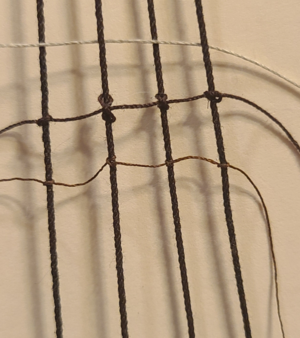
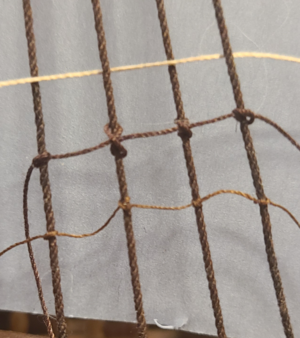
I've narrowed down my choices for ratlines a bit. In the pictures below, the top tan one is the original that I installed above, that looked too large and and knots were too visible. The second is the thread I had actually intended to use, which is actually larger but looks better being brown, I think, and the bottom is a smaller thread, rather difficult for me to see and use when working:
1701657371075.png 1701657381122.png
Shown with different backgrounds (and one clearer than the other - sorry). And these will be removed, so the knots were not that tight.

The top scales out in 1:59 scale to 0.72" (18.3mm), the second to 0.77" (19.5mm), and the bottom one to 0.46" (11.8mm). This is on the Foremast shrouds, which are 0.8mm in diameter (a scale 1.86" or 47.2mm).

While the middle one is still a bit too large, I think it looks good, while the bottom one is definitely a bit small, and very hard for me to work with. I can find nothing in between the two in thread. The perfect size would be 0.25mm, scaling to 0.58" or 11.75mm diameter, which is what the above upper brown rope above was /supposed/ to be but isn't. I can buy 0.25mm rope from RopesOfScale, but I figure I'd need at least 40 yards of it for this model, which would cost me about $45, and I just can't justify that.

I thought this would be simple after having so much thread on hand, but it really isn't.
 
I've narrowed down my choices for ratlines a bit. In the pictures below, the top tan one is the original that I installed above, that looked too large and and knots were too visible. The second is the thread I had actually intended to use, which is actually larger but looks better being brown, I think, and the bottom is a smaller thread, rather difficult for me to see and use when working:
View attachment 411734 View attachment 411735
Shown with different backgrounds (and one clearer than the other - sorry). And these will be removed, so the knots were not that tight.

The top scales out in 1:59 scale to 0.72" (18.3mm), the second to 0.77" (19.5mm), and the bottom one to 0.46" (11.8mm). This is on the Foremast shrouds, which are 0.8mm in diameter (a scale 1.86" or 47.2mm).

While the middle one is still a bit too large, I think it looks good, while the bottom one is definitely a bit small, and very hard for me to work with. I can find nothing in between the two in thread. The perfect size would be 0.25mm, scaling to 0.58" or 11.75mm diameter, which is what the above upper brown rope above was /supposed/ to be but isn't. I can buy 0.25mm rope from RopesOfScale, but I figure I'd need at least 40 yards of it for this model, which would cost me about $45, and I just can't justify that.

I thought this would be simple after having so much thread on hand, but it really isn't.
I like the one bottom right. But yeah. tiny knots can be a deterring factor. A little brown shoe polish on a lighter, if more easily obtained thread is a possibility. Got any upholsterer friends? I used to raid my upholstery guy's sundry locker all the time.
 
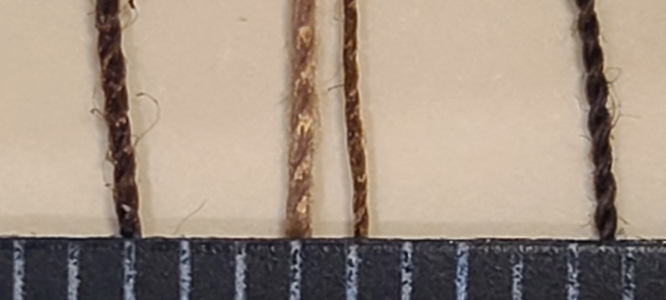
I know this is getting silly, but instead of estimating size based on the "standard" 0.3mm scale rope, I decided to look at my finalists and measure their actual size:
1701661433855.png
Leftmost is the Coats & Clark Dual Duty XP Heavy, which is supposed to be 0.25mm in diameter, but is actually 0.46mm.
Next is the Gutermann Top Stitch Heavy Duty, which is supposed to be 0.18mm in diameter, but is actually 0.44mm.
3rd is the Mettler Metrosene Plus, which is supposed to be 0.14mm in diameter, but is actually 0.26mm.
Last on the right is the 0.3mm Polyester Rope from Modellbau Takelgarn, but it actually measure between 0.35mm and 0.42mm (hills and valleys).

I don't mind that the Modellbau thread is larger than specified; it is scaled nicely as sizes increase, and relative size is more important to me.

So, actually, the hard-to-handle stuff, that I almost can't see, is almost exactly the right size in scale (Peter was right - but with a "thread" last name, of course he was!). I'm just not sure I can work with it.

BTW, for anyone wondering how I calculated the specified diameters on the threads, there are a number of formulas that "should" allow one to calculate other size factors, knowing any one factor:

The size measurement types are:

Wt or Weight = the Number of Kilometers of thread to weigh 1 Kilogram.
Tex = the Weight in Grams of 1,000 Meters of thread.

Tex = 1000/Wt

Those conversions are pretty much absolute. It gets a bit confusing with diameters, though. These are the most standard formulas I've found:

Diameter in mm = SquareRoot(Tex)/32.92 or Tex = (Diameter*32.92)^2
Diameter in mm = 0.96/SquareRoot(Wt) or Wt = (0.96*Diameter)^2

Most diameters actually measure larger than the formulas indicate, it seems. I believe that may be that the "density" of the thread is less than expected. Possibly the formulas are based on solid polyester, rather than polyester thread, which has open areas in its cross section.

Does this determine what I should use? I don't know. Cautious
 
My last name has two"t"s, not one. The only reason this is of any consequence is that there is a Peter Guterman on Yahoo whose email I get all the time by mistake, often a matter of some overdue bill. Cautious I always send his errant emails on and he never so much as says "thanks",:mad:
Peter Gutterman (two "t"s!).
 
I know this is getting silly, but instead of estimating size based on the "standard" 0.3mm scale rope, I decided to look at my finalists and measure their actual size:
View attachment 411742
Leftmost is the Coats & Clark Dual Duty XP Heavy, which is supposed to be 0.25mm in diameter, but is actually 0.46mm.
Next is the Gutermann Top Stitch Heavy Duty, which is supposed to be 0.18mm in diameter, but is actually 0.44mm.
3rd is the Mettler Metrosene Plus, which is supposed to be 0.14mm in diameter, but is actually 0.26mm.
Last on the right is the 0.3mm Polyester Rope from Modellbau Takelgarn, but it actually measure between 0.35mm and 0.42mm (hills and valleys).

I don't mind that the Modellbau thread is larger than specified; it is scaled nicely as sizes increase, and relative size is more important to me.

So, actually, the hard-to-handle stuff, that I almost can't see, is almost exactly the right size in scale (Peter was right - but with a "thread" last name, of course he was!). I'm just not sure I can work with it.

BTW, for anyone wondering how I calculated the specified diameters on the threads, there are a number of formulas that "should" allow one to calculate other size factors, knowing any one factor:

The size measurement types are:

Wt or Weight = the Number of Kilometers of thread to weigh 1 Kilogram.
Tex = the Weight in Grams of 1,000 Meters of thread.

Tex = 1000/Wt

Those conversions are pretty much absolute. It gets a bit confusing with diameters, though. These are the most standard formulas I've found:

Diameter in mm = SquareRoot(Tex)/32.92 or Tex = (Diameter*32.92)^2
Diameter in mm = 0.96/SquareRoot(Wt) or Wt = (0.96*Diameter)^2

Most diameters actually measure larger than the formulas indicate, it seems. I believe that may be that the "density" of the thread is less than expected. Possibly the formulas are based on solid polyester, rather than polyester thread, which has open areas in its cross section.

Does this determine what I should use? I don't know. Cautious
At such a tiny scale a simple overhand knot should suffice for ease of handling, with no one the wiser.;)
 
Back
Top