MarisStella Ragusian Carrack by Signet [COMPLETED BUILD]

Planking has commenced. First, I had to fix the location of the strip under the rubbing strake at the stern of the ship; There was no real reference as to its exact location from the side view, and I realized that it was too high to have the required planks between it and the strake above. So it was moved down prior to proceeding:
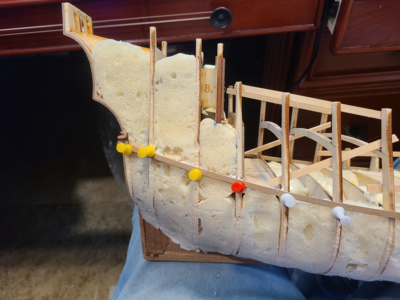
1679543165883.png
This eases mounting of planks near the stern, but the bow planks still require a lot of bending. I used a soldering-iron type heat bender with round end to add these bends.

6 planks/strips have been added to each side in this picture. The uppermost and lowermost strips will be covered by rubbing strakes and are full size, while the four in between vary greatly in width from stern to mid to bow:
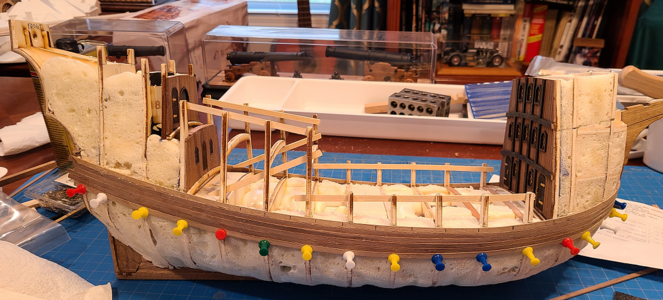
1679543411180.png
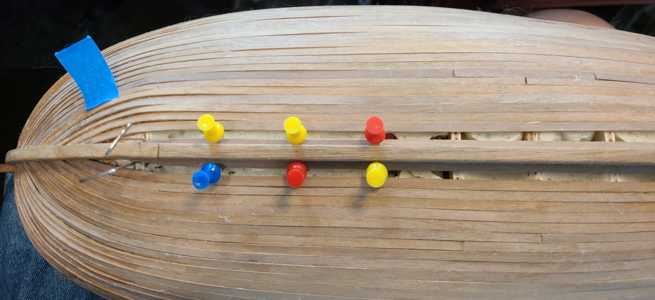
I'm trying to keep the strips in one piece, but realize that for the 7 strips above this that will be impossible, so I've located on the upper strip where external supports would cover seams in the planking.

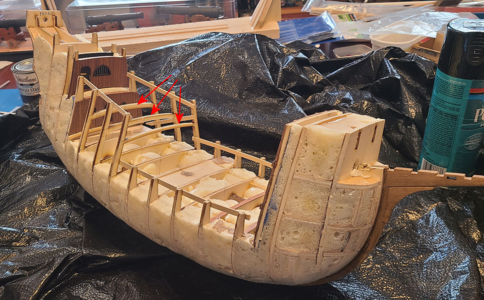
According to the instructions, as well as builds I've seen, after planking reaches the top of the rails, the top of the bulkheads above the deck are to be removed, and other bracing and such added. I really don't like this method, but it seems to be standard. Mostly, I don't like that the only thing holding the hull together at the rails is the gluing of one plank on edge to its neighbor, and it's hard to be sure that is sufficient. Taking an idea from Jack Aubrey's build of the Carrack, I decided to add thin (0.5mm) pieces of veneer /between/ the bulkheads:
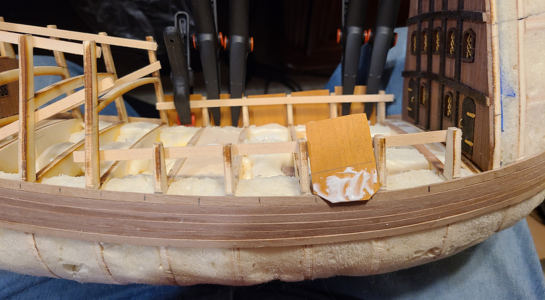
1679543845214.png
The grain on these added veneer pieces runs vertically, so should greatly increase the strength of the rail area structure, being perpendicular to outside sheathing.

These thin pieces are pushed in and glued against the existing planking to provide a surface to glue planks in this area to:
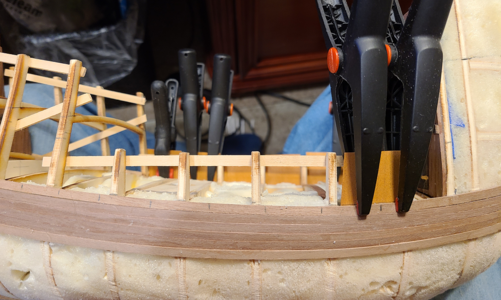
1679543911277.png

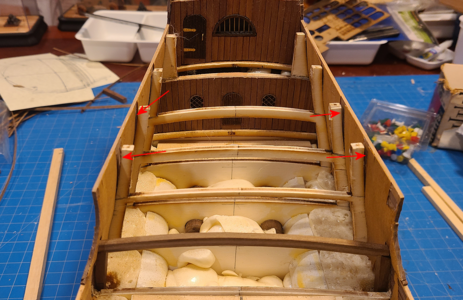
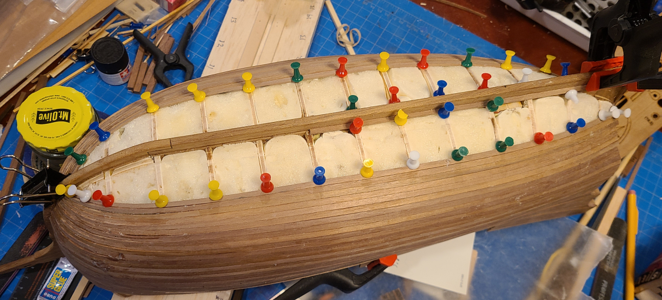
Here there are veneer pieces glued all along the main deck rail on each side:
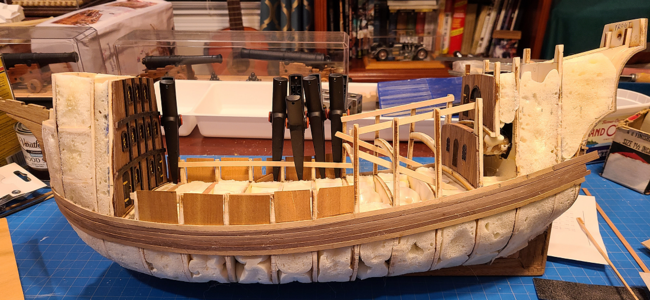
1679543967762.png
When mounting planks above this point, I will glue the planks to the veneer in this area alone, NOT to the bulkheads, making removal of the bulkheads easier, as they will not be glued to anything, and also eliminating cleanup and sanding. I will then add additional horizontal planking to the inside. Since that isn't required in the kit, I may not have enough wood, so may instead substitute some 0.5mm walnut veneer cut in strips instead. This will keep the hull thickness at the rail close to that intended, while still making it much stronger and secure.

I have yet to decide if I will use a similar procedure under the quarterdeck. Again, it is intended in the kit to cut that all away, losing the quarterdeck decking supports in the process, and I really don't like that. I'm thinking/hoping the parts of the bulkheads under the quarterdeck may not be visible enough to warrant this, and may just leave them in place, with planking or something between them. I'll have to see.
 
Last edited:
Good morning. I enjoy the way you approach your build. The veneer supports will very achieve the desired structure support and will also make the planking along there easier. Cheers Grant
Thank you, I appreciate it. I find that I do several thinking/planning/researching hours for every hour of actually working on the model. But I enjoy that too, so...
 
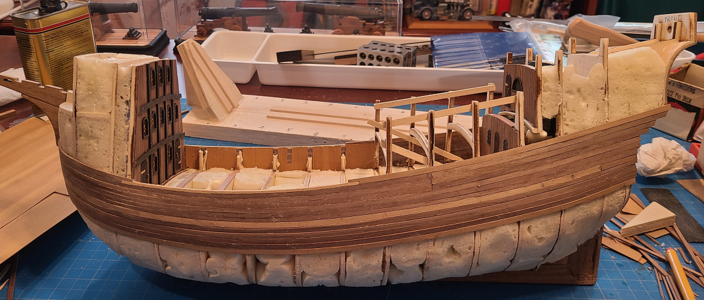
Continuing on, I've added planking from the lower rubbing strake line to the top of the main deck rail:
1679767093834.png
Note that the lowest and highest plank, as well as the light one at the middle, which do not match well color-wise, will be covered by rubbing strakes later, so will not be visible. Also, the 3 joints of planks together, due to included kit planks not being long enough, will be covered by outside reinforcement pieces, so also will not be visible.

Deviating a bit from the instructions, rather than making the top plank here full width end-to-end, then cutting the top 2mm off of the area where the topgallant rail will be mounted, I substituted a 2mm high piece of scrap in this area instead Had had little confidence in being able to smoothly remove 2mm later, and didn't see why this wouldn't work.

I've also started removing the upper portions of the bulkheads inside of the exposed main deck. These will be completely removed, and planking added to the inside of the inserted veneer for strength. I have to obtain some 0.5mm walnut for this, as it is not included or recommended with the kit. I also did not at the time cut openings for the water drain ports; hopefully, the rubbing strake at that location will end up level with the decking inside, and they can be cut in the plank above, but if not, I may just mount the surrounds and paint the area behind black, rather than have them mislocated.

Question: The planking should look much better after sanding, but what, if anything, do you recommend for gaps between planking? Should wood filler be used there, or would that make the gaps look more obvious? If filler is used, would it be better used before or after at least a thin coat of finish is applied to the planking? I hate to show the following picture, which shows how poor my workmanship is at the bow, but it does show what I'm trying to hide or make better:

Being unsanded, it looks even worse in the photo below than in real life, but I still think some kind of filler may be required:
1679769566903.png
 
Continuing on, I've added planking from the lower rubbing strake line to the top of the main deck rail:
View attachment 365015
Note that the lowest and highest plank, as well as the light one at the middle, which do not match well color-wise, will be covered by rubbing strakes later, so will not be visible. Also, the 3 joints of planks together, due to included kit planks not being long enough, will be covered by outside reinforcement pieces, so also will not be visible.

Deviating a bit from the instructions, rather than making the top plank here full width end-to-end, then cutting the top 2mm off of the area where the topgallant rail will be mounted, I substituted a 2mm high piece of scrap in this area instead Had had little confidence in being able to smoothly remove 2mm later, and didn't see why this wouldn't work.

I've also started removing the upper portions of the bulkheads inside of the exposed main deck. These will be completely removed, and planking added to the inside of the inserted veneer for strength. I have to obtain some 0.5mm walnut for this, as it is not included or recommended with the kit. I also did not at the time cut openings for the water drain ports; hopefully, the rubbing strake at that location will end up level with the decking inside, and they can be cut in the plank above, but if not, I may just mount the surrounds and paint the area behind black, rather than have them mislocated.

Question: The planking should look much better after sanding, but what, if anything, do you recommend for gaps between planking? Should wood filler be used there, or would that make the gaps look more obvious? If filler is used, would it be better used before or after at least a thin coat of finish is applied to the planking? I hate to show the following picture, which shows how poor my workmanship is at the bow, but it does show what I'm trying to hide or make better:

Being unsanded, it looks even worse in the photo below than in real life, but I still think some kind of filler may be required:
View attachment 365029
Just my opinion now...I would NOT use filler as you will never get a good match. What I would do is create some sawdust from some wood scraps and create a slurry with a glue that will dry clear (PVA, for example) and smear it into place or just wipe some glue into the openings and then sand the planks in the area forcing the sawdust into the glue. When I have used this approach the repair is virtually invisible...

Maybe others will have a better suggestion...
I was thinking of something along that line. Wasn't sure how much it would hide, but thought it would match better. Thanks!
 
Parts 47 in the kit are curved deck beams for the quarterdeck. The instructions tell you to bend them from 4x4mm walnut squares, although view P8 shows them closer to 5mm in height. These are to replace the quarterdeck support area built into the bulkheads, shown in this photo:
1680057341226.png
Those built-in supports on the bulkheads are obviously in the right place, and I just can't see cutting them out, and replacing them with something that will I will not be able to locate as accurately. I agree with cutting off the bulkhead extensions that help form the rails, as they're too thick, but don't think these are that bad. Plus, they will be inside a tunnel, below the quarterdeck, and not easily seen. It is therefore my intention to retain them. To do that, I also need to make part 46, again suggested of 4x4mm walnut, curved to match parts 47 and at the same level, to support the foremost part of the quarterdeck.

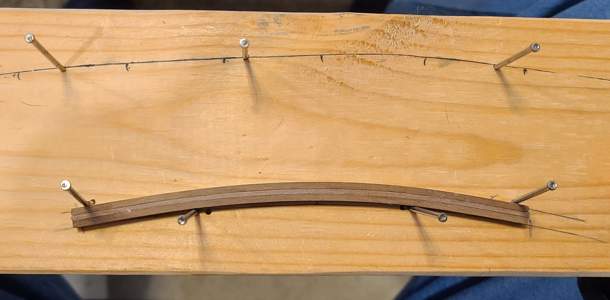
As I said, I know I cannot evenly bend a 4x4mm piece, and had no 4mm sheet to use, so decided instead to laminate the part using two pieces of 2x4mm located either side of a thinner piece, glued together and bent around a nail form:
1680057793258.png
I think that the laminations should not be too visible after sanding and finishing. Note that I have used 4 nails, the minimum to approximate a circular curve. If you just use 3 nails, 1 in in the center and 1 at each end, the curve will be parabolic, not circular. Technically, only the section between the two center nails above is circular, and the areas outside that are parabolic, but this is a much better approximation.

This photo shows two new supports I've added to support the above curved beam at the end of the quarterdeck.
1680058098446.png

I notched the ends of the beam to mate with the vertical beams and create the correct height. This curved beam in combination with the cross beams already on the bulkheads will form the support for my quarterdeck.
1680058180470.png

To help support the inside of the rails above the quarterdeck, as well as the the planking under it, I again added 1/64" veneer between the bulkheads.
1680058297572.png

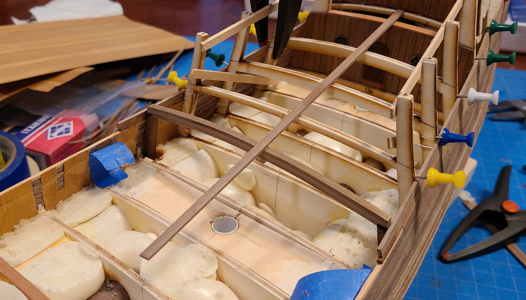
When adding planking from this point, planks are glued to each other, and to the veneer, but NOT to the bulkheads, as the area of the bulkheads protruding above the quarterdeck will be removed, and are used here only to help form the size and position of the hull:
1680058426633.png
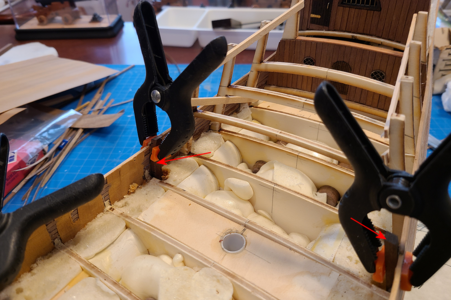
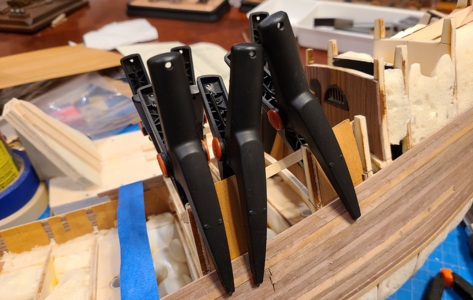
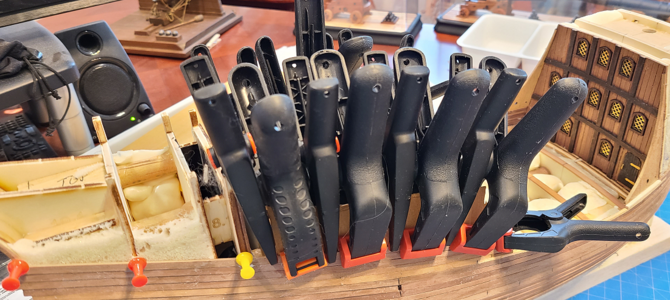
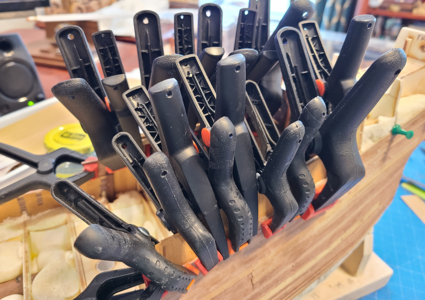
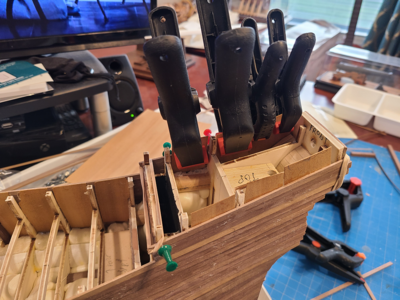
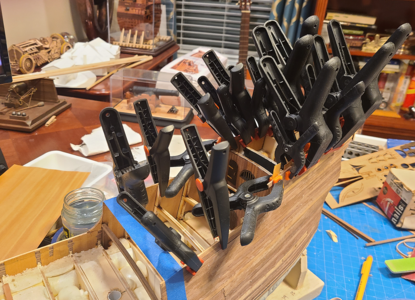
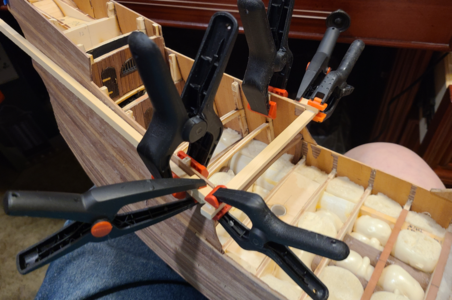
This takes a LOT of clamps, trying to insure that the veneer is glued well to the planks, the planks are glued well to each other, nothing is glued to the bulkhead extensions, yet the planking is held tight against the bulkhead extensions:
1680058548618.png
A lot of clamps.

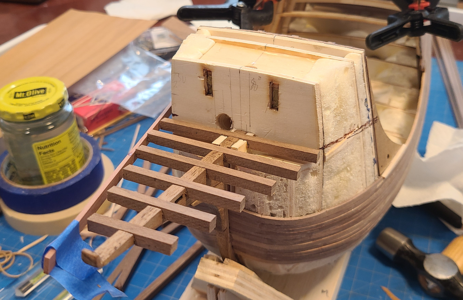
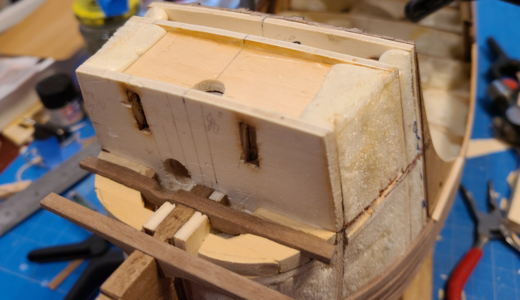
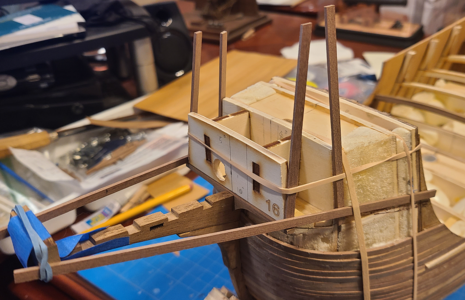
To plan the planking at the stem, I had to make the bowsprit deck beams and determine their location:
1680058672303.png
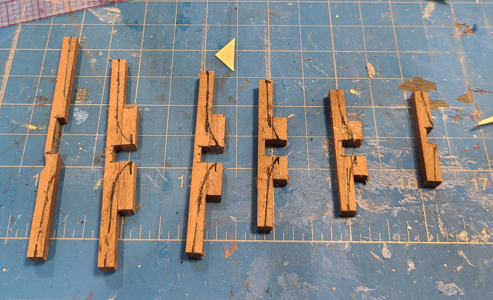
Made of 4x4 walnut and notched, these beams are thicker than 4mm towards the center, so have extra pieces added on:
1680058784827.png
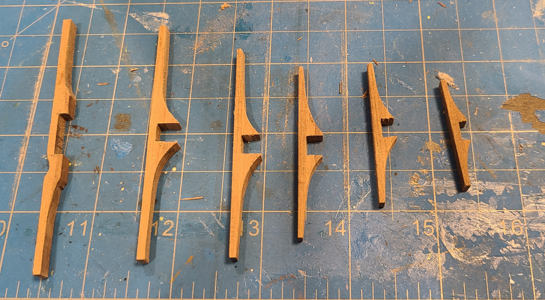
After shaping, they look a bit better:
1680058875642.png

As mentioned previously, the bowsprit of this ship is located off-center:
1680058948693.png
And therefore the closest deck beam to it must be trimmed to clear the bowsprit:
1680059002799.png
The above view also shows some additional blocking I've added to support the planking which is still curved at this point. Here it will transition from curved to straight, along the outer edge of the bowsprit deck beams.

Planking done to this point:
1680059172220.png\
Not well done, I know, but hopefully once sanded and finished and with all the external details added, will still look okay.

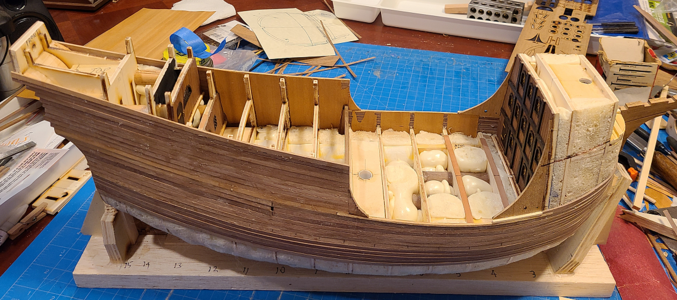
And this view shows the internals at this time:
1680059365481.png
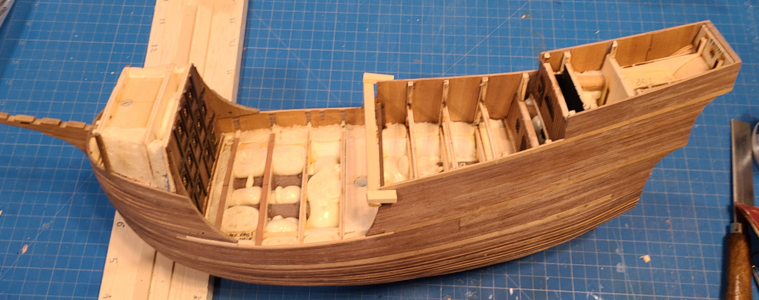
Bulkhead extensions have been removed from the exposed portion of the main deck, but not the quarterdeck. The veneer definitely helps keep things together and helps maintain the shape. I have ordered 0.6x4mm walnut strips for inside planking in this area.

Here you may notice that the aft breakwater, while not yet glued in position, will have planking over it, rather than being placed separately on the topgallant rail. The breakwaters are supposed to stand alone, without planking. That is one detail that I really don't like on this model/ship, and to me (the engineer in me), it makes no sense. I think it will look better if planking covers the breakwaters, so that is what I am doing. The fore breakwaters are in position, and planking will extend from the stem past the bulkhead to the curved end of the breakwater. I'll call it artistic license. Just as I blame any errors in construction on the Ragusian shipbuilders trying new methods and ideas, rather than on the model-builder. :)
 
Last edited:
When planking the poop deck, I again added small pieces of 1/64" thick veneer with grain vertical as a better attachment of one plank to the next than just edge-gluing them:
1680232114951.png
Even though these don't stick up much, they still must be sturdy and in the correct place, and I think this will help achieve that.

Continuing work on the planking:
1680232203913.png
I also noticed that the sides at the quarterdeck were pulling away from the bulkhead supports, so tried to strengthen them some.

In the end, these sides warped, and didn't want to stay in the correct position. Clamping them in place just resulted in them springing back after they sat a while. You can see the warping here:
1680232365316.png

To correct this, I wet the warped areas from the outside with water, softening the white glue, then clamped them in place using straight pieces of scrap:
1680232479141.png
After drying overnight and being released, the sides had come back into place and still seem strong (a worry was that wetting and softening the white glue might weaken it after drying). I'll have to construct some other clamps once bulkhead extensions are cut down when gluing to these and other thin areas to prevent this in the future.

While getting an idea of the alignment of the rubbing strakes that extend to the bow extension, I felt the width at the bulkheads did not quite provide the shape needed, so I inserted shims to get the correct alignment:
1680232842383.png
This additional width hurts nothing at this point, and makes the line from the hull to the point straighter.

Here are the shims glued in place on the bulkheads:
1680232945933.png

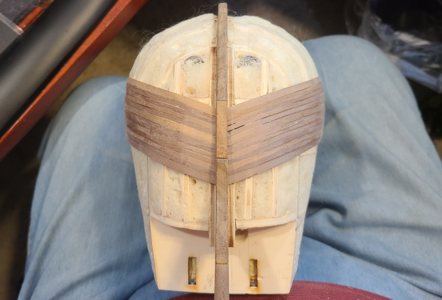
Here the planking has been completed for the rounded portion of the bow:
1680233011088.png
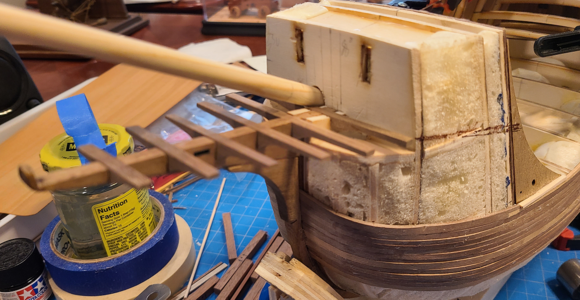
Temporarily inserting one of the bowsprit deck supports worked ideally to locate and retain the upper planks while being glued in place.

The aftmost deck support is mostly within the hull, and just protrudes slightly on either side of the planking:
1680233148519.png

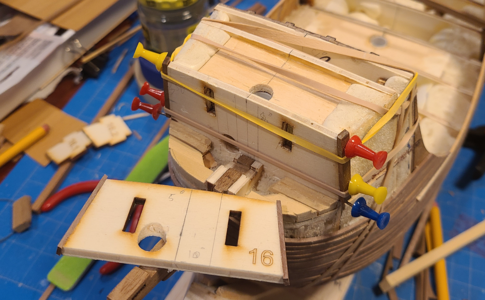
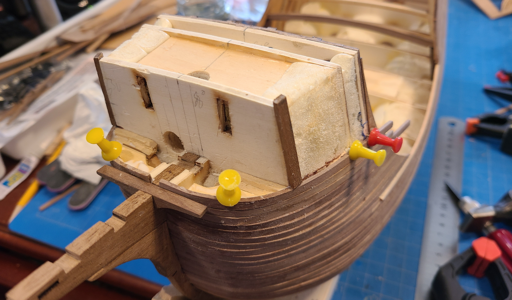
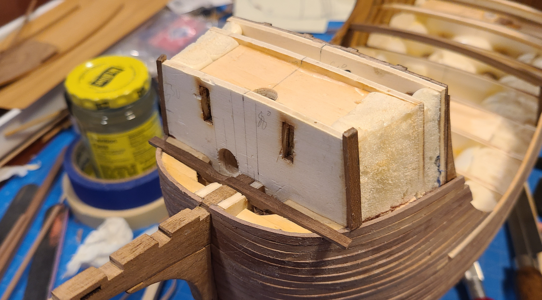
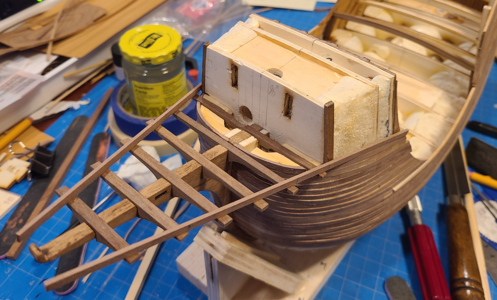
Mocking up the bowsprit deck supports and beginning of planking in that area:
1680233227207.png

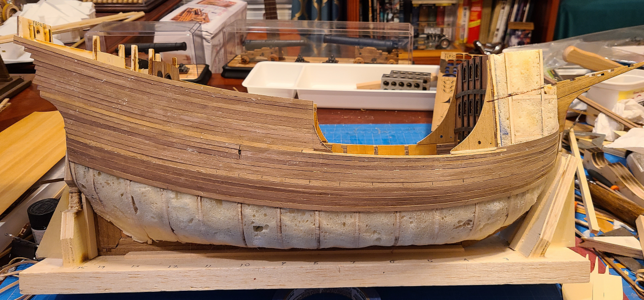
The planking as it is at this point in construction:
1680233266512.png

I don't want to continue work on the bowsprit area just yet. Since it will be more vulnerable, I want to sand the planking overall before doing that. I'll probably continue, and maybe finish, the lower planking first.

I do have a question, though: The list of materials lists the outside planking as all 1.5x7mm walnut strips, but also four 1.5x7mm walnut strips. I don't know where they should go. I don't see any wider ones anywhere. I wondered if I shouldn't use 1 1.5x7 strip on either side of the keel, into the groove on either side of the keel. Olha did this strip last, but she added the keel later. I think it will be difficult to place that last strip last in place along most of the keel, and it seemed like I should at least add one strip, and I thought I remembered (somewhere) that the first plank there can be wider. Does that sound right? Any other location for the 1.5x7s?

Until next time....
 
Just my opinion now...I would NOT use filler as you will never get a good match. What I would do is create some sawdust from some wood scraps and create a slurry with a glue that will dry clear (PVA, for example) and smear it into place or just wipe some glue into the openings and then sand the planks in the area forcing the sawdust into the glue. When I have used this approach the repair is virtually invisible...

Maybe others will have a better suggestion...
Good morning. I’m 100% with Paul here. I used filler on my Victory and while came out good on closer inspection the variance is evident. The saw dust method I used on my deck gap and it is so effective. Cheers Grant
 
Good morning. I’m 100% with Paul here. I used filler on my Victory and while came out good on closer inspection the variance is evident. The saw dust method I used on my deck gap and it is so effective. Cheers Grant
Thank you. I will definitely be using the saw dust method. I'm assuming Elmer's Glue All is as good as any for this usage.
 
I thought I'd mention here a couple things I should have previously. First, walnut strips included with this or any kit will vary somewhat in color. And while variation in color of actual strips of decking or planking can look good, accentuating the fact that you're using real wood, ship-length strips of one color mixed amongst other colors do not appeal to me. I should have done this sooner, but fairly early on I separated all the 1.5x4mm walnut strips in this kit by color. While it could have been a finer definition, I came up with four groups: light/orangish, medium, dark and varied. Varied are pieces that may start out their 50cm length dark, but vary and end up light. I've tried to use the light/orangish (not liking the orangish) and varied strips in areas that will 1) be painted black, toward the bottom of the hull, 2) be covered by other strips like the rubbing strakes or 3) be less visible on the completed model.

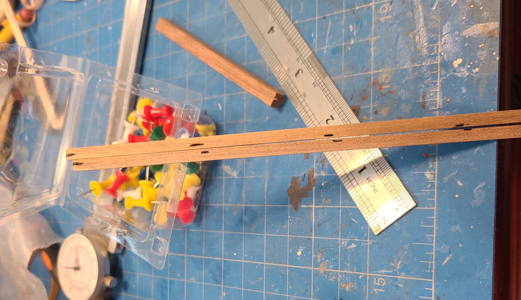
Secondly, I am completely unable to taper strips for planking (or any purpose, really) using Xacto knives or similar, using a metal straight edge, or just marking and cutting with a blade. I've even made a fixture to hold the strips in place during cutting, with poor results. I just can't do it. I considered buying a couple straight bars and mounting them in a vise, to limit material removal, but that sounded like it would quadruple my planking time. The method that works for me is to first mark along the strips (I usually work in pairs for each side) what material is to be removed using a pen:
1680541294496.png
Hopefully more even than shown above. And of course that might be along most of its length, rather than just a bit of tapering as shown above.

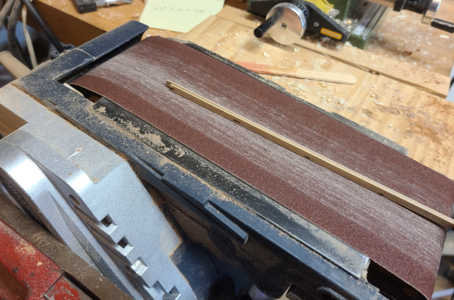
Then I hold the two strips, edge to be sanded downward in one hand over a running belt sander held in a vise:
1680541406318.png
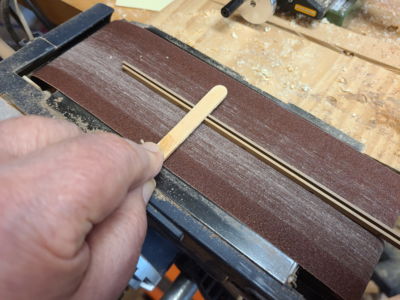
And with the other hand, hold my patented popcycle stick thickness determiner® (yes, it's a used one - cherry, I think) and press down on the area to be sanded:
1680541579440.png
By moving the stick and strips lengthwise, varying stick pressure and location, I can achieve far better accuracy that I can with a knife, as well as a smooth tapering along the length. Both strips will be quite close in thickness, if the popcycle stick is held parallel to the sanding belt. Clumsy, yeah. But it works for me.

I do have a question, though: The list of materials lists the outside planking as all 1.5x7mm walnut strips, but also four 1.5x7mm walnut strips. I don't know where they should go. I don't see any wider ones anywhere. I wondered if I shouldn't use 1 1.5x7 strip on either side of the keel, into the groove on either side of the keel. Olha did this strip last, but she added the keel later. I think it will be difficult to place that last strip last in place along most of the keel, and it seemed like I should at least add one strip, and I thought I remembered (somewhere) that the first plank there can be wider. Does that sound right? Any other location for the 1.5x7s?
I hadn't received an answer, so I decided to just use the 4mm strips against the keel. I know what plank widths I need from mid-hull aft, but not forwards, as I'm not sure where all the tapered strips will end up, so I cut the strip against the keel to end over a bulkhead, and will add the forward part later. This strip against the keel is not trimmed toward the middle of the hull (it inserts into the groove cut in the keel by about 1mm), but to appear the same exposed length at the end, it is trimmed to 3mm. And in the transition between, it varies in width and angle toward the keel. Just cut to fit. Then to make mounting easier, I wetted the end, and twisted it using clamps to allow it to dry in close to the correct position:
1680542088664.png
When mounting, the strip must be held tight into the groove, against the keel, and within the recessed portion aft:
1680542156682.png
With these strips mounted and clamped on both sides of the keel, you can see where they end:
1680542208814.png
After clamp removal, the transition from horizontal to vertical went pretty well:
1680543303385.png
Again, this area will be filled and painted black later.

I finished this all last night, and then this morning received word from Zoran of MarisStella that the 7mm planks were to be used here, rather than the 4mm. In fact for both the first and second plank against the keel. I thought at first I might remove the 4mm strips and use 7mm instead, but: 1) I thought the wider strips might be more difficult to get to conform to the bulkheads without cracking/breaking, 2) This area below the waterline will all be filled (somewhat) and painted so planking will be less discernable, 3) During normal viewing these plans are hardly able to be seen, 4) None of the drawings show wider planks used at this point, 5) I'm lazy, and 6) NO builders I have found of this model, including Olha, used wider garboard planks at the keel. So they will probably stay.
 
Last edited:
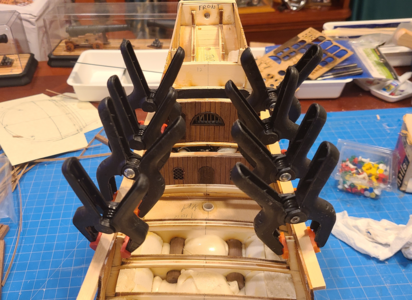
Now much to post recently; I've just been planking away. Here's a bottom pic close to finished, with only a couple rows to go:
1680990424961.png
A bit back I'd placed the garboard plank in place from mid to aft. I left the remainder of it to be installed until the last plank on each side was ready to be installed, to know exactly where it would be. And the garboard plank is in 2 pieces because each end has to be fitted properly, so doing them separately was much better.

One plank to go, time to place the forward portion of the garboard plank:
1680990666393.png

Fore garboard plank is now in, time to measure the last plank width:
1680990813041.png

Since I'll be doing a lot of sanding next, I wanted to support the upper wales with something less cumbersome than clamps, so made up a clamp with 3 pieces of scrap:
1680990899784.png
The result holds pretty well, and can be taped in place to be more secure:
1680990948748.png

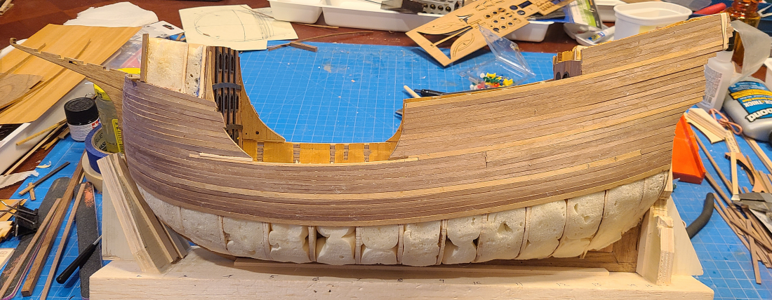
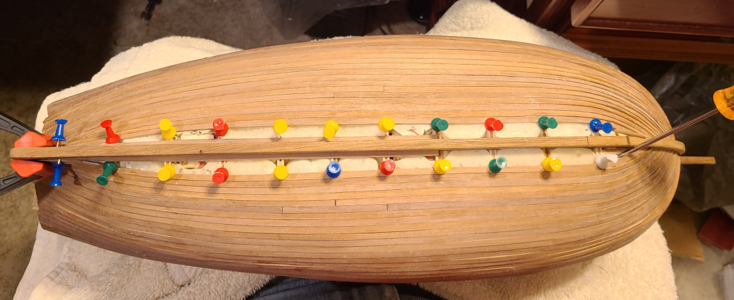
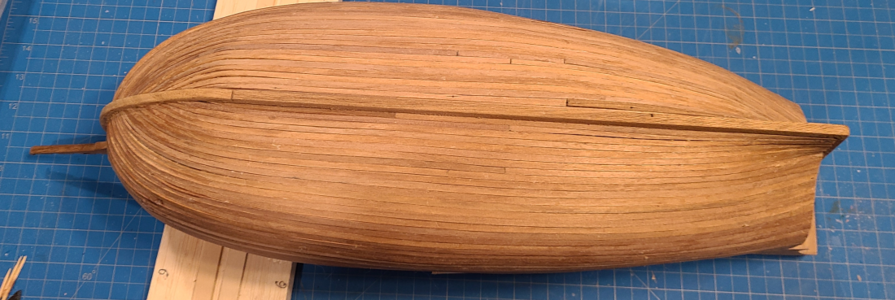
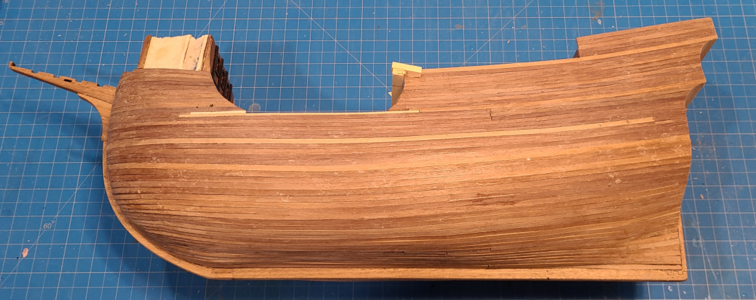
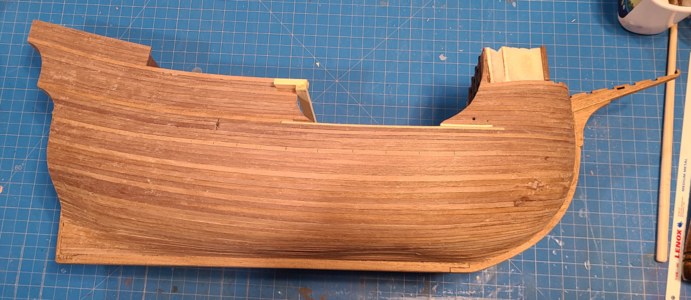
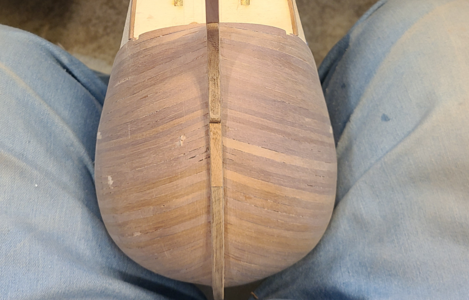
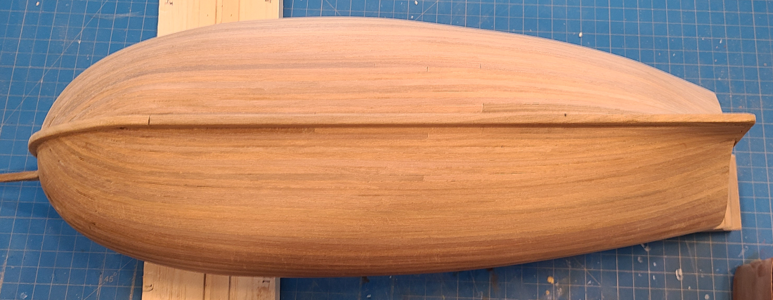
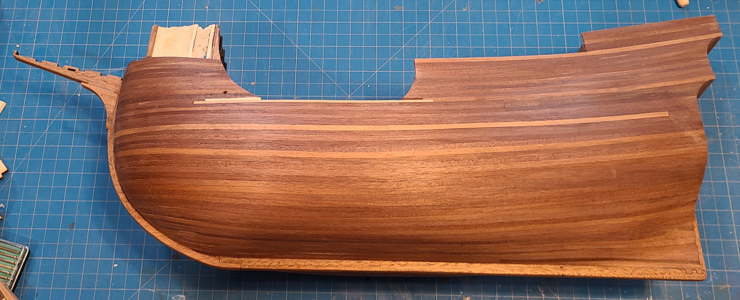
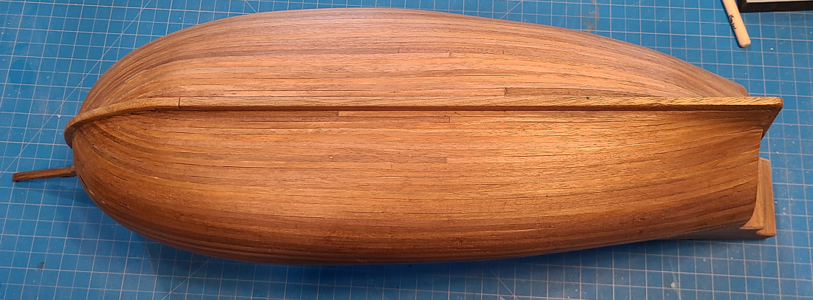
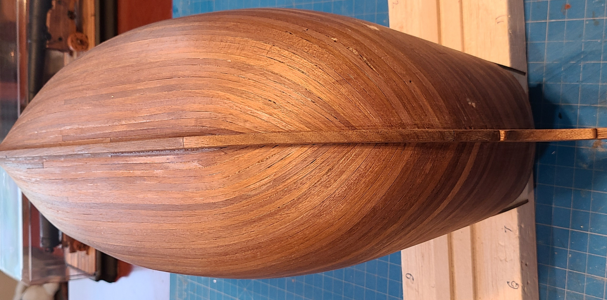
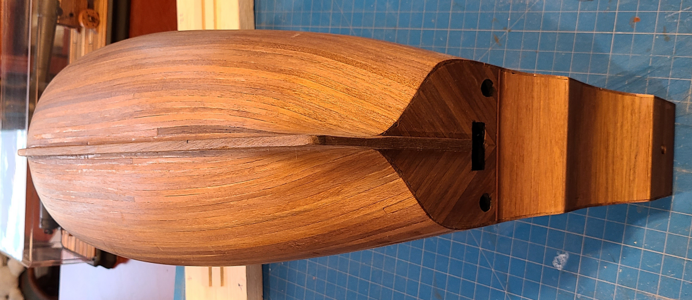
Here are a couple views of my completed planking (except what will be added to the once bowsprit supports and such have been installed - I needed to be able to get to the curved areas below it first):
1680991458225.png
1680991476398.png
1680991509211.png
Obviously, I'm not proud of my planking job. I know it doesn't look good, especially at the bow curves. But I'm hoping sanding a good sanding and filling cracks will help it a lot. And this is my first and last planked ship model, so there is that. I will say that between the planking and the expanding foam, this is one very strong and stable hull. It ain't going anywhere, that's for sure.

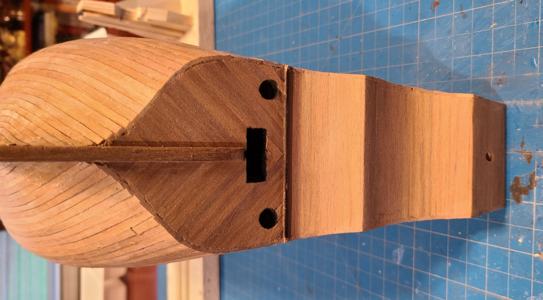
The rear has been (very) roughly sanded; the rest will shortly.
1680991560048.png
So, after Easter, time to fill my work areas with sawdust. I think I'll need a mask, as just breathing in dust from the rear area last night had me choking.

Happy Easter, everyone!
1680992079405.png
 
Why is this the first and last planked model Signet?
I haven't built that many ship models. As a young teenager, a built a wood pirate ship about a foot or so long, then a longer/better model of the Sovereign of the Seas clipper ship, both from kit and with solid hulls. My only "real" ship model was a Chebec, built from scratch, from plans and instructions starting in the November 1958 issue of Popular Mechanics magazine. That one took me over a year of my teen life, and traveled with me for many years, mostly boxed, until its ultimate destruction in a rigging implosion. It never seemed to gain a place of honor, and protection, over those many years.

While I built many non-ship models in between, like Pocher cars and such, my next ship model was completed after the Covid pandemic began, the Corel HMS Victory cross section. It was a challenge to me; my fingers don't work like they should anymore, and my back aches when I pick things up which I've dropped, and I do that pretty much constantly. But I enjoyed the Victory, and even more so the Bonhomme Richard cross section that followed it. It had the closest I've ever done to planking, and that really doesn't count, as the planks covered only a small portion of the hull.

But, all because of Olha, I've fallen in love with this ship and her construction of it, and it has now become my first planked model ship. This model suits my purposes in a number of ways but it's length happens to be within an inch of what I can put into a bookcase I have in my den. Originally, I never expected to do the rigging, thinking Olha was not as well, but I hope to continue on to it. My den is already filled with ship, cannon and train models, 3D printed models of every house I've ever lived in and my son's (9 total), and my goal at this point is simply to finish a quality (for me) build of this ship model. I don't have room for another, thus this will be my last planked model as well. I'll be 80 next month, and time will tell if I finish it or not, and what if anything I do afterwards, but it certainly will NOT be another full ship model, planked or not. And that's okay with me. I'm having fun with this one.

As someone said here: Make each part a model in itself. I'm not in a big hurry.
 
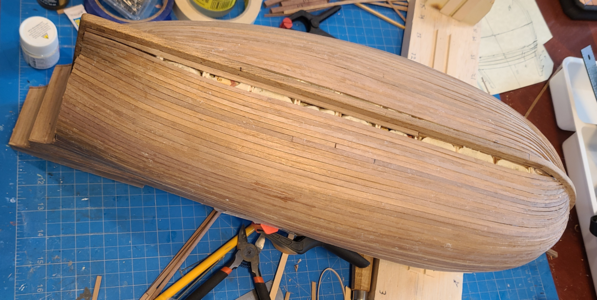
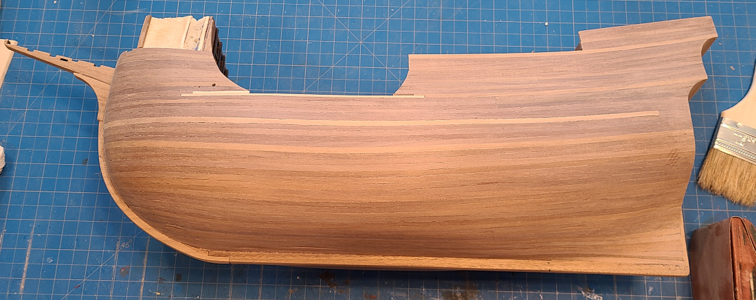
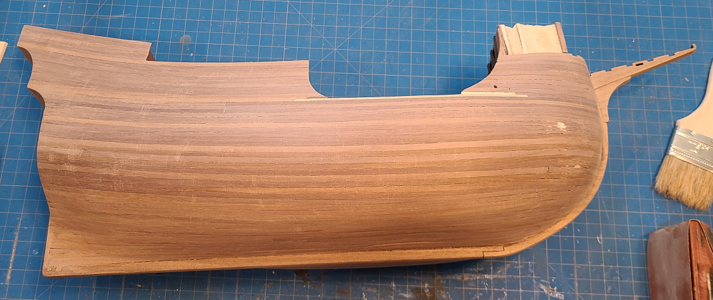
After a whole lotta sanding, it's beginning to shape up:
1681409952839.png
No, I'm not proud of the job. There are still cracks/gaps, and some places are sanded through to lighter wood (not sure how that happened).
1681410056623.png
1681410077285.png
1681410095741.png
It should look better with a finish on it. If the gaps still show up, I may fill them. The finish below the waterline is not as good as that above, in general, but I'm hoping black paint will hide many of the defects. I will touch up the small light areas after finishing. The exposed strips of light and lighter wood will be covered by planking over them for rubbing strakes, etc.
 
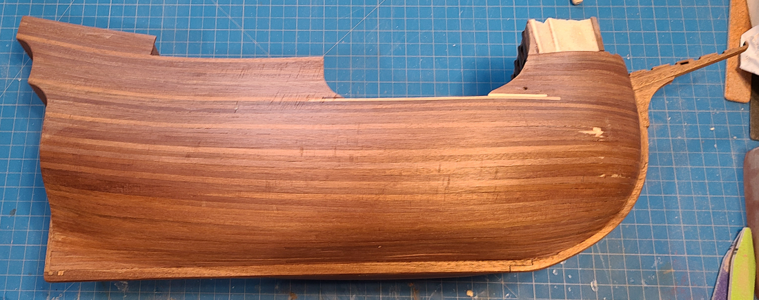
Once again, I thought I posted the above yesterday. Today I put one coat of Minwax Wipe-On Poly Clear Satin on, brushed then wiped:
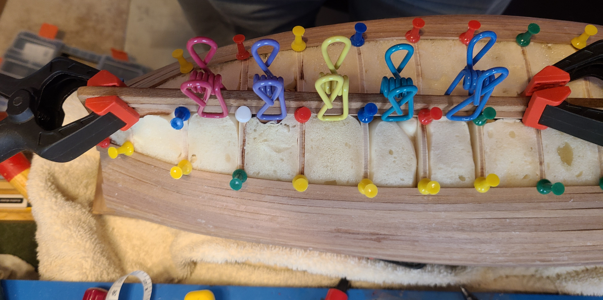
1681506044425.png
The photo shows up some scratched areas, but they aren't that obvious in person, and I think the detail to be added will cover some of it. I still have to paint/stain/blend the couple white areas, which I guess are from underlying wood.
1681506133090.png
As mentioned previously, the much lighter strips were chosen specifically to be under the rubbing strakes and similar, so will not be visible later.
1681506186250.png
Areas which will for the most part be below the waterline are the worst, and will be covered with black paint, so I'm not as concerned with them. If it looks bad after painting, it can be filled and painted again. For the gaps, most of which have been filled with glue and sawdust, I'll probably use wood putty.
1681506303644.png
The bow is the worst, but again, mostly below the WL.
1681506338271.png
I think the general shape came out pretty well. Much of the planking is decent, and will hopefully make a good model.

Why did I apply finish now, so early in construction?
  • It's only a first coat, more will be added later in construction.
  • Applying the finish coat showed some areas that had a bit of glue on them, allowing them to be re-sanded and finish re-applied.
  • I have found not much difference in the adhesion of wood glue to finished areas and unfinished areas.
  • If glue is left on the hull when applying detail, it will be much less visible.'
  • The finish keeps the hull "clean" and dust-free (or at least dust can be seen and removed).
  • The finish gives a good base, allowing me to fill cracks and color/stain certain areas as needed.
  • It is far easier working with the hull without all the details on it.
  • Many/most of the added details (wales, rubbing strakes, mouldings, etc.) will be stained dark, so touch-up of them has less chance of messing up lighter hull finish.
Those are my thoughts, anyhow. Next: working on the bowsprit deck and planking.
 
Back
Top