Hi Dean, what a fantastic job, just looks great. As you noted, Ialso like to build WWI aircraft. I really like what are you doing.
-

Win a Free Custom Engraved Brass Coin!!!
As a way to introduce our brass coins to the community, we will raffle off a free coin during the month of August. Follow link ABOVE for instructions for entering.
-

PRE-ORDER SHIPS IN SCALE TODAY!
The beloved Ships in Scale Magazine is back and charting a new course for 2026!
Discover new skills, new techniques, and new inspirations in every issue.
NOTE THAT OUR FIRST ISSUE WILL BE JAN/FEB 2026
- Home
- Forums
- Ships of Scale Build Logs
- Super Detailing Static Models / Other Genres
- Historical Trailways, Guns, Aircraft, and Cars
You are using an out of date browser. It may not display this or other websites correctly.
You should upgrade or use an alternative browser.
You should upgrade or use an alternative browser.
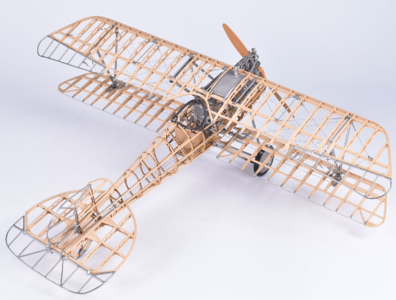
Model Airways Sopwith Camel 1/16 scale [COMPLETED BUILD]
Thank you! I take that as a big compliment coming from you, I just love your WW1 airplane dioramas, they look excellent!Hi Dean, what a fantastic job, just looks great. As you noted, Ialso like to build WWI aircraft. I really like what are you doing.

Last edited:
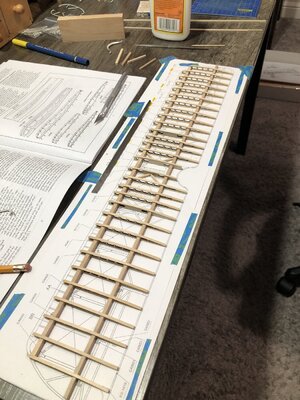
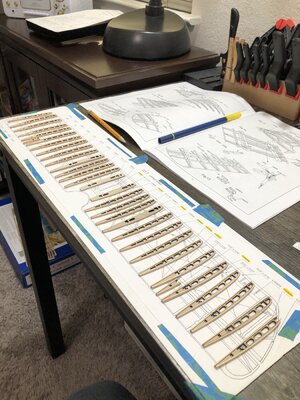
Yesterday I finished capping the ribs on the upper wing…
Then I spliced the main spars, as the provided wood is not long enough to use one piece…sigh!
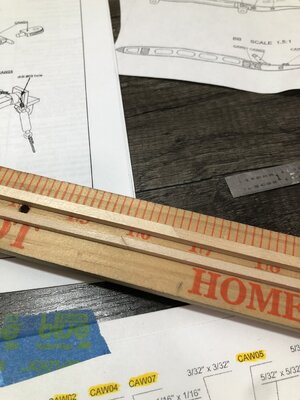
Then after sanding the main spars and test fitting in the ribs, it was time for assembly.
I started stacking the ribs on the spars in order, like making a ladder…
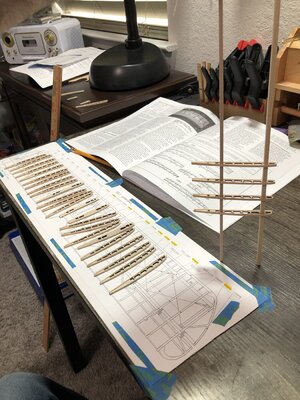
After all ribs were on the main spars, I located them properly using the full scale plans…
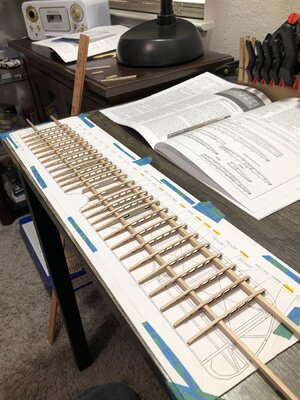
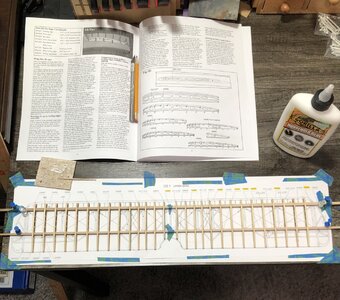
Then I verified my leading edge was straight and all ribs were square, and then glued all of the ribs to the spars…that was time consuming!
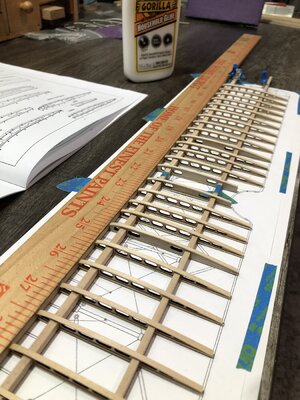

Then I spliced the main spars, as the provided wood is not long enough to use one piece…sigh!

Then after sanding the main spars and test fitting in the ribs, it was time for assembly.
I started stacking the ribs on the spars in order, like making a ladder…

After all ribs were on the main spars, I located them properly using the full scale plans…


Then I verified my leading edge was straight and all ribs were square, and then glued all of the ribs to the spars…that was time consuming!

Last edited:
Thank you Lou!Looking great Dean! Are you going to stain the basswood at all?
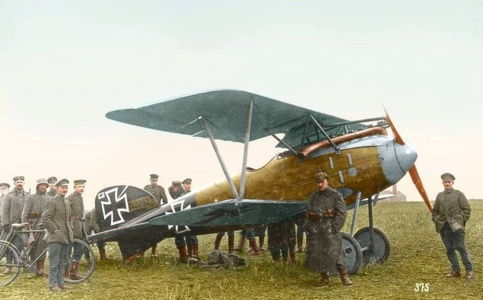
I am not sure yet, I don't like it stained dark, it doesn't look good on an airframe IMO. So I will test a piece. I believe with a clear coat it will get slightly darker and be just right. I am also thinking about what color I want the metal parts. I am thinking black on those, as that is how the real plane was.
Thanks again. That may look nice too.I was thinking more of a honey or golden oak, add a little color and and subdues the basswood a bit…. It’s looking good as is too! Very clean as usual….
I have to tell you, I really hate the Britannia metal, it’s way too soft and will crack and even break if you bend it too much. The wing tips are horrible, I don’t think I’m going to use them! They don’t fit correctly, and making them work is a compromise. So I think I am going to make them out of wood.
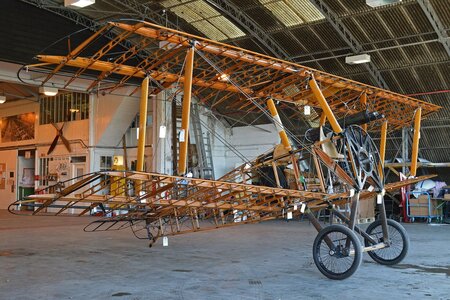
True…I’ll just use some wire!I think on the real camel they were metal hoops, maybe you could make some out of some brass wire, it would be thick enough to hold its shape…. ? This is also the color wood I was thinking….View attachment 291203
As on the wings of eagles your airship is rising. RichTrue…I’ll just use some wire!
Final progress for the day…I added the aileron spars and trimmed them to fit the wing tips. The aileron rib is added at this point, with a small gap for clearance. The wing will be cut later so the aileron is free to rotate, after some sanding of the leading spar and ribs, and adding hinges. 
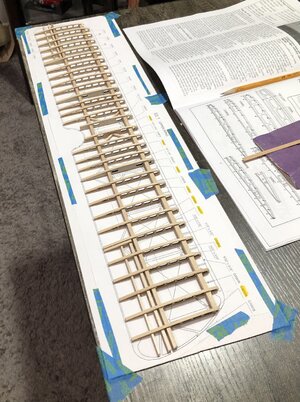
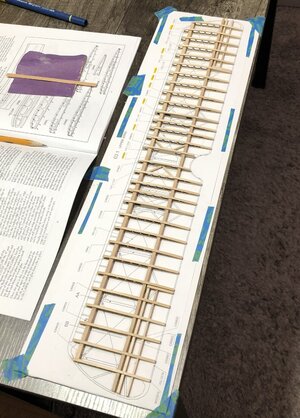
Next all the angle braces will be glued in.


Next all the angle braces will be glued in.
Last edited:
- Joined
- Apr 21, 2018
- Messages
- 881
- Points
- 353

Just popped in for a look-see.
Your propeller looks impressive and the build is coming along nicely.
Checked out the price of this kit, so with that in mind here are a few comments.
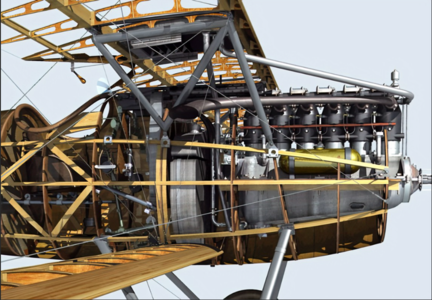
Engine; you gave us a photo of a real one.
Sadly the kit engine is a parody of that.
All details are so crude and clunky. For the money I'd want some serious fidelity, as it is a major feature of the kit.
I've concluded that the Camel is such an iconic machine, getting drawings, photos and plans of every single component is a breeze.
A scratch build is a real feasibility in any scale of your choice. Including the engine, there's nothing complicated to make.
Cost of materials would be a small fraction of what comes with the box.
That said, I wish you much pleasure building this kit.
Hi Dean. After your first impression in your NL-log, I now found your new build-log of this historical airplane. The kit and the parts looks very nice and good quality.Final progress for the day…I added the aileron spars and trimmed them to fit the wing tips.
View attachment 291240View attachment 291241
Next all the angle braces will be glued in.
The extra detailing of the engine looks very realistic. Well done!
My chair is ready and can’t wait to lift it into the air.
Regards, Peter
Thank you Peter! Welcome aboard!Hi Dean. After your first impression in your NL-log, I now found your new build-log of this historical airplane. The kit and the parts looks very nice and good quality.
The extra detailing of the engine looks very realistic. Well done!
My chair is ready and can’t wait to lift it into the air.
Regards, Peter
Hey Pugwash, thanks for dropping in.Just popped in for a look-see.
Your propeller looks impressive and the build is coming along nicely.
Checked out the price of this kit, so with that in mind here are a few comments.
Engine; you gave us a photo of a real one.
Sadly the kit engine is a parody of that.
All details are so crude and clunky. For the money I'd want some serious fidelity, as it is a major feature of the kit.
I've concluded that the Camel is such an iconic machine, getting drawings, photos and plans of every single component is a breeze.
A scratch build is a real feasibility in any scale of your choice. Including the engine, there's nothing complicated to make.
Cost of materials would be a small fraction of what comes with the box.
That said, I wish you much pleasure building this kit.
I purchased the kit for $185 US dollars, including shipping. I consider that a fair price since the kit includes hundreds of metal parts (over 350), tubing, wire, decals, wood, lazer cut parts (150), tires, etc. and 1/16 scale plan sheets (5) and an instruction booklet (44 pages).
There are plastic models that cost more!
I’m not sure by the time you buy plans, wood, tubing, wire, metals, tires, etc. that you would come out much cheaper. And then you have to cut everything out, including all of the ribs for the wings! That is a lot of time and work! Not to mention you would have no guidance or instructions, which would require more research. And finally that’s a big shopping list that would require a lot of time.
In conclusion, we buy a kit for convenience, and we pay extra for that! It saves time and research. Maybe one day when I retire I will do scratch builds.
Last edited:
- Joined
- Apr 21, 2018
- Messages
- 881
- Points
- 353

Hi Dean, my comments weren't meant to be a downer on the kit or your choice. Of course you are right about the convenience a kit provides. More, I was indicating another way.
The prices I saw were nearly double what you paid so good for you.
Will the engine be cowled? That will hide a multitude of sins.
Will you be attempting the internal wire bracing, including turn buckles etc?
The prices I saw were nearly double what you paid so good for you.
Will the engine be cowled? That will hide a multitude of sins.
Will you be attempting the internal wire bracing, including turn buckles etc?
Dean, just saw this log and am amazed at the quality of your build. Real craftsmanship. I built this kit 8-10 years ago and really enjoyed it. One issue comes to mind, as you have finished the engine you know that it is pretty weighty. It puts a lot of stress on the landing gear struts when installed. I had my finished model on display for a few weeks when I noticed that the brittania metal landing gear struts were starting to bend under the continuous weight. Scratched my head for a while and then braced the struts with some silver painted wood. Worked ok but not ideal, best I could do with an already finished kit. If those struts are still made of brittania, you might be able to come up with a better solution while the build is in progress. Just a heads up, you are doing such a fantastic job, didn't want those struts to mess up your finished product.
Cheers and congrats
Cheers and congrats
Where the wheels attach to the axle could also use some strengtheningDean, just saw this log and am amazed at the quality of your build. Real craftsmanship. I built this kit 8-10 years ago and really enjoyed it. One issue comes to mind, as you have finished the engine you know that it is pretty weighty. It puts a lot of stress on the landing gear struts when installed. I had my finished model on display for a few weeks when I noticed that the brittania metal landing gear struts were starting to bend under the continuous weight. Scratched my head for a while and then braced the struts with some silver painted wood. Worked ok but not ideal, best I could do with an already finished kit. If those struts are still made of brittania, you might be able to come up with a better solution while the build is in progress. Just a heads up, you are doing such a fantastic job, didn't want those struts to mess up your finished product.
Cheers and congrats


