That’s kind of like when I go to the kitchen for a snack and the Admiral says “ Oh that would taste good”. After I have sat down of course. I believe it’s called. Monkey see, monkey do.As others have said your spreading a new disease here with this great aircraft build, makes me want to order one for the future.
-

Win a Free Custom Engraved Brass Coin!!!
As a way to introduce our brass coins to the community, we will raffle off a free coin during the month of August. Follow link ABOVE for instructions for entering.
-

PRE-ORDER SHIPS IN SCALE TODAY!
The beloved Ships in Scale Magazine is back and charting a new course for 2026!
Discover new skills, new techniques, and new inspirations in every issue.
NOTE THAT OUR FIRST ISSUE WILL BE JAN/FEB 2026
- Home
- Forums
- Ships of Scale Build Logs
- Super Detailing Static Models / Other Genres
- Historical Trailways, Guns, Aircraft, and Cars
You are using an out of date browser. It may not display this or other websites correctly.
You should upgrade or use an alternative browser.
You should upgrade or use an alternative browser.
Model Airways Sopwith Camel 1/16 scale [COMPLETED BUILD]
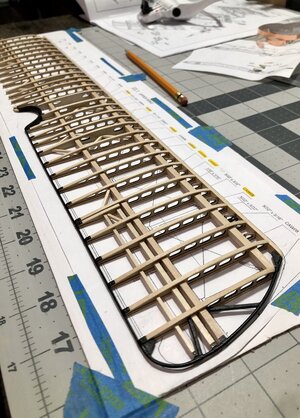
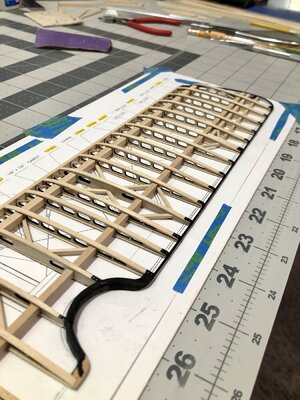
Today I added the ribs (26), after sanding, that go between the front spar and leading edge.
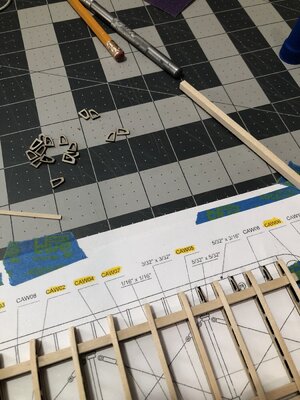
I used a spacer board to establish height and align the angle and location…
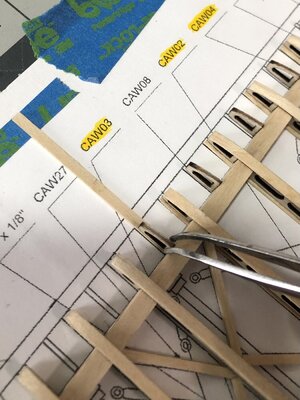
Then I ensured it was plumb using another board…
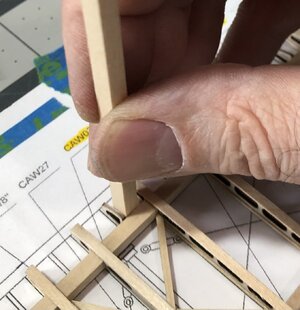
Then I added the pulleys. The instructions only mention drilling a hole for it in the main spar prior to adding the leading edge boards. But it’s so tight, I decided to paint and install it now while I can!
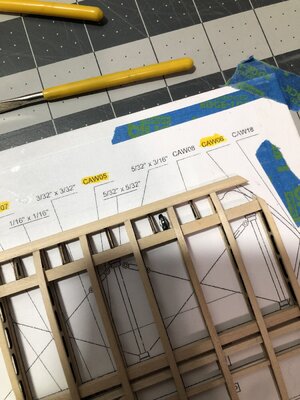
Then I glued on the leading edge boards after splicing them together.
After which I sanded, and sanded, and filed, and sanded…etc

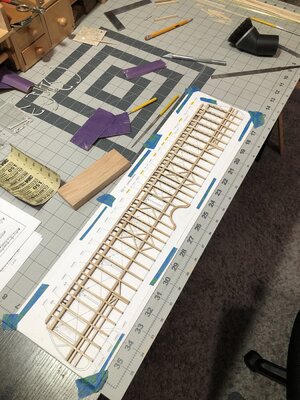
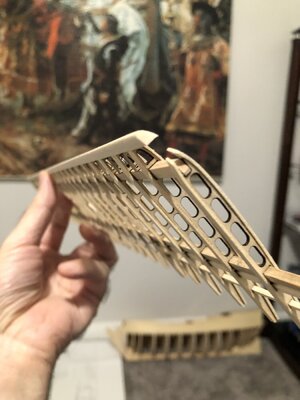
It’s hard to see the profile, but if you hold it at the right angle, you will see it matches the rib profile and tapers towards the leading edge.
Whew! That was a lot of work. Now to do the wing tips and trailing edge.

I used a spacer board to establish height and align the angle and location…

Then I ensured it was plumb using another board…

Then I added the pulleys. The instructions only mention drilling a hole for it in the main spar prior to adding the leading edge boards. But it’s so tight, I decided to paint and install it now while I can!

Then I glued on the leading edge boards after splicing them together.
After which I sanded, and sanded, and filed, and sanded…etc


It’s hard to see the profile, but if you hold it at the right angle, you will see it matches the rib profile and tapers towards the leading edge.
Whew! That was a lot of work. Now to do the wing tips and trailing edge.
Last edited:
Excellent assembly of this wing. Makes it easy to see the airfoil and uniformity of placement tip to tip. RichToday I added the ribs (26), after sanding, that go between the front spar and leading edge.
View attachment 291609
I used a spacer board to establish height and align the angle and location…
View attachment 291611
Then I ensured it was plumb using another board…
View attachment 291612
Then I added the pulleys. The instructions only mention drilling a hole for it in the main spar prior to adding the leading edge boards. But it’s so tight, I decided to paint and install it now while I can!
View attachment 291613
Then I glued on the leading edge boards after splicing them together.
After which I sanded, and sanded, and filed, and sanded…etc
View attachment 291614View attachment 291615View attachment 291616
It’s hard to see the profile, but if you hold it at the right angle, you will see it matches the rib profile and tapers towards the leading edge.
Whew! That was a lot of work. Now to do the wing tips and trailing edge.
Kurt Konrath
Kurt Konrath
The upper wing is really shaping up nicely. Do the ailerons get cut loose when wing build if finished or are they fixed with the wing.
I know some early aircraft designs didn't have movable ailerons, but used what was called "Wing Warping" where they twisted the whole length of the wing to cause movement of the aircraft.
I know some early aircraft designs didn't have movable ailerons, but used what was called "Wing Warping" where they twisted the whole length of the wing to cause movement of the aircraft.
Kurt Konrath
Kurt Konrath
With this subject being about aircraft design, construction and such I am much more knowledgeable in this subject than ship and sailing construction and work methods.
Years of aircraft maintenance and aircraft history in high school and in the Air Force taught me a lot about design and function.
Years of aircraft maintenance and aircraft history in high school and in the Air Force taught me a lot about design and function.
Thanks Rich!Excellent assembly of this wing. Makes it easy to see the airfoil and uniformity of placement tip to tip. Rich
Thanks Kurt! Once the wing tips and trailing edges are added, the ailerons are cut free from the wing. Then you install them with hinges.The upper wing is really shaping up nicely. Do the ailerons get cut loose when wing build if finished or are they fixed with the wing.
I know some early aircraft designs didn't have movable ailerons, but used what was called "Wing Warping" where they twisted the whole length of the wing to cause movement of the aircraft.
It looks like you maintained the leading-edge cross section all the way. That does not seem to have been easy, well done!
Thank you Daniel. I used to build and fly wood remote control airplanes. So I have profiled many leading and trailing edges.It looks like you maintained the leading-edge cross section all the way. That does not seem to have been easy, well done!
I set the wings on my work table, and put sandpaper on a block, but do not let the sandpaper go to the edge of the block. That way I can keep the edge of the block on the work table surface as I sand across the edge of the wing, all the time maintaining the same angle. Then I can change the angle as required to get the final geometry. This way the work surface controls the height of the block and keeps it parallel to the wings top to bottom, and the wings themselves keep the block parallel side to side. Then there is only one variable left, and that's the angle of the block. If you keep the angle consistent, using the wings and work table surface as guides, you will have a very consistent leading or trailing edge.
Then I hand sand the leading edge corner by wrapping the sand paper around the edge and sliding the length of the wing.
Last edited:
Thats great methodology Dean, thanks for the instruction, your post is now bookmarked.Thank you Daniel. I used to build and fly wood remote control airplanes. So I have profiled many leading and trailing edges.
I set the wings on my work table, and put sandpaper on a block, but do not let the sandpaper go to the edge of the block. That way I can keep the edge of the block on the work table surface as I sand across the edge of the wing, all the time maintaining the same angle. Then I can change the angle as required to get the final geometry. This way the work surface controls the height of the block and keeps it parallel to the wings top to bottom, and the wings themselves keep the block parallel side to side. Then there is only one variable left, and that's the angle of the block. If you keep the angle consistent, using the wings and work table surface as guides, you will have a very consistent leading or trailing edge.
Then I hand sand the leading edge corner by wrapping the sand paper around the edge and sliding the length of the wing.
Kurt Konrath
Kurt Konrath
Cute helper in updated photos.
Today I have been working on one side… adding the trailing edge and straps, and making a wing tip. Wing tip cast pieces (Britannia metal) didn’t fit well and one was broken. I tried to glue it 3 times, kept breaking. Then I contemplated soldering it together. But decided it was going in the bin!
So I had some nice aluminum tubing that is the right size. So first I bent it to the correct shape…
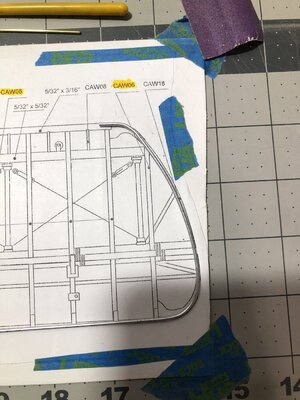
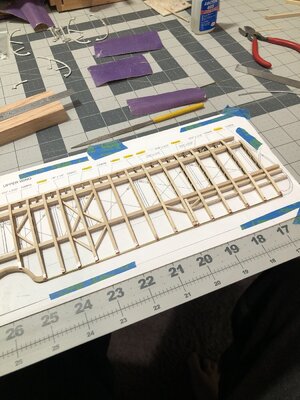
Then I added the trailing edge, and the straps (copper tape) that have to be cut to size…
Then I installed the wing tip, and made the struts for it, and the angle brackets. This will be painted black later…
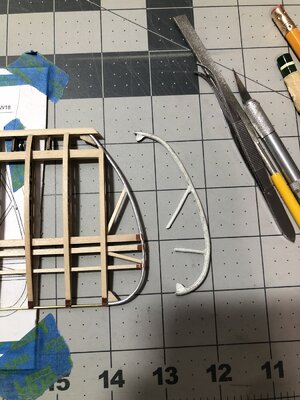
Cast piece shown to the right for comparison.
Then I sanding the leading edge and transitioned it into the wing tip…
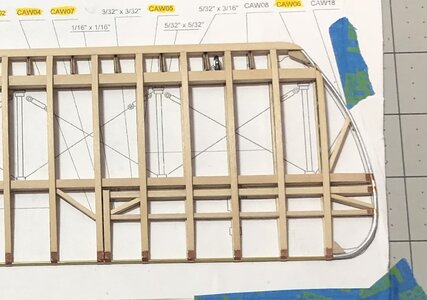
Then I decided to do a little painting and add some bolts to the straps…
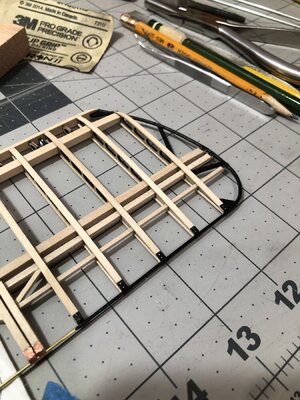
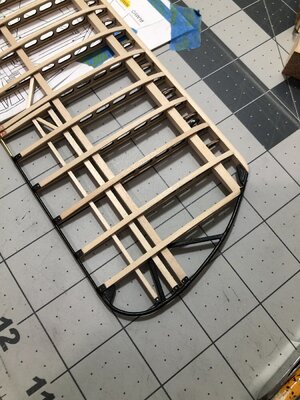
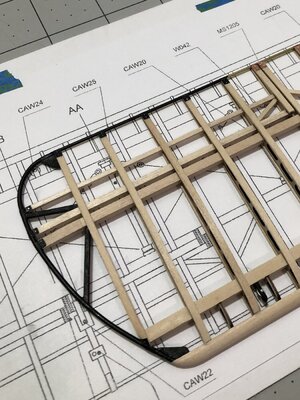
Already thinking ahead to the next step after finishing wing tips and trailing edges. I will have to cut the ailerons loose and sand, then clear coat or add a light stain to the whole assembly! Decisions ahead on stain or clear coat!
After that the ailerons will be put on with hinges, control horns added to them, and then all of the wing compression bars and mounting brackets are added along with the turnbuckles and wire for bracing. So a lot of work ahead to finish this wing.
Then I get to do it again for the lower wing! But it is cut in half and the dihedral is set.
So I had some nice aluminum tubing that is the right size. So first I bent it to the correct shape…

Then I added the trailing edge, and the straps (copper tape) that have to be cut to size…

Then I installed the wing tip, and made the struts for it, and the angle brackets. This will be painted black later…

Cast piece shown to the right for comparison.
Then I sanding the leading edge and transitioned it into the wing tip…

Then I decided to do a little painting and add some bolts to the straps…


Already thinking ahead to the next step after finishing wing tips and trailing edges. I will have to cut the ailerons loose and sand, then clear coat or add a light stain to the whole assembly! Decisions ahead on stain or clear coat!
After that the ailerons will be put on with hinges, control horns added to them, and then all of the wing compression bars and mounting brackets are added along with the turnbuckles and wire for bracing. So a lot of work ahead to finish this wing.
Then I get to do it again for the lower wing! But it is cut in half and the dihedral is set.
Last edited:
Kurt Konrath
Kurt Konrath
The wingtip and trailing edge piece look great, up to the standards you have set in your sailing vessel work.
Thank you Kurt!The wingtip and trailing edge piece look great, up to the standards you have set in your sailing vessel work.
Wow, that wing looks terrific.
Jan
Jan
Thanks Jan! It still has a long way to go, but starting to look promising.Wow, that wing looks terrific.
Jan
- Joined
- Oct 11, 2021
- Messages
- 740
- Points
- 403

Hi Dean,
just found you here. Flighing high in the depts of this forum. I love the Model Airways kits. I’ve started years ago on the Nieuport. Never finished it for some reason. Kit was expensive to get it shipped to The Netherlands. almost doubled the price.
I think my buildlog on a Dutch forum still exists…
I love your improvements done on this kit and I will toggle along.
Thank you! Welcome aboard!Hi Dean,
just found you here. Flighing high in the depts of this forum. I love the Model Airways kits. I’ve started years ago on the Nieuport. Never finished it for some reason. Kit was expensive to get it shipped to The Netherlands. almost doubled the price.
I think my buildlog on a Dutch forum still exists…
I love your improvements done on this kit and I will toggle along.
I was going to build the Nieuport 28 first. But the Camel arrived about 4 days before, and I couldn’t wait to start on an airplane.
Hallo Dean, a great Job. It looks very, very good.


