You are using an out of date browser. It may not display this or other websites correctly.
You should upgrade or use an alternative browser.
You should upgrade or use an alternative browser.
Model VICTORY by Deagostini, scale 1/84
- Thread starter Alexander74
- Start date
- Watchers 85
-
- Tags
- deagostini victory
Great progress, Sanya! Please consider posting regularly...we are waiting for your updates. 
Thanks Dima. This time I somehow delayed the process, but I try to upload regularly.Great progress, Sanya! Please consider posting regularly...we are waiting for your updates.
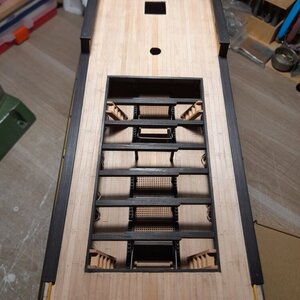
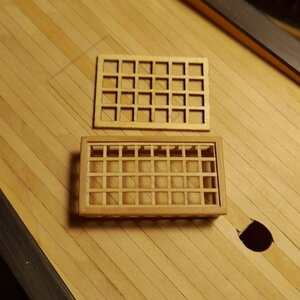
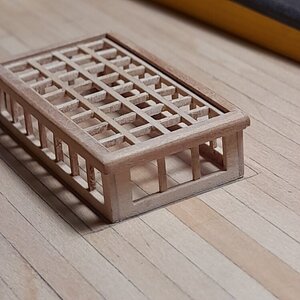
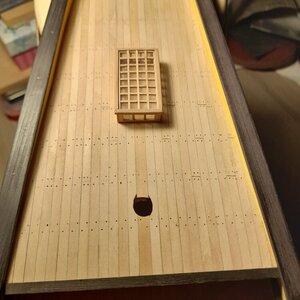
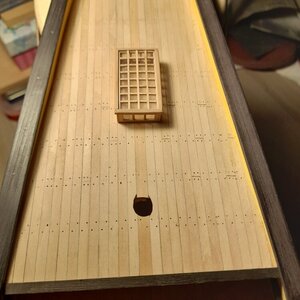
Good morning Sasha. That is brilliant. Clearly you are still going to put the “glass” in. Cheers GrantInstead of a type-setting, he independently made a skylight on the poop deck. The size in the kit is not to scale and the number of light windows does not match the drawings in Anatomy of Mk Kay
View attachment 337994View attachment 337995
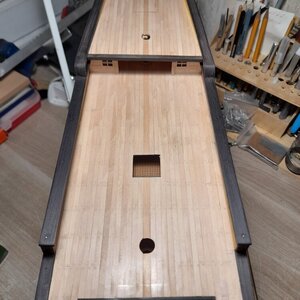
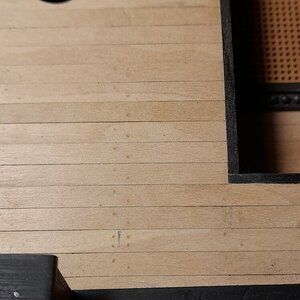
I cannot see on my phone zoom but is the glass in the skylight. If so it is very clear- what material do you use the glass? The tree nails at 1:84 scale must be tiny. Cheers GrantWell, I started nailing the poop deck. So far I've only marked and drilled the holes.
View attachment 337996
While all. If you are interested in the details of manufacturing, ask, I will try to explain and show
Grant, hi. For glass I used transparent plastic. thickness is 0.4 mm, but this is not very important, because its thickness is not visible. Pins in the deck with a diameter of 0.5 mmI cannot see on my phone zoom but is the glass in the skylight. If so it is very clear- what material do you use the glass? The tree nails at 1:84 scale must be tiny. Cheers Grant
I am everytime interested in improvement of my treenailing works.Pins in the deck with a diameter of 0.5 mm
So which material /technique you will use to make the treenails / pins of the deck planking? I am looking forward ....
Good afternoon friends. Ove this post at your request, as well as for all fellow modellers. Maybe someone will come in handy. And so - nailing the deck, as I do.I am everytime interested in improvement of my treenailing works.
So which material /technique you will use to make the treenails / pins of the deck planking? I am looking forward ....
We need an old old hard drive from the computer. I took it apart and made a grinder. I put emery, 600 grit, on the top disk and pressed it with a ring in the middle. It's enough
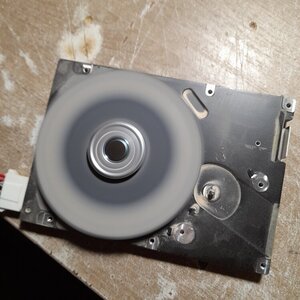
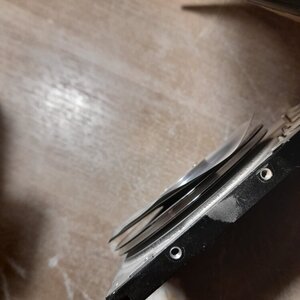
Reiki 1x1 mm
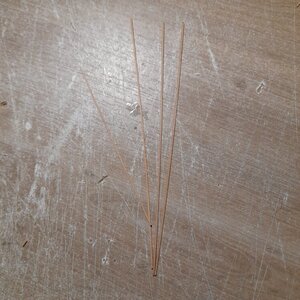
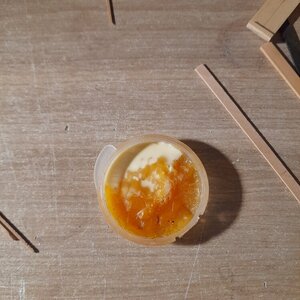
PVA glue, (I have a titebond) diluted with water about 50/50. Must be liquid
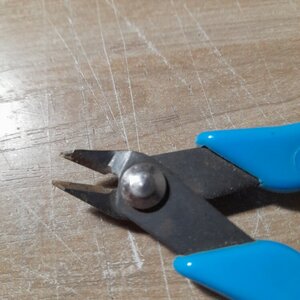
And sprue cutters. I have these, they are more convenient to bite off
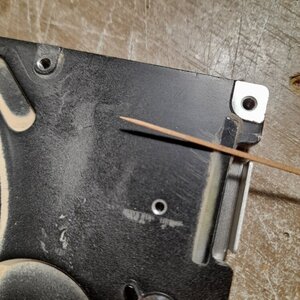
On sandpaper we grind the end of the rail under a cone, like this
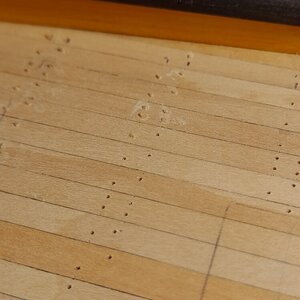
I slightly moisten the tip with diluted glue We insert WITHOUT EFFORT into a pre-drilled hole and bite off with wire cutters.

There is not a big tail left, not at all like a porcupine, if you use toothpicks
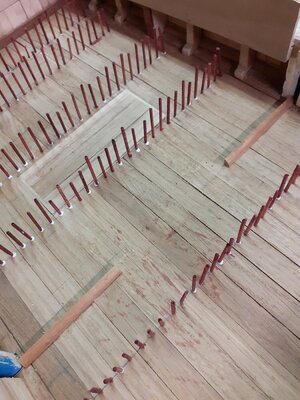
When the glue dries (I leave it for a day, but it can be earlier), I cut off the protruding pins with a sharp chisel. Then it remains to process the deck with sandpaper and you're done.
When the glue dries (I leave it for a day, but it can be earlier), I cut off the protruding pins with a sharp chisel. Then it remains to process the deck with sandpaper and you're done.
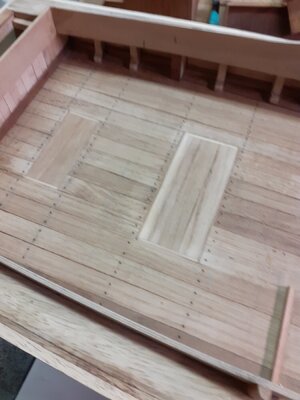
And this is how it will look at the very end
That's the whole technology. For small scales from 64 and below, it is quite working. On larger scales, this probably won't work.
This is a very old disk. If I'm not mistaken, 20 GB. Damn, I have more disk in my phone. Modern disks do not spin for a long time, its rotation is enough to fix about 5 or 6 pins. Then it stops and needs to be turned off and on again. And the old disks spin all the time.Nice use of the harddrive
- Joined
- Aug 8, 2019
- Messages
- 4,826
- Points
- 688

That's the reason why. Good to know. There is on Aliexpress an circuit board to let the new disk turn endless. But the price is about 15 euro. Better look for the very old ones.This is a very old disk. If I'm not mistaken, 20 GB. Damn, I have more disk in my phone. Modern disks do not spin for a long time, its rotation is enough to fix about 5 or 6 pins. Then it stops and needs to be turned off and on again. And the old disks spin all the time.
- Joined
- Oct 17, 2020
- Messages
- 1,459
- Points
- 393

questo è il sistema che uso con gli stuzzicadenti, prima e dopoBuon pomeriggio amici. Ove questo post su tua richiesta, così come per tutti gli altri modellisti. Forse qualcuno tornerà utile. E così - inchiodare il mazzo, come faccio io.
Abbiamo bisogno di un vecchio vecchio disco rigido dal computer. L'ho smontato e ho fatto una smerigliatrice. Ho messo della smeriglio, grana 600, sul disco superiore e l'ho pressato con un anello al centro. È abbastanza
[ALLEGA]339214[/ATTACH][ALLEGA]339219[/ATTACH]
Reiki 1x1 mm
[ALLEGARE]339213[/ALLEGARE]
Colla vinilica, (io ho un titebond) diluita con acqua circa 50/50. Deve essere liquido
[ALLEGARE]339220[/ALLEGARE]
E tronchesi. Ho questi, sono più comodi da mordere
[ALLEGARE]339217[/ALLEGARE]
Su carta vetrata maciniamo l'estremità del binario sotto un cono, in questo modo
[ALLEGARE]339215[/ALLEGARE]
Inumidisco leggermente la punta con colla diluita Inseriamo SENZA SFORZO in un foro preforato e mordiamo con tronchesi.
[ALLEGARE]339216[/ALLEGARE]
Non è rimasta una coda grande, per niente come un porcospino, se usi gli stuzzicadenti
[ALLEGARE]339218[/ALLEGARE]
Quando la colla si asciuga (la lascio per un giorno, ma può essere prima), taglio i perni sporgenti con uno scalpello affilato. Quindi resta da elaborare il mazzo con carta vetrata e il gioco è fatto.
Quando la colla si asciuga (la lascio per un giorno, ma può essere prima), taglio i perni sporgenti con uno scalpello affilato. Quindi resta da elaborare il mazzo con carta vetrata e il gioco è fatto.
[ALLEGARE=completo]339212[/ALLEGARE]
Ed ecco come apparirà alla fine
[ALLEGARE=completo]339221[/ALLEGARE]
Questa è l'intera tecnologia. Per piccole scale da 64 in su, funziona abbastanza. Su scale più grandi, questo probabilmente non funzionerà.
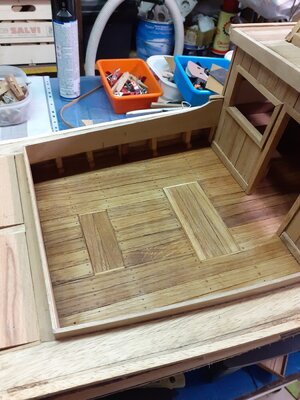
Last edited:
Yes, I used to use toothpicks too. But they are mostly made of bamboo, birch at best. Here I used for the pins a pear of the same shade as the deck boards.this is the system I use with toothpicks, before and after
View attachment 339232
View attachment 339233
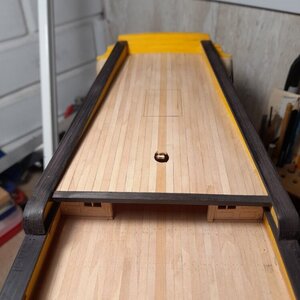
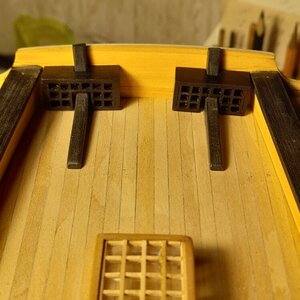
Hi all. Work at the shipyard continues. made flag boxes and stern knits. The ends are made of black hornbeam, and the flag boxes are made of wood in a set and painted with black permanent marker. Then everything is polished. After coating with oil, the difference will not be visible at all.
Cannon lodgements on the tank deck
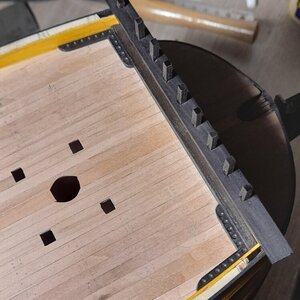

Cannon lodgements on the tank deck

Finally, I started decorating the aft galleries. for two weeks I collected my thoughts and thought over assembly technologies. Finally the work began. The window frames were cut out by a laser, which I pasted on the plastic from the kit. The frames are so fragile that I will fix some already in place. Yellow and black slats, it's all hornbeam wood. As long as it looks like this
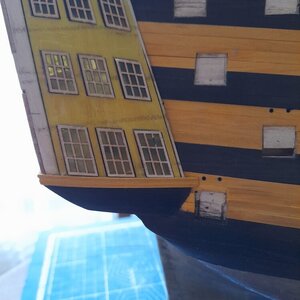
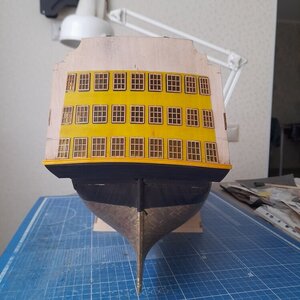
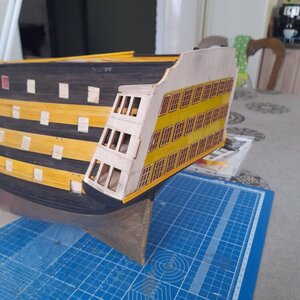
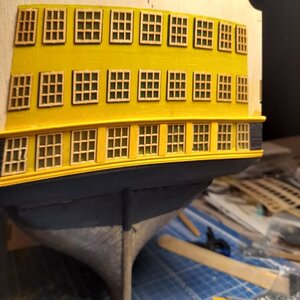
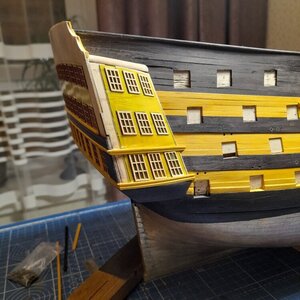
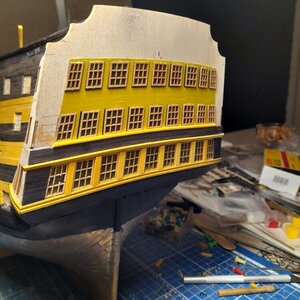
On the yellow slats between the window frames there will still be black hornbeam inserts. Here, almost every detail requires an individual approach and manufacturing. The slats between the windows go up with narrowing and the width is different. I will try to make these items. The yellow slats between the windows are not glued yet.


On the yellow slats between the window frames there will still be black hornbeam inserts. Here, almost every detail requires an individual approach and manufacturing. The slats between the windows go up with narrowing and the width is different. I will try to make these items. The yellow slats between the windows are not glued yet.
Good morning Sasha. It’s good to see your progress on your Victory again. The aft galleries on this ship are intense. As with everything you have done so far your accuracy and detail is amazing. Those window frames must have been a challenge for sure. I love the planking on the base of the galleries. There are very few Victory’s I have seen who get this right. Great flag boxes BTW. I think you should make tiny rolled flags to go inside each one.Finally, I started decorating the aft galleries. for two weeks I collected my thoughts and thought over assembly technologies. Finally the work began. The window frames were cut out by a laser, which I pasted on the plastic from the kit. The frames are so fragile that I will fix some already in place. Yellow and black slats, it's all hornbeam wood. As long as it looks like this
View attachment 342972View attachment 342973View attachment 342974View attachment 342975View attachment 342976View attachment 342977
On the yellow slats between the window frames there will still be black hornbeam inserts. Here, almost every detail requires an individual approach and manufacturing. The slats between the windows go up with narrowing and the width is different. I will try to make these items. The yellow slats between the windows are not glued yet.
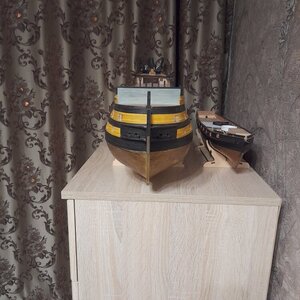
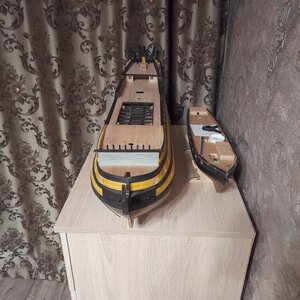
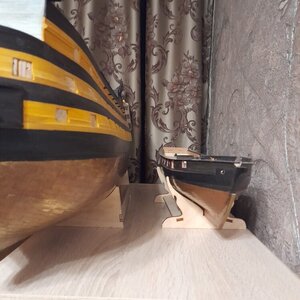
This is a brilliant representation of what a beast this ship is. Cheers GrantWell, photos of my projects in progress. On the left is Victory in 84 scale, on the right is the schooner Swallow in 72 scale. To understand the difference in the ships.
View attachment 342982View attachment 342983View attachment 342984

