MY BLUENOSE- YUANQING SCALE 1:72 SCALE [COMPLETED BUILD]

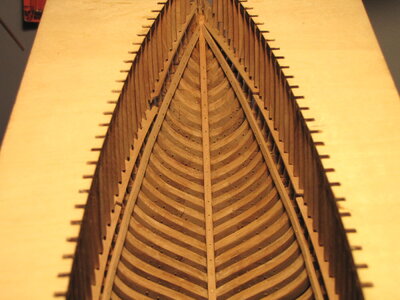
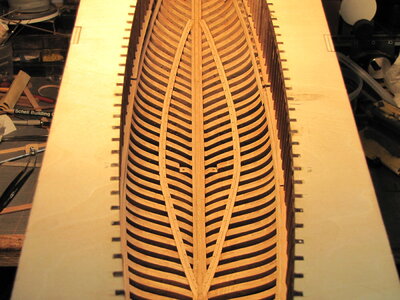
Hello Ship Mates, Well after a trying day yesterday we finally got all of the Waterways [spacers] in there temporary places so that we can start adding the interior support beams to the interior of the hull. Yesterday we had to remove the recently completed stern section as we ended up about 0.250" or 3mm, not a good thing. But today we are finally moving ahead with working on the inter hull.

Regards Lawrence View attachment 296663View attachment 296664
Don't talk to me about the (aft) spacers; I'm in the process of fabricating new ones. The ones supplied with the kit just could not fit; they don't even fit the jig...
The stern section is a tricky assembly with lots of opportunities to get it wrong.
But from what I can discern from your pics, it sure shows a master builder at work. Thumbsup
Hello Johan, Thanks for your very kind words and nice comments. And here I thought that I was the only one having trouble with those Waterways [spacers]. I broke one when I was removing the stern section when my knife broke with just a bit of too much pressure.
Regards Lawrence
 
Hello Johan, Thanks for your very kind words and nice comments. And here I thought that I was the only one having trouble with those Waterways [spacers]. I broke one when I was removing the stern section when my knife broke with just a bit of too much pressure.
Regards Lawrence

I broke one of mine too! They are thin and fragile with all of the notches for the frames. The notches all have to be filed to fit snug, but not too tight or they will break. Not a pleasant task!
 
Hello Johan, Nice fix this YQ Bluenose sure dose keep one on it's toes and if you do not pay full attention to what you are doing she will make you pay. Last night I was horrified to discover that I had inadvertently installed # 35 frame backwards. This I could not believe but there it was. To recodify this problem I had to fully remove the keelson remove frame # 35 clean these parts all up add reapply. Luckily I had no broken parts but this was a very bad set back costing me almost a full day for such a foolish boo-boo.
Regards Lawrence
I had a similar issue. During bonding the frames to the keel I inserted, I think it was, frame 37 or there about and after firmly pressing the frame to the keel, I realized that the frame was facing the wrong way. Luckily for me, the adhesive hadn't set yet, so I could take the frame out without too much hazzle,..
 
Great work on the waterways Lawrence. You are right - a challenging build will always keep the builder on his toes. However, that is where the excitement and ultimately the satisfaction come from.
 
Great work on the waterways Lawrence. You are right - a challenging build will always keep the builder on his toes. However, that is where the excitement and ultimately the satisfaction come from.
Hello Heinrich,, Thanks for your very kind words and nice comments. Yes you are very much correct there, a boo-boo is very easy to make and even more challenging to fix it and make it a bit better on the rebuild. Still can not get used to the Char, but I thought the same way about all of the saw dust in my Oliver Cromwell build.
Regards Lawrence
 
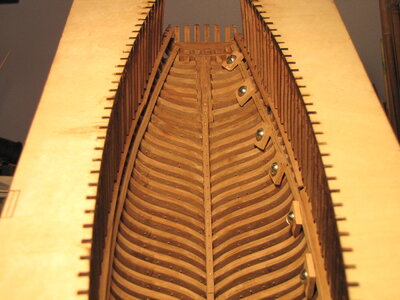
Hello Ship Mates, After our little setback and our return from the rebuild ship yard the little fellows and I have have completed the ships Clamps # 102 & 103 so that we can move on to the load bearing beams # 135. Another set of challenges for us.

Regards LawrenceView attachment 297201View attachment 297202
Looks great Lawrence! I like your clamps. ;)
 
Hello Ship Mates, After our little setback and our return from the rebuild ship yard the little fellows and I have have completed the ships Clamps # 102 & 103 so that we can move on to the load bearing beams # 135. Another set of challenges for us.

Regards LawrenceView attachment 297201View attachment 297202
A nice and tidy fit of those lower beams with those bolts. And fitting the bolts is a lot of work in that narrow space. A deja-vu!
Regards, Peter
 
A nice and tidy fit of those lower beams with those bolts. And fitting the bolts is a lot of work in that narrow space. A deja-vu!
Regards, Peter
Thank you Peter for your very nice words. I cheated, unlike you who added the bolts down in the hull of the ship I installed mine on the work bench. Feel a bit guilty for doing so, but I do not have your great skills.
Regards Lawrence
 
Last edited:
Thank you Peter for your very nice words. I cheated, unlike you who added the bolts down in the hull of the ship I installed mine on the work bench. Feel a bit guilty for doing so, but I do not have your great skills.
Regards Lawrence
That's not cheating, just thinking logically, Lawrence. ;) As long as you do not saw the hull in parts, all glued beams together provide sufficient strength.
I had to have at least 2 solid connections per frame in each part of the hull to keep both parts in shape.
I totally agree that you did it this way. :)
Regards, Peter
 
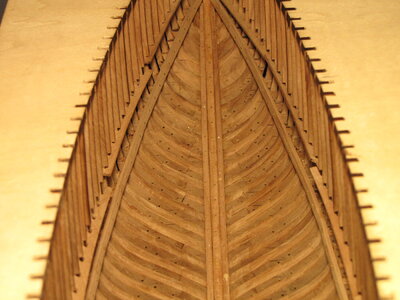
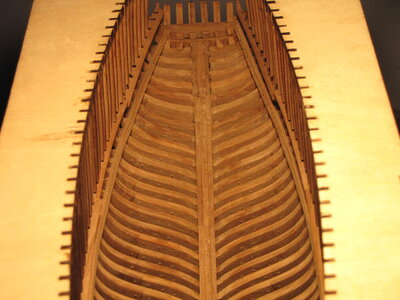
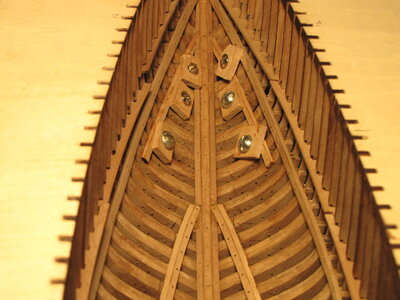
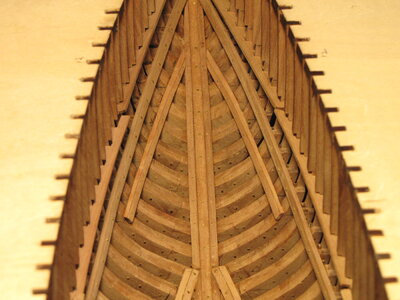
Hello Ship Mates, The little fellows and I have made a little more progress in the building of our YQ-Bluenose. We have decided to follow Peter in his adding of the ships Sister Keelson rather than those short pieces supplied in our kits. We have also added our simulated bolts.

Regards LawrenceIMG_6132.JPGIMG_6133.JPG
 
Hello Ship Mates, The little fellows and I have made a little more progress in the building of our YQ-Bluenose. We have decided to follow Peter in his adding of the ships Sister Keelson rather than those short pieces supplied in our kits. We have also added our simulated bolts.

Regards LawrenceView attachment 297535View attachment 297536
I'm glad I was able to serve as inspiration, Lawrence. Your ‘sister’s’ are looking great!
Regards, Peter
 
I was going to say that I remember those clamps from the OC days. Fine work my friend - you are well on your way!Thumbsup
 
I was going to say that I remember those clamps from the OC days. Fine work my friend - you are well on your way!Thumbsup
Hello Heinrich, Thank you for your nice and encouraging words. Yes these are the same clamps that I used on my Oliver Cromwell build. The bolts are a little snug in places as they are 3/16" or 4mm and 1/8" or 3mm would be more fitting for the YQ-Bluenose.
Regards Lawrence
 
Back
Top