I should also probably mention that the planks/stakes for the whale boat are supplied as laser cut pieces. This greatly helps with getting the shape of the hull correct as each plank has a specific shape which would be difficult to get correct for most of us.This is definitely a fun build. One needs to constantly be constructing from stock wood instead of laser cut pieces, although I do appreciate the laser cut pieces included (such as the rudder).
-

Win a Free Custom Engraved Brass Coin!!!
As a way to introduce our brass coins to the community, we will raffle off a free coin during the month of August. Follow link ABOVE for instructions for entering.
-

PRE-ORDER SHIPS IN SCALE TODAY!
The beloved Ships in Scale Magazine is back and charting a new course for 2026!
Discover new skills, new techniques, and new inspirations in every issue.
NOTE THAT OUR FIRST ISSUE WILL BE JAN/FEB 2026
You are using an out of date browser. It may not display this or other websites correctly.
You should upgrade or use an alternative browser.
You should upgrade or use an alternative browser.
New Bedford Whaleboat - Model Shipways - 1/16 - by JeffT [COMPLETED BUILD]
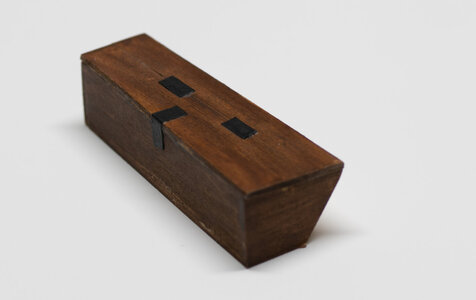
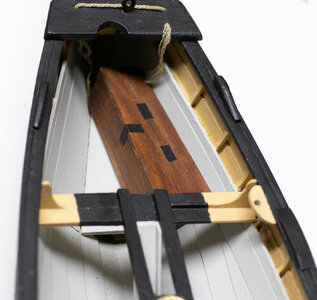
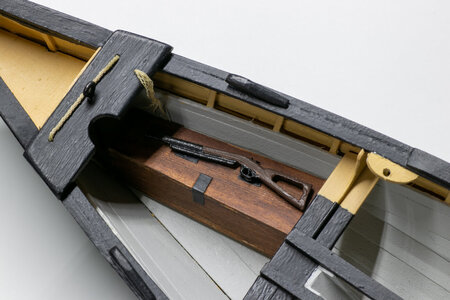
I constructed the whaling gun box. The box is made to fit up to the starboard ceiling. I also painted the whaling gun which is provided as a metal part in the kit. It need some cleanup before painting. I have not glued the box in place yet.
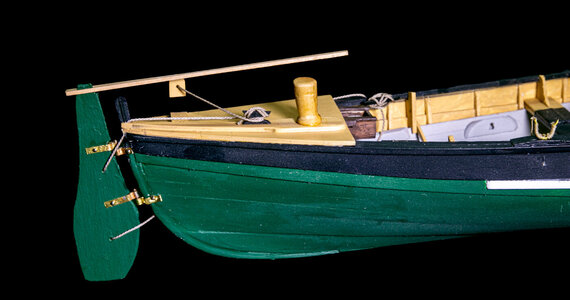
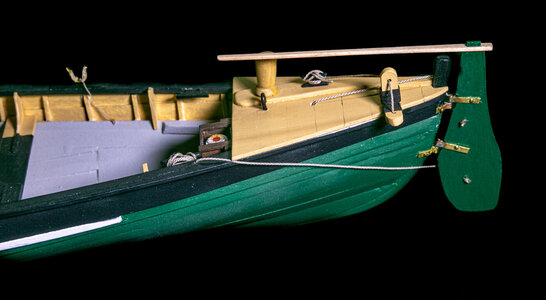
The rudder is provided as a laser cut piece. Gudgeons and pintles are provided as strips that need to be formed according to the plans. The gudgeons are trimmed so that they only mount to the stern post/keel as opposed to flaring out over the hull as in most ships. Brass nails were cut off and used as the pin in the hinges.


The rudder is provided as a laser cut piece. Gudgeons and pintles are provided as strips that need to be formed according to the plans. The gudgeons are trimmed so that they only mount to the stern post/keel as opposed to flaring out over the hull as in most ships. Brass nails were cut off and used as the pin in the hinges.

I love your gun box! What did you use for hinges and clasp?I constructed the whaling gun box. The box is made to fit up to the starboard ceiling. I also painted the whaling gun which is provided as a metal part in the kit. It need some cleanup before painting. I have not glued the box in place yet.
View attachment 340802View attachment 340803View attachment 340805
The rudder is provided as a laser cut piece. Gudgeons and pintles are provided as strips that need to be formed according to the plans. The gudgeons are trimmed so that they only mount to the stern post/keel as opposed to flaring out over the hull as in most ships. Brass nails were cut off and used as the pin in the hinges.
View attachment 340804
Standard 4x6 note card paper painted black. and then matt varnished with the rest of the box.I love your gun box! What did you use for hinges and clasp?
I’ve used black card stock for gun carriage straps, mast bands and treasure box before. Looks good!
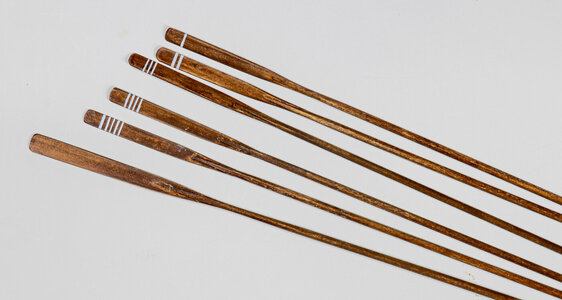
Oars are constructed using dowels and laser cut blades. The edge profile of each blade is as per the plans. The grip areas were turned on my mini lathe and the blade ends of the shaft were notched to fit the blades. After gluing, the joint of the shaft/loom and blade was sanded so the there was a smooth blend between the two parts. The finished oars were stained with a walnut stain. Each oar is identified by its thwart number with the stroke oar being #5 (five painted stripes) going forward to the bow (harpooner's oar) painted with 1 stripe.

Oarlocks were provided as strips of shaped brass at needed to be bent into the shape of an oarlock. A hole is drilled for the brass nail that holds the oarlock ton the pad. The oarlocks are wrapped with thread. According to the instructions this is to help quiet the sounds of rowing while approaching a whale. Lines are run from the oarlock to the rising thwart to keep the oarlocks from falling out of the boat. I also made the tub oar crotch which can be seen hanging from a rope in the pictures. This piece replaces the metal oarlock when the oar is peaked due to the height of the rope tub (to be described in an upcoming post).
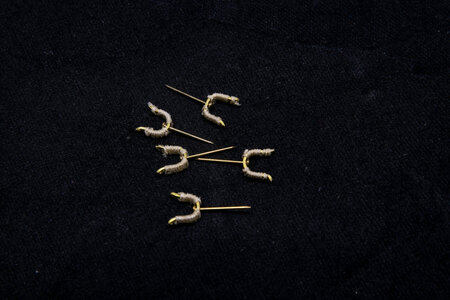
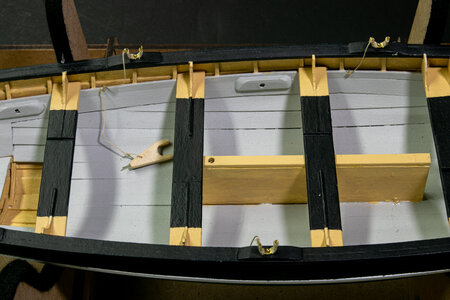
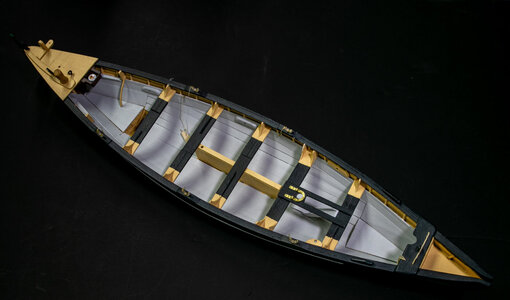


Oarlocks were provided as strips of shaped brass at needed to be bent into the shape of an oarlock. A hole is drilled for the brass nail that holds the oarlock ton the pad. The oarlocks are wrapped with thread. According to the instructions this is to help quiet the sounds of rowing while approaching a whale. Lines are run from the oarlock to the rising thwart to keep the oarlocks from falling out of the boat. I also made the tub oar crotch which can be seen hanging from a rope in the pictures. This piece replaces the metal oarlock when the oar is peaked due to the height of the rope tub (to be described in an upcoming post).


Those oars look to be fiddly little things.
Very nice Jeff!Oars are constructed using dowels and laser cut blades. The edge profile of each blade is as per the plans. The grip areas were turned on my mini lathe and the blade ends of the shaft were notched to fit the blades. After gluing, the joint of the shaft/loom and blade was sanded so the there was a smooth blend between the two parts. The finished oars were stained with a walnut stain. Each oar is identified by its thwart number with the stroke oar being #5 (five painted stripes) going forward to the bow (harpooner's oar) painted with 1 stripe.
View attachment 340912View attachment 340913
Oarlocks were provided as strips of shaped brass at needed to be bent into the shape of an oarlock. A hole is drilled for the brass nail that holds the oarlock ton the pad. The oarlocks are wrapped with thread. According to the instructions this is to help quiet the sounds of rowing while approaching a whale. Lines are run from the oarlock to the rising thwart to keep the oarlocks from falling out of the boat. I also made the tub oar crotch which can be seen hanging from a rope in the pictures. This piece replaces the metal oarlock when the oar is peaked due to the height of the rope tub (to be described in an upcoming post).
View attachment 340914View attachment 340915View attachment 340916
Somewhat fiddly, but not as much as other things in this build.Those oars look to be fiddly little things.
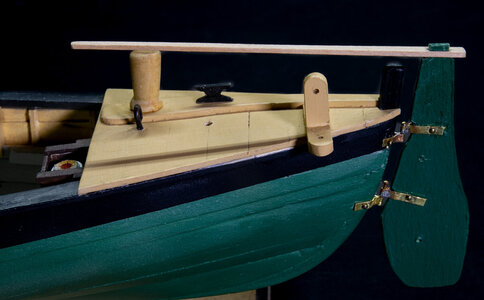
The tiller was constructed to be tapered and have a slot to fit on top of the rudder. I left the tiller unpainted, with only a coat of acrylic matt varnish. The rudder was rigged which required drilling an additional hole near the stern post. The rope for the steering oar brace was rigged and run to the cleat on the cuddy. I also added some thin leather to the brace where the oar rests. 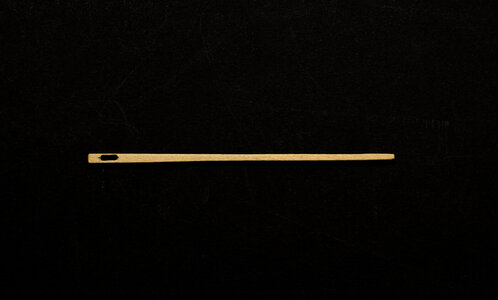
I made the thimbles for the shrouds for dowel putting a groove in them for tying to the gunwales and drilling a hole for the shroud.
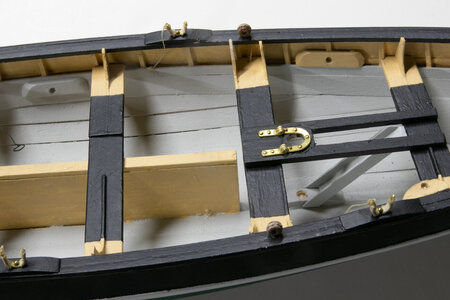
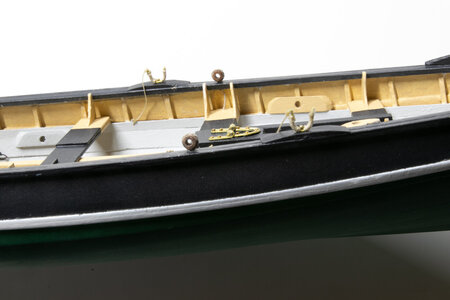


I made the thimbles for the shrouds for dowel putting a groove in them for tying to the gunwales and drilling a hole for the shroud.


Do you plan on blackening the brass rudder hinges?The tiller was constructed to be tapered and have a slot to fit on top of the rudder. I left the tiller unpainted, with only a coat of acrylic matt varnish. The rudder was rigged which required drilling an additional hole near the stern post. The rope for the steering oar brace was rigged and run to the cleat on the cuddy. I also added some thin leather to the brace where the oar rests. View attachment 341040
View attachment 341041View attachment 341042View attachment 341043
I made the thimbles for the shrouds for dowel putting a groove in them for tying to the gunwales and drilling a hole for the shroud.
View attachment 341044View attachment 341045
Hi, Vic. I have not made up my mind on that. I decided to leave the mast hinge as brass, I thought I would do the same with the rudder hinges. The more I look at it, the more I think I am going to paint them black. I seem really bright in that position and some solder is showing. I can untie the rudder rigging and remove the rudder which would make it easier to mask off although it might not be necessary to do so.
I’ve used a paint brush to put on some vinegar to etch brass a little. Later I brushed on some Novacan black patina on the brass. It didn’t bother the surrounding paint. It just turned the brass black while it was in place.
The mast and sprit pole were fashioned according to the plans. The mast is gently tapered to its highest point and more sharply tapered at its base where it fits into a hole in the mast step beneath the tabernacle assembly. Once the mast was tapered, it was set into the tabernacle hinge and the hole was marked and drilled. Both the mast and the sprit pole were finished with an acrylic walnut stain and matt varnish.
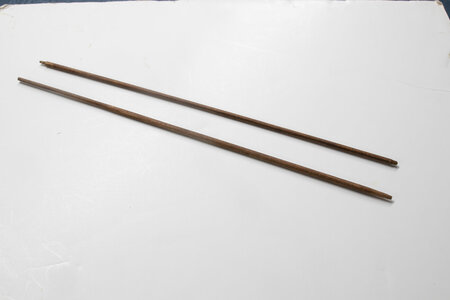
The mast is held in place by gravity, the tabernacle hinge and two shrouds. The shrouds were made to have a loop to go over the top of the mast. I did this by seizing 2 pieces to form the loop. The mast shoulder cleats were fashioned, stained and glued to the mast.
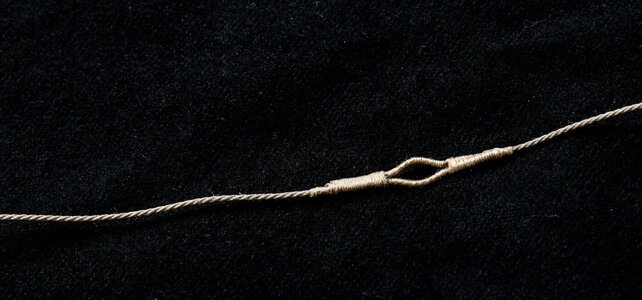
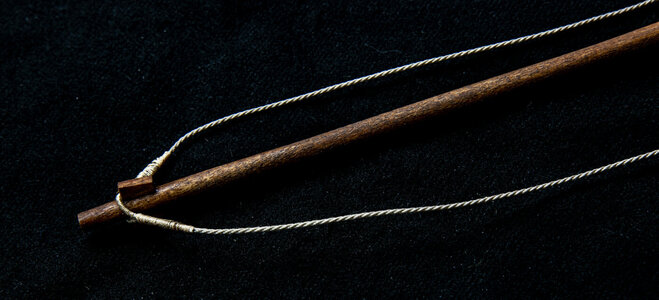

The mast is held in place by gravity, the tabernacle hinge and two shrouds. The shrouds were made to have a loop to go over the top of the mast. I did this by seizing 2 pieces to form the loop. The mast shoulder cleats were fashioned, stained and glued to the mast.


Seizing looks good. Will you have the mast up? Did they use oars most of the time?The mast and sprit pole were fashioned according to the plans. The mast is gently tapered to its highest point and more sharply tapered at its base where it fits into a hole in the mast step beneath the tabernacle assembly. Once the mast was tapered, it was set into the tabernacle hinge and the hole was marked and drilled. Both the mast and the sprit pole were finished with an acrylic walnut stain and matt varnish.
View attachment 341201
The mast is held in place by gravity, the tabernacle hinge and two shrouds. The shrouds were made to have a loop to go over the top of the mast. I did this by seizing 2 pieces to form the loop. The mast shoulder cleats were fashioned, stained and glued to the mast.
View attachment 341202View attachment 341203
Thanks for the compliment.Seizing looks good. Will you have the mast up? Did they use oars most of the time?
I plan to have the sail up, oars inboard, and rudder rigged/in place. My speculation is that this would be the scenario where the boat is on its way to where the whale is located or possibly returning to the ship from a distance. From what I have gathered from the book with the kit, oars and the steering oar would be used to approach their target. Once the harpoon is set, the line would run out, oars would be brought inboard, and the steering oar would be used due to the much greater steering leverage it would have over the rudder.
Great information!Thanks for the compliment.
I plan to have the sail up, oars inboard, and rudder rigged/in place. My speculation is that this would be the scenario where the boat is on its way to where the whale is located or possibly returning to the ship from a distance. From what I have gathered from the book with the kit, oars and the steering oar would be used to approach their target. Once the harpoon is set, the line would run out, oars would be brought inboard, and the steering oar would be used due to the much greater steering leverage it would have over the rudder.
The equivalent of deadeyes (thimbles in this case) were attached to the shrouds. Paper clips were cut to space and hold the thimbles on the ends of the shrouds. The shrouds were seized up from the thimble and then the lanyards laid alongside the shroud and the seizing was continued further to complete the attachment of the lanyard.
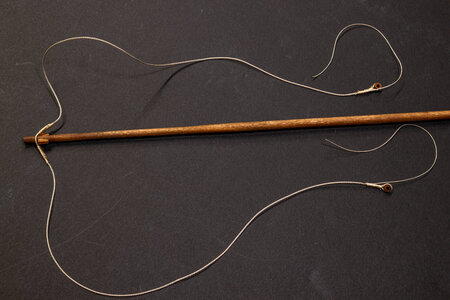
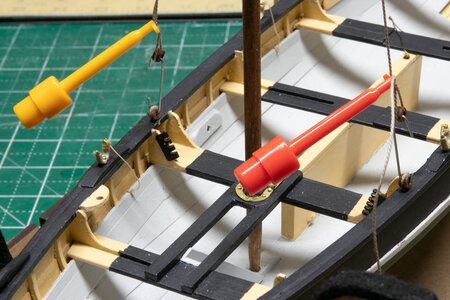
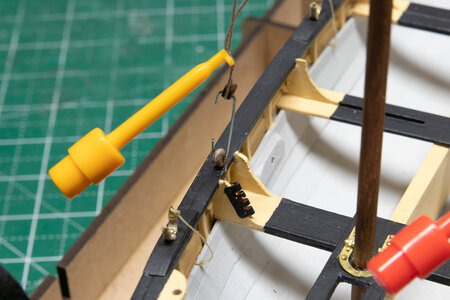
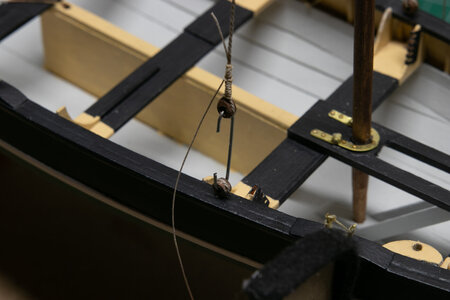
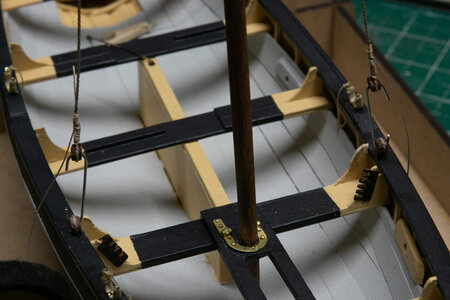
Prior to rigging the shrouds, I added the harpoon holders on the thwart knee of the 2nd thwart. These are brass pieces that need to be bent to shape. I painted them black before gluing in place.


Prior to rigging the shrouds, I added the harpoon holders on the thwart knee of the 2nd thwart. These are brass pieces that need to be bent to shape. I painted them black before gluing in place.
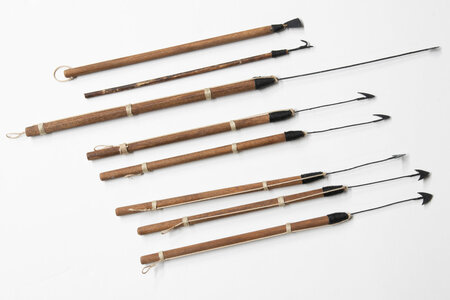
Harpoons, lance boat hook and boat spade iron were made using dowel, thin brass rod and brass heads. Several different types of heads for the harpoons and the heads were soldered onto the rods. The pieces were rigged as per the plans.

Waifs (flags) were made from some red fabric I found in a rag bag found in the house. Waifs were used to mark the location of the whale so it could be found later if the whaleboat had to leave for some reason. These were rolled up until used.
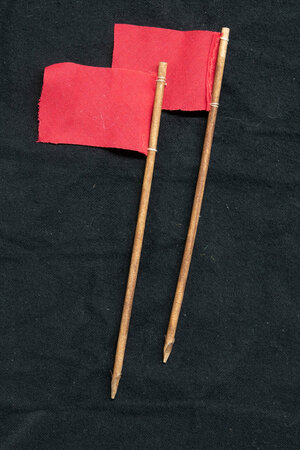
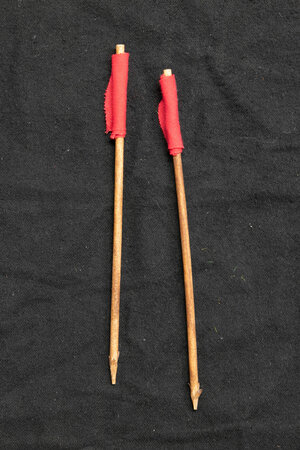


Waifs (flags) were made from some red fabric I found in a rag bag found in the house. Waifs were used to mark the location of the whale so it could be found later if the whaleboat had to leave for some reason. These were rolled up until used.


Fancy dancy!Harpoons, lance boat hook and boat spade iron were made using dowel, thin brass rod and brass heads. Several different types of heads for the harpoons and the heads were soldered onto the rods. The pieces were rigged as per the plans.
View attachment 341577View attachment 341578
Waifs (flags) were made from some red fabric I found in a rag bag found in the house. Waifs were used to mark the location of the whale so it could be found later if the whaleboat had to leave for some reason. These were rolled up until used.
View attachment 341579View attachment 341580


