Nikitin San Bartolome 1584 A.D. (Kit #35)

Good morning Jan. This is such an amazing kit from Pavel. Not an easy one for sure. You are doing it justice. I think I should move up to Maine for a few weeks and get some of that lovely hot weather. We are having one of those Cape Storms (usual for this time of the year), plenty wind, rain (some flooding) and even snow in the Boland. Cheers Grant
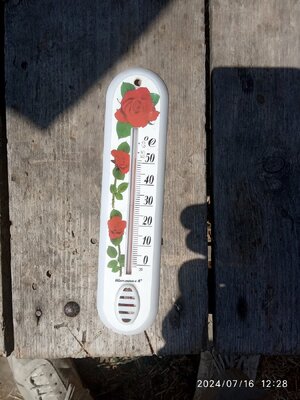
Grant, why do you need to go to Maine? It’s better to come to Ukraine, to the Odessa region :D . Yesterday, before leaving for work, I put the thermometer in a sunny place.IMG_20240716_122848.jpg How much does it show? About 52 Celsius, right? It's 125 Fahrenheit. And pay attention to the time at the bottom of the photo - it was 12:28 at the time. A few hours later, my father looked at the thermometer and saw that it showed 56 degrees Celsius, that is, 132 Fahrenheit! I'm sure you'll warm up to your heart's content hereROTF. The main thing is not to overheat, because at this temperature the asphalt on the roads melts:oops::D
 
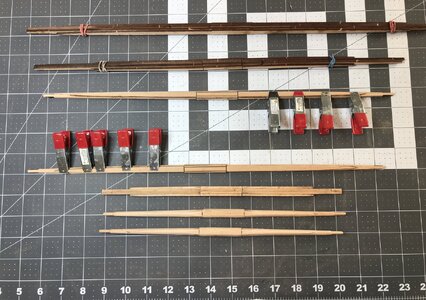
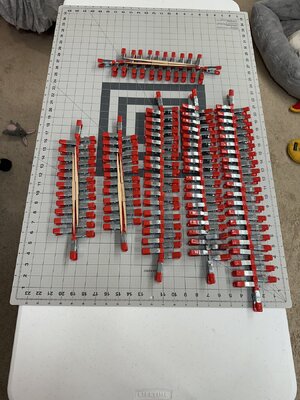
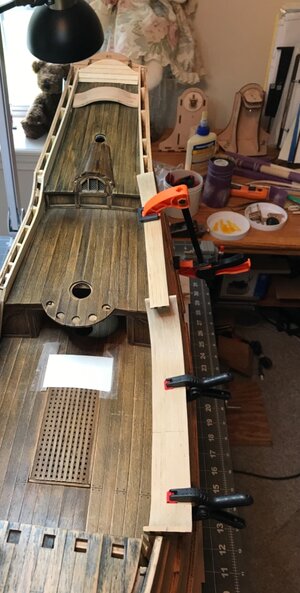
The yardarm saga continues:

7264361E-888B-4D0F-92C7-31C9236CE701.jpeg

I’ve managed to shape two out of three of the short yardarms and started the gluing process on the longer ones.

Each one is a sanding marathon. Remove the char, rough shape with 80 grit sandpaper, smooth with 220 grit and finally finish with 400 grit. Tough on an old guys big fumble fingers.

Jan
 
Grant, why do you need to go to Maine? It’s better to come to Ukraine, to the Odessa region :D . Yesterday, before leaving for work, I put the thermometer in a sunny place.View attachment 459618 How much does it show? About 52 Celsius, right? It's 125 Fahrenheit. And pay attention to the time at the bottom of the photo - it was 12:28 at the time. A few hours later, my father looked at the thermometer and saw that it showed 56 degrees Celsius, that is, 132 Fahrenheit! I'm sure you'll warm up to your heart's content hereROTF. The main thing is not to overheat, because at this temperature the asphalt on the roads melts:oops::D
Good morning Dave. As much of a sun seeker I am that is insane hoto_O. Cheers Grant
 
The yardarm saga continues:

View attachment 459629

I’ve managed to shape two out of three of the short yardarms and started the gluing process on the longer ones.

Each one is a sanding marathon. Remove the char, rough shape with 80 grit sandpaper, smooth with 220 grit and finally finish with 400 grit. Tough on an old guys big fumble fingers.

Jan
Whew!…:D
 
The yardarm saga continues:

View attachment 459629

I’ve managed to shape two out of three of the short yardarms and started the gluing process on the longer ones.

Each one is a sanding marathon. Remove the char, rough shape with 80 grit sandpaper, smooth with 220 grit and finally finish with 400 grit. Tough on an old guys big fumble fingers.

Jan
I am just at the stage of the masts and yardarms, so am wondering if you have shaped them by hand, or used a lathe? I don't have a lathe, so I am open for any tricks or thoughts you have from experience for the best way to shape these. Thanks, and I continue to enjoy watching your progress!
 
I am just at the stage of the masts and yardarms, so am wondering if you have shaped them by hand, or used a lathe? I don't have a lathe, so I am open for any tricks or thoughts you have from experience for the best way to shape these. Thanks, and I continue to enjoy watching your progress!
Hi, I was just out on our porch working on the yardarms. Had to give up and come inside. Temperature is up to 88F/31C.

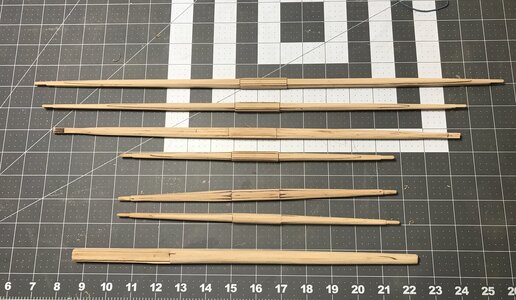
To answer your question I started with the yardarms, figuring I could develop some sort of method before starting on the masts. I don’t have a lathe either. My method has been to use 80 grit sandpaper, then 220 and finish up with 400. It takes a bit of time but I think I can live with my results.

26FB6A24-13D9-4006-9E91-316D9AAB125E.jpeg

The yardarms need a little tweaking, but that is minor chore. The piece on the bottom is the bowsprit. I need to shape the insert part on that. I used a 3 inch mini plane to rough shape the top portion before the sanding marathon. I didn’t use the plane on the yardarms because of their odd shape.

Jan
 
Hi, I was just out on our porch working on the yardarms. Had to give up and come inside. Temperature is up to 88F/31C.

To answer your question I started with the yardarms, figuring I could develop some sort of method before starting on the masts. I don’t have a lathe either. My method has been to use 80 grit sandpaper, then 220 and finish up with 400. It takes a bit of time but I think I can live with my results.

View attachment 459907

The yardarms need a little tweaking, but that is minor chore. The piece on the bottom is the bowsprit. I need to shape the insert part on that. I used a 3 inch mini plane to rough shape the top portion before the sanding marathon. I didn’t use the plane on the yardarms because of their odd shape.

Jan
Thanks for the quick reply. A bit nervous about this step, but fingers crossed!
 
The “INVASION” !

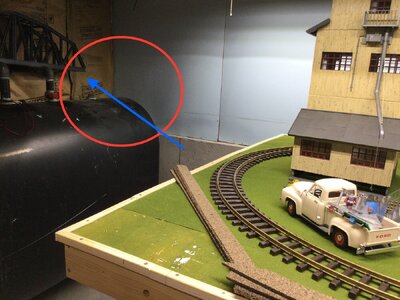
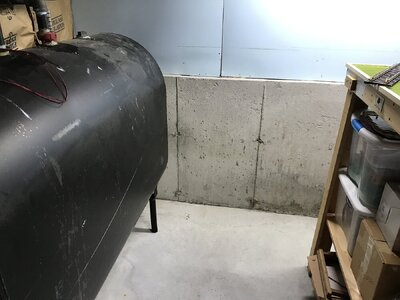
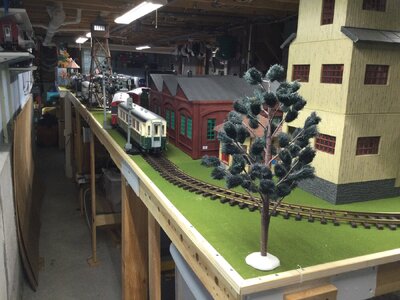
A slight interruption in the shipbuilding time line. After many years of no problems a colony of mice took up residence in the paneling behind my model railroad layout. The area that they decided would be their new home was not easily reachable. So… I’ve spent a lot of time moving and rebuilding my railroad empire so I could evict the the little buggers.

A0A03768-5C0A-4C58-AE37-C72D6954FA3A.jpeg

The mouse condominiums area, wallboard removed to get to the insulation.

749C2C70-42B7-46BD-9AEF-F544E800B2EC.jpeg

The new work area needed for access.

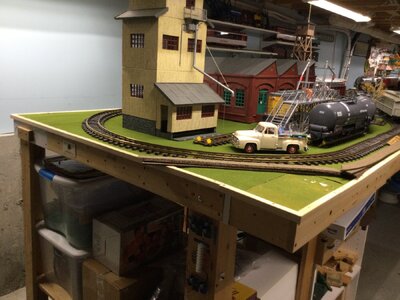
979C0DB4-2EA7-4275-BF7E-CA58D7AF1902.jpeg

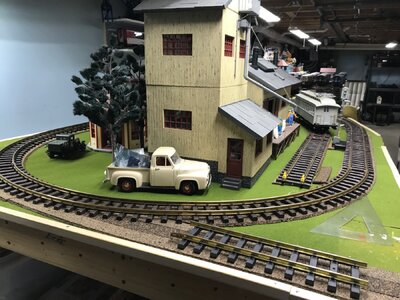
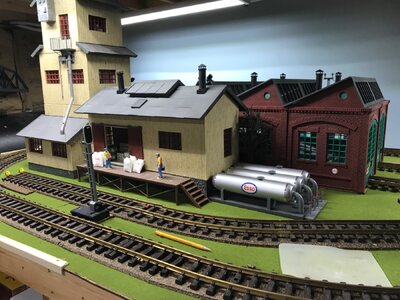
The modified layout.

073212D8-E250-48C1-9DE0-4E56269D1BEB.jpeg

The entire layout moved 18 inches out from the wall just in case I might have to …..

So long story short, that’s what I’ve been doing. Hopefully I can be back in the shipyard by this weekend.

Jan
 
The “INVASION” !

A slight interruption in the shipbuilding time line. After many years of no problems a colony of mice took up residence in the paneling behind my model railroad layout. The area that they decided would be their new home was not easily reachable. So… I’ve spent a lot of time moving and rebuilding my railroad empire so I could evict the the little buggers.

View attachment 464768

The mouse condominiums area, wallboard removed to get to the insulation.

View attachment 464769

The new work area needed for access.

View attachment 464770

The modified layout.

View attachment 464771

The entire layout moved 18 inches out from the wall just in case I might have to …..

So long story short, that’s what I’ve been doing. Hopefully I can be back in the shipyard by this weekend.

Jan
Good morning Jan. Pesky blighters…. One on the businesses I’m involved in is a Hygiene and pest control company. I will quickly send a team over and sort out those cute little mice ROTF . For you I will charge travel costs onlyROTF. Cool railroad BTW.
Cheers Grant
 
Good morning Jan. Pesky blighters…. One on the businesses I’m involved in is a Hygiene and pest control company. I will quickly send a team over and sort out those cute little mice ROTF . For you I will charge travel costs onlyROTF. Cool railroad BTW.
Cheers Grant

Hi Grant.

ROTFROTF Excellent idea ROTFROTF


The layout has been a work in progress for over 25 years. It's evolved from going around in circles to a complicated switching puzzle. All the cars have waybill destinations, implied cargo and must be switched to the appropriate location. There are several wrinkles involved, the arriving freight train must be broken up, cars must be switched to their destination. The biggest wrinkle is passenger service arriving and departing at odd times. Lots of fun for a couple old timers, who have to keep an eye on a fast clock, the train schedule and where they put the Beer


Jan
 
Little buggers aside I commend all you builders of the San Bartolome. When it first came out I contemplated ordering one.
However, after seeing the number of pieces involved in the construction I chickened out. :eek: I figured it would sit on a shelf with the rest of those that 'I just had to have'.
Well done Jan and all.
I also have to commend Pavel for being able to produce his kits giving the current turmoil in his country.
 
Nice to see you back on the yard, Jan. Hopefully the buggers are far away.
Regards, Peter
Yup, I used expanding foam to seal the chewed out tunnels and replaced all the insulation bats. Next step is to replace all the wall board I removed. I'm hoping that is the last I see of the little critters.

Meanwhile that end of my layout is rebuild.
I had to eliminate the bridge (the isolated section of track) to my staging yard. That (the isolated track section) will now be modeled as an abandoned branch line.

IMG_4456.jpeg


IMG_4457.jpeg

There is still quite a bit of rebuild to do, but most of it is electrical wiring and spreading ground clutter.

The layout is my frustration eraser when things in the shipyard go SOUTH.

Jan
 
Last edited:
Back
Top