Nikitin San Bartolome 1584 A.D. (Kit #35)

This morning i stumbled upon your new build Jan.
What a beatifull kit this is, and you are doing a great job on it.
i will hop in every now and then if there is still a chair left in your workshop.
Have fun with this beauty
 
This morning i stumbled upon your new build Jan.
What a beatifull kit this is, and you are doing a great job on it.
i will hop in every now and then if there is still a chair left in your workshop.
Have fun with this beauty
Absolutely great to have you follow along. Plenty of room in the front row. I‘m fascinated by Pavel’s engineering for this kit.
 
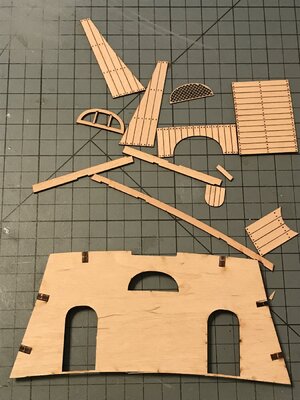
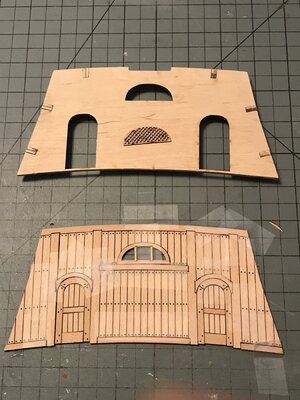
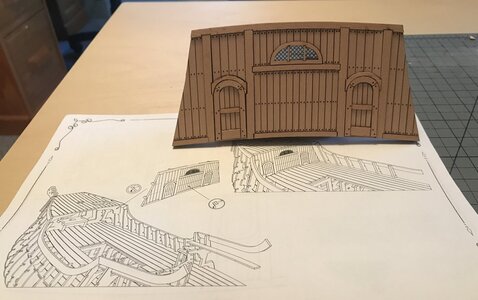
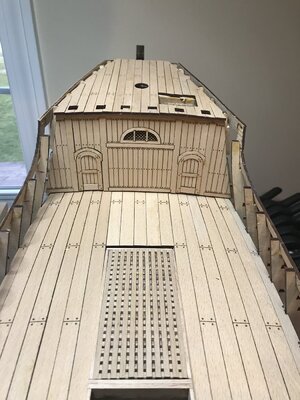
The ForeCastle Bulkhead.

The finished sanding, dry fitting and gluing exercise for the Bulkhead.

.IMG_3638.jpeg

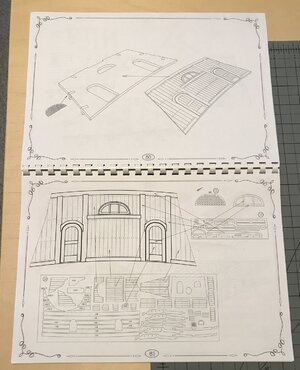
An interesting comment -- Without watching Pavel's video for this assembly, there would have been lot of head scratching on how to glue in all the door parts.

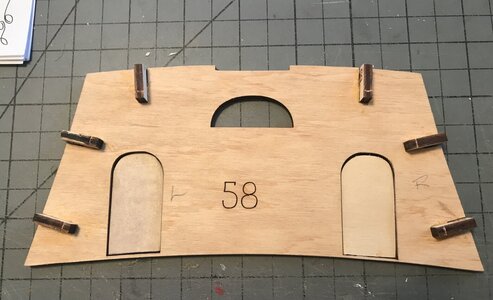
His method is to use pieces of scrap to fill in the door openings.


IMG_3636.jpeg

The pieces are glued in flush with the opposite side leaving a flat surface to work with.

The competed assembly will now have to wait on my paint method. I need to complete a couple of other assemblies and then decide on a stain to use.

A dry fit.

3C873257-21D7-4FEE-B10D-115980644A8A.jpeg


Jan
 
Last edited:
A quick post this morning. The Admiral is in the middle of decorating the house for Christmas and I’ve been volunteered as the primary work crew. But I’ve managed some progress.

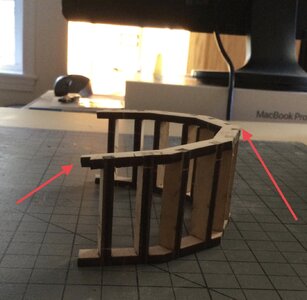
I’m currently working on the Poop Bulkhead.

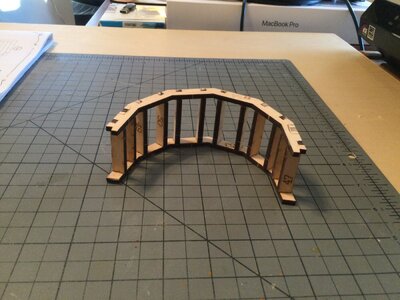
The Bulkhead frame.
2865D598-FEDD-4477-A370-16E0D0C58455.jpeg 22269E68-795E-412E-8AF3-CD7AB48F73AF.jpeg

This part is easy to assemble wrong. As Sleepyfish noted in his log the uprights have an indentation with a slope at one end. That end is glued into the top piece and provides the bulkhead with the correct form.

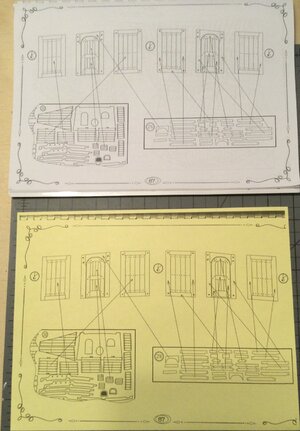
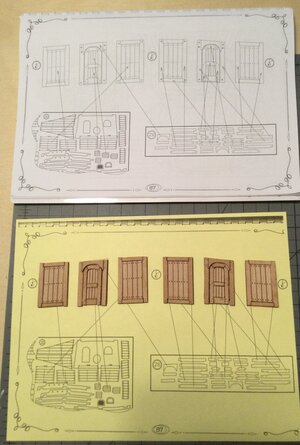
Pavel’s video for this part of the build shows an unique method of assembling the six wall panels for the bulkhead. He assembles and glues the bits to pieces of thick card. I thought about that a bit and came up with this method.

I made a copy of the build instruction. Copied that onto some heavy construction paper.

80995526-1126-4DCA-8EDE-37537C711E98.jpeg

Placed and glued the bits on the construction paper.


AC7757D3-2E00-4C7E-B7DA-6EE5877ED14C.jpeg

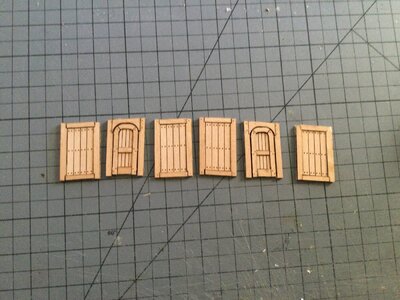
Then cutout the finished panels from the construction paper backing.

55A441F9-DBD6-43A9-A939-3F16F2F55178.jpeg

Phew, a long winded explanation for a small project.

The whole assembly will now wait to be painted.

Painting, I don’t own a airbrush, have no Idea how to use one and need some help with that. What should I looking for as far as airbrushes go. Gravity feed, little screw on bottle, .3mm, 3.5mm. compressors? A lot of information out there and I don’t understand any of it.

Got to go I can hear the Admiral calling. Decor time!
 
A quick post this morning. The Admiral is in the middle of decorating the house for Christmas and I’ve been volunteered as the primary work crew. But I’ve managed some progress.

I’m currently working on the Poop Bulkhead.

The Bulkhead frame.
I love this detail on Pavel's ship. One of the reasons I'm considering waiting for it.
 
I love this detail on Pavel's ship. One of the reasons I'm considering waiting for it.
There is a lot of detail. The 100 plus page book of instructions ( Book #1) shows the bits and pieces of the major assemblies but the superb videos are without a doubt the best instructions. The really fun part is going through the three kit boxes to find the parts needed for the next step. The “Frets/Flats” that hold the parts are wrapped in groups with a label indicating the content. Unfortunately there is no master index for finding the parts other than the isometric build plans. The location of the parts is shown on the plans as a circled number. The videos are a great help with that, Pavel indicates which “Fret/Flat” he is working from.
 
Jan,
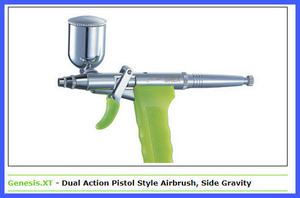
My Goto airbrush is the Grex Genesis.xt. With its pistol grip design, it is very easy to manipulate/control and with a large assortment of needles it covers a wide range of spray patterns. I've tried many over the years and found this one best suitable to me with my meager artistic skills.
I also have their air compressor which is very quiet when running and has an auto shutoff feature.

Grex Airbrush.jpg
 
Jan,
My Goto airbrush is the Grex Genesis.xt. With its pistol grip design, it is very easy to manipulate/control and with a large assortment of needles it covers a wide range of spray patterns. I've tried many over the years and found this one best suitable to me with my meager artistic skills.
I also have their air compressor which is very quiet when running and has an auto shutoff feature.

View attachment 344680
Ron,

Thank you for the post. This is a new bit for me. I‘m very well versed in “Rattle Can” painting but using an airbrush? That will be another learning curve!
 
Ron,

Thank you for the post. This is a new bit for me. I‘m very well versed in “Rattle Can” painting but using an airbrush? That will be another learning curve!
Wow, I‘m on information overload. Just Goggled the airbrush you use. Is there a difference between “side gravity” or “top gravity“ feed. Single action - dual action? What does that refer to? Needle size? Oh Boy, lot’s of questions.
 
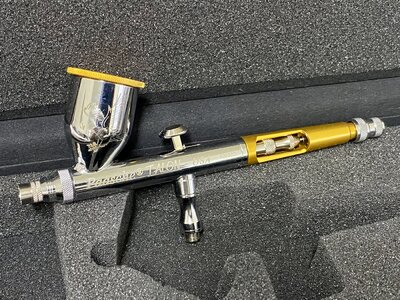
According to Mike Shanks, the Paasche Talon is the best there is.

View attachment 344526

Wowzer. I also Googled the Paasch Talon airbrush. More information overload. Gravity feed? Needle sizes?
Compressors with or without air tanks. Going to take some time to absorb all this data. Makes me feel bad that I’ve stained my other builds using a small foam brush and buffing the results with an old T-shirt.
 
This morning i stumbled upon your new build Jan.
What a beatifull kit this is, and you are doing a great job on it.
i will hop in every now and then if there is still a chair left in your workshop.
Have fun with this beauty
And another Peter who slides in to your log, Jan. I am gone sit next to Peter.
A nice big kit with some different approaches.
Regards, Peter
 
Wow, I‘m on information overload. Just Goggled the airbrush you use. Is there a difference between “side gravity” or “top gravity“ feed. Single action - dual action? What does that refer to? Needle size? Oh Boy, lot’s of questions.
Mine is top feed, dual action and I have an assortment of needle sizes depending on the spray pattern I want. I could never quite get the hang of the top button airbrushes controlling the flow and air. But that’s just me :( The trigger action works well for me.
Do your research and don’t do what I did buying several over time until I found the one that works best for me.
It’s just like any other tool, it’s how you use it. ;)
 
And another Peter who slides in to your log, Jan. I am gone sit next to Peter.
A nice big kit with some different approaches.
Regards, Peter
Hello, hello. You are very welcome. The Usher will seat you in the VIP section.

Yup, the hull is BIG but easy to work on. So far there haven’t been any “Al-Fi” moments and only a couple of “Do-Overs”.
 
Back
Top