Nikitin San Bartolome 1584 A.D. (Kit #35)

Mine is top feed, dual action and I have an assortment of needle sizes depending on the spray pattern I want. I could never quite get the hang of the top button airbrushes controlling the flow and air. But that’s just me :( The trigger action works well for me.
Do your research and don’t do what I did buying several over time until I found the one that works best for me.
It’s just like any other tool, it’s how you use it. ;)
Ron,

Great advice. I think the top button would be problematic for me. I’m right handed and at this ripe old age I don’t have the finger flexibility I used to have.

Jan
 
A QUICK NOTE: I received a PDF by email this morning from Denis at Pavel’s shop with build instruction pages 106 to 119.

Kudos to them, I don’t know how they are managing to work considering the conditions they are working under.
 
A QUICK NOTE: I received a PDF by email this morning from Denis at Pavel’s shop with build instruction pages 106 to 119.

Kudos to them, I don’t know how they are managing to work considering the conditions they are working under.

Brings a whole new meaning to Customer Service doesn’t it. A few other manufacturers should take notice.
 
A quick post this morning. The Admiral is in the middle of decorating the house for Christmas and I’ve been volunteered as the primary work crew. But I’ve managed some progress.

I’m currently working on the Poop Bulkhead.

The Bulkhead frame.

View attachment 344509 View attachment 344513

This part is easy to assemble wrong. As Sleepyfish noted in his log the uprights have an indentation with a slope at one end. That end is glued into the top piece and provides the bulkhead with the correct form.
Pavel’s video for this part of the build shows an unique method of assembling the six wall panels for the bulkhead. He assembles and glues the bits to pieces of thick card. I thought about that a bit and came up with this method.

I made a copy of the build instruction. Copied that onto some heavy construction paper.

View attachment 344511

Placed and glued the bits on the construction paper.


View attachment 344512

Then cutout the finished panels from the construction paper backing.

View attachment 344514

Phew, a long winded explanation for a small project.

The whole assembly will now wait to be painted.

Painting, I don’t own a airbrush, have no Idea how to use one and need some help with that. What should I looking for as far as airbrushes go. Gravity feed, little screw on bottle, .3mm, 3.5mm. compressors? A lot of information out there and I don’t understand any of it.

Got to go I can hear the Admiral calling. Decor time!
Yep Jan…when the Admiral calls we run ;) . I’m enjoying this log and kit. Cheers Grant
 
RATS: Another “Do-Over”.

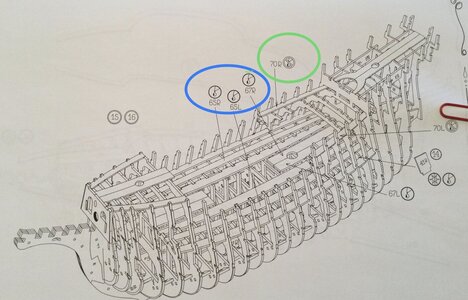
I completed missed the no glue symbols for Planks 70 R and 70L (Green Circle), the blue circle shows the glue symbol for the other planks to be placed.

5E92C925-9B2B-452A-9A80-D3A11AFC9965.jpeg

I noticed that error this morning while fitting the completed Poop Bulkhead.

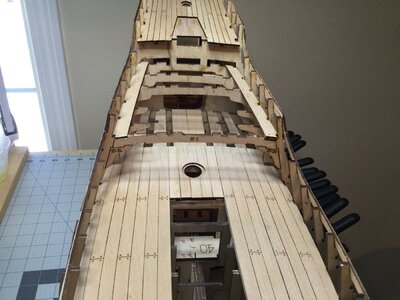
Frame fifteen has an “arch” added to provide the subsurface of the next deck to be planked, BUT since I buggered up the first two planks earlier the “arches” for frames sixteen and seventeen aren’t going to fit properly.

C464CC46-BEF9-4D72-AB5B-47E2DE3C3090.jpeg

Todays work will be the “hot water and brush” unglue process. But first I have to clear the driveway of last nights snow. The Admiral is headed out to do some Christmas shopping.

I did manage to finish planking the stern deck.

633FBEC7-81FC-4943-B531-8E808C1C301B.jpeg

Jan
 
RATS: Another “Do-Over”.

I completed missed the no glue symbols for Planks 70 R and 70L (Green Circle), the blue circle shows the glue symbol for the other planks to be placed.

View attachment 345620

I noticed that error this morning while fitting the completed Poop Bulkhead.

Frame fifteen has an “arch” added to provide the subsurface of the next deck to be planked, BUT since I buggered up the first two planks earlier the “arches” for frames sixteen and seventeen aren’t going to fit properly.

View attachment 345621

Todays work will be the “hot water and brush” unglue process. But first I have to clear the driveway of last nights snow. The Admiral is headed out to do some Christmas shopping.

I did manage to finish planking the stern deck.

View attachment 345633

Jan
Good morning Jan. It’s a good thing you spot these “do overs”. As we know in this hobby it will bite us on the butt badly later if we don’t get it spot on. Cheers Grant
 
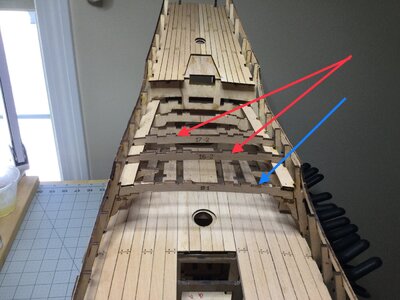
I noticed another piece that I probably should not have added while placing the frames.

A61BFE71-F72D-4211-A9B5-574B12AF6137.jpeg

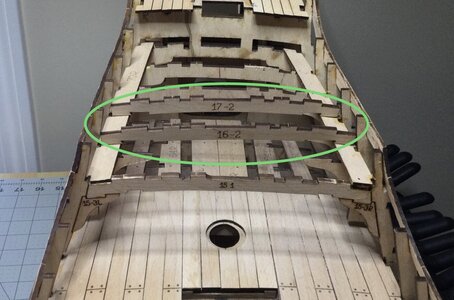
Piece 15-1 at frame #15 (Blue arrow) would be better added when adding pieces 16-2 and 17-2 (Red arrows). Placing the Poop Bulkhead would be a lot easier. Of course I still have to fix the little planking error that I made.

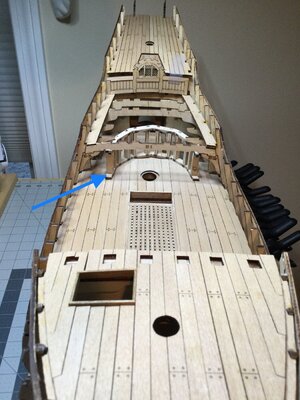
DF7BC878-3B5A-41E2-8561-1F605FD7FCEE.jpeg

I spent a lot of time sanding and fitting the Poop Bulkhead frame (Blue arrow). Without piece 15-1 all ready in place that process would have been easier.

A monster winter storm is starting to roll in, so today will be a full pot of coffee and a lot of shipyard time. Plenty of opportunity to fix my errors.
 
It's good that you have time for those fixer-uppers, Jan. We are also expecting an extreme cold front to hit Nantong tonight, so tomorrow will also be a shipyard day for me.
 
It's good that you have time for those fixer-uppers, Jan. We are also expecting an extreme cold front to hit Nantong tonight, so tomorrow will also be a shipyard day for me.
I’ll have to work on some of the small assemblies after I finish the fixes. I’m at the point where the decks and partitions need to be painted. I‘ve ordered Pavel’s Paint kit and will be ordering the Paasche “H” Airbrush kit. That kit has three different brush nozzles. The airbrush will be a new adventure for me.
 
I’ll have to work on some of the small assemblies after I finish the fixes. I’m at the point where the decks and partitions need to be painted. I‘ve ordered Pavel’s Paint kit and will be ordering the Paasche “H” Airbrush kit. That kit has three different brush nozzles. The airbrush will be a new adventure for me.
I just got my paint kit a couple days ago. 4 stains, 1 danish oil, 1 patina. The patina is an alcohol base so should be interesting to play with. will try testing soon. I already had a top finger control air brush and just dug it out to try a couple of weeks ago (first time) It worked ok but after reading the discussions here I order a pistol grip / trigger control dual action airbrush from amazon ( $50 CAD ) I think it will be easier to control/use than the top finger button style.
 
I just got my paint kit a couple days ago. 4 stains, 1 danish oil, 1 patina. The patina is an alcohol base so should be interesting to play with. will try testing soon. I already had a top finger control air brush and just dug it out to try a couple of weeks ago (first time) It worked ok but after reading the discussions here I order a pistol grip / trigger control dual action airbrush from amazon ( $50 CAD ) I think it will be easier to control/use than the top finger button style.
I’m still vacillating about the airbrush type. The one I was thinking about ordering has a few Thumbs-Down reviews, I do like the pistol grip that Ron posted. So I’m not there yet.
 
I noticed another piece that I probably should not have added while placing the frames.

View attachment 345895

Piece 15-1 at frame #15 (Blue arrow) would be better added when adding pieces 16-2 and 17-2 (Red arrows). Placing the Poop Bulkhead would be a lot easier. Of course I still have to fix the little planking error that I made.

View attachment 345896

I spent a lot of time sanding and fitting the Poop Bulkhead frame (Blue arrow). Without piece 15-1 all ready in place that process would have been easier.

A monster winter storm is starting to roll in, so today will be a full pot of coffee and a lot of shipyard time. Plenty of opportunity to fix my errors.
Good morning Jan. It looks mighty impressive. Nothing better than playing in the shipyard during inclement weather.:D. Even repairs and redo’s become enjoyable.
Cheers Grant
 
Good morning Jan. It looks mighty impressive. Nothing better than playing in the shipyard during inclement weather.:D. Even repairs and redo’s become enjoyable.
Cheers Grant
Indeed, we had about seven inches of very wet and heavy snow. I spent a lot of time clearing the chute on the snowblower of nicely formed snow sausages, by the time I finished the driveway our generator was up and running. Absolutely great, no shipyard time was lost. Commercial power was restored about ten hours later.
 
Wow, Thursday all ready. The Admiral and I are settled in and awaiting the next Nor’Easter headed our way. This one promises to be interesting. Heavy rain and winds up to fifty miles an hour. Pretty close to a Hurricane. So I have a great excuse to be in the Pathfinder boatyard tomorrow.

The boatyard has been busy at odd times this week.

F4328B4D-E217-4C23-A4AB-3AEF2D387F73.jpeg

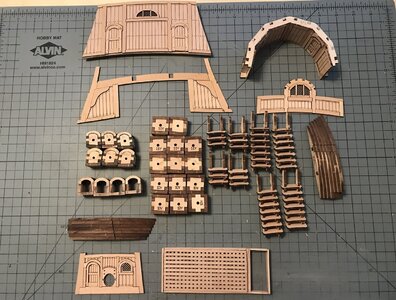
All the gun ports and ladders are done, the bow inserts are waiting for a fair day to be sanded into the right contour. The other odds and ends are ready to be painted. (BTW have I ever mentioned I don’t like to paint!)

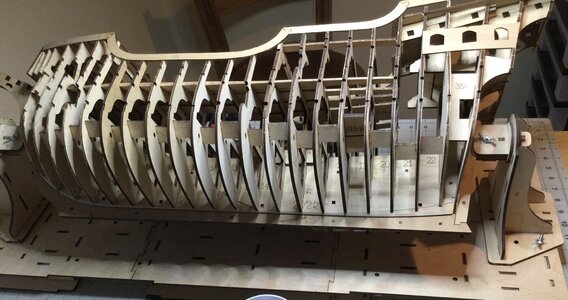
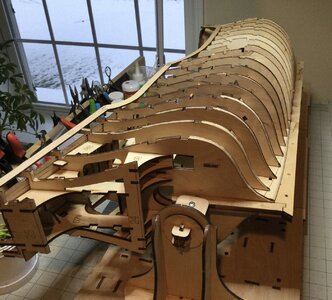
I removed the keel holders from the build jig in preparation for placing all the gun port framing. This is quite the jig, Makes the hull easy to work on.

377BBCC7-CC61-4F14-8D45-45E35094873D.jpeg

75EFEA0B-AE99-4E9F-99D5-750546E4C5AD.jpeg

There are another set of supports supplied to hold the hull firm at ninety degrees. But for now I’m finding it easier to work without them.

Back to the storm. The temperature tomorrow (Friday) is forecast to be 50+F/ 10C, BUT the temperature will drop to about 16F/ -8C by Saturday morning. A monstrous quick freeze. So as I said above, it’s going to be interesting.
 
Thank you, Jan! Same from ours to yours!

MTYucG5n
 
Back
Top