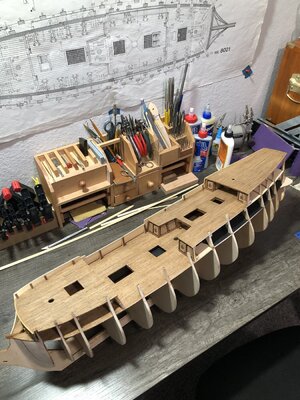
NORSKE LOVE - Billing Boats 1:75 scale

A nice lesson in 'planking around a corner', Dean. The circumstances determine the approach. With a creative solution.
Regards, Peter
Before becoming a frequent visitor to this website, I think I was rather complacent with respect to my modeling capabilities. What I did, so many years ago, was to follow the build plans as good as possible, but without the necessary knowledge and capabilities. This approach resulted in models which look oké, from a distance, but up close they leave much to be desired.
After starting to follow a number of builds on this site, I soon realized that invaluable lessons can be learned from the multiple build logs. I also realized that I need to raise the bar for my future build(s?). One simply does need more historical information on one's model, one needs to know more about how ships were build in a given period and so on, and so on. Also the craftsmanship and level of quality, displayed on many of the build logs, can serve as a guide for anyone willing to learn.
I will not mention any names, that would be selling short the builder's I wouldn't mention, but all the examples and solutions shown on this site can be used to draw one's lessons from.
The build and build log of this Lion is but one such example.
 
Last edited:
Nicely done Dean. As an artist you think in 3D and that helps you picture what needs to happen - though the same can be achieved with try and retry and retry with each 'try' sneaking up on the final result. Brilliant result on that complex join.

Merry Christmas to you and yours. Be blessed!
 
Before becoming a frequent visitor to this website, I think I was rather complacent with respect to my modeling capabilities. What I did, so many years ago, was to follow the build plans as good as possible, but without the necessary knowledge and capabilities. This approach resulted in models which look oké, from a distance, but up close they leave much to be desired.
After starting to follow a number of builds on this site, I soon realized that invaluable lessons can be learned from the multiple build logs. I also realized that I need to raise the bar for my future build(s?). One simply does need more historical information on one's model, one needs to know more about how ships were build in a given period and so on, and so on. Also the craftsmanship and level of quality, displayed on many of the build logs, can serve as a guide for anyone willing to learn.
I will not mention any names, that would be selling short the builder's I wouldn't mention, but all the examples and solutions shown on this site can be used to draw one's lessons from.
The build and build log of this Lion is but one such example.
Johan, thank you…this reminds me of a few things.
First, at work we often brainstorm in design review meetings. And there are those who always have creative input.
Second, everyone has something they can teach you, because nobody knows everything.
And finally, one of the first build logs I read when I joined SOS, was the Royal Caroline by @Maarten. Talk about a humbling experience! ;)
I thought to myself, there is no way I could ever build as good as this guy! But I can certainly stand to learn a lot from him.
And soon I learned from so many other talented builders on this site. Too many to name! And I also learned the value of a build log. To share, and to give and take advice and techniques. There is a certain amount of pressure when showing your work. But that too has benefits, because it makes you try harder than if you were not sharing it. Too many times I take a picture of what I thought looked good, then the camera shows me otherwise! :p You tell yourself I can’t post that! So you fix it and take another picture! Is a new kind of scrutiny that makes you better for it! If your work passes the camera test, it will look fantastic in person! ;)
 
I wanted to say thanks to everyone who follows my build, and to those who contribute and comment. As we all know, this input proves to be invaluable and rewarding at the same time. You are all a great bunch of people, whom I wish I could be in the same room with to meet in person. How great would that be if we could all meet and spend a day together! Oh well, I toast you from afar. ;)
 
Granddaughter is at home with her mom… :(
But…that means I am getting much work done on my ship. So not all bad! ;)
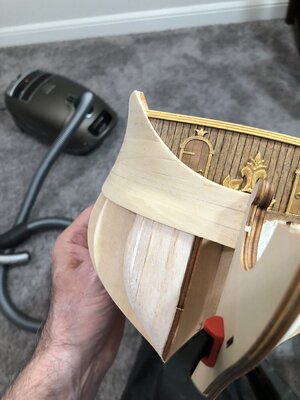
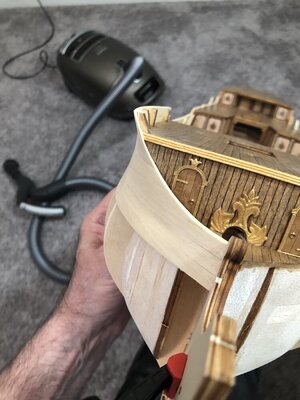
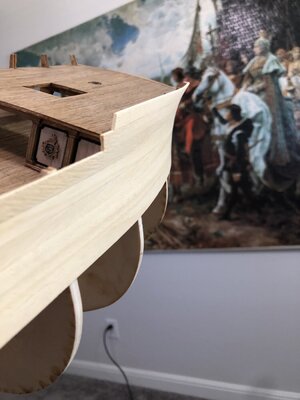
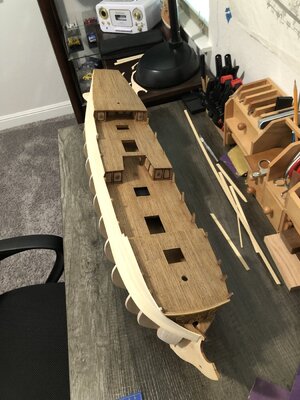
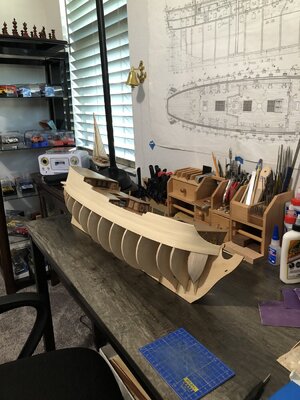
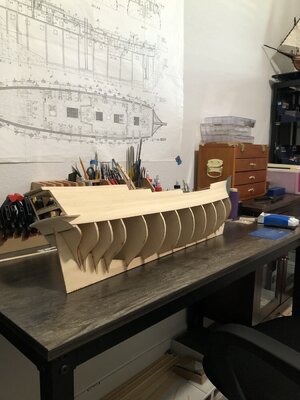
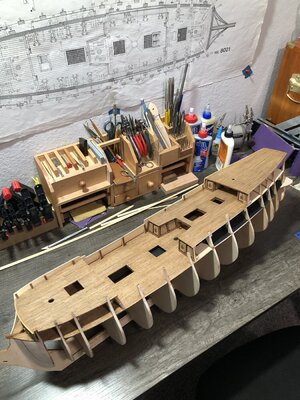
I wanted to post some planking pictures to show some of the bends at the top of the bow. It curves outward and at the same time around the hull towards the bow, but this is fairly typical for many war ships. There is a beauty in it, and at same time a little frustration…lol.
Here are some pics with light sanding, to get an idea of what I have so far.

551F91F8-2CB5-410F-A3EE-8355DA91708A.jpeg8B7A3955-C620-40A1-BAFA-423BD0E28046.jpeg1828EE9D-FF2D-4866-BC02-2B3893DD686B.jpeg


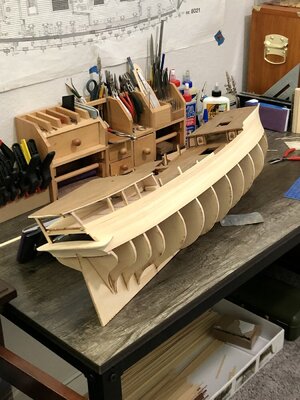
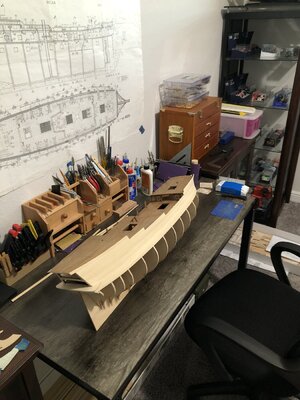
And one of overall progress…921ED667-2F0F-496B-8167-DF6D8627AF09.jpeg
 
Last edited:
Johan, thank you…this reminds me of a few things.
First, at work we often brainstorm in design review meetings. And there are those who always have creative input.
Second, everyone has something they can teach you, because nobody knows everything.
And finally, one of the first build logs I read when I joined SOS, was the Royal Caroline by @Maarten. Talk about a humbling experience! ;)
I thought to myself, there is no way I could ever build as good as this guy! But I can certainly stand to learn a lot from him.
And soon I learned from so many other talented builders on this site. Too many to name! And I also learned the value of a build log. To share, and to give and take advice and techniques. There is a certain amount of pressure when showing your work. But that too has benefits, because it makes you try harder than if you were not sharing it. Too many times I take a picture of what I thought looked good, then the camera shows me otherwise! :p You tell yourself I can’t post that! So you fix it and take another picture! Is a new kind of scrutiny that makes you better for it! If your work passes the camera test, it will look fantastic in person! ;)
Hi Dean,
You hit the nail on the head. We never know what we are capable off untill we just try and amaze ourselves. As long we are just sharing techniques and experience we will al become better and better.
 
You are off to a great start Dean! Thumbs-UpYou mention "a little frustration" - where I am at the moment, I have heaps of it ... :(
 
You are off to a great start Dean! Thumbs-UpYou mention "a little frustration" - where I am at the moment, I have heaps of it ... :(
Thank you Heinrich! I can imagine with a smaller ship and more extreme curves, there may be some real frustration! I’m sure you will do it justice when it’s all said and done! ;)
 
It does look very smooth and nice run across the board. If you don't mind, I suggest alternating between the Port and Starboard the same number of planks, like two planks per side. This will ensure the stability of the hull frames and prevent twisting.
I have not seen you were using nails or clamps. how do you secure planks while drying? ;)
 
Thank you Rich! I had a few areas I was nervous about, however it sanded out nicely! ;)
Files and sandpaper in our hands are similar to the concept "a good painter can make a finish carpenter out of anyone". You do well with both trades. RIch
 
It does look very smooth and nice run across the board. If you don't mind, I suggest alternating between the Port and Starboard the same number of planks, like two planks per side. This will ensure the stability of the hull frames and prevent twisting.
I have not seen you were using nails or clamps. how do you secure planks while drying? ;)
Thanks Jimsky! I will alternate on the lower hull. The upper half has a lot of extra support on the frames, if you remember I added the spacer boards in between every frame. That’s not moving! ;)
As far as the clamping, I rarely do on the hull. I used nails on some of the more extreme bends at the bow. Then after I removed them, put some glue in them and sanded while the glue was wet to fill with saw dust. ;)
Instead of using clamps on the hull, I soak the boards in hot water for about 10 minutes, then towel dry. Then I add wood glue on the edge, and then put CA on the frames. The CA cures almost instantly with the damp boards, similar to using accelerator. Only in the extreme bends do I need a nail to hold. But if I pre bend good enough, then I can usually get away without using anything. On the lateral bends, I nail a small piece of plank above the area that needs to be pushed down. That way I don’t nail into the board. I hate I had to use nails at all. But I’m adding the treenails later above the water line. So the few I had to use, will most likely not be visible. Below the water line will be painted white.
Excellent procedure well stated for the caranial brain box and will done. Rich
 
Back
Top