NORSKE LOVE - Billing Boats 1:75 scale

Granddaughter is at home with her mom… :(
But…that means I am getting much work done on my ship. So not all bad! ;)
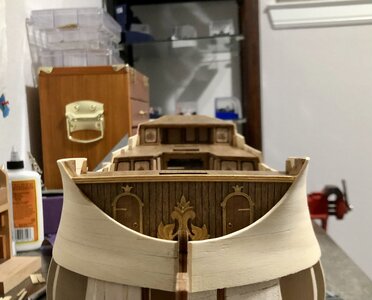
I wanted to post some planking pictures to show some of the bends at the top of the bow. It curves outward and at the same time around the hull towards the bow, but this is fairly typical for many war ships. There is a beauty in it, and at same time a little frustration…lol.
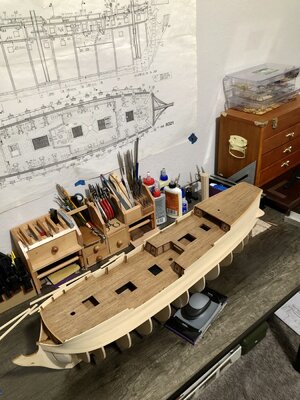
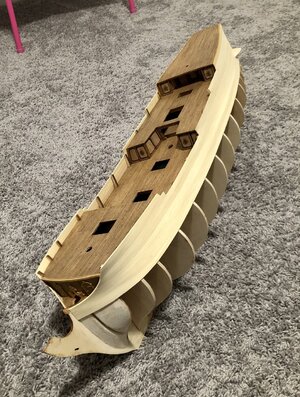
Here are some pics with light sanding, to get an idea of what I have so far.

View attachment 277244View attachment 277245View attachment 277246


And one of overall progress…View attachment 277248
Wonderful Dean.Thumbsup
 
Hi Dean, your planking looks superb! absolutely stunning result so far!
I was wondering what will happen to the upper parts of the bulkheads. With your RC build, they need to be removed. How about with the NL?

View attachment 277285
Thank you Pter, the upper part of the bulkheads on the NL remain. You plank the inside of them and cap with a rail. ;)
 
It does look very smooth and nice run across the board. If you don't mind, I suggest alternating between the Port and Starboard the same number of planks, like two planks per side. This will ensure the stability of the hull frames and prevent twisting.
I have not seen you were using nails or clamps. how do you secure planks while drying? ;)
That question also occurred to me.
Thanks Jimsky! I will alternate on the lower hull. The upper half has a lot of extra support on the frames, if you remember I added the spacer boards in between every frame. That’s not moving! ;)
As far as the clamping, I rarely do on the hull. I used nails on some of the more extreme bends at the bow. Then after I removed them, put some glue in them and sanded while the glue was wet to fill with saw dust. ;)
Instead of using clamps on the hull, I soak the boards in hot water for about 10 minutes, then towel dry. Then I add wood glue on the edge, and then put CA on the frames. The CA cures almost instantly with the damp boards, similar to using accelerator. Only in the extreme bends do I need a nail to hold. But if I pre bend good enough, then I can usually get away without using anything. On the lateral bends, I nail a small piece of plank above the area that needs to be pushed down. That way I don’t nail into the board. I hate I had to use nails at all. But I’m adding the treenails later above the water line. So the few I had to use, will most likely not be visible. Below the water line will be painted white.
But with your answer I have every confidence that it will be fine.

So far I see a nice tight skin. Not bad for this ‘new’ old lady. :)
Regards, Peter
 
Today I finished the port side upper hull planking. I did some initial sanding with 150 grit sandpaper, there are still a few areas that need a little more sanding. So far I’m happy with what I have. Soon I will start marking the lower frames to determine the flow of the planks.
A few pics of current progress…
5FC72264-3E51-4076-A245-1ABE9736BAA5.jpeg1AD8D4DF-E6C7-4510-8287-2EF5E675494B.jpegC6AE20B9-3A12-4193-92C6-5B1D80231E4A.jpeg
 
Last edited:
Today I finished the port side upper hull planking. I did some initial sanding with 150 grit sandpaper, there are still a few areas that need a little more sanding. So far I’m happy with what I have. Soon I will start marking the lower frames to determine the flow of the planks.
A few pics of current progress…
View attachment 277680View attachment 277681View attachment 277682View attachment 277683
Morning Dean. That forward picture of the bow is so “sexy”. The curves coming down showing your beautiful crafted doors and carving is fantastic. This is coming out really well. I can see this Norske Love being sent to the Melkbosstrand museum on completion as well.
 
Great work, Mia Amigo. A nice, clean planking run. She is getting shape and sounds. Merry Christmas to you and your loved ones, as much happiness and joy for many more years ahead.
 
Helllo Dean

Instructive to see for me how you put the planks on

Merry Christmas to you and your family!
 
Back
Top