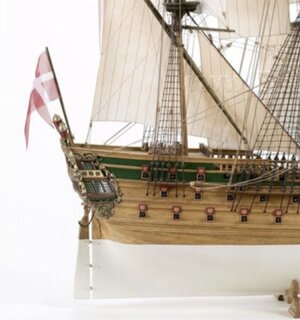
NORSKE LOVE - Billing Boats 1:75 scale

Here is a plank that has been tapered at the bow and stern, and beveled on the opposite side. I taper on the side that faces the keel and bevel on the top side that faces the deck. It is pre bent at the bow. It will be soaked and glued on up to the stern frame where the bend is needed. At that point I bend it and adjust the final length, then glue that last section down.
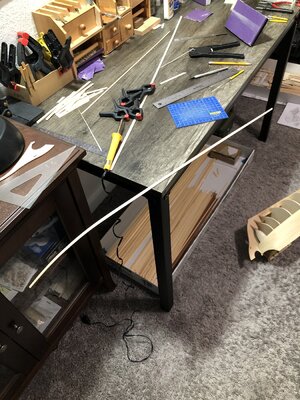
E08ED177-DE19-41AE-A58B-793D3E5F0CF2.jpeg

I have now completed the first belt of 6 planks on the starboard side. Now it’s time to repeat on the port side.
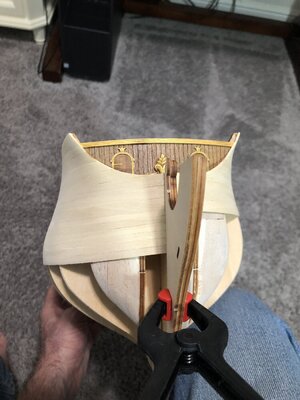
Here is a picture of the bow, with light sanding. A final sanding will be required once I finish the entire hull! There is a few tiny gaps, but those will actually fill in with stain or paint, when the time comes. So I’m not too concerned with any of those at this point. As long as there are no large gaps, it’s all good! ;)
7544F387-2959-4AE2-81B4-B062688F51CD.jpeg

You can see the difference in progress after 6 planks, or 1 belt. There is 4 belts per side, so this represents 25 percent of the planking for the lower hull on one side!
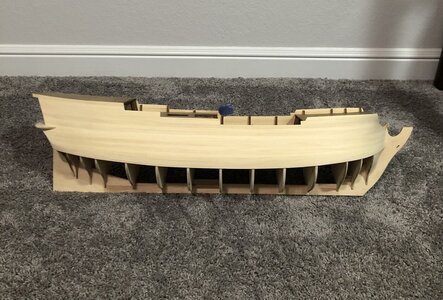
Here is an overall pic…
B4D0B5F3-35BD-4DFF-88BA-8CBDC7A9BE0E.jpeg

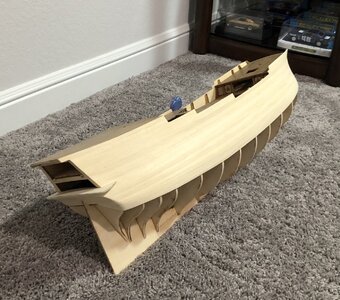
Here is an overall showing the planking at the stern. It is going well so far!
60CB5CD1-2453-490F-8E8F-630D55E4AAE3.jpeg

Onward we go! I’m averaging about 2 boards a day! This could take another 3 weeks or more to complete the hull planking. Then another couple of days for final sanding. Then things will start happening quicker! ;)
 
Thank you Johan! I haven’t survived it yet, but I remain hopeful! :p
Your procedure of starting by securing an end with a short radius curve, getting it set and then working around to the longer and more gently curve makes a lot of seance. Previously I had been setting a plank in the middle making sure that both ends terminated in their proper locations, middle to end and then the other did present problems in clamping the small radius end in place. Good lesson for me to pick up from you. Rich
 
Onward we go! I’m averaging about 2 boards a day! This could take another 3 weeks or more to complete the hull planking. Then another couple of days for final sanding. Then things will start happening quicker! ;)
Hi Dean,
As my mother often said when knitting: “A stitch every day is a shirt sleeve in a year”.
For you: "2 planks every day, is a ship's hull in ....... a few weeks."
But what you shows you have done so far, it looks very nice. Special the curves at the stern.
Regards, Peter
 
I put the plank in position after tapering, beveling and soaking in water. Then I heat it while it is wet and bend it while applying the heat. Once I get the bend in the plank, I mark the final length and angle, then cut the end. Then I put glue on the edge of the previous plank and CA on the frames, then glue down the plank immediately while still damp. I let it dry after being glued.
So the short answer is no, I always glue the boards down while damp, this helps with the lateral bends as well. ;)
This is such and interesting technique Dean. The edge glue - do you use PVa or Ca here? I like this method.
 
Shrinkage is usually not an issue. But there are a few factors, ie. type wood, moisture level changes and drying time. Because I towel dry prior to gluing, I have removed a lot of the water or moisture, but the board is still damp. However I never dry with heat, I let it dry naturally. The shrinkage at worse case would be around 5 percent, but as you mentioned the glue helps. The wood glue dries before the wood does. I am sure this helps keep the board from changing as much. For example, my planks are 7mm wide, and at worse case it would see a total of .35mm or .013” total shrinkage. Which is .175mm or .0065” per side, which is negligible.
Thus far I have never had an issue with shrinkage causing gaps. ;)
Ok here is the answer to my question - Cheers
 
Here is a plank that has been tapered at the bow and stern, and beveled on the opposite side. I taper on the side that faces the keel and bevel on the top side that faces the deck. It is pre bent at the bow. It will be soaked and glued on up to the stern frame where the bend is needed. At that point I bend it and adjust the final length, then glue that last section down.
View attachment 279441

I have now completed the first belt of 6 planks on the starboard side. Now it’s time to repeat on the port side.
Here is a picture of the bow, with light sanding. A final sanding will be required once I finish the entire hull! There is a few tiny gaps, but those will actually fill in with stain or paint, when the time comes. So I’m not too concerned with any of those at this point. As long as there are no large gaps, it’s all good! ;)
View attachment 279442

You can see the difference in progress after 6 planks, or 1 belt. There is 4 belts per side, so this represents 25 percent of the planking for the lower hull on one side!
Here is an overall pic…
View attachment 279443

Here is an overall showing the planking at the stern. It is going well so far!
View attachment 279444

Onward we go! I’m averaging about 2 boards a day! This could take another 3 weeks or more to complete the hull planking. Then another couple of days for final sanding. Then things will start happening quicker! ;)
Brilliant Dean
 
Din62, great job. But the poop confuses me. Kind of like a regular 74 gun, and the stern should be curved. There should be no 90 degree bend in the stern. And if the stern is transom, then the boards should be stacked differently.
 
Din62, great job. But the poop confuses me. Kind of like a regular 74 gun, and the stern should be curved. There should be no 90 degree bend in the stern. And if the stern is transom, then the boards should be stacked differently.
Hi Sasha, I don’t have the knowledge of ships that you do, so I’m not sure I understand what you are saying. The stern is not actually a 90 degree bend. I think people are assuming that because I said it was almost 90 degrees. But that is only on the upper boards. As you get closer to the bottom the bend is less and less and eventually goes away.
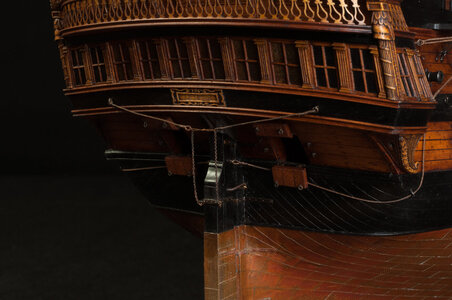
Here are some pictures of the stern on built models…
9E221555-1AC9-4440-B74B-C88F0B2F2C32.jpeg9AAD2923-BF0C-4615-A6F2-B3F3530C8B8D.jpegD3570F8B-07D0-444A-AF61-E04C814BBF76.jpeg3EC7EC98-A975-444F-B7B4-F53FF4E199F2.jpeg
 
Last edited:
Hi Sasha, I don’t have the knowledge of ships that you do, so I’m not sure I understand what you are saying. The stern is not actually a 90 degree bend. I think people are assuming that because I said it was almost 90 degrees. But that is only on the upper boards. As you get closer to the bottom the bend is less and less and eventually goes away.
Here are some pictures of the stern on built models…
View attachment 279569View attachment 279570View attachment 279571View attachment 279572
First off, the way you are able to plank the Lion is a true piece of art.
I think I understand what Sasha is aiming at; when looking at the last picture in your post, I would assume that all planking below the canon belt is continuous around the stern, not through ninety degree, but nonetheless a pretty steep radius. The planking of the canon belt is, at least that's what I like to think, not continous, but stops at the stern ánd the stern then planked separately.
I know for sure that I wouldn't have dared what you did and would have taken the easy way out, but since it's done already, please leave it as is.
If I did what you described, some of the boards on the side would end in a point. I wanted to avoid this. So only the first board before wrapping around the frame ends in a point, to setup up the curve that goes to the transom or stern. Hope that makes sense! ;)
Also, I wanted the angle of the boards, that end at the bottom of the horizontal section on the stern, to be at an angle close to 45 degrees. If you look at all the reference pictures, it is clear that the bends that start the angled section are fairly extreme, regardless!
 
Hi Sasha, I don’t have the knowledge of ships that you do, so I’m not sure I understand what you are saying. The stern is not actually a 90 degree bend. I think people are assuming that because I said it was almost 90 degrees. But that is only on the upper boards. As you get closer to the bottom the bend is less and less and eventually goes away.
Here are some pictures of the stern on built models…
Also, I wanted the angle of the boards, that end at the bottom of the horizontal section on the stern, to be at an angle close to 45 degrees. If you look at all the reference pictures, it is clear that the bends that start the angled section are fairly extreme, regardless!
What I see on your ref.pics, your are right, Dean.
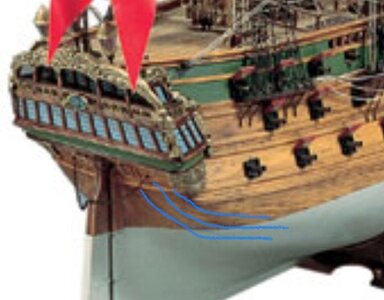
It’s clear to see on the pictures. I draw a few (quick) blue lines on my iPad:
1C03BB83-CE3E-4813-8D92-3513C6D1E0D0.jpeg
If that is what you mean.
Regards, Peter
 
Last edited:
If I did what you described, some of the boards on the side would end in a point. I wanted to avoid this. So only the first board before wrapping around the frame ends in a point, to setup up the curve that goes to the transom or stern. Hope that makes sense! ;)
Also, I wanted the angle of the boards, that end at the bottom of the horizontal section on the stern, to be at an angle close to 45 degrees. If you look at all the reference pictures, it is clear that the bends that start the angled section are fairly extreme, regardless!
Agreed and makes sense as well. Besides, as long as the Lion is happy, the questions and remarks from us mere mortals are irrelevant. :D
 
Back
Top