NORSKE LOVE - Billing Boats 1:75 scale

For educational purposes, I will show the end goal.
First let’s start with a painting of a Danish Norwegian ship…

C87F6F2C-62F7-412F-BD59-EC5E5DE4FA1D.jpeg
Next is the original design documents for the Norske Love…
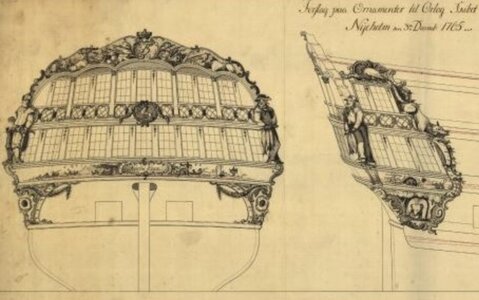
A694175A-17A1-4276-9CCB-E33B1530307E.jpeg
Then the demo model of the kit I am building (Norske Love)…
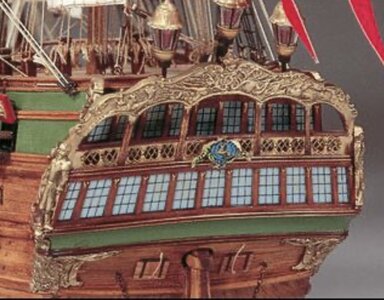
18B60469-8EE9-49B6-852A-893192E369C8.jpeg
And finally we have the Printz Friderich designed by the same person who designed the Norske Love…this was built by Karl @kalliboot
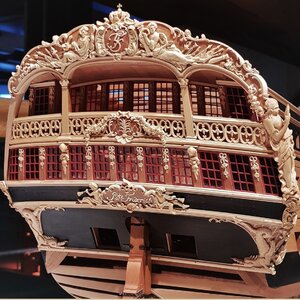
D923A17B-B100-4356-8F13-83230D026079.jpeg5C85BB45-99D8-49A3-959F-644D70C1275B.jpegDE4C98E5-F077-483D-AC88-B7F7D94BD95B.jpeg
This is a breathtaking example of craftsmanship and the elegance of the Danish Norwegian ships. ;)
The Norske Love has different decorations and railings, but also a lot of similarities.
In conclusion, this is a make or break area of the ship, as is the bow. It is my hopes to do something worthy. If I could do half as good as Karl, I will be happy! :p
So that’s the future of this part of the ship. It’s a little intimidating, but challenging and exciting at the same time!
But first all the wales and cannon ports need to be finished, along with the railings. Then the stern and bow can be built.
Thanks for checking in on me.
 
Beautiful work Dean. The P-51D Mustang is my favorite WW2 fighter. I watch air show videos of it with great sound on my headphones while I ride my recumbent exercise bike. My dad was a B-17 pilot at the end of WW2.
Good morning Daniel. Mine too. It is such a beautiful looking fighter. At the end of Top Gun 2, when Tom flies the Mustang (I believe this is his personal plane) it was so cool. Cheers Grant
 
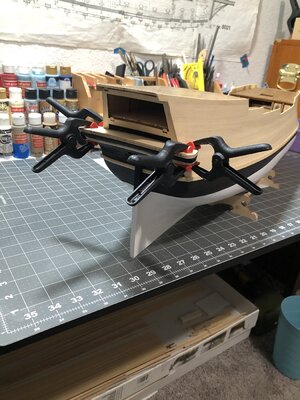
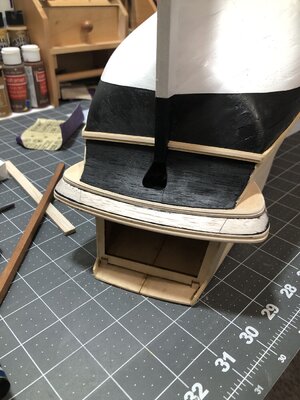
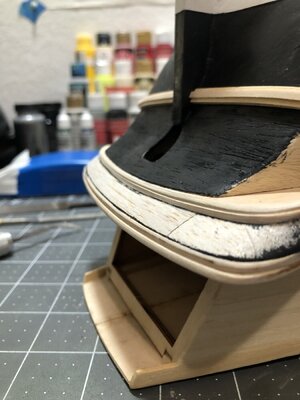
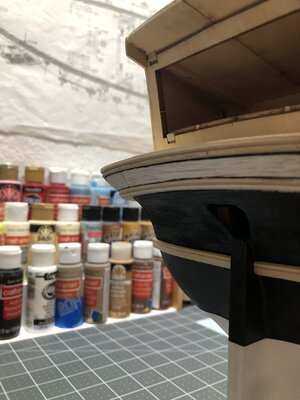
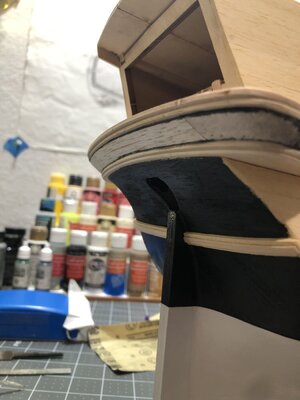
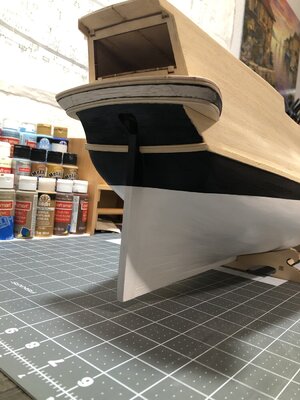
Then I painted black on the stern and between the gallery floor. The boards above and below will be gold. And there will be carvings in the corners that are gold. That will be later. I am doing this to help establish the wales that will be put on next. Then I can start the cannon ports…
View attachment 358049View attachment 358050View attachment 358051
So it is still in the ugly stage…but moving forward! ;)
Good morning Dean. This is impressive work. I really admire guys like yourself who have such skill with woodworking. Cheers Grant
 
For educational purposes, I will show the end goal.
First let’s start with a painting of a Danish Norwegian ship…
View attachment 358232
Next is the original design documents for the Norske Love…
View attachment 358234
Then the demo model of the kit I am building (Norske Love)…
View attachment 358237
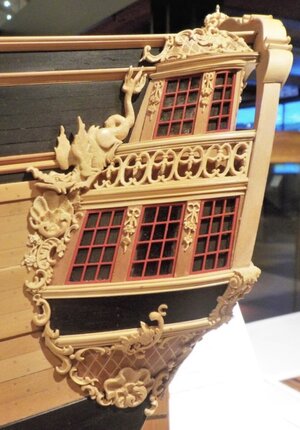
And finally we have the Printz Friderich designed by the same person who designed the Norske Love…this was built by Karl @kalliboot
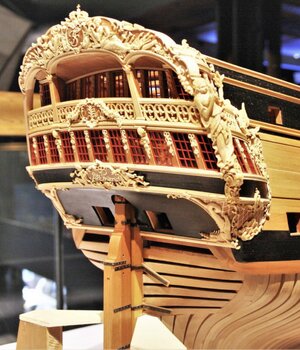
View attachment 358238View attachment 358239View attachment 358240
This is a breathtaking example of craftsmanship and the elegance of the Danish Norwegian ships. ;)
The Norske Love has different decorations and railings, but also a lot of similarities.
In conclusion, this is a make or break area of the ship, as is the bow. It is my hopes to do something worthy. If I could do half as good as Karl, I will be happy! :p
So that’s the future of this part of the ship. It’s a little intimidating, but challenging and exciting at the same time!
But first all the wales and cannon ports need to be finished, along with the railings. Then the stern and bow can be built.
Thanks for checking in on me.
You are certainly raising the bars for yourself.
I have no doubt you'll be able to pull it off and I am so looking forward to see your progress on all the carvings.
 
You are certainly raising the bars for yourself.
I have no doubt you'll be able to pull it off and I am so looking forward to see your progress on all the carvings.
Thank you Johan!
It will be one of those, “what did I get myself into” moments, I am sure! But I will be better off for it. ;)
I ordered some new micro chisels today!
 
Beautiful work Dean. The P-51D Mustang is my favorite WW2 fighter. I watch air show videos of it with great sound on my headphones while I ride my recumbent exercise bike. My dad was a B-17 pilot at the end of WW2.
Again, heavily off topic, but...
IMHO the most beautiful plane ever:
87345DD2-2859-4762-A1A8-47B5B432DF1D.jpeg
Sorry Dean, I'll try not to pollute your NL-blog again with aviation topics.
 
Again, heavily off topic, but...
IMHO the most beautiful plane ever:
View attachment 358520
Sorry Dean, I'll try not to pollute your NL-blog again with aviation topics.
It’s fine…lol…I started it! :p
Yes, many beautiful WW2 airplanes. A topic for another day. ;)
Ps - fav jets are the F-86 Sabre and the F-4 Phantom…
Example of the F-4
3AD8EB27-8650-47A7-82A1-B0AA60BE63BC.jpeg
 
Last edited:
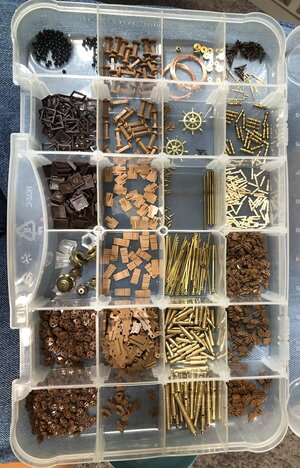
Today was a holiday…I started with organizing all the components in the kit…
A0B390A0-E69A-423E-972D-C91182468806.jpeg
I won’t be using any of the plastic blocks or deadeyes, even though they are stropped properly. Looks like I am making a huge order soon for wooden deadeyes, blocks, cleats, rope, etc. from our favorite vendor! ;)
After that I added the upper board on the galley…
C27C8151-EA50-488F-9FD8-D52B8F8144B1.jpeg
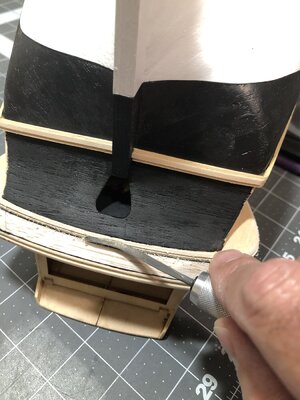
Once that was dry, I decided I wasn’t completely happy with my previous progress and took the opportunity to go ahead make that better.
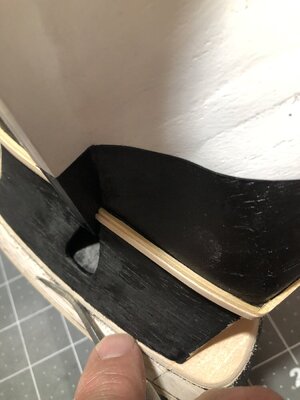
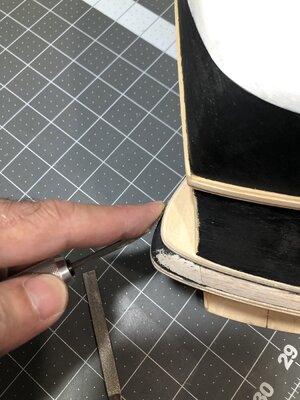
First I sanded again between the upper and lower to average the bevel, then I used a riffler file to creat a V groove between boards…
3B997E3D-23AA-484D-AE5D-8608E41B11D5.jpeg83DF25CD-C9F6-4BFD-BB35-EB8BD9DEC8B2.jpeg
I try to stay on the radius of the file and drag it carefully across to make sure I stay in the groove. Do not rush or push too hard or bad things will happen!
5328D145-E21F-4111-8EDD-607EF70E80D7.jpeg
When working on the end of the board, I simply get on the point and pull away from the edge, using your finger tip to control. ;)
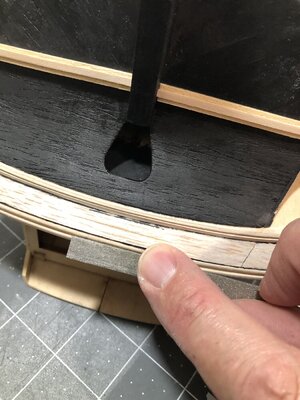
After making the groove, if I have an adjacent board with an overhang, then I come back and file on that board at an angle with a flat file…
24CB90D2-E7D4-4081-A28A-8EB8D27825CB.jpeg
Basically I do most all model wood working by hand, especially trim pieces already glued to the ship. I can profile them by hand. You can make a V grove with a rifler file, or a U or circular groove with a rat taile file. You have to make a small v groove as a guide prior to using a rat tail file…just an FYI. ;)

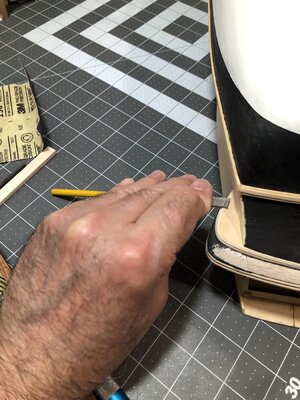
Also below I show a technique to keep your bevel consistent by hand…
A7DE58C8-7EDF-43E4-9D1D-E91AF76C2D65.jpeg
What I do is use the table top to maintain my angle by determining the overhang of the file on the board, which changes your angle, then maintain that overhang distance as you drag the file around the edge. This creates a more uniform and consistent angle by hand.
Of course I do a lot without using this method, but it can be helpful in some circumstances. ;)

And a few pics of the end results. It will most likely be more obvious what I have once everything is painted. The edge or profile boards will be gold, as will the carvings.
FF838FA6-CD1E-4354-9DED-2BAB8C568525.jpeg5C91FC3D-A95F-4690-8165-9DAD38C74585.jpeg0E9675AB-F9B2-4B0F-966B-C4C3C9BF0C0D.jpeg25D34514-2681-442A-9BE7-F3BF18AD0E7E.jpeg
That’s it for now…Happy Modeling! ;)


AB78D62B-AA09-4BD5-A9C9-998BC25C32AC.jpeg

..
 
Last edited:
After looking at the photos…there will be some final sanding with fine grit sandpaper! It’s not quite smooth enough…sometimes I sand after painting, because that will bring out any surface imperfections. :p
In addition, all wales will be sanded after installation. So much to do…
 
Wow Dean, just Wow. Love the handcrafted details you put into it including the description how you did it. Great work!
 
Today was a holiday…I started with organizing all the components in the kit…
View attachment 358570
I won’t be using any of the plastic blocks or deadeyes, even though they are stropped properly. Looks like I am making a huge order soon for wooden deadeyes, blocks, cleats, rope, etc. from our favorite vendor! ;)
After that I added the upper board on the galley…
View attachment 358571
Once that was dry, I decided I wasn’t completely happy with my previous progress and took the opportunity to go ahead make that better.
First I sanded again between the upper and lower to average the bevel, then I used a riffler file to creat a V groove between boards…
View attachment 358572View attachment 358573
I try to stay on the radius of the file and drag it carefully across to make sure I stay in the groove. Do not rush or push too hard or bad things will happen!
View attachment 358574
When coming to an edge, I simply get on the point and pull away from the edge, using your finger tip to control. ;)
After making the groove, if I have an adjacent board with an overhang, then I come back and file on that board at an angle with a flat file…
View attachment 358576
Basically I do most all model wood working by hand, especially trim pieces already glued to the ship. I can profile them by hand. You can make a V grove with a rifler file, or a U or circular groove with a rat taile file. You have to make a small v groove as a guide prior to using a rat tail file…just an FYI. ;)
Also below I show a technique to keep your bevel consistent by hand…
View attachment 358579View attachment 358580
What I do is use the table top to maintain my angle by determining the overhang of the file on the board, which changes your angle, then maintain that overhang distance as you drag the file around the edge. This creates a more uniform and consistent angle by hand. Of course I do a lot without using this method, but it can be helpful in some circumstances. ;)
And a few pics of the end results. It will most likely be more obvious what I have once everything is painted. The edge or profile boards will be gold, as will the carvings.
View attachment 358581View attachment 358582View attachment 358583View attachment 358584
That’s it for now…Happy Modeling! ;)


View attachment 358585

View attachment 358577

View attachment 358578
Master carver and his art...
 
Master carver and his art...
Thanks Johan, but I am no master… but working towards it. I really like doing things by hand, verses using mills and other electronic equipment. There is an application for that, however I prefer doing everything with hand tools that I can. That’s how the old carpenters and shipwrights worked. They didn’t have fancy equipment. ;)
 
I like this work lots and lots! It is the work by hand, in particular, that I find so impressive. Free-hand and a file is as close to natural as you can get and shows the true craftsman and his art. I cannot wait to see as she unfolds further.
 
Today was a holiday…I started with organizing all the components in the kit…
View attachment 358570
I won’t be using any of the plastic blocks or deadeyes, even though they are stropped properly. Looks like I am making a huge order soon for wooden deadeyes, blocks, cleats, rope, etc. from our favorite vendor! ;)
After that I added the upper board on the galley…
View attachment 358571
Once that was dry, I decided I wasn’t completely happy with my previous progress and took the opportunity to go ahead make that better.
First I sanded again between the upper and lower to average the bevel, then I used a riffler file to creat a V groove between boards…
View attachment 358572View attachment 358573
I try to stay on the radius of the file and drag it carefully across to make sure I stay in the groove. Do not rush or push too hard or bad things will happen!
View attachment 358574
When coming to an edge, I simply get on the point and pull away from the edge, using your finger tip to control. ;)
After making the groove, if I have an adjacent board with an overhang, then I come back and file on that board at an angle with a flat file…
View attachment 358576
Basically I do most all model wood working by hand, especially trim pieces already glued to the ship. I can profile them by hand. You can make a V grove with a rifler file, or a U or circular groove with a rat taile file. You have to make a small v groove as a guide prior to using a rat tail file…just an FYI. ;)
Also below I show a technique to keep your bevel consistent by hand…
View attachment 358579View attachment 358580
What I do is use the table top to maintain my angle by determining the overhang of the file on the board, which changes your angle, then maintain that overhang distance as you drag the file around the edge. This creates a more uniform and consistent angle by hand. Of course I do a lot without using this method, but it can be helpful in some circumstances. ;)
And a few pics of the end results. It will most likely be more obvious what I have once everything is painted. The edge or profile boards will be gold, as will the carvings.
View attachment 358581View attachment 358582View attachment 358583View attachment 358584
That’s it for now…Happy Modeling! ;)


View attachment 358585

View attachment 358577

View attachment 358578
It are the tiny details that gives the parts there elegance. Well done, Dean.
Regards, Peter
 
Back
Top