Nice touch and tutorial with the files Dean.Today was a holiday…I started with organizing all the components in the kit…
View attachment 358570
I won’t be using any of the plastic blocks or deadeyes, even though they are stropped properly. Looks like I am making a huge order soon for wooden deadeyes, blocks, cleats, rope, etc. from our favorite vendor!
After that I added the upper board on the galley…
View attachment 358571
Once that was dry, I decided I wasn’t completely happy with my previous progress and took the opportunity to go ahead make that better.
First I sanded again between the upper and lower to average the bevel, then I used a riffler file to creat a V groove between boards…
View attachment 358572View attachment 358573
I try to stay on the radius of the file and drag it carefully across to make sure I stay in the groove. Do not rush or push too hard or bad things will happen!
View attachment 358574
When coming to an edge, I simply get on the point and pull away from the edge, using your finger tip to control.
After making the groove, if I have an adjacent board with an overhang, then I come back and file on that board at an angle with a flat file…
View attachment 358576
Basically I do most all model wood working by hand, especially trim pieces already glued to the ship. I can profile them by hand. You can make a V grove with a rifler file, or a U or circular groove with a rat taile file. You have to make a small v groove as a guide prior to using a rat tail file…just an FYI.
Also below I show a technique to keep your bevel consistent by hand…
View attachment 358579View attachment 358580
What I do is use the table top to maintain my angle by determining the overhang of the file on the board, which changes your angle, then maintain that overhang distance as you drag the file around the edge. This creates a more uniform and consistent angle by hand. Of course I do a lot without using this method, but it can be helpful in some circumstances.
And a few pics of the end results. It will most likely be more obvious what I have once everything is painted. The edge or profile boards will be gold, as will the carvings.
View attachment 358581View attachment 358582View attachment 358583View attachment 358584
That’s it for now…Happy Modeling!
View attachment 358585
View attachment 358577
View attachment 358578
-

Win a Free Custom Engraved Brass Coin!!!
As a way to introduce our brass coins to the community, we will raffle off a free coin during the month of August. Follow link ABOVE for instructions for entering.
-

PRE-ORDER SHIPS IN SCALE TODAY!
The beloved Ships in Scale Magazine is back and charting a new course for 2026!
Discover new skills, new techniques, and new inspirations in every issue.
NOTE THAT OUR FIRST ISSUE WILL BE JAN/FEB 2026
You are using an out of date browser. It may not display this or other websites correctly.
You should upgrade or use an alternative browser.
You should upgrade or use an alternative browser.
NORSKE LOVE - Billing Boats 1:75 scale
- Thread starter Dean62
- Start date
- Watchers 74
-
- Tags
- billing boats norske lowe
Thank you Daniel!Nice touch and tutorial with the files Dean.
Last edited:
I appreciate everyone's comments, however I have to admit I don't think what I did was anything special. I just used a technique to add something extra to what would otherwise be straight and plain boards, in an area that will become ornate. And I thought while I was at it, I would show the usefulness of a rifler file. 
I am on a little vacation and have time to view some logs. Wow, Dean, that is some intricate filing work. I would have never thought about using that type of curved file. Now, this is something I need to add to my tool selection!
Thanks Donnie!I am on a little vacation and have time to view some logs. Wow, Dean, that is some intricate filing work. I would have never thought about using that type of curved file. Now, this is something I need to add to my tool selection!
Yes, the rifler file, being curved and having a pointed end, is excellent for getting into corners and tight areas, like to the edge of an intersection. I use it to carve as well, because it is very versatile.
- Joined
- Sep 3, 2021
- Messages
- 5,191
- Points
- 738

Keep telling you that...I am no master…
Today I started framing out the cannon ports on the upper deck and adding the railing. I want to add all upper cannon ports, trim and railings to help me locate the wales better.
The area I am focusing on…
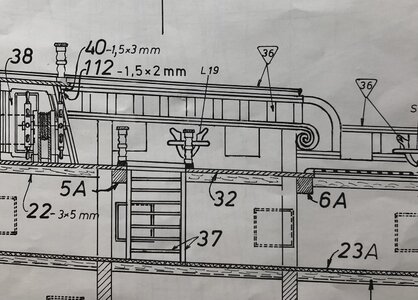
First I added boards to thicken the bulwarks between frames. I also framed out the cannon ports while doing this…
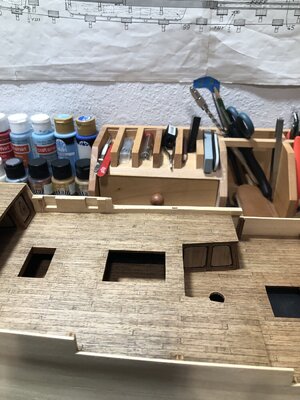
Then I planked the wall…
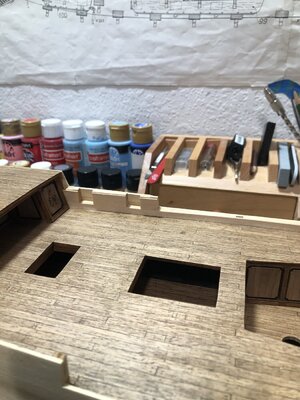
Then started cutting out the ports…
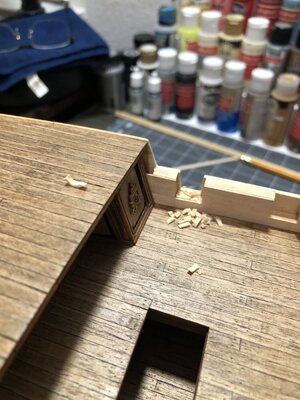
Then capped the bulwarks with the first part of the railing after filing and sanding…
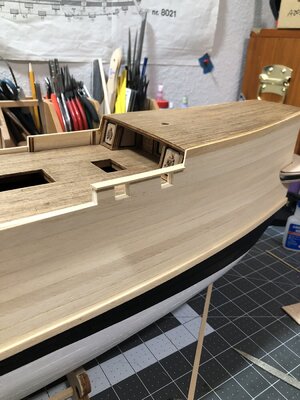
More to come…
The area I am focusing on…

First I added boards to thicken the bulwarks between frames. I also framed out the cannon ports while doing this…

Then I planked the wall…

Then started cutting out the ports…

Then capped the bulwarks with the first part of the railing after filing and sanding…

More to come…
Last edited:
Next I added another board on the railing, then two small boards that run the length of the stern from the railing…
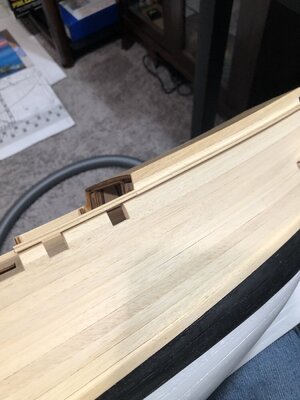
At this point I started filing the profile into the trim and railing boards. First a small V groove with the rifler file, then I finished it with a rat tail file…
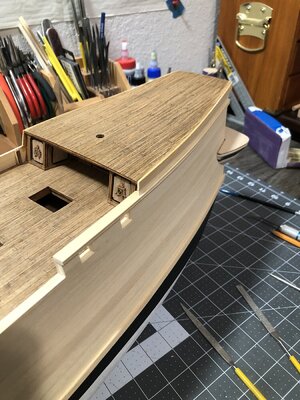
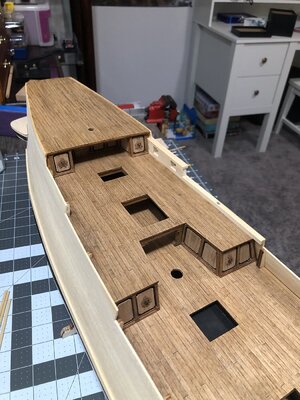
Then I did fine sanding…will do steel wool next…
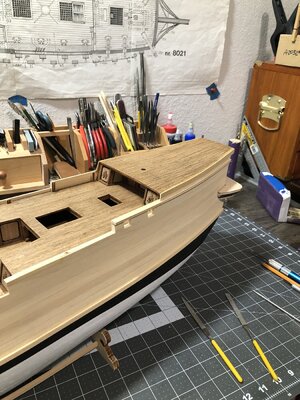
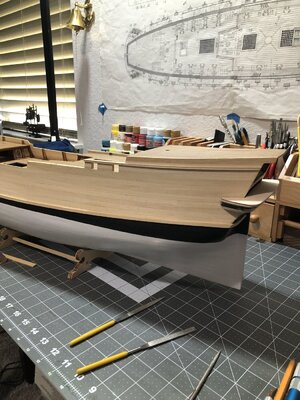
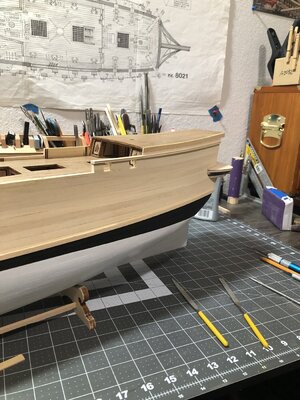
Next I have to sand the end flush where it steps down. Then I can add the first section of the lower railing and make a scroll for the end of this railing!

At this point I started filing the profile into the trim and railing boards. First a small V groove with the rifler file, then I finished it with a rat tail file…


Then I did fine sanding…will do steel wool next…


Next I have to sand the end flush where it steps down. Then I can add the first section of the lower railing and make a scroll for the end of this railing!
Thanks Pter!clean and accurate work. Love the railing, Made it yourself or part of the kit?
peter
I made it with individual boards. Two boards stacked. Then use rifler file between boards to create a groove. Then I used a rat tail file to get the final profile.
This kit gives you a box of wood…lol…old school, no nice trim pieces. You have to make everything from scratch.
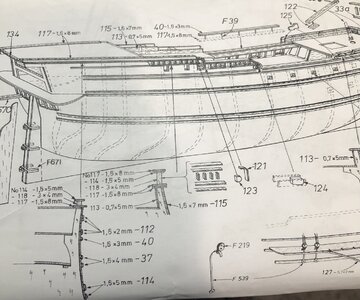
That’s the great instructions.
I started the railing below the first one so I could make the scroll next at the end of the first railing.
Since they will be painted gold, I am not trying to match the wood. I just scrounged up some pear I had and sandwiched that with the kit wood. I need to buy boxwood and pear for carvings! Running dangerously low on wood to carve!
Anyway, I am pretty happy with it. It is taller than wide, so I had to get a little creative.
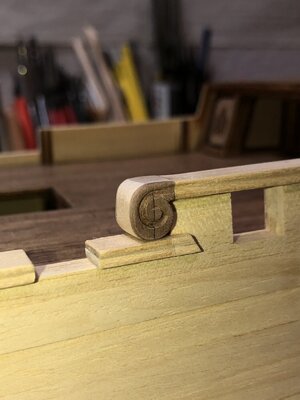
Inside of the bulwarks will be painted red, so I didn’t carve anything for the inside.
Happy modeling!
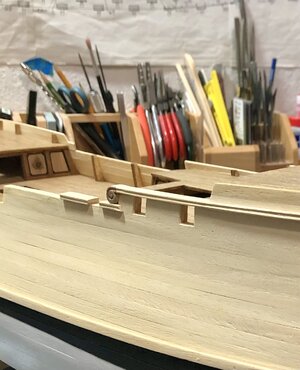
Since they will be painted gold, I am not trying to match the wood. I just scrounged up some pear I had and sandwiched that with the kit wood. I need to buy boxwood and pear for carvings! Running dangerously low on wood to carve!
Anyway, I am pretty happy with it. It is taller than wide, so I had to get a little creative.

Inside of the bulwarks will be painted red, so I didn’t carve anything for the inside.
Happy modeling!

Last edited:
Good morning Dean. Your work is brilliant. The earlier “master” debate. Well from my point of view as someone who cannot even cut a plank straight, you certainly create some masterful work. Hand tools and all…….Cheers GrantI started the railing below the first one so I could make the scroll next at the end of the first railing.
Since they will be painted gold, I am not trying to match the wood. I just scrounged up some pear I had and sandwiched that with the kit wood. I need to buy boxwood and pear for carvings! Running dangerously low on wood to carve!
Anyway, I am pretty happy with it. It is taller than wide, so I had to get a little creative.
View attachment 359042
View attachment 359039View attachment 359040View attachment 359041
Inside of the bulwarks will be painted red, so I didn’t carve anything for the inside.
Happy modeling!
Thanks Grant! But you sure built a beautiful ship!Good morning Dean. Your work is brilliant. The earlier “master” debate. Well from my point of view as someone who cannot even cut a plank straight, you certainly create some masterful work. Hand tools and all…….Cheers Grant
Nice elegant flowing details, Dean. You‘ve got back your pace and spirit!I started the railing below the first one so I could make the scroll next at the end of the first railing.
Since they will be painted gold, I am not trying to match the wood. I just scrounged up some pear I had and sandwiched that with the kit wood. I need to buy boxwood and pear for carvings! Running dangerously low on wood to carve!
Anyway, I am pretty happy with it. It is taller than wide, so I had to get a little creative.
View attachment 359042
View attachment 359040View attachment 359041
Inside of the bulwarks will be painted red, so I didn’t carve anything for the inside.
Happy modeling!
Regards, Peter
- Joined
- Sep 3, 2021
- Messages
- 5,191
- Points
- 738

Meticulous work, Dean.I started the railing below the first one so I could make the scroll next at the end of the first railing.
Since they will be painted gold, I am not trying to match the wood. I just scrounged up some pear I had and sandwiched that with the kit wood. I need to buy boxwood and pear for carvings! Running dangerously low on wood to carve!
Anyway, I am pretty happy with it. It is taller than wide, so I had to get a little creative.
View attachment 359042
View attachment 359041
Inside of the bulwarks will be painted red, so I didn’t carve anything for the inside.
Happy modeling!
My earlier remark on mastery still stands.
Thank you Peter! The details are the fun things to build.Nice elegant flowing details, Dean. You‘ve got back your pace and spirit!
Regards, Peter
Thank you Johan!Meticulous work, Dean.
My earlier remark on mastery still stands.
Thank you Pter! Yes…many many more to go!Nice crisp lines with the carving Dean. It flows very nice between railing and carving. Excellent work.
One down, many to go?


