Thanks for following along, I hope I can give a few insights into the madness on this kit!I noticed the difference ;-)
Been following your build for a while.
-

Win a Free Custom Engraved Brass Coin!!!
As a way to introduce our brass coins to the community, we will raffle off a free coin during the month of August. Follow link ABOVE for instructions for entering.
-

PRE-ORDER SHIPS IN SCALE TODAY!
The beloved Ships in Scale Magazine is back and charting a new course for 2026!
Discover new skills, new techniques, and new inspirations in every issue.
NOTE THAT OUR FIRST ISSUE WILL BE JAN/FEB 2026
You are using an out of date browser. It may not display this or other websites correctly.
You should upgrade or use an alternative browser.
You should upgrade or use an alternative browser.
NORSKE LOVE - Billing Boats 1:75 scale
- Thread starter Dean62
- Start date
- Watchers 74
-
- Tags
- billing boats norske lowe
You must be kind of insane to start a Billing kit. LOL.Thanks for following along, I hope I can give a few insights into the madness on this kit!
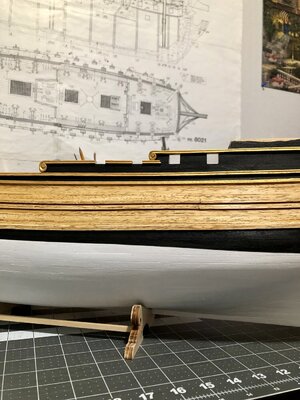
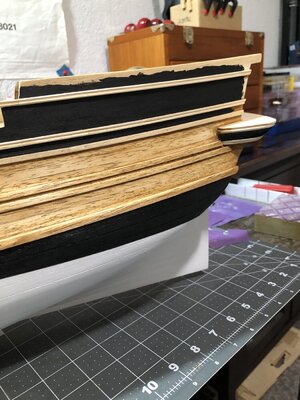
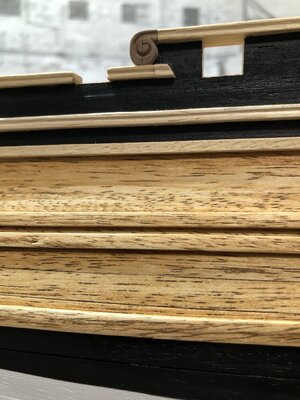
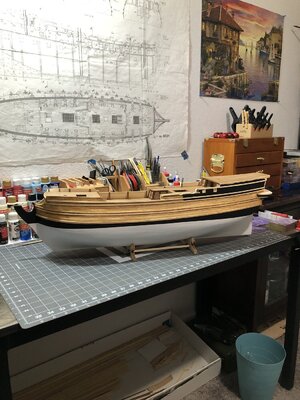
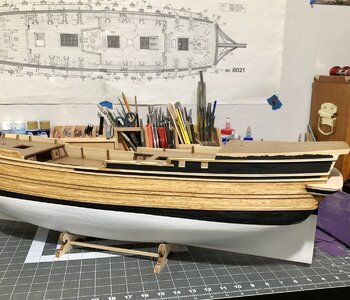
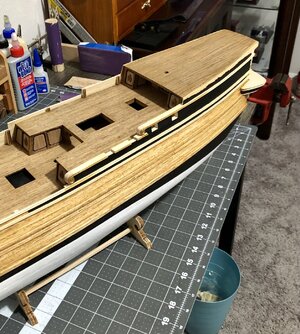
For @Heinrich, I started to stain the side I am working on and painting what I can. First let me say that Heinrich showed a ship by a Russian builder who used techniques to make it appear aged. It was very impressive and I wanted to incorporate that some on my ship, but only to a mild degree. So I stained the wood first, then scraped it, then applied a little more stain in the deep areas and edges, and finally sanded it. I’m happy with the look. It will be even better with a coat of matte clear, but that will be much later, as I have cannon ports to do and nails.
A few pics…
The railings will be gold in the areas that have black up top.
Anyway, back to more railings!
Then when I finish the railings and bulwarks on this side, I will finish locating all of the cannon ports and get busy cutting those out (not a fun part of the build)!
And yes, I have to repeat everything on the other side. Some people prefer to work equally on each side. I don’t! One side is my learning side. The other is the experienced side. Which side will I display the ship on?
Happy Modeling!!!
A few pics…


The railings will be gold in the areas that have black up top.
Anyway, back to more railings!
Then when I finish the railings and bulwarks on this side, I will finish locating all of the cannon ports and get busy cutting those out (not a fun part of the build)!
And yes, I have to repeat everything on the other side. Some people prefer to work equally on each side. I don’t! One side is my learning side. The other is the experienced side. Which side will I display the ship on?
Happy Modeling!!!
- Joined
- Jan 9, 2020
- Messages
- 10,566
- Points
- 938

Hi Dean. I like it - lots!For @Heinrich, I started to stain the side I am working on and painting what I can. First let me say that Heinrich showed a ship by a Russian builder who used techniques to make it appear aged. It was very impressive and I wanted to incorporate that some on my ship, but only to a mild degree. So I stained the wood first, then scraped it, then applied a little more stain in the deep areas and edges, and finally sanded it. I’m happy with the look. It will be even better with a coat of matte clear, but that will be much later, as I have cannon ports to do and nails.
A few pics…
View attachment 359284View attachment 359285View attachment 359286
The railings will be gold in the areas that have black up top.
Anyway, back to more railings!
Then when I finish the railings and bulwarks on this side, I will finish locating all of the cannon ports and get busy cutting those out (not a fun part of the build)!
And yes, I have to repeat everything on the other side. Some people prefer to work equally on each side. I don’t! One side is my learning side. The other is the experienced side. Which side will I display the ship on?
Happy Modeling!!!
 You have created - in my mind - the perfect patinated effect on the NL. It is clearly visible, but is not overdone - just like Goldilock's porridge, you have created the perfect temperature! and what I really like about it, is that appears like natural woodgrain - very much like the oak on the WB. This is going to be a beautiful ship - I am so glad you started working on her again!
Thank you Heinrich! I was a little nervous in the beginning because I wasn’t sure how well it was going to turn out. It was a very labor intensive process of staining, scraping and sanding. But overall I am happy with the end result. The stained band will be full of cannon ports…35 cannons per side. So imagine all the black squares in the wood stained bands. In addition, each cannon door will be red with a gold Lion head emblem. All of the wales and railings that border the black will be gold. The bulwarks are red inside, and the cannon carriages are red. There will be plenty of color. But the museum ship I showed for reference is also the same paint scheme and I thought it was very nice, and it’s correct for the ship.Hi Dean. I like it - lots!You have created - in my mind - the perfect patinated effect on the NL. It is clearly visible, but is not overdone - just like Goldilock's porridge, you have created the perfect temperature! and what I really like about it, is that appears like natural woodgrain - very much like the oak on the WB. This is going to be a beautiful ship - I am so glad you started working on her again!
In conclusion there is a lot of carvings, scrolls and ornate stuff to go on and a lot of tedious painting. But I look forward to it all coming together eventually. This is only a small glimpse of what is to come. I do appreciate your support and am glad you agree I am on the right track!
I finished the next scroll on the lower railing.
Then I did a little more painting. I added more black and then some gold on the edge of the railing to see how it is going to look against the black.
Also this will answer @Jimsky, as he made a good point about the darker wood potentially changing the color. But I put two coats on and it seems to match the lighter wood.


You did a very fine job with the ‘aging’, Dean. And the coloring besides the railing gives nice accents to the flowing lines.I finished the next scroll on the lower railing.
Then I did a little more painting. I added more black and then some gold on the edge of the railing to see how it is going to look against the black.
Also this will answer @Jimsky, as he made a good point about the darker wood potentially changing the color. But I put two coats on and it seems to match the lighter wood.
View attachment 359328
View attachment 359329
Regards, Peter
Thank you Peter! It’s starting to take shape, which is motivating me to work more on it.You did a very fine job with the ‘aging’, Dean. And the coloring besides the railing gives nice accents to the flowing lines.
Regards, Peter
The plans show the upper and lower railings. I have only built the lower railings.

Since I don’t want to try to paint the top of the lower railings with the vertical supports in place, I decided to paint them first, before building the upper railings. You know, work smart, not hard.
So I also painted the inside bulwarks…
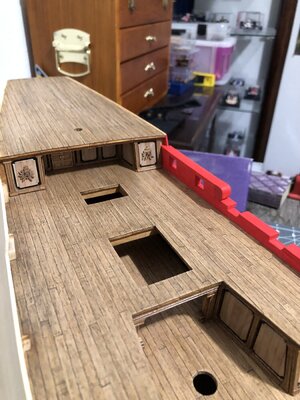
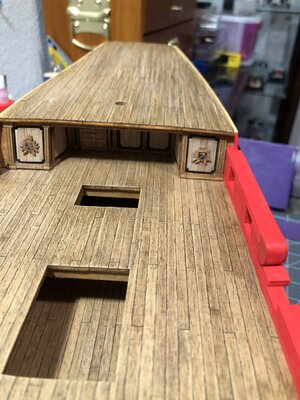
Then I touched up the gold on the railings and added some nails to the wales…
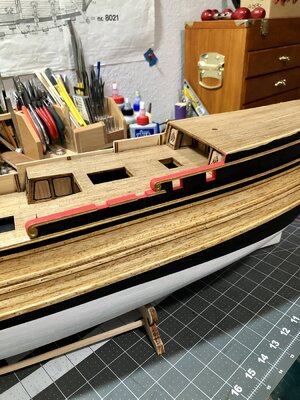
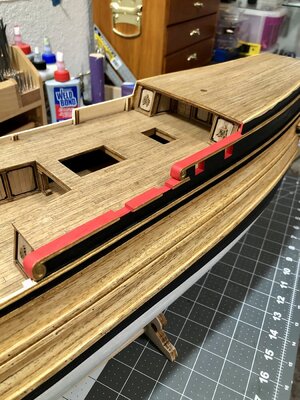
The vertical supports will be gold. Anyway, now I can start on the upper rails.
Happy Modeling!

Since I don’t want to try to paint the top of the lower railings with the vertical supports in place, I decided to paint them first, before building the upper railings. You know, work smart, not hard.
So I also painted the inside bulwarks…


Then I touched up the gold on the railings and added some nails to the wales…


The vertical supports will be gold. Anyway, now I can start on the upper rails.
Happy Modeling!
Good morning Dean. I’m not watching you build anymore!Not much to show…I spent my day doing meticulous painting of the gold and black. Ready to move forward with the upper railings next.
View attachment 359513
 . How you get everything so spot on is upsetting me.
 Cheers Grant
Lol…thanks Grant, but I prefer you stick around!Good morning Dean. I’m not watching you build anymore!. How you get everything so spot on is upsetting me.
Cheers Grant
Thank you, fortunately I have a steady hand from doing detail painting on plastic models for years, or it would have been a mess!You're going fast are you? This needs to be finished before the summer starts?
I cannont paint, so I look and wonder in awe...
Peter
No rush, just putting in a lot of hours when I can. There is so much to do yet! Railings, cannons, galleries at the stern (many carvings) and the bow with the crazy railings and figurehead, ladders, grates, etc. etc. …and then mast, yards, rigging…I will be lucky if I can think about masts this year!
Thank you Heinrich!Lovely, lovely, lovely. What is really like about the nails is that you have the scale the spot on! The gold and red look luxurious, man!
Yes, the red and black both get accented with the gold.
Very nice looking tiny nails, Dean. It’s all in the details. Size does matters ……The plans show the upper and lower railings. I have only built the lower railings.
View attachment 359552
Since I don’t want to try to paint the top of the lower railings with the vertical supports in place, I decided to paint them first, before building the upper railings. You know, work smart, not hard.
So I also painted the inside bulwarks…
View attachment 359553View attachment 359554
Then I touched up the gold on the railings and added some nails to the wales…
View attachment 359555View attachment 359556
The vertical supports will be gold. Anyway, now I can start on the upper rails.
Happy Modeling!
Regards, Peter
Thank you Peter! Yes, oversized parts take away from the model. 
Ok, question…I used a color called True Red. My wife and daughter don’t like it. It was a lot of work, so before I do anymore, what do you guys think? Keep or change? I’m afraid of the answer…  Fingers crossed!
For reference…
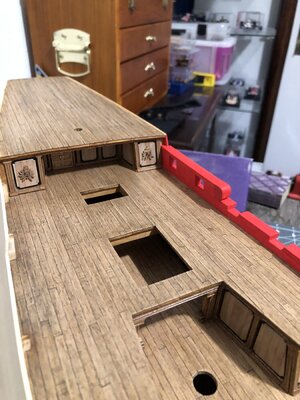
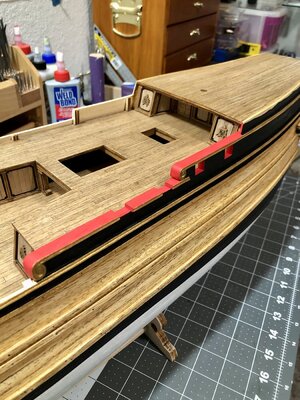
There will be a waterway board between the deck and bulwarks. It will be wood color.
For reference…


There will be a waterway board between the deck and bulwarks. It will be wood color.
Last edited:
Hi Dean. My favorite red is the old fashion Karmijn/Carmine-red. So …….Ok, question…I used a color called True Red. My wife and daughter don’t like it. It was a lot of work, so before I do anymore, what do you guys think? Keep or change? I’m afraid of the answer…Fingers crossed!
For reference…
View attachment 359622View attachment 359623
There will be waterway board between the deck and bulwarks. It will be wood color.
Regards, Peter
Last edited:


