-

Win a Free Custom Engraved Brass Coin!!!
As a way to introduce our brass coins to the community, we will raffle off a free coin during the month of August. Follow link ABOVE for instructions for entering.
-

PRE-ORDER SHIPS IN SCALE TODAY!
The beloved Ships in Scale Magazine is back and charting a new course for 2026!
Discover new skills, new techniques, and new inspirations in every issue.
NOTE THAT OUR FIRST ISSUE WILL BE JAN/FEB 2026
You are using an out of date browser. It may not display this or other websites correctly.
You should upgrade or use an alternative browser.
You should upgrade or use an alternative browser.
Panart: San Felipe 1:75 Scale Build Log [COMPLETED BUILD]
- Thread starter Donnie
- Start date
- Watchers 66
-
- Tags
- completed build
Canoe21
Lawrence
Hello Donnie
Great job you are doing on your planking, so very neat, just love your idea of Splitting and Stealers, and it sure does make a very neat job. I will have to give that little trick a try in my next build, Well Done, ENJOY.
Regards Canoe21 { Lawrence }
Great job you are doing on your planking, so very neat, just love your idea of Splitting and Stealers, and it sure does make a very neat job. I will have to give that little trick a try in my next build, Well Done, ENJOY.
Regards Canoe21 { Lawrence }
Folks,
I am very humbled by all the kind comments - I really am. I was wanting to use this first layer as a self guided learning curve so that when I put the real layer on, it will look half way decent. It is hard sometimes to slow down - I get impatient too.
Well, I have been at home for the past several days with sinus infection. Went to Doc - got a shot and it literally kept me up all night long. No sleep-period. I didn't realize how much weird stuff is on TV during the wee hours. I got plenty of time to read over things when I feel like it.
This is kind of a little off topic - there I go again breaking some rules.... When I was making all these photos, I was thinking that if I had time, I would make a video tutorial showing my workflow in how I personally prepare images for uploading. I also wrote an email to Winston at modelshipbuilder offering to write an article. I do not have a college degree in Graphics. I only have about 15+ years to contribute from my knowledge. I know that some of you may know more than I do on the subject, but my motive is always for the newcomer and someone that might not have a firm grip on it and want to know more. Trying to find info on this subject is rare. But I would like to share what I do know.
Topics would be like:
1) What kind of camera do I really need?
2) Lighting and backgrounds.
3) What are camera pixels, image sizes, file sizes, and what all that means?
4) How to prep your photos for uploading for forums which includes image processing, compression techniques, etc.
5) Do I really need graphic software, and what all is out there from free to purchase.
Donnie
sounds good to me.
BTW here is a link to the build log of the "Far east " version of the kit. You will need google translate as its all in Chinese and the actual translation makes very little sense however the images say it all.
There are other "Far east" logs....
https://translate.googleusercontent.com/translate_c?depth=1&hl=en&prev=search&rurl=translate.google.com.au&sl=zh-CN&sp=nmt4&u=http://www.4hmodel.com/forum.php%3Fmod%3Dviewthread%26tid%3D26040%26extra%3Dpage%253D1%2526filter%253Dtypeid%2526typeid%253D68&usg=ALkJrhgZ_XGbywQ5drs7AFJve9mFmociKA
The site is the actual kit makers ref site.
thank you Donnie. This is a great forum and you have a great build long with a very humble attitude.
Many new members have come across here in recent times to support your forum and we are most grateful.
Many new members have come across here in recent times to support your forum and we are most grateful.
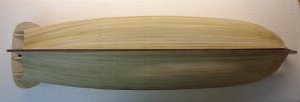
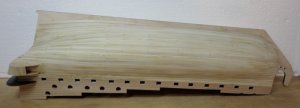
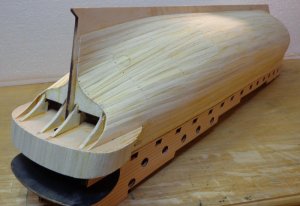
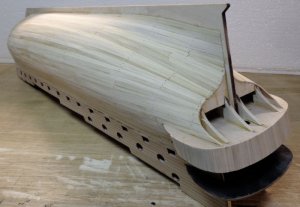
Yea, I just sort of found out about the china kit when I ordered this one I have. The China version is several inches longer too. It is really nice kit as far as I can tell. Well, I have finally got the first layer of planking done. I do not have any wood filler on this yet. I am not sure if I need to do that or not. A few more Laser cut pieces will extend down into the hull, so some places will be covered up anyways.
Last edited:
Superb job on the planking.
Looks brilliant
Looks brilliant
Adding the lower laser cut gun port strips. Yes, I know.... a lot of pins. But, the pins are not actually sticking into laser cut piece. The are sticking through the base hull and base of pins are holding the laser cut piece. Now, an ugly surprise awaits me. I am going to cut out the rest of the Gun Port openings and see how the false cannons fit....that is the displacement of the 10 x 10 balsa cannon support strips.
Last edited:
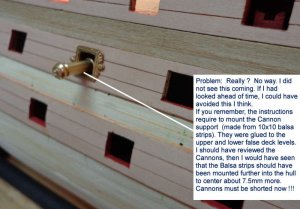
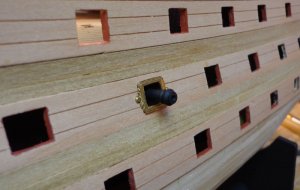
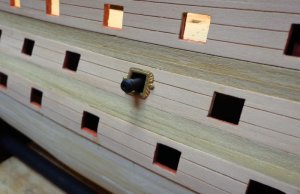
Ok, here is the UGLY surprise. The False cannons protrude WAY out beyond the Frames. I knew I should have gotten those Cannons out and seen how long they were. But, I was trusting the instructions to mount the Cannon Support Strips in the position as were in the instructions. When I insert the Cannon stump into the frame opening, the rear of the Cannon hits the "backwall" of the cannon supports strips. The strips should have been mounted at least about 7.5 mm further into the ships body (to the center of hull) to accommodate the extra length of cannons.
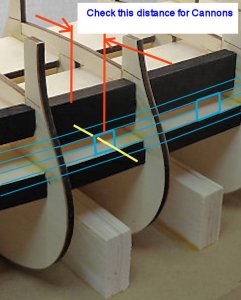
However, in order for EACH cannon to fit correctly, EACH cannon support strip would have had to be custom fitted. That means a lot of mocking up of estimating about where the cannon tip was going to line up to the port frame WITHOUT any planking, etc. So, in this case, what I am going to have to do is get my lathe out and remove about 7mm of length from each cannon. This is not all bad, because I can now at least use the extra length to customize the length of each cannon to fit just right. So, all is not lost.
Here is a graphic that I posted earlier in my log so that when readers see it, they will be warned. Ok, here is a graphic of the best I could do (time permitting) to demonstrate what happened. I re posted this same info near the beginning of my log to help other to detour this problem. Oh, well, it is what it is...as I say.
Last edited:
Hi Donnie,I don't see any problem here,if you check many master builders ship the cannons are sticking out as much if not more then yours,so I would say don't worry about it.The planking looks superb!
Hi Donnie, I don't think it would be a good idea to trim the gun barrels, it shows the gun fully 'run out'. Study a gun in its carriage and see how much of the barrel protrudes beyond the carriage. When the guns were run out the front of the carriage was hard up against the side of the ship. From drawings I've seen, about 2/3 of the gun is forward of the carriage.
Regards
Eric
Regards
Eric
Ok guys... I was thinking - are you all serious ? Really ? I guess I need to do more studying - my ignorance again shows forth !!! But....it just doesn't look right - but I take your word for it and I will look into this matter just for the sake of it. (not that I do not believe you all - I am just totally unaware).
Donnie
Donnie
Last edited:
hahahaha, Donnie, don't put yourself down.
There is a saying, which is now classed as a proverb - "Where ignorance is bliss, 'tis folly to be wise."
Meaning - Lack of knowledge results in happiness; it is more comfortable not to know certain things.
Regards
Eric
PS. a friendly poke in the ribs.
There is a saying, which is now classed as a proverb - "Where ignorance is bliss, 'tis folly to be wise."
Meaning - Lack of knowledge results in happiness; it is more comfortable not to know certain things.
Regards
Eric
PS. a friendly poke in the ribs.
I hear ya Eric !!
Thanks to you and Zoltan.
Thanks to you and Zoltan.
It all looks great, Donnie! Amazing craftsmanship!


