Jan,
Getting there! - Your log will be a "must go to" when I get there - Thanks for sharing your log including so many details
That is great, you guys made my day.Yes Jan I have already bookmarked a few of your post too. Thanks a million!
Jan
 |
As a way to introduce our brass coins to the community, we will raffle off a free coin during the month of August. Follow link ABOVE for instructions for entering. |
 |
 |
The beloved Ships in Scale Magazine is back and charting a new course for 2026! Discover new skills, new techniques, and new inspirations in every issue. NOTE THAT OUR FIRST ISSUE WILL BE JAN/FEB 2026 |
 |
Jan,
Getting there! - Your log will be a "must go to" when I get there - Thanks for sharing your log including so many details
That is great, you guys made my day.Yes Jan I have already bookmarked a few of your post too. Thanks a million!
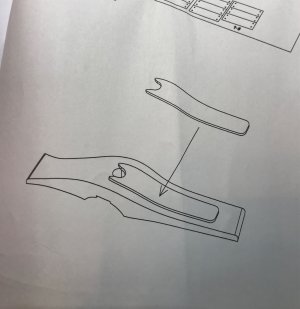
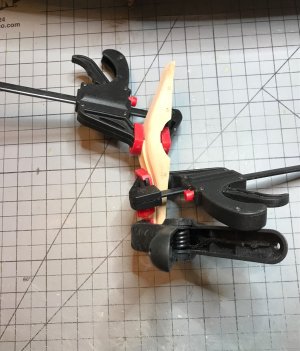
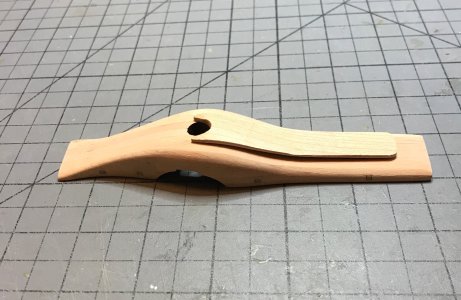
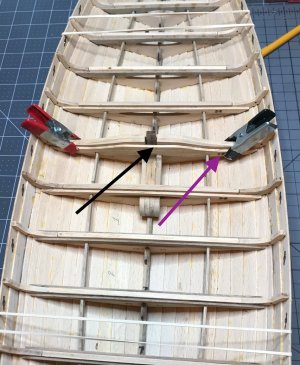
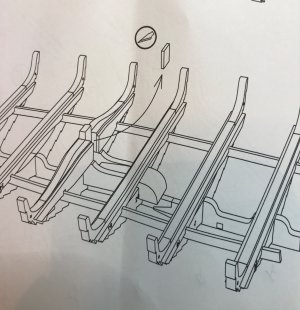

Final dry fit of the Mast step.
View attachment 544288
View attachment 544289
I think I've managed to get this step right. No final gluing until I paint the interior , frames and the complted decks. I've been putting that off since I don't like to paint.
Jan
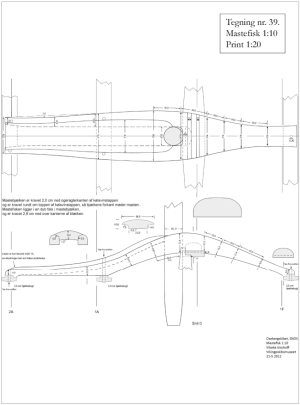
That is interesting, I think that could easily be done with some more shapingVery nice job Jan! I think you'd agree, this looks much better than the original and was worth the effort.
That said, it looks like, even in his attempt to make a more scale-like mast partner, Pavel still took some artistic liberties. As you can see from Dr. Bischoff's dissertation below, the mast partner ended at the biti and did not extend beyond them. Additionally, the portion forward of the mast is significantly thinner.
View attachment 544299
Hi Paul, that was an incredible amount of char removal and a long morning of sanding.I can't speak to the accuracy of placement or design here - but that is a fine looking work-in-progress Jan!
Good morning Jan. Looking very cool. Going to be a impressive model to display once done. Cheers GrantFinal dry fit of the Mast step.
View attachment 544288
View attachment 544289
I think I've managed to get this step right. No final gluing until I paint the interior , frames and the complted decks. I've been putting that off since I don't like to paint.
Jan
That is a very nice update of the mast step, Jan.Final dry fit of the Mast step.
View attachment 544288
View attachment 544289
I think I've managed to get this step right. No final gluing until I paint the interior , frames and the complted decks. I've been putting that off since I don't like to paint.
Jan
Pavel's upgrade made that project easier, I didn't have to glue all the odd pieces together to form that piece.That is a very nice update of the mast step, Jan.
Yup, there is a lot of that with this kit.Interesting build Jan…a build within a build?
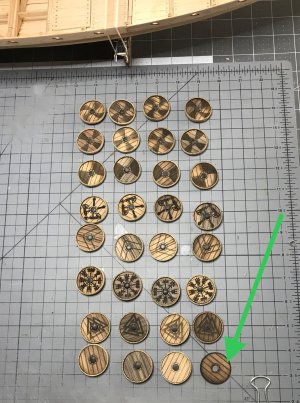
Jan,Little bit of morning humor.
View attachment 545180
Thirty two shields ready for the paint shop, oops, only thirty one (Green arrow). While removing the round hoops that are glued to the front of the shields one of them popped out and fell into the "Black Hole" under my workbench. Not a problem, the plans show thirty shields, fifteen to a side mounted on the top rail. So I have two spares, hmm, one spare
Jan


Jan,
Nice - do those shield hoops come with the kit - metal or plastic? And, are you also going to make/add the hand holding straps?
I may have already mentioned that I finally received Dr. Bischoff's dissertation The Oseberg Ship. It will become invaluable along with Pavel's excellent kit.
Oh and your log
Much looking forward to leaving the 1600 hundreds - been there three times. haha
The hoops are Laser cut and included in the kit and fit on the outside of the shields. Pavel's kit also includes the hand holding straps. I found that to get a good fit on those I squared the litte plastic hand shield insert edges. I could have filed the notch in hand holding straps a bit wider but choose not to. It was a choice of one or the other.Nice - do those shield hoops come with the kit - metal or plastic? And, are you also going to make/add the hand holding straps?
Good morning Jan......That black hole......Little bit of morning humor.
View attachment 545180
Thirty two shields ready for the paint shop, oops, only thirty one (Green arrow). While removing the round hoops that are glued to the front of the shields one of them popped out and fell into the "Black Hole" under my workbench. Not a problem, the plans show thirty shields, fifteen to a side mounted on the top rail. So I have two spares, hmm, one spare
Jan
Yup, I think you ae spot on.Good morning Jan......That black hole....... I think Pavel just knew some of these shields are of the disappearing variety. Cheers Grant
