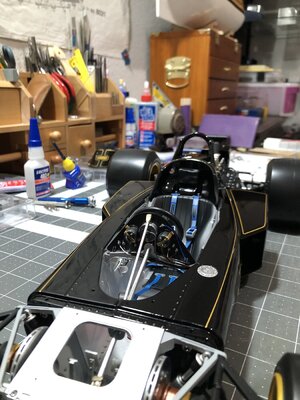
-

Win a Free Custom Engraved Brass Coin!!!
As a way to introduce our brass coins to the community, we will raffle off a free coin during the month of August. Follow link ABOVE for instructions for entering.
-

PRE-ORDER SHIPS IN SCALE TODAY!
The beloved Ships in Scale Magazine is back and charting a new course for 2026!
Discover new skills, new techniques, and new inspirations in every issue.
NOTE THAT OUR FIRST ISSUE WILL BE JAN/FEB 2026
- Home
- Forums
- Ships of Scale Build Logs
- Super Detailing Static Models / Other Genres
- Historical Trailways, Guns, Aircraft, and Cars
You are using an out of date browser. It may not display this or other websites correctly.
You should upgrade or use an alternative browser.
You should upgrade or use an alternative browser.
Good morning Dean. I don’t know why your posts stopped reflecting on my reminders. Anyway played some catch up. Wow she transformed from an engine to a go cart on steroids(That era of exhilarating F1). Impressive. Cheers GrantNow that the car will remain upright for the remainder of the build, it was time to add the seat belts!
Page 30 is dedicated to the seat belts…
View attachment 378877
Page 29 had all the part numbers…so gathering the parts first…
View attachment 378878
3 different belt sizes, 10 buckles, and 1 center latch. The instructions give the lengths for each belt, but I just made them to fit, not trusting anything!
Next I made the individual belt assemblies, 2 for the waist, 2 for the shoulders, and 2 leg constraint belts (just straight belt). The leg belts wrapped around the drivers legs and were adjusted at the additional buckle on the waist belt (smaller black belt). An extra measure to keep the driver from being thrown from the car.
View attachment 378879
Next was adding the decals that simulate the extra stitching on the upper belts and the logo with scaled stitching on the edges.
Problem… decals don’t stick to ribbon, so I painted the top surface of the belt with matte polyurethane to create a surface the decals can adhere to. Next they were applied, much frustration as they are so thin it’s like picking up a wet noodle and they just fold on themselves…sigh! But I have applied tiny decals before and I persevered! Then I put a coat of polyurethane on top of them to seal them to the belts.
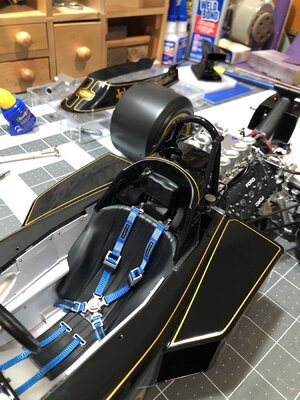
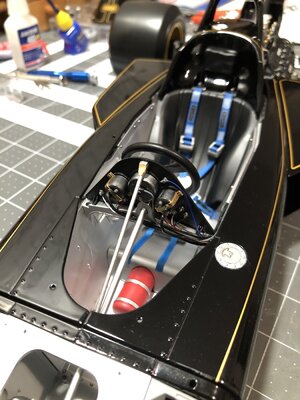
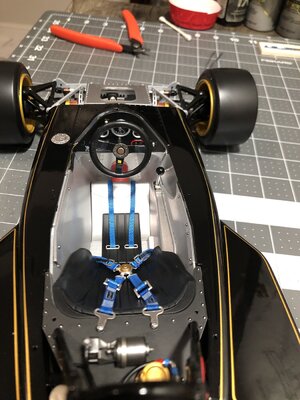
Then finally assembly began. I don’t like straight and perfect looking belts. The goal is to have them drape and not look stiff at scale. This required some clear PVA glue underneath to stick them down where necessary to look more natural.
I am very happy with the end result, as I think it looks very natural, not too perfect and not too stiff.
View attachment 378880View attachment 378881View attachment 378882
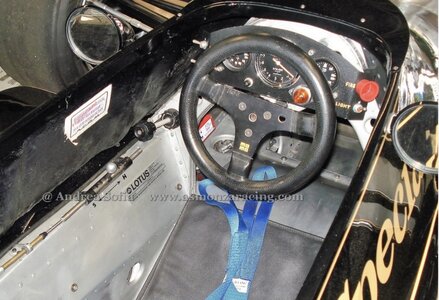
Oh and I decided to go ahead and detail the steering wheel and add it now, instead of 2 pages later.
I painted the center ring and bolts, then dry brushed the wheel lightly with grey to look a little worn and separate it from the black on the spokes. Finally the tiny Momo logo decal was added.
View attachment 378885
Well that’s it for this update! Happy modeling! Happy life!
Good morning Dean. Did you ever make progress with you Brabham? It was one of my least favourite F1 cars never really living up to expectations in the 1970’s. Even Nelson Piquet championship car in the early 80’s looked like a pointed battering ram - must be the Aussie influence  . Cheers Grant
 . Cheers Grant
Thanks Grant! I usually don’t rely on reminders, I just go through the different sections and look for updated posts.Good morning Dean. I don’t know why your posts stopped reflecting on my reminders. Anyway played some catch up. Wow she transformed from an engine to a go cart on steroids(That era of exhilarating F1). Impressive. Cheers Grant
Hey Grant, I have not started the Brabham yet. I got it because it was an F1 car in the large 1/12 scale by Tamiya. But I also got a Ferrari and will probably get the Lotus 78 and Renualt turbo in 1/12 by Tamiya.Good morning Dean. Did you ever make progress with you Brabham? It was one of my least favourite F1 cars never really living up to expectations in the 1970’s. Even Nelson Piquet championship car in the early 80’s looked like a pointed battering ram - must be the Aussie influence. Cheers Grant
This kit got me side tracked…lol. Going back to the Norske Love once I finish.
Eventually I will build my airplanes and cars.
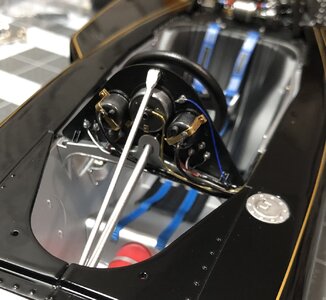
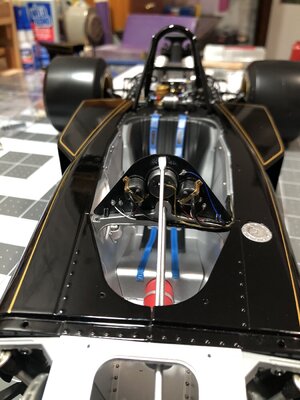
I started the instrument panel, it has the gage pods in the back and the terminal posts for the switches. But that is where the detail stops, there is no provision in the kit for wiring on it.
So I decided to add wires. At scale it’s really tough! I used .015” wire and drilled holes in the terminal posts by hand and used CA to hold the wires in place. First I painted the back, as everything was black plastic.
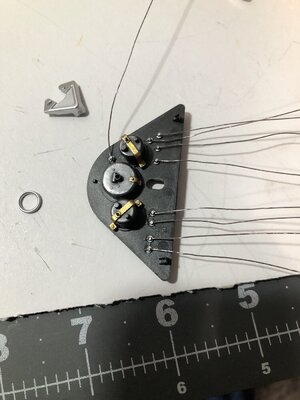
The gage pods will use tubing when I get to them.
Next I painted the wires to look like insulation, and then I had to figure out a way to make electrical tape at scale. I ended up cutting Teflon tape into thin strips and wrapping it around the wires to bundle them. Then I painted it flat black. I think it looks correct for scale. But very tedious work! What did I get myself into?
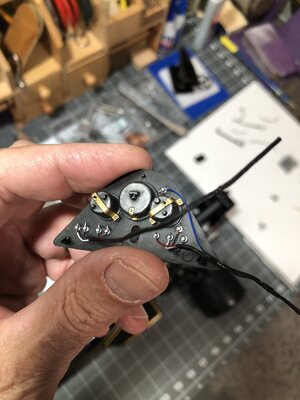
This is where I am at so far!
Then I painted the switches on the front and added gage decals and bezels…
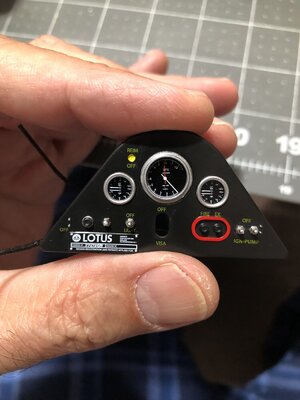
I will update once I get it finished. See you then…
So I decided to add wires. At scale it’s really tough! I used .015” wire and drilled holes in the terminal posts by hand and used CA to hold the wires in place. First I painted the back, as everything was black plastic.

The gage pods will use tubing when I get to them.
Next I painted the wires to look like insulation, and then I had to figure out a way to make electrical tape at scale. I ended up cutting Teflon tape into thin strips and wrapping it around the wires to bundle them. Then I painted it flat black. I think it looks correct for scale. But very tedious work! What did I get myself into?


This is where I am at so far!
Then I painted the switches on the front and added gage decals and bezels…

I will update once I get it finished. See you then…
Last edited:
Kurt Konrath
Kurt Konrath
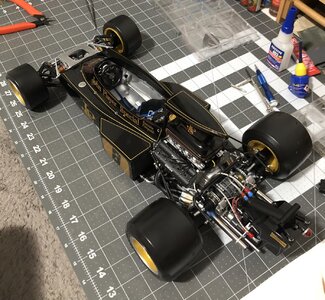
Starting to look like a real racer now!After skipping the seat belts, it was time to prepare the motor assy to join the body.
View attachment 378710
Then it was time to join the two…and I added another page since I had it upside down and added the lower body panel.
View attachment 378711
So it was time and the struts that connect to the body have to be lined up and at the same time the shifter linkage…
View attachment 378712
Then the attachment…
View attachment 378713
I had to be creative so I didn’t break anything, so I used packing foam…
View attachment 378714
Then I attached the bottom panel, but forgot to take a pic. Also attached the lower hoses for the radiators.
View attachment 378715View attachment 378716
Then I attached the 4 hoses that go to the motor from the components at the back of the body…
View attachment 378717View attachment 378718
It looks so realistic already! Getting excited, so put on air box for a few pics…
View attachment 378719View attachment 378720View attachment 378721
And another comparison with my 1/32 scale Lotus 72…
View attachment 378722
Next I will start on the seat belts, and I am skipping ahead to make the wheels so I can get it off the bench!
At that point I will be 7 pages away from finishing! Then it’s back to the Norske Love!
Thanks Kurt, it’s getting there!Starting to look like a real racer now!
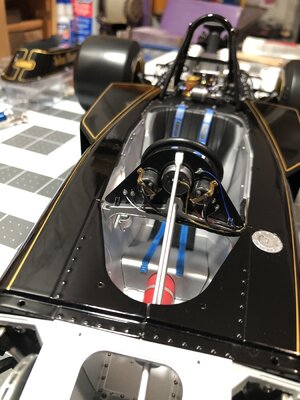
Well I pushed through the instrument panel wiring and then put the support brace on. And then put wheel back on (it’s not glued).
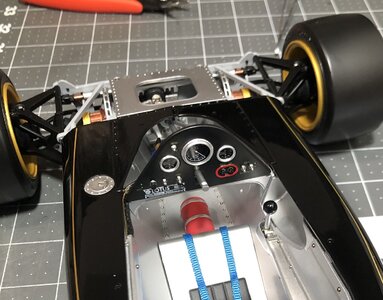
Then I realized the upper left circle was not a light, after looking at a reference photo I saw there is supposed to be another toggle switch! So I scratch built one and added it. Then I decided to be brave and paint the silver bezels around the fire extinguisher buttons.
So the instrument panel is finished on the front as well…
Then I decided to make sure the fairing fit…
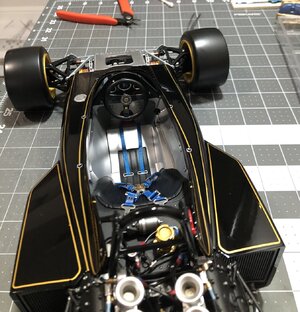
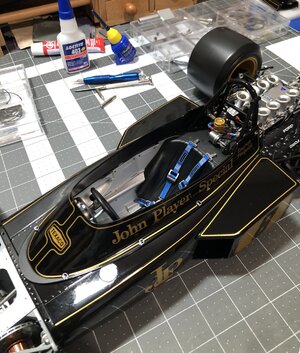
Then I figured I would take a few photos with the air box added too!
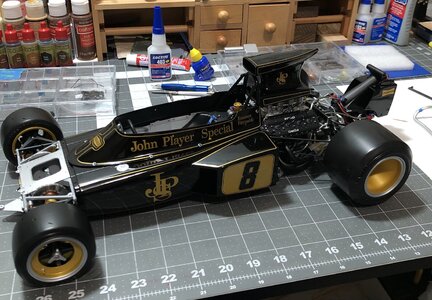
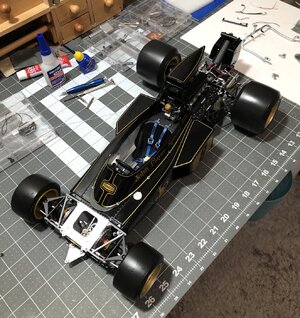
See you next time…


Then I realized the upper left circle was not a light, after looking at a reference photo I saw there is supposed to be another toggle switch! So I scratch built one and added it. Then I decided to be brave and paint the silver bezels around the fire extinguisher buttons.
So the instrument panel is finished on the front as well…


Then I decided to make sure the fairing fit…


Then I figured I would take a few photos with the air box added too!


See you next time…
Last edited:
Last edited:
Very nice model Dean, the details on these pocher kits are outstanding. Looking at the pictures, I notice the the front brakes were inbord. So I can probably safely assume that weight (and safety)was not an issue back in the 70's. But, I must admit it does make for a very cool design. If the designer was anything like I was, I can imagine the brainstorm they had on this.
Chuck the designer:
Hey boss, why don't we put the disk inside the car and add jackshafts from the disk to the wheels?
Boss: would't that be heavier? And what happens if a shaft brake?
Chuck the designer:
Hmm, you're right but just think how cool it would look!
Boss: yeah! It would look way cool, let's do it
hi five!!!
Chuck the designer:
Hey boss, why don't we put the disk inside the car and add jackshafts from the disk to the wheels?
Boss: would't that be heavier? And what happens if a shaft brake?
Chuck the designer:
Hmm, you're right but just think how cool it would look!
Boss: yeah! It would look way cool, let's do it
hi five!!!
Thank you Francois! Adding the wiring to the instrument panel was a task, even at 1/8 scale, I imagine it would be much worse in 1/12!Very nice model Dean, the details on these pocher kits are outstanding. Looking at the pictures, I notice the the front brakes were inbord. So I can probably safely assume that weight (and safety)was not an issue back in the 70's. But, I must admit it does make for a very cool design. If the designer was anything like I was, I can imagine the brainstorm they had on this.
Chuck the designer:
Hey boss, why don't we put the disk inside the car and add jackshafts from the disk to the wheels?
Boss: would't that be heavier? And what happens if a shaft brake?
Chuck the designer:
Hmm, you're right but just think how cool it would look!
Boss: yeah! It would look way cool, let's do it
hi five!!!
As far as the design logic for the inboard brakes, I can’t explain it any better than this:
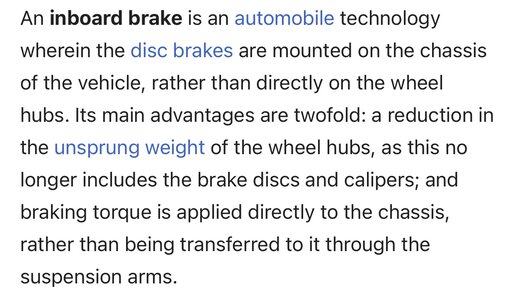
Therefore, it improves the suspension performance by reducing the unsprung weight, and it also reduces the torque and stress loads on the A-arms and linkage. So it is an improvement that would not have any adverse effects whatsoever.
Furthermore, handling wise, independent suspension is always better than a live axle or straight axle.
And finally, axle shafts are made from hardened steel to increase the yield strength to handle the high loads they are subjected to. If the rear shafts can handle the torque loads, we can safely assume the front shafts, being made of the same material and seeing less torque, are equally safe.
Last edited:
Well I pushed through the instrument panel wiring and then put the support brace on. And then put wheel back on (it’s not glued).
View attachment 379181View attachment 379182
Then I realized the upper left circle was not a light, after looking at a reference photo I saw there is supposed to be another toggle switch! So I scratch built one and added it. Then I decided to be brave and paint the silver bezels around the fire extinguisher buttons.
So the instrument panel is finished on the front as well…
View attachment 379186View attachment 379187
Then I decided to make sure the fairing fit…
View attachment 379188View attachment 379189
Then I figured I would take a few photos with the air box added too!
View attachment 379190View attachment 379191View attachment 379192
See you next time…
The car looks real. Lots of details.
Good morning Dean. Awesome. This Lotus has its hooks in you deep and secureOne last thing…lol…I have to stop looking at things! But…I didn’t like the tack cable being gold, it looked like tubing. So I painted it grey.
View attachment 379209
View attachment 379212
No more on the panel, moving to the upper radiator hose assembly!
Thank you Kurt!The car looks real. Lots of details.
Thanks Grant! Yes I am hooked!Good morning Dean. Awesome. This Lotus has its hooks in you deep and secure. Cheers Grant
Kurt Konrath
Kurt Konrath
Well he has a good safety harness installed to keep him in the ride for the whole trip down the road.
Sorry, wrong post
Last edited:


