I just caught up Dean, you're simply the best at fine detail work. I think if you could pick the correct angle of just the motor and bare chassis, superimpose it on the right background, it just might be very hard to distinguish between the real thing.
-

Win a Free Custom Engraved Brass Coin!!!
As a way to introduce our brass coins to the community, we will raffle off a free coin during the month of August. Follow link ABOVE for instructions for entering.
-

PRE-ORDER SHIPS IN SCALE TODAY!
The beloved Ships in Scale Magazine is back and charting a new course for 2026!
Discover new skills, new techniques, and new inspirations in every issue.
NOTE THAT OUR FIRST ISSUE WILL BE JAN/FEB 2026
- Home
- Forums
- Ships of Scale Build Logs
- Super Detailing Static Models / Other Genres
- Historical Trailways, Guns, Aircraft, and Cars
You are using an out of date browser. It may not display this or other websites correctly.
You should upgrade or use an alternative browser.
You should upgrade or use an alternative browser.
Thank you Daniel, I appreciate that!
Thanks Mark! I would love to drive one!Very realistic Dean, makes you want to get in and drive the thing!
FYI - For those of you who have been following, it has come to my attention through reports by many, that the build log updates are not being sent out to followers. So I advise you to manually check in on builds of your interest, as obviously we can’t count on being notified. Just a heads up!
True storyI just caught up Dean, you're simply the best at fine detail work. I think if you could pick the correct angle of just the motor and bare chassis, superimpose it on the right background, it just might be very hard to distinguish between the real thing.
Good morning Dean. I don’t think I would get out the pit lane safely if I climbed in one of those.Thanks Mark! I would love to drive one!
Thanks Grant!True story
You might surprise yourself!Good morning Dean. I don’t think I would get out the pit lane safely if I climbed in one of those..Cheers Grant
I finished the upper radiator hose assembly…
As provided it was incorrect, there were two triangular pieces attached to it that are actually part of the motor. So I cut those off and will be attaching them separately after modifying them to look correct.
Here is the hose assembly after cutting them off and sanding…
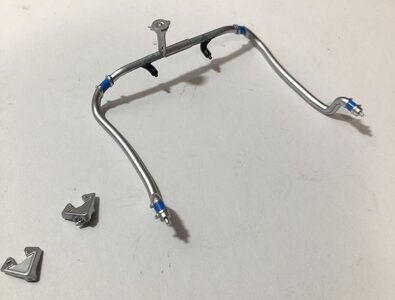
Also next to the fill neck is a raised section that should actually be a hose with clamps. So I painted it black and added hose clamps I made. And for some reason they give you two black pieces to glue on that will connect to the motor, so those have to be painted. The other ends connect to the top of the radiators. So you have to glue and stab 4 connections at once after snaking them in between the struts. Fun!
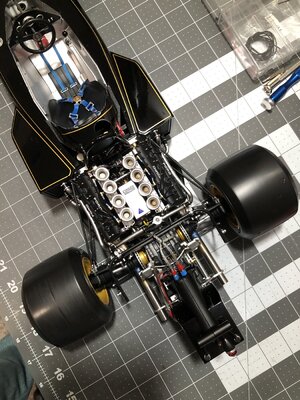
I also painted the other hoses black.
On the car…
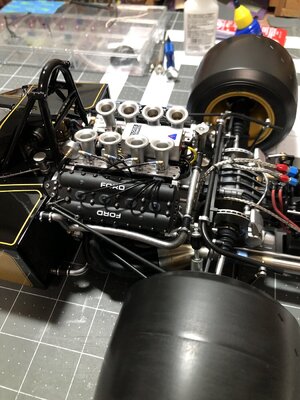
Now the triangular piece…
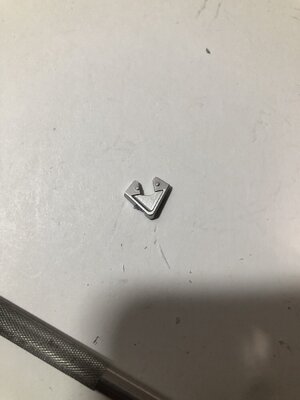
There are two, one per side. They should look like this…
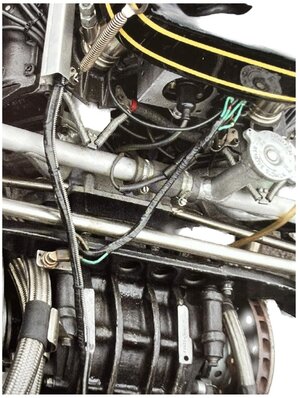
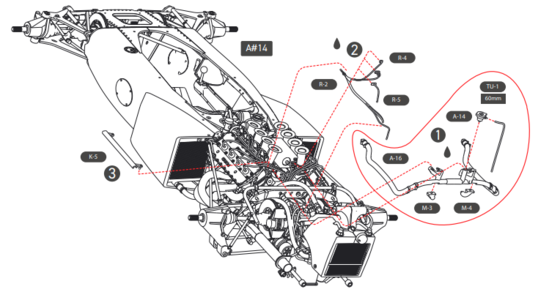
As you can see in the upper left, it is part of the fuel injection slide, and should have springs and the end keeper plate.
I started modifying it and put one on the motor…
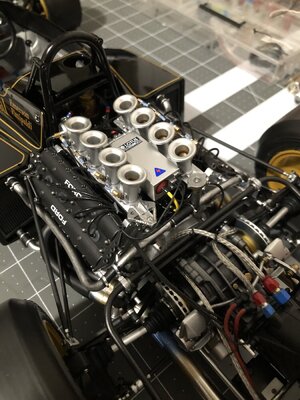
I am not completely happy with it and will do some more tweaking on it. Then I will make the other side. I also started adding the wiring to the ignition box…just getting started with those…
See you next time.
As provided it was incorrect, there were two triangular pieces attached to it that are actually part of the motor. So I cut those off and will be attaching them separately after modifying them to look correct.
Here is the hose assembly after cutting them off and sanding…

Also next to the fill neck is a raised section that should actually be a hose with clamps. So I painted it black and added hose clamps I made. And for some reason they give you two black pieces to glue on that will connect to the motor, so those have to be painted. The other ends connect to the top of the radiators. So you have to glue and stab 4 connections at once after snaking them in between the struts. Fun!
I also painted the other hoses black.
On the car…


Now the triangular piece…

There are two, one per side. They should look like this…

As you can see in the upper left, it is part of the fuel injection slide, and should have springs and the end keeper plate.
I started modifying it and put one on the motor…

I am not completely happy with it and will do some more tweaking on it. Then I will make the other side. I also started adding the wiring to the ignition box…just getting started with those…
See you next time.
Last edited:
Hi Dean,
I'm enjoying quietly following along - your work here is on par with the excellence we have come to expect from you. My respect. A question: what's your plan for the tires?
I'm enjoying quietly following along - your work here is on par with the excellence we have come to expect from you. My respect. A question: what's your plan for the tires?
- Joined
- Mar 1, 2022
- Messages
- 702
- Points
- 308

Looks like it goes uder the "corpo farfallato" (just have no idea of what's the english for)
Thanks Paul! I plan to take them off and sand them with a fine sandpaper to get rid of the shine on the road surface. And then I will most likely paint the letters white. I just put them on for now to get it off the work table. 
- Joined
- Mar 1, 2022
- Messages
- 702
- Points
- 308

Very impressive modification to the triangular piece Dean.I finished the upper radiator hose assembly…
As provided it was incorrect, there were two triangular pieces attached to it that are actually part of the motor. So I cut those off and will be attaching them separately after modifying them to look correct.
Here is the hose assembly after cutting them off and sanding…
View attachment 379581
Also next to the fill neck it a raised section that should actually be a hose with clamps. So I painted it black and added hose clamps I made. And for some reason they give you two black pieces to glue on that will connect to the motor. The other ends connect to the top of the radiators. So you have to glue and stab 4 connections at once after snaking them in between the struts. Fun!
I also painted the other hoses black.
On the car…
View attachment 379582View attachment 379583
Now the triangular piece…
View attachment 379584
There are two, one per side. They should look like this…
View attachment 379585
As you can see in the upper left, it is part of the fuel injection slide, and should have springs and the end keeper plate.
I started modifying it and put one on the motor…
View attachment 379586
I am not completely happy with it and will do some more tweaking on it. Then I will make the other side. I also started adding the wiring to the ignition box…just getting started with those…
See you next time.
That translates to throttle body in English, however it is for the "fuel injection" ...iniezione di carburanteLooks like it goes uder the "corpo farfallato" (just have no idea of what's the english for)
Thank you Daniel, it needs some final detail painting to be more convincing. But I am on it...Very impressive modification to the triangular piece Dean.

This is a F1 car developed in 1970!
Back when race cars were just as manly as the men who dared drive them!This is a F1 car developed in 1970!
Amen! No power steering ( I refer to it as Armstrong steeringBack when race cars were just as manly as the men who dared drive them!
 ), no traction control, etc. It took guts and skill to drive one to the limits!


