Dean - -- Brilliant work!!
-

Win a Free Custom Engraved Brass Coin!!!
As a way to introduce our brass coins to the community, we will raffle off a free coin during the month of August. Follow link ABOVE for instructions for entering.
-

PRE-ORDER SHIPS IN SCALE TODAY!
The beloved Ships in Scale Magazine is back and charting a new course for 2026!
Discover new skills, new techniques, and new inspirations in every issue.
NOTE THAT OUR FIRST ISSUE WILL BE JAN/FEB 2026
- Home
- Forums
- Ships of Scale Build Logs
- Super Detailing Static Models / Other Genres
- Historical Trailways, Guns, Aircraft, and Cars
You are using an out of date browser. It may not display this or other websites correctly.
You should upgrade or use an alternative browser.
You should upgrade or use an alternative browser.
Thank you John! Can't wait until the missing part arrives, so I can finally get all of this put together!Dean - -- Brilliant work!!
Thank you Peter! No stays, just control arms!Just crawling in this corner of SOS finding a gem that's being build. Wow, just wow.....
Just wondering where you're going to place the stays and the ratlines.
I have staged all the parts up to page 21, they are all ready for assembly…
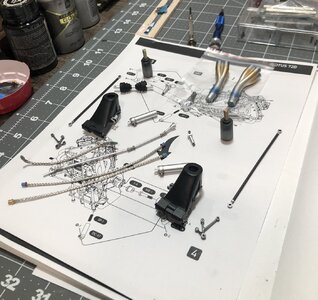
There are a few parts not pictured that have been painted as well, and are drying.
I also tested the fit of the rubber boot and axle shaft on the rear rotor hub…
Then I assembled the air box for the motor and test fit…
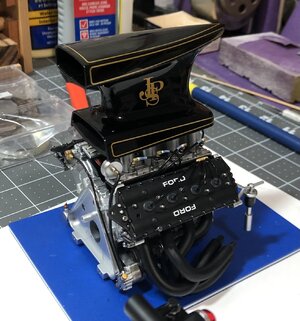
I continue to work on moving forward with whatever I can, whether it’s getting parts ready or making sub assemblies for steps coming up.

There are a few parts not pictured that have been painted as well, and are drying.
I also tested the fit of the rubber boot and axle shaft on the rear rotor hub…

Then I assembled the air box for the motor and test fit…

I continue to work on moving forward with whatever I can, whether it’s getting parts ready or making sub assemblies for steps coming up.
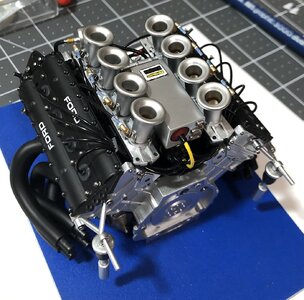
Well…I had an episode of model madness! 
I decided I had to paint the wire looms grey, because brass didn’t look right and black would make them disappear. But without getting paint on the plug wires or surrounding parts. And then I decided because I saw in a reference picture that the coil wire boot on the ignition box was red and the coil wire was yellow, that’s how mine should be. It would have been easier to paint prior to assembly, and the tiny rubber hose doesn’t want paint to stick to it willingly. In addition it would need clear coat and then have to be reassembled with tweezers without scraping or scratching the paint off. What could go wrong there?
That my friends is model madness!

Last edited:
Also her: it’s in the details! A little madness is not bad at all, Dean.Well…I had an episode of model madness!
I decided I had to paint the wire looms grey, because brass didn’t look right and black would make them disappear. But without getting paint on the plug wires or surrounding parts. And then I decided because I saw in a reference picture that the coil wire boot on the ignition box was red and the coil wire was yellow, that’s how mine should be. It would have been easier to paint prior to assembly, and the tiny rubber hose doesn’t want paint to stick to it willingly. In addition it would need clear coat and then have to be reassembled with tweezers without scraping or scratching the paint off. What could go wrong there?
That my friends is model madness!
View attachment 377717
Regards, Peter
Thanks Peter, I knew you would understand!Also her: it’s in the details! A little madness is not bad at all, Dean.
Regards, Peter

Hi Dean,
Looks fantastic!
This is also my favourite F1 car of all time! I built the Tamiya 1/12 kit with Ronnie Peterson markings back 10 years ago. (posted a log on Blogger : http://f1lotusbuild.blogspot.com/)
Looking forward to seeing the finished model!
Cheers,
Peter
Looks fantastic!
This is also my favourite F1 car of all time! I built the Tamiya 1/12 kit with Ronnie Peterson markings back 10 years ago. (posted a log on Blogger : http://f1lotusbuild.blogspot.com/)
Looking forward to seeing the finished model!
Cheers,
Peter
Thank you Peter! Welcome to pit row.Hi Dean,
Looks fantastic!
This is also my favourite F1 car of all time! I built the Tamiya 1/12 kit with Ronnie Peterson markings back 10 years ago. (posted a log on Blogger : http://f1lotusbuild.blogspot.com/)
Looking forward to seeing the finished model!
Cheers,
Peter
I will definitely look at your build.
I think I am going to order the Tamiya 1/12 Lotus 78 too. I currently have the Tamiya Brabham BT44B in 1/12 and a Ferrari 126C2 in 1/20, in waiting. I may get my hands on the Renault turbo in 1/12 as well. Just love the classic F1 cars! I have a small collection of them (17) in 1/32 scale. So this is my first F1 model and I am already getting addicted!

Last edited:
Thanks!
That's a lot of cars in the pipeline.
I have only built the 72 Lotus so far as a favourite from my childhood back in Sweden, where teaching would stop and the TV would be rolled in for either of these three competing: Björn Borg, Ingemar Stenmark or Ronnie Peterson.
I also have the 1977 Lotus 78 from Tamiya in 1/20 scale.
Shipmodels and other things have gotten in the way though.
I'd love to try a Pocher model, but I don't have the budget for it unfortunately.
Peter
Well, I am in the middle of a ship build, and I have 2 more model airways WW1 wooden planes to build, 6 plastic airplanes, and a few plastic F1 cars! So once I retire I will have plenty to keep me busy!Thanks!
That's a lot of cars in the pipeline.
I have only built the 72 Lotus so far as a favourite from my childhood back in Sweden, where teaching would stop and the TV would be rolled in for either of these three competing: Björn Borg, Ingemar Stenmark or Ronnie Peterson.
I also have the 1977 Lotus 78 from Tamiya in 1/20 scale.
Shipmodels and other things have gotten in the way though.
I'd love to try a Pocher model, but I don't have the budget for it unfortunately.
Peter

I got the Pocher kit because it was on sell. I had been waiting for it to come out and forgot about it until I got an email from a vendor about a sale…and there it was! Fate was sealed at that moment, could not resist!
Ps - I looked at your build on the Lotus 72, great job! Looks awesome!
Last edited:
Good morning Dean…now that is sexy.I have staged all the parts up to page 21, they are all ready for assembly…
View attachment 377653
There are a few parts not pictured that have been painted as well, and are drying.
I also tested the fit of the rubber boot and axle shaft on the rear rotor hub…
View attachment 377654
Then I assembled the air box for the motor and test fit…
View attachment 377655
I continue to work on moving forward with whatever I can, whether it’s getting parts ready or making sub assemblies for steps coming up.
….without a touch of insanity we would not be doing this hobby. Cheers GrantWell…I had an episode of model madness!
I decided I had to paint the wire looms grey, because brass didn’t look right and black would make them disappear. But without getting paint on the plug wires or surrounding parts. And then I decided because I saw in a reference picture that the coil wire boot on the ignition box was red and the coil wire was yellow, that’s how mine should be. It would have been easier to paint prior to assembly, and the tiny rubber hose doesn’t want paint to stick to it willingly. In addition it would need clear coat and then have to be reassembled with tweezers without scraping or scratching the paint off. What could go wrong there?
That my friends is model madness!
View attachment 377717
Thanks Grant! Yes we have to be a little insane to work with such small parts! When you have to handle and glue a part with tweezers, and paint it with magnifying glasses on...Good morning Dean…now that is sexy.
….without a touch of insanity we would not be doing this hobby. Cheers Grant

Kurt Konrath
Kurt Konrath
It is great when a companies customer service really supports the end user and takes care of problems for their products.
Agreed!It is great when a companies customer service really supports the end user and takes care of problems for their products.
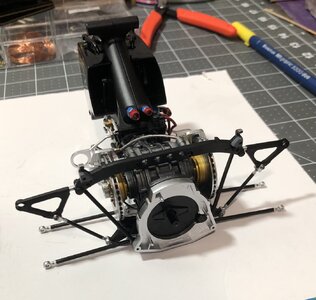
Then it was time to join the two sub assemblies of the motor and rear end…
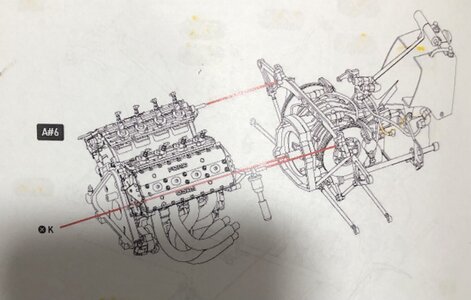
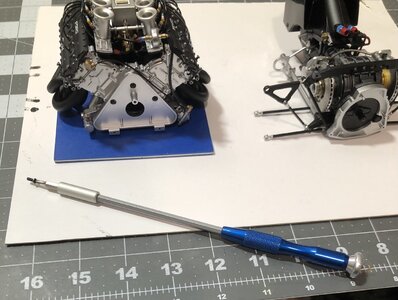
Not as easy as it looks…screw K has to go thru a hole in the back of the motor, with access thru a hole in the front!
Luckily I have an extension and a magnetic tip to hold the screw…still like surgery trying to get the screw in the rear hole without knocking it off the tip of the screwdriver…
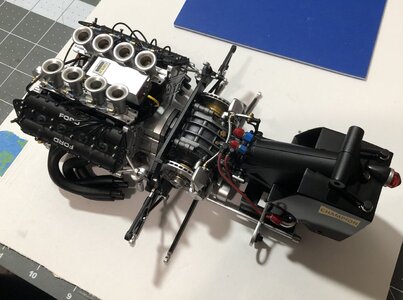
And success at last!

Not as easy as it looks…screw K has to go thru a hole in the back of the motor, with access thru a hole in the front!
Luckily I have an extension and a magnetic tip to hold the screw…still like surgery trying to get the screw in the rear hole without knocking it off the tip of the screwdriver…

And success at last!

Next step…already done while waiting on part! 
Next step…also done…
And the next step too!
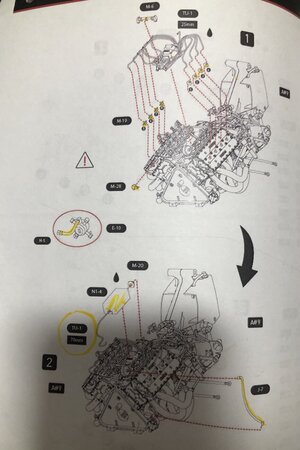
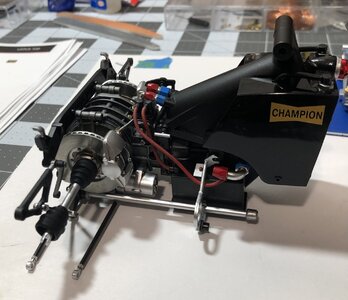
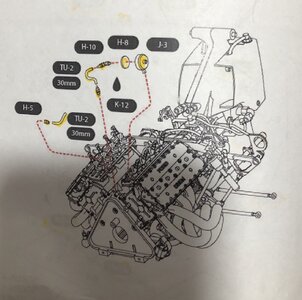
Which put me at this step…adding the hoses and the shifter linkage and housing that attaches to the rear…
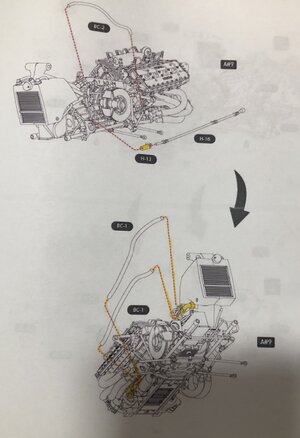
Shifter linkage and housing attach here (lower left)...
And ends here at the front of motor, and will connect to the linkage in the body later…
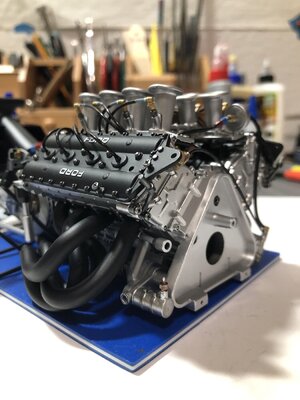
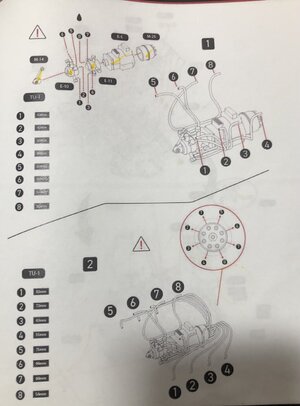
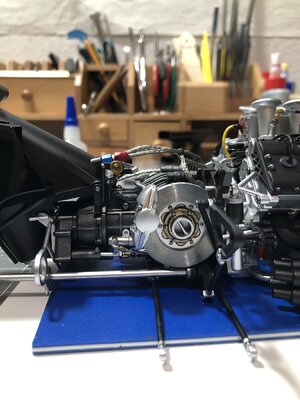
And the hoses were added…I also added tie straps that I made from 1/32” wide strips (1/4” at scale)…
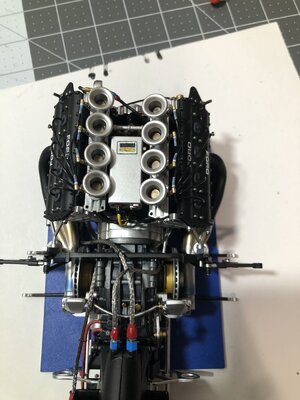
Was a bit tricky trying to bend and keep the braided hoses from flattening out, had to bend and then use needle nose pliers to round again. In the end I think they turned out ok.
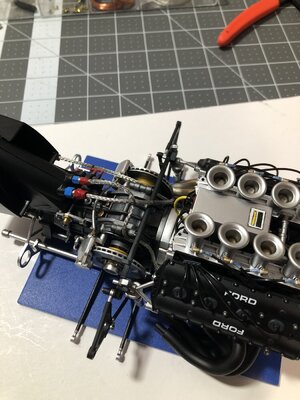

Next step…also done…

And the next step too!

Which put me at this step…adding the hoses and the shifter linkage and housing that attaches to the rear…

Shifter linkage and housing attach here (lower left)...

And ends here at the front of motor, and will connect to the linkage in the body later…

And the hoses were added…I also added tie straps that I made from 1/32” wide strips (1/4” at scale)…

Was a bit tricky trying to bend and keep the braided hoses from flattening out, had to bend and then use needle nose pliers to round again. In the end I think they turned out ok.

Last edited:


