Saint-Philippe 1693-POF to the Monograph by Jean-Claude Lemineur by NMBrook-1/36

A small update and a prelude to what is next.
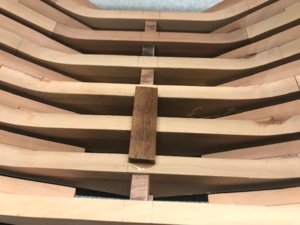
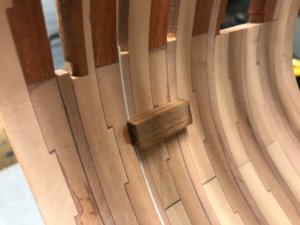
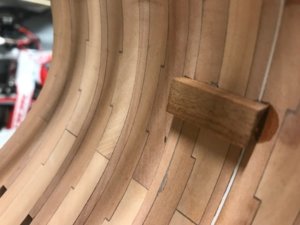
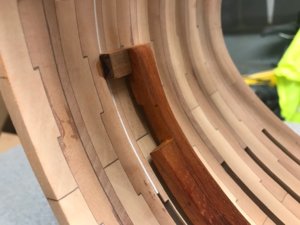
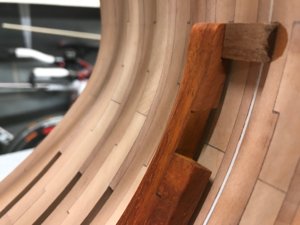
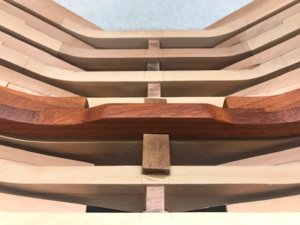
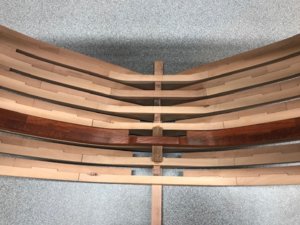
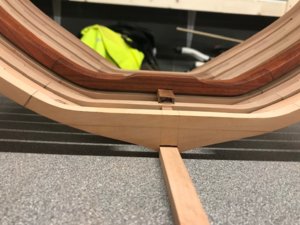
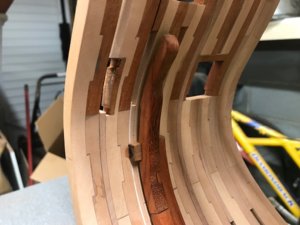
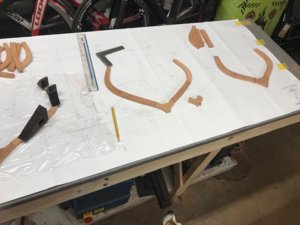
It is my intention to make the rider frames as I go along.These are shown on the frame drawings.I intend to make these oversize apart from the area that touches the floor.If you remember,I milled the top of the floor area on the frames.This gives me a very accurate point of reference inside the hull.The rider frames incorporate an open notch for the deck clamps of the lower gun deck.The principle is that these notches will not only locate the deck clamp but also hold it in place to allow fixing with copper pins and epoxy.
Producing the frames before fitting the hull out with ceiling planking and binding strakes allows the frames to be placed in position and scribed for trimming to allow for planking and strake thickness.This should,in theory give me a snug fit with no gaps.
An added complication is that the upper futtock of these frames penetrates the lower deck and finishes just below the level of the next deck.This section cannot be glued on and will have to be manipulated into place after the lower deck beams are in place.A similar process can be seen in Bernard Frolich's book when building l'Ambiteaux.
I will be build the frames and the complete finishing process will be carried out before installation.This is an idea I have stolen from Narim Maygeldinov,a Russian master modeller.All internal work is built then stripped back down into modules for applying finish.I will also use his finishing technique of four coats of thin cut shellac then a coat of spirit based Polyurethane.Being in broken down into modules facilitates polishing between coats with steel wool.Narim's models have the finish of fine pieces of furniture both inside and out using this technique.The varnish will be thinned and sprayed on using a gun with a 0.5mm nozzle.
My next job is to build the rider frame complete and fully finish it.No finish will be applied to the surface that touches the hull.This will remain ever so slightly oversize to allow small adjustments for the final sanding process.I will also add all the dummy clench bolts.
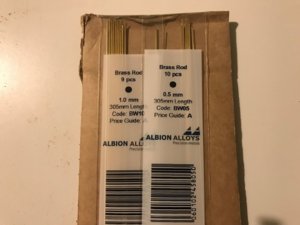
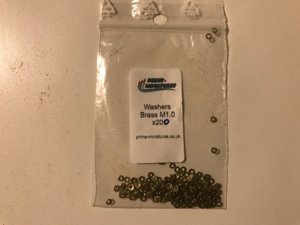
Today I have received the materials for the bolts.This consists of 1mm brass rod that will have a 0.5mm hole drilled through near the top which will take a transverse 0.5mm brass pin.Between this and the frame will be an 1mm internal diameter brass washer.I will make a drilling jig as drilling a 0.5mm hole in a 1mm pin is impossible freehand.I have some Birchwood Casey Brass Black landing tomorrow for blackening these parts.
Just as a side note,I intend all flush fixings to be in natural copper,all clench bolts to be blackened brass.The natural copper is chosen as it is more harmonious to the finished timber hues and I feel will be more aesthetically pleasing.This may change slightly for the hull planking as I can get square brass to represent the nails but not copper.

Kind Regards

Nigel

sp183.jpgsp184.jpg
 
Thanks Jim neither can I;)There is a modeller I know of that is building a great POF model.His moto is treat each part as a model in it's own right.His results speak for themselves.It does make a lot of sense in that one can become bogged down otherwise when looking at the complete picture all the time.On a model like this you are looking at something approaching 100,000 parts!
So yes it will be nice to start to build a collection of finished subassemblies that require the minimum of work to install.
Regarding the rod and washers,the rod is available many many places,just google Albion Alloys.The washers have the web address in the picture.These are sensibly priced compared to somewhere like scale hardware.They need to be as I need a lot of them!They are covering the rider frames and all the knees.

Kind Regards

Nigel
 
Last edited:
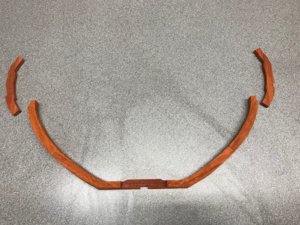
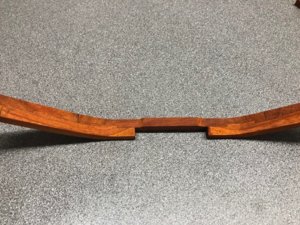
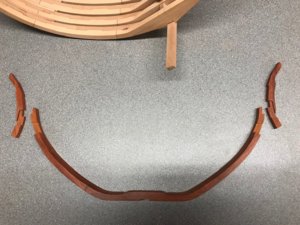
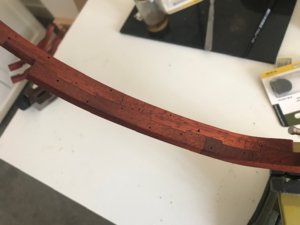
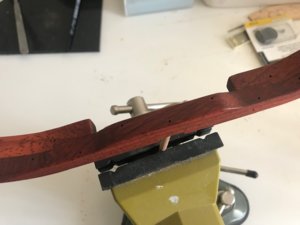
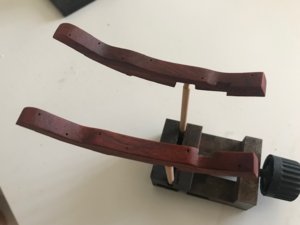
I have done the initial fabrication of the Rider frame.This is in African Red Padauk.The Monograph states that the full interior on this vessel was Red Occre bar the officers quarters,so the full interior will be Padauk bar the decks,which will be Pear.
The upper futtocks are not attached and will not be until much later.These penetrate the lower gun deck.The base has been sanded to the bevel of the floor timbers.
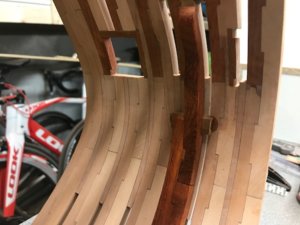
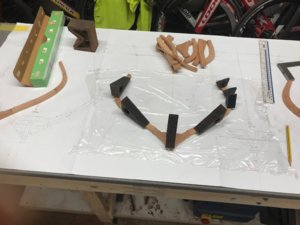
Final pics how the item in location,it will need setting up properly to scribe both sides to follow the hull interior minus the internal planks and strakes (3mm).I will leave a little meat though for final tweaking prior to fitting.

Kind Regards

Nigel

sp185.jpgsp186.jpgsp187.jpgsp188.jpgsp189.jpgsp190.jpg
 
Thank you Jim,still lots of shaping yet to come,this is very much in the rough so to speak.The outside of the rider will be shaped to the inside of the hull,then the inside of the rider will get it's final shape.The inside face follows the hull form rather than being a square face as it is at the moment.
A square is nearly redundant on this build,everything is either curved,beveled,tapered or slopingROTFROTF

Kind Regards

Nigel
 
In order to accurately get the final shape of the rider frame,I glued scrap bits of timber replicating the keelson and the deck clamps either side.You can just make out in the pictures I have drilled 0.5mm shallow holes at their positions.These will remain despite any further sanding and enable me to set everything up to these positions later in the build.The mock up pieces are only glued on their ends so should be fairly easy to remove.I have been careful to only glue in areas that will be covered later.
The outside was sanded to the inside hull contour first then the inside face of the frame was sanded parallel to the outside.The shaping of this part is now complete,the next stage is to make the two upper futtocks that will have to remain removeable to allow the fitting of the deck clamps and spirketing on the lower gun deck.

Kind Regards

Nigel

sp191.jpgsp192.jpgsp193.jpgsp194.jpgsp195.jpgsp196.jpgsp197.jpgsp198.jpg
 
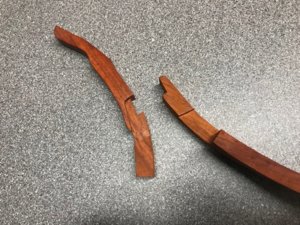
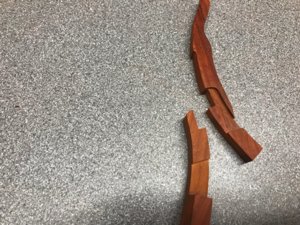
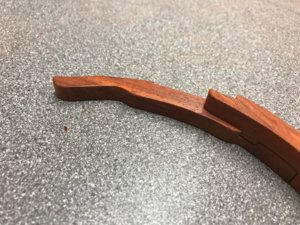
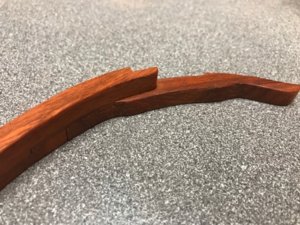
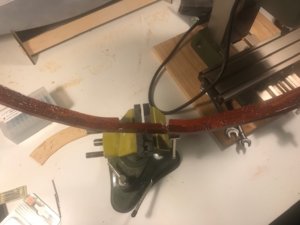
The next step was to shape the upper futtocks.These incorporate a blind housing joint as you have several parts (two futtocks and a deck clamp )intersecting.The joint was roughed out on the mill but was finished with a scalpel due to the shape.The final pics show the parts balanced in position.

Kind Regards

Nigel

sp199.jpgsp200.jpgsp201.jpgsp202.jpgsp203.jpgsp204.jpgsp205.jpg
 
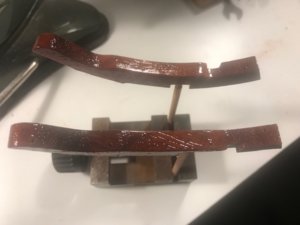
After drilling a load of 1mm holes for the fixings that I will represent(a total of 49 clenched bolts in this assembly alone) I drilled 1 hole in each piece in a area where the pieces would be glued in situ.I then glued a length of lime dowel into each.This is solely for handling purposes in the next stages.

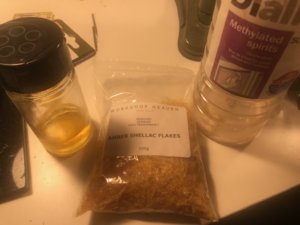
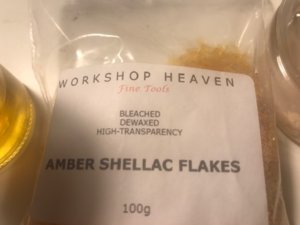
I mixed up a thin cut of Amber Shellac.Basically I poured Methylated Spirit into a jar and then added the Shellac flakes until they came up to about a third of the level of the liquid.The flakes are left to fully dissolve for a day or two giving the jar an occasional shake to help things along.When mixed,this is good for a few weeks then will need to be discarded as it goes off once in a solution.This is why I would never buy something in liquid form,you do not know how long it has been on the shelf and run the risk it will never go hard.

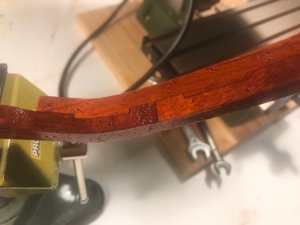
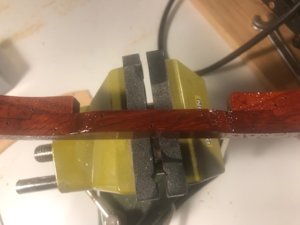
A total of twenty coats were applied to the parts using a soft flat brush.The good thing about Shellac is it softens the previous coat so you never have an issue with intercoat adhesion but you cannot overbrush like you would a polyurethane as you will get drag of the previous coat.These items will now be set aside for a couple of weeks to fully harden before the are thoroughly flatted down.The Shellac's job is to fill the large pores in this timber and the final finish will not have the high gloss it does now.

There is a separate beam that carries a sub deck to fit to the frame.Ideally I would have prepared this at the same time but the drivebelt snapped on my table saw and I have only just got a replacement from China this weekend.

Kind Regards

Nigel

sp206.jpgsp207.jpgsp208.jpgsp209.jpgsp210.jpgsp211.jpg
 
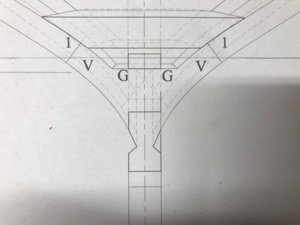
I have made a start on the next framing drawing.This comprises of the first six frames from the bow.The last picture illustrates the issues I am having with the drawings.This is the base of the second frame.The frame half nearest is obviously notched to fit the keel.The farside however shows that this half is recessed into the keel sides and meets the tip of the rabbet,however there are two dotted lines suggesting the futtocks terminate short of the keel as they do on the frames moving aft:mad:

Kind Regards

Nigel

sp212.jpgsp213.jpgsp214.jpg
 
I am plodding along with the first six frames but until I get to doing something different from what I have done already or make substantial progress,I haven't taken any pics.
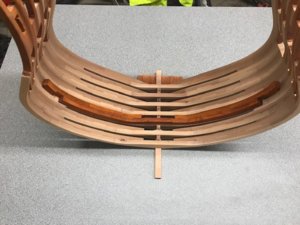
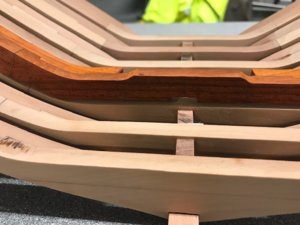
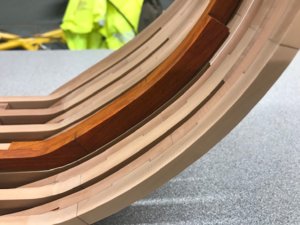
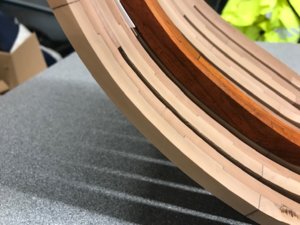
However,I have flatted the rider frame parts down with 320 grade silicon carbide paper.I then applied 3 thin coats of thinned spirit based Satin Polyurethane varnish with a Sparmax spraygun using a 0.5mm nozzle.The coarse grain of the wood hasn't completely disappeared but has been greatly reduced.I could have got rid of this completely using more coats of Shellac but I felt it would end up looking like plastic if I went too far.
I will burnish with superfine steel wool after leaving another week to harden and will probably give this a coat of wax,but that will happen when assembled in the hull.I fear the wipes I use for clean up of excess glue may have an adverse reaction with the wax.
One thing is that these parts appear far darker due to photography than in reality.

Kind Regards

Nigel

sp215.jpgsp216.jpgsp217.jpg
 
......
One thing is that these parts appear far darker due to photography than in reality.
The first thing in my mind, when I saw these actual photos was:
"Upps - they are really dark"
 
Uwe
Yes looking at the pics they look too dark but the trouble with this timber and the current weather is it comes to life in bright natural light,something lacking in my part of the world at the moment.When burnished and waxed to create a slight sheen,I am confident the timber will look different again.There literally is only a few microns of Poly on there but it is a necessity to have a layer of protection against UV light turning the Padauk brown and offer resistance against moisture.Shellac in itself does not like water.

Kind Regards

Nigel
 
I am having a short sabbatical from this build.Unfortuneatly I have developed a very nasty rash on my chest over the last couple of months.Uncertain as to exactly what has caused this I am having a little break to see if it goes away.
After researching the African Padauk timber,it turns out the oils in the wood,whilst not an allergen,do cause skin sensitisation.There is a possibility this could be the culprit as many a day I have come in from the workshop bright orange from the dust.
I am going to suspend work on this build to see if this rash goes away.If it does,I need to re-evaluate how I work with this timber and take necessary precautions.If it doesn't then I am going to have to pay a visit to the doctors and it isn't down to Padauk dust.
I did once have hives all over both forearms,this turned out to be the result of a massive session cutting Ebony.

So,for the minute,I am going to do a bit on my Artesania Santa Ana as I know there are no timbers that will cause an issue.

Kind Regards

Nigel
 
I am having a short sabbatical from this build. Unfortuneatly I have developed a very nasty rash on my chest over the last couple of months.Uncertain as to exactly what has caused this I am having a little break to see if it goes away.
After researching the African Padauk timber,it turns out the oils in the wood,whilst not an allergen,do cause skin sensitisation.There is a possibility this could be the culprit as many a day I have come in from the workshop bright orange from the dust.
I am going to suspend work on this build to see if this rash goes away.If it does,I need to re-evaluate how I work with this timber and take necessary precautions.If it doesn't then I am going to have to pay a visit to the doctors and it isn't down to Padauk dust.
I did once have hives all over both forearms,this turned out to be the result of a massive session cutting Ebony.

So,for the minute,I am going to do a bit on my Artesania Santa Ana as I know there are no timbers that will cause an issue.

Kind Regards

Nigel
Keep care my friend - hope, that the rash will disappear asap....
 
Back
Top