It's looking really good . I'm just about to place the upper deck on mine . The instructions are interesting to put it mildly
-

Win a Free Custom Engraved Brass Coin!!!
As a way to introduce our brass coins to the community, we will raffle off a free coin during the month of August. Follow link ABOVE for instructions for entering.
-

PRE-ORDER SHIPS IN SCALE TODAY!
The beloved Ships in Scale Magazine is back and charting a new course for 2026!
Discover new skills, new techniques, and new inspirations in every issue.
NOTE THAT OUR FIRST ISSUE WILL BE JAN/FEB 2026
You are using an out of date browser. It may not display this or other websites correctly.
You should upgrade or use an alternative browser.
You should upgrade or use an alternative browser.
San Felipe 1690 from ZHL
- Thread starter Scott Shilling
- Start date
- Watchers 43
-
- Tags
- san felipe zhl
Good morning Scott. Wow quite the adventure you have had getting the gun ports cut out. Agreed- was not my favorite task on my Victory either. All done and looks awesome. Cheers GrantHello all,
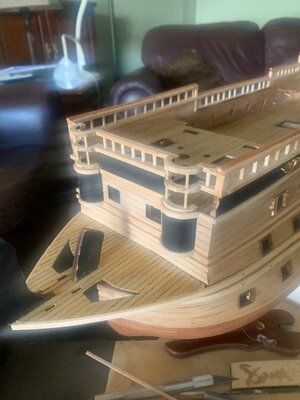
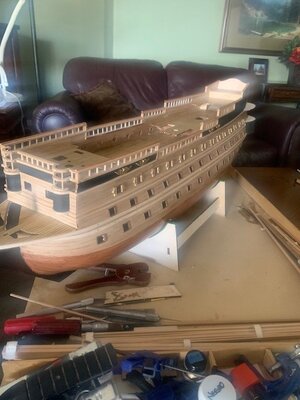
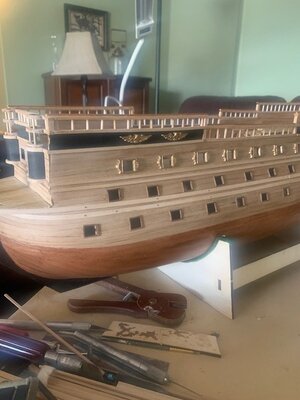
I finished redoing the cannon ports. I hated it! My least favorite task but now it behind me. Cut two big holes in one of my fingers. Reworking these needed to be done, but put me way behind my timeline. I kept finding excuses to do something else.
So - it's back to making progress and dealing with other issues and wobbly instructions.
Here are a couple of pictures. My next task is to put putty or wood filler on the back section and get it painted.
Greg - I'll jump over to your build to have a look at your center board.
View attachment 422716View attachment 422717View attachment 422718View attachment 422719
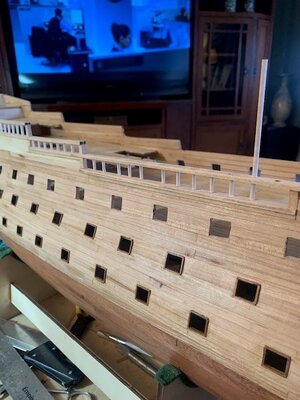
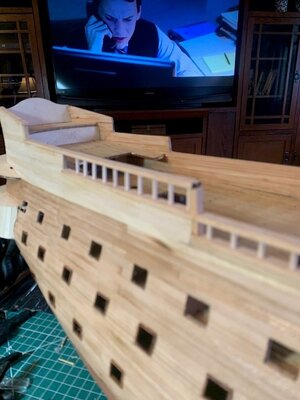
Hello everyone. Now that I have most of the cannon ports completed I decided to get my butt in gear and start working on the railings. Finally back to things that are fun. The provided parts only needed a bit of cutting, snipping, and shaping. Lots of pondering the instructions. Had to use a magnifying glass to try to figure out the sequence etc.... My only gripe is that the kit includes 3, 3mm dowel rods. Looks like it will take 5 or 6 of them. So a quick trip to Home Depot get the rest is in order. I'll do my best to get these done this week.
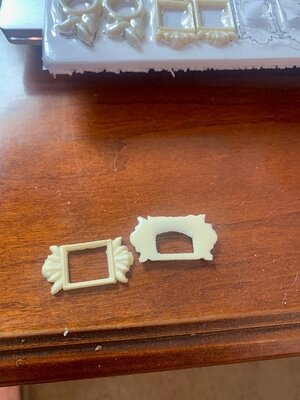
Also of note. I went and purchased some bronze paint for the decorative cannon port covers on that third row. They are not 3D printed, they are poured. And a bit messy at that. I'll need to use my disc sander to fix this. For the example below I had to sand off a full mm to get it right.
Bronze is not the way to go. Gold looks much better. See pics below.


Greg,
Did you get your center frame straightened. Obviously. How did you get it straight.
Did you get your center frame straightened. Obviously. How did you get it straight.
Your Felipe is looking awesome, nice work Scott. Yes I got it straightened. I soaked it in water for about 12 hours then clamped it to my bench for a further 2 days and it came up well. I'm deciding at the moment whether to make my own template for the gun ports or extend the cannon blocks to match up with the supplied one. Although one of them is in the middle of a frame.Greg,
Did you get your center frame straightened. Obviously. How did you get it straight.
Last edited:
Hallo @Scott ShillingHello everyone, I'm back. This time with a ZHL San Felipe. I finished up the Montanes (I'll post some closing photos). That was a massive learning experience for sure. I know my mistakes and how to avoid them for this next build.
The model is in transit, arriving mid September, so I have time to prep. Here is a list of things I have in mind:
1. I plan on single planking the hull instead of doble planking. I am thinking Mahogany for the below water line and Cherry for everything above the water line. Does anyone out there have any thoughts about using Cherry for planking (too soft, too hard, too grainy etc). This weekend I plan on purchasing a couple of boards that I can rip down to 5mm X 2mm planks
2. I am not even going to open the provided rigging - it's going straight into the trash. I'll be ordering from Ropes of Scale. This was my biggest mistake on the Montanes, fuzzy, messy rigging. Since then I have purchased a book on rigging and will follow that pretty closely. Going to up my game here.
3. For the floor planking. Instead of using a pencil and just marking the nails I plan on drilling holes and putting in the tips of some tooth pics. I've been lookin around for some walnut tooth pics but no success. So instead I'll soak some in walnut stain and give that a test. Anyone have alternate suggestions.
4. The kit does not come with sails. My better half wants sails. That is a year away so we'll make that decision when the time comes. Although, I'll need to add extra belay pins during the hull build.
The Cherry wood decision needs to be made by Saturday. I'll be going down to the south side of Denver to the Modelers club meeting. The best exotic wood store is near by so I'll do my purchases there. If not cherry wood what other wood would you suggest. Pear maybe? hard to find though.
Have a great day. I look forward to any suggestions.
Scott
we wish you all the BEST and a HAPPY BIRTHDAY

Happy birthday Scott !
Thanks for the birthday wishes.
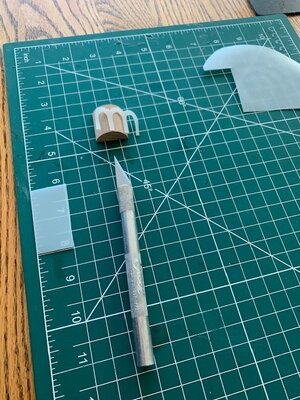
Made some progress on the boat this weekend. I wrapped up the railings and started a few other items. Finally, back to some of the more fun parts of model boat building, giving the boat some character. It's one thing to build the hull and dig out the cannon ports and decking, it's another to start adding real detail.
Let's see. Couple things I plan on doing differently. On the top row of cannon ports. I am not going to frame them to the outside, instead I will frame them to the inside. The decorative piece that goes on the outside would not fit if you place the frames per the instructions. I painted the decorative frames gold, seems ok, then glued a couple to the frame. Looks great! Although, I need to repair a couple of the cannon ports to make them a tad smaller.
One thing I did that I wish had not done. Per the instructions (if you want to call them that) have you putting a 2X3mm strip of wood on the top of the railings to hide the tops of the holes for the little pins. Greg, don't do this until much later in the build.
Here are a couple of pics.
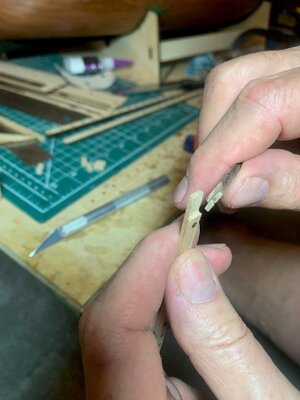
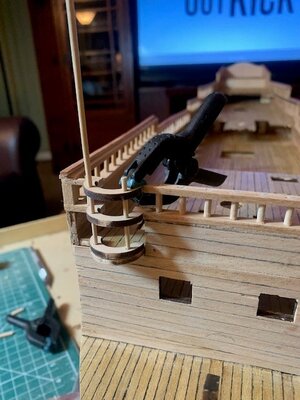
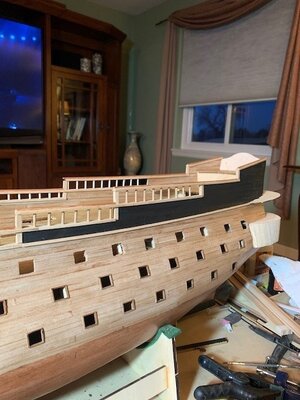
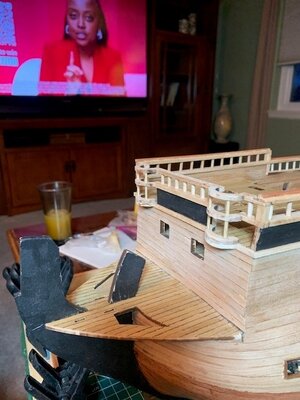
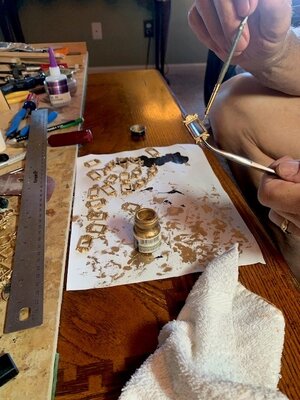


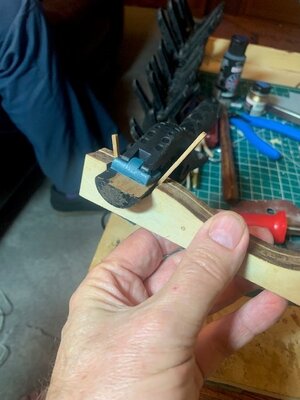
It appears that I have a real challenge trying to bend this 2X3mm wood around these head thingies. The wood they provide is pretty stiff, so much so bending it is becoming a challenge. I have tried my plank bender and my soldering iron on soaked wood. I'm reasonably good at bending this stuff but this one is proving to be a challenge for sure. I'm go try boiling, yes boiling, a strip to see if I can soften up the wood fibers. I may have to switch up the wood to something more workable.
Need to get around this bend. Any suggestions?

Need to get around this bend. Any suggestions?


If you soak veneer in water, you may be able to carefully press it into a concave mold, then apply heat with your iron, or simply clamp it into the mold with small clamps and let it dry. Then cover the plywood edge with the veneer strip using CA glue. The 2mm thick wood you tried to bend is probably too thick for so tight a bend.It appears that I have a real challenge trying to bend this 2X3mm wood around these head thingies. The wood they provide is pretty stiff, so much so bending it is becoming a challenge. I have tried my plank bender and my soldering iron on soaked wood. I'm reasonably good at bending this stuff but this one is proving to be a challenge for sure. I'm go try boiling, yes boiling, a strip to see if I can soften up the wood fibers. I may have to switch up the wood to something more workable.
Need to get around this bend. Any suggestions?
View attachment 427477
View attachment 427476
Kurt,
I was going to do your approach but decided to give it one more try. This time I put the wood in boiling hot water for a bit, then hit it with my plank bender, then back into the boiling water then I hit is with my soldering iron. I got it to bend without breaking. I clamped it into place for a couple hours before taking it out and using it. Even then it wanted to spring back so I used CA glue (which I hate) so it would set quickly. Sheesh!!!
Moving on.
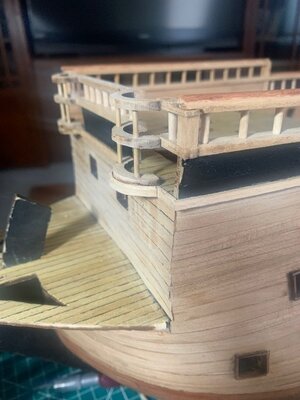
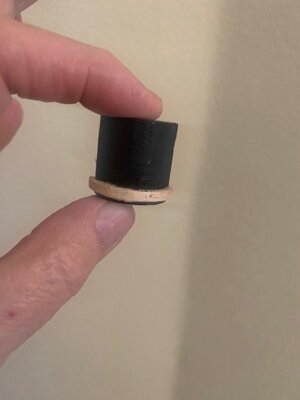


Nicely done, Scott. Something for me to look forward to. Currently working on the Stern, and it seems like nothing fits properly, and the instructions and plans rarely agree.
SUCCESS! Glad you could make it happen. Those sharp bends are tricky. Your results are excellent.Kurt,
I was going to do your approach but decided to give it one more try. This time I put the wood in boiling hot water for a bit, then hit it with my plank bender, then back into the boiling water then I hit is with my soldering iron. I got it to bend without breaking. I clamped it into place for a couple hours before taking it out and using it. Even then it wanted to spring back so I used CA glue (which I hate) so it would set quickly. Sheesh!!!
Moving on.
View attachment 428213View attachment 428214View attachment 428215
Last edited:
Good afternoon Scott. This is turning into a beautiful build. Some interesting techniques but certainly work out a treat. Cheers GrantKurt,
I was going to do your approach but decided to give it one more try. This time I put the wood in boiling hot water for a bit, then hit it with my plank bender, then back into the boiling water then I hit is with my soldering iron. I got it to bend without breaking. I clamped it into place for a couple hours before taking it out and using it. Even then it wanted to spring back so I used CA glue (which I hate) so it would set quickly. Sheesh!!!
Moving on.
View attachment 428213View attachment 428214View attachment 428215
It's a Monday afternoon and I thought I'd bring everyone up to speed on my progress. I managed the bends on the 2x3 wood to finish up the heads. Those are now mounted. Next task was to start working on the rub rails (wales? Not sure about the spelling). There are three different widths. Looks like 2x3, then midway down 2x5 and the bottom set is 2x7. I have searched high and low in the instructions for the sizing of the lower rub rails because the 2x7 just looks tooooo big.
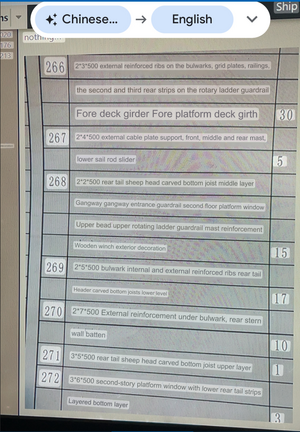
I am sending this to my friends in China for a translation. What I care about are 269 and 270. In the pictures they suddenly just appear. No notes or references or just nothing!!!

Here are a couple more pictures - making progress.
I am sending this to my friends in China for a translation. What I care about are 269 and 270. In the pictures they suddenly just appear. No notes or references or just nothing!!!

Here are a couple more pictures - making progress.


Looking magnificent!
Magnifico!It's a Monday afternoon and I thought I'd bring everyone up to speed on my progress. I managed the bends on the 2x3 wood to finish up the heads. Those are now mounted. Next task was to start working on the rub rails (wales? Not sure about the spelling). There are three different widths. Looks like 2x3, then midway down 2x5 and the bottom set is 2x7. I have searched high and low in the instructions for the sizing of the lower rub rails because the 2x7 just looks tooooo big.
I am sending this to my friends in China for a translation. What I care about are 269 and 270. In the pictures they suddenly just appear. No notes or references or just nothing!!!
View attachment 429093
Here are a couple more pictures - making progress.
View attachment 429097View attachment 429098View attachment 429099
Bill
I used google translate to do a quick translation of the text you posted above. I usually use this to translate Italian ship related books into English. It does a fair job on Chinese:It's a Monday afternoon and I thought I'd bring everyone up to speed on my progress. I managed the bends on the 2x3 wood to finish up the heads. Those are now mounted. Next task was to start working on the rub rails (wales? Not sure about the spelling). There are three different widths. Looks like 2x3, then midway down 2x5 and the bottom set is 2x7. I have searched high and low in the instructions for the sizing of the lower rub rails because the 2x7 just looks tooooo big.
I am sending this to my friends in China for a translation. What I care about are 269 and 270. In the pictures they suddenly just appear. No notes or references or just nothing!!!
View attachment 429093
Here are a couple more pictures - making progress.
View attachment 429097View attachment 429098View attachment 429099
Kurt, you had better success with google translate they I did. Pretty accurate.
Last night I was chatting with one of my China based staff. She was stumped. Here is my conversation below, it's a bit of a crackup.
alisa 5:59 PM
good evening
I'm good
how are you
Scott S 5:59 PM
I'm good
did you see that email for translation ?
alisa 6:00 PM
yes
Scott S 6:00 PM
can you or someone translate for me
alisa 6:02 PM
that sounds Architectural terminology
Scott S 6:03 PM
its a type of wood.
I need to know what its used for
can you send to someone that might know
alisa 6:03 PM
build house maybe
Scott S 6:03 PM
its for a model boat that i am working on
alisa 6:04 PM
yes
Scott S 6:04 PM
I can figure out most everything
alisa 6:04 PM
like build boat
Scott S 6:04 PM
but I am unsure about these. I think I know what to use them for but I'd like some conformation
alisa 6:05 PM
ok
At this point I shifted back to regular work. Alisa and a couple others just could not figure it out as they weren't familiar with the terms. I'll stick to Kurts google translator. For that matter I'll try it again.
Have a great day everyone. What an adventure.
Last night I was chatting with one of my China based staff. She was stumped. Here is my conversation below, it's a bit of a crackup.
alisa 5:59 PM
good evening
I'm good
how are you
Scott S 5:59 PM
I'm good
did you see that email for translation ?
alisa 6:00 PM
yes
6:00
who can translationScott S 6:00 PM
can you or someone translate for me
6:00
do you know what it saysalisa 6:02 PM
that sounds Architectural terminology
Scott S 6:03 PM
its a type of wood.
I need to know what its used for
can you send to someone that might know
alisa 6:03 PM
build house maybe
Scott S 6:03 PM
its for a model boat that i am working on
alisa 6:04 PM
yes
Scott S 6:04 PM
I can figure out most everything
alisa 6:04 PM
like build boat
Scott S 6:04 PM
but I am unsure about these. I think I know what to use them for but I'd like some conformation
alisa 6:05 PM
ok
At this point I shifted back to regular work. Alisa and a couple others just could not figure it out as they weren't familiar with the terms. I'll stick to Kurts google translator. For that matter I'll try it again.
Have a great day everyone. What an adventure.

 Go ahead and post more things you need translated. Glad to help!


