Santisima Trinidad - Occre Build Log [COMPLETED BUILD]

Donnie

Administrator
Staff member
Administrator
Forum Moderator
Le Rochefort Moderator
Joined
Aug 21, 2011
Messages
5,097
Points
738

Location
Madison, MS
This is a build log of OcCre's 1/90 Santisima Trinidad. This ship has been built or is in process of being built by a few freinds here of which I am thankful for their guidance and help. I am sure that I will be asking for help along the way. So I thank each one of you in advance for your encouragement.

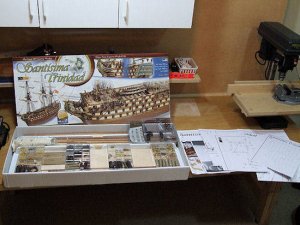
So with much anticipation here is my build log. The image is seen with all contents. This image is very familiar with those undertaking the task of building this ship. But, for those that might want to see the latest box of contents, it is here below. I received this ship December 21, 2008.

Thanks for joining me in this build.

Donnie
ps I want to thank Charles for sending me the English Version of instructions.

Box Contents as of 12-26-08

box01.jpg

box02.JPG
 
Last edited by a moderator:
Re: OcCre Santisima Trinidad Build Log

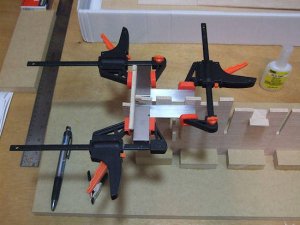
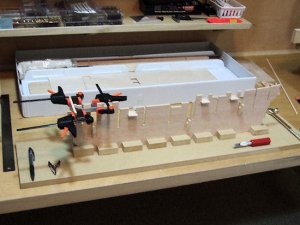
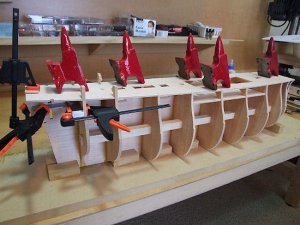
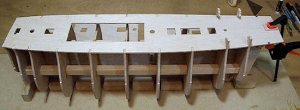
Started Gluing up the frames. It seems that it might be overkill for alignment using the clamps, however, I figure that this is the most important in making sure the hull frame is square.

frame01.jpg

frame02.jpg
 
Last edited:
Re: OcCre Santisima Trinidad Build Log

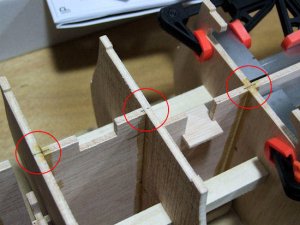
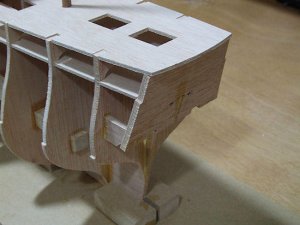
One part of making the alignment of frames square, I almost overlooked making sure that the Frames were of equal distance of port and starboard as well. The circles show that I made some marks on the False Keel and Frames to make sure this part is made with good alignment.

frame03.jpg
 
Last edited:
Re: OcCre Santisima Trinidad Build Log

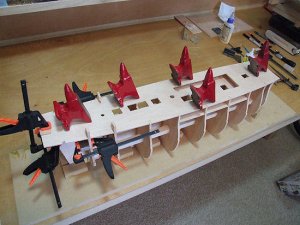
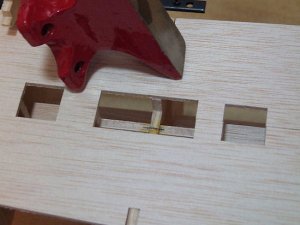
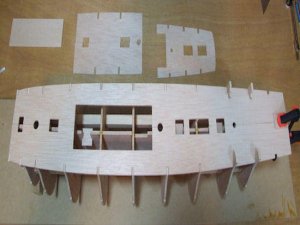
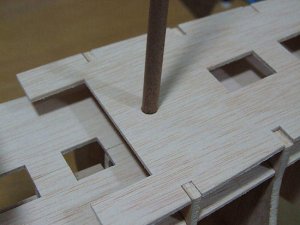
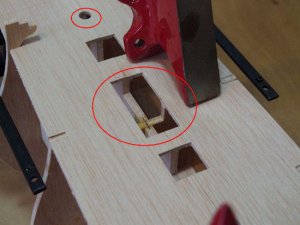
I thought I would mock up the fitting of the upper deck to see how the frame is going to line up. So far, not too bad. I will fit the deck onto the frame, but not glue it. Then I will glue the cross beam that runs thru the frames and then the frame should be complete. With the deck temporarily secured to the frame, this will assist in making sure that the deck will fit nicely later. Then when I remove the deck, the deck should fit good. The directions do not indicate this. As a matter of fact, the instructions want you to lay the frame on its back and then glue the cross beam in. This would complete the frame assembly. However, I choose another route in that is the fore mentioned of temporarily securing the deck "while" I finish gluing the frame.

The image showing the red circles indicated that this area seems to be a little more difficult to make alignment. Everything else falls into place nicely. I can not overemphasis that making the frame as square as you can will pay off. And even then, there may be areas that might not be so square.

frame04.jpg

frame05.jpg

frame06.jpg

frame07.jpg
 
Last edited:
Re: OcCre Santisima Trinidad Build Log
All seems well at this point.

frame08.jpg

frame09.jpg
 
Re: OcCre Santisima Trinidad Build Log

I did a little more work in alignment of frames. I added the last frame piece 18 and supports. The images with the mast are only in there for alignment purposes. I am just doing this so that there will not be any unpleasant surprises when I start adding the deck for real. The False Deck is still not glued for the moment. I still followed the instructions about turning the whole frame upside down and gluing the cross-beam in place. It is really important to stay diligent in making sure everything is square and aligned. It will really make the ship build better if the foundation is done correctly. I am hoping that all of this work will pay off soon. This is the first large advanced project I have done.
BTW - the small anvils were bought from Harbor Freight tools. There were only a few dollars a piece and they really come in handy holding things in place. The mini clamps were bought at HF as well.

frame10.jpg

frame11.jpg

frame12.jpg

frame13.jpg

 
Re: OcCre Santisima Trinidad Build Log

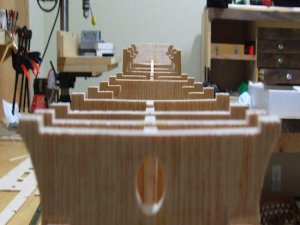
I think that I am satisfied with the alignment. I tried to take a shot showing looking down the deck frames. The camera was a little off is the reason for the False Keel is a little off center about mid way. But this is the camera not being exactly centered.
The only thing left to do at this point is to add the support beams for the lower deck and then moving on.

frame14.jpg
 
Re: OcCre Santisima Trinidad Build Log

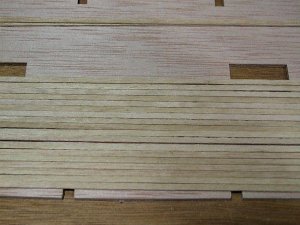
I hate making decisions like this about deck finishing but... the deal is this. The Deck Planking is only 1mm x 3mm. As you can see by the photo, these strips do not have any false caulking on them. (they are not glued down just yet) Everything is natural. I am thinking that putting pencil lead on each side of Planking strips (of which I have done before) on this model, might not look so good. The reason is that the Planking strips have such variation of colors - you can see the planks separately anyway. Now, if the Planks were of the same texture and color, they would need that separation using the false caulking.

I am asking the opinion of others that has been this route before many times as to if use the pencil caulking technique on such a small scale or not. I do plan to use a tiny pin vise to make some false treenails and that should alone suffice. My concern is making the deck "too busy" looking and too distracting. I don't really mean to go overboard as really, I like to keep things simple. once it is done, its done.

lowdeck01.jpg
 
Re: OcCre Santisima Trinidad Build Log

I think I might have found a combination that looks ok to me. I am using an Oil Pastel by Prang Sketcho "Oil Pastel Crayons" This is the dark brown color applied to only one side of the Planks. Then I put a small amount of Satin Polyurethane.

zoilpastel.jpg
 
Re: OcCre Santisima Trinidad Build Log

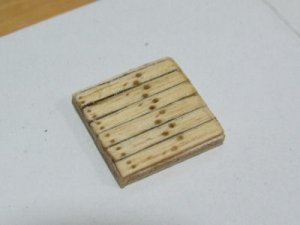
Sorry folks for acting over concerned about this. But this shot I am using medium gray chalk pastel (something my wife had on hand from her crafts)<br/>
she wanted me to try the Oil Brown and the Gray chalk before I end using the Pencil as so many suggest. She enjoys my building the ships. She helps from time to time.
so anyway - please bear with me as I try my wife's ideas too !!!
Also is a lame attempt to do false treenailing - I know the treenails are not lined up. One set of treenails are a little larger. I went back a second time to make them more defined, but in the process, I made them bigger. I sanded over the finished product and I did not wipe the sand dust off the deck piece so that the Polyurethane would soak in with the sand dust and fill in the treenail holes. Ok, so now that I have bored everyone with my experiments, it is time for me to make a decision.

zchalkpastel.jpg
 
Re: OcCre Santisima Trinidad Build Log

I finally made the decision and go with the pencil. I used a pinvise to make the treenails. I will now move on to the installation of the lower deck and then on to the main deck. I guess it will be a while before I post again due to the fact that there will not be much to post until I get the main deck planked.

planking01.jpg
 
Re: OcCre Santisima Trinidad Build Log

I looked at the instructions to absolutely make sure, but it says "Hull Lining strakes" material is "Sapelli" quantity 80 pieces for single planking. (no double). Hey, this makes me happy. Sapelli is a dark warm brown color.
 
Re: OcCre Santisima Trinidad Build Log

Well,
I have come across a decision that I am going to have to make soon. And that is the Cannons. I am not too happy with the kits Cannons. So, I guess either I will buy some from Model Expo's lazer cut cannons (which could be a generic style that would fit just about any error or period OR I could just scratch build my own of which I am not sure if I am up to that or not.
The Cannons with the kit only have limited rigging. Only one rope from bulwark thru end of cannon back to bulwark again. No other rigging. Even though this would simplify things, the realism and authenticity is not there. Does anyone have any suggestions about cannons for the Trinidad?
I have studied Charles Cross section and also Andrea ST build and I am gathering ideas. Are the Model Shipways Cannons ok? Or are they out of history and scale?
 
Re: OcCre Santisima Trinidad Build Log

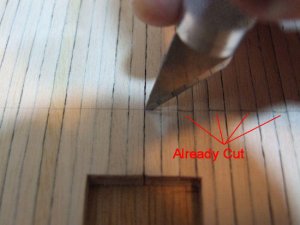
As seen in the image, it demonstrates a method I choose to simulate precut planking lengths. I just use a pencil to make a light mark across the deck and then alternating planks, I will use a knife to cut into the planking to simulate the planking lengths. I am cutting almost all the way thru the plank.

I am not sure if anyone else uses this technique, but it does save a lot of time and frustration of pre cutting decking planks. I had read that decking planks are from 16 feet up to 25 feet. I think I made mine 25 feet.

Therefore (I hope that I do not get into trouble doing this math and especially not used to Metric, but here it goes)<br/>

25' x 12" = 300" 300"/(90 scale) = ~3.33" each plank
7.62 meters x 1000 = 7620 mm 7620mm/(90 scale) = ~84.66mm

deck_cutting-1.jpg
 
Re: OcCre Santisima Trinidad Build Log

There is some research that dictates that either a 60-40-20 lengths are used, or either a 50-50 cut pattern is used. I wanted to use the 60-40-20 ratio cut pattern, but I had already started. Based on other builders of this project, I noticed a 50-50 ratio. It wasn't until I found some plans that shows the other mentioned.

The purpose of this image is only to show how I choose to cut the planking boards (no matter what arrangement) after the entire plank from Bow to Stern has been glued and laid, instead of cutting each plank individually and "then" gluing them down. I was demonstrating an efficient method.

thanks for your observations !!
 
Re: OcCre Santisima Trinidad Build Log

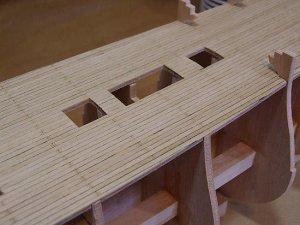
I finally have the Main Deck Planking completed with one coat of Satin Polyurethane, then sanded with 150, then lightly with 400 grit to finish.
Some things to take note of:
1) Some planks had to be removed- too rough of edges.
2) I used pencil for caulking only on one side.
3) I used a dremel tool to make treenails with .47mm or .018" bit. Sorry, do not know the # size. Each treenail hole was prepared with a sharp scriber so that bit would not "wander" around.
4) There are no planks laid individually. One full length strip was used, then I used an xacto blade to score or mark off the deck to simulate where the planks butt up against each other.
5) since I started with the 50-50 ratio of laying planks, I had to stick with those values. Wish I had known earlier about the 60-40-20, but that is ok. The Deck will be busy with cannons / rigging, ect.

I think that I am going to stain those Bulwark post with either walnut stain or Red. I have not decided yet.

deck01.jpg

deck02.jpg

deck03.jpg

deck04.jpg

deck05.jpg
 
Re: OcCre Santisima Trinidad Build Log

Ok Friends,
I have a problem that I am faced with. It is the dreaded cannon problem. I am getting frustrated with my attempts to find a solution. I have already spent about $100 USD on sample cannons, first from Bluejacket and now I ordered some samples from Model Expo.

It was requested of me to post the images of the Bluejacket cannons that I received yesterday, but I have not done so. The cannons are ok. There is nothing wrong with them per usage, but as far as putting them to use on my project, I might have a problem. First of all, all the cannons, carronades, carriages that I bought from BJ are of some type of whitish metal. I guess it must be britannia metal, not sure. But BJ, if I remember, does not specify on their website store about this. I am after wooden carriages and brass cannons - carronades. BJ's also do not have any rigging ring bolts on the carriages either. And besides, the cannons are not brass !!

My requirements:

1) Find BRASS cannons that match the cannons that came with kit.
2) Find carriages that have the rigging ring bolts added to it.
3) If I can not find a match, then I would then need to replace all upper deck cannons. Then those would not match the other lower deck cannons.<br/>

My dilemma remains at just building the kit as per instructions and not add cannons to the lower deck. Maybe the designers of this kit thought that the cannons for lower waist deck would not be seen from above, so they just used a false cannon instead. I was slightly disappointed when I saw that the kit did not include waist deck cannons. Even if I scratch build my own carriages, I would have to buy upper deck cannons to match the lower ones. I guess I am being too picky about things.
I will wait and see what the Model Expo Cannons - carriages look like. They have provisions for the ring bolts. I guess I could drill holes for the ring bolts to the kits carriages.
 
Re: OcCre Santisima Trinidad Build Log

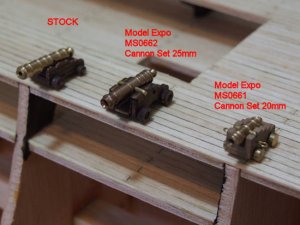
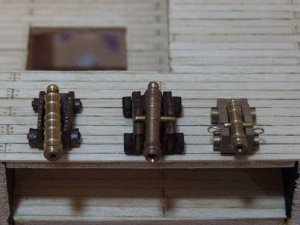
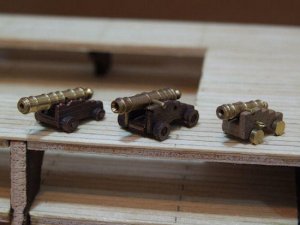
This is my Cannon update of which I plan not to use the cannons supplied with the OcCre kit. There is nothing wrong with the kits version, so why am I doing this. It all started with the idea that Fam and Charles gave me to modify the kit to "add" cannons to the waist deck.

So, it is with their inspiration I took the task of finding the cannons for myself. The units from Bluejacket are fine and very well detailed, but simply was not my choice.

Then I decided to order a variety from Model Shipways. I still have some on back order and hope to get those in as well. I will do an up date on that too. I think that I am overall satisfied with the 20mm size. The bore will also come close to matching the false cannons on the other levels (sorry, can't think of what deck number that is).

I will take parts and pieces to make the carronades. Once I decide what I want to do, then I am going to have to be committed to purchasing the cannons from Model Expo. I hope that they do not change styles on my in the meantime !!

So anyway, here is the documentation for what I have so far.

samplecannon01.jpg

samplecannon02.jpg

samplecannon03.jpg

samplecannon04.jpg

 
Re: OcCre Santisima Trinidad Build Log

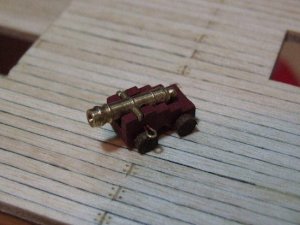
This is the same one except painted and I added my own trucks, (tooth pick for the axle, and 1/8" dowel for the wheels). The original wheels are of brass. Seems a little too much for what I want. So I made my own wheels and kept the carriage and cannon.

The paint is Model Master #4228 Anti-fouling Red and American Walnut stain for the wheels.

The whole time I am doing this I am thinking why do us modelers go thru this much just to be happy with something.

Now, once I decide what I want, it is a matter of ordering a bunch from ME and start making a bunch of wheels and axles.

samplecannon05.jpg
 
Re: OcCre Santisima Trinidad Build Log

I guess this still shows my lack of experience of cannons and the period they came from. This is becoming a true challenge in the fact that I am almost ready to just build the Trinidad per instructions in the book and not worry about everything. Heck, I could have had a lot of work done on it by now, but as it is, I am at an impasse' on all of this.
Alan, I really admire your molding. I guess I am not adequately setup to cast my own. Or, I guess I must admit that I am after a quick fix. My hats are off to you guys that really get into the effort of making your own parts. As I take a sigh it is off again to do more research.
The main reason that I did not want to use the given cannon/carriage that came with the kit, they do not have any rigging rings. The directions only want you to pass a breaching line and that is all. It is representative instead of accuracy I think that OcCre was after.
 
Back
Top