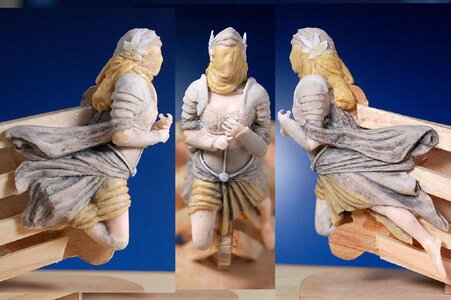
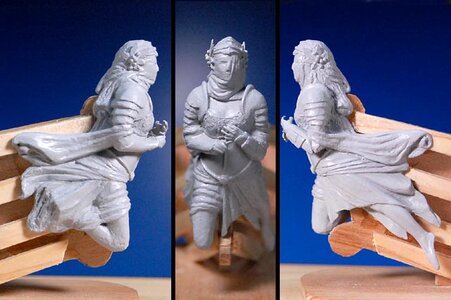
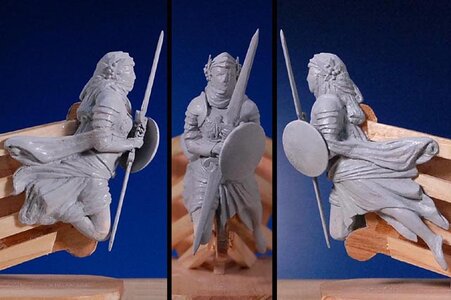
Silent Mary by Mellpapa

Melpapa,
If you want to try gold leaf, I have several sheets I would be willing to share. It is not real gold, but it looks and behaves just like gold leaf. If you message me your address I will send some sheets through Japan Post. I also have the adhesive, but I don't think I can send that through the mail. You might be able to use something like rubber cement instead--I think they are very similar.
Namabiiru, it's been a long time.
You said you would send me gold leaf! I'm very grateful.
But you know, I'm trying to express myself with paint.
I greatly appreciate Namabiiru's sentiments.
The Silent Mary I'm working on now has a stained hull, so gold leaf would be too uncomfortable and a waste.
I think it would be good to stain the gilded bow statue, but then there would be no point in gilding it.
I think the gold leaf on the bow statue should be used on the clean hull.
Please keep Namabiiru's gold leaf.
I am sure that one day Namabiiru will use it.

A big, big thank you to Namabiiru-san for her feelings!
 
I've got plenty, and it will be here if you do find a need. I have used it for several projects, and it works well and looks very good. One day I hope to use it to complete a Woody Joe model of Kinkakuji that has been in the closet for many years.
 
I've got plenty, and it will be here if you do find a need. I have used it for several projects, and it works well and looks very good. One day I hope to use it to complete a Woody Joe model of Kinkakuji that has been in the closet for many years.
Mr. Namabiiru
Woody Joe's model is a very kind model. All the kits are made with kindness and care, and with the modeler's needs in mind.
Please use the gold leaf for the Kinkakuji temple.
I'm fine with it.Thumbsup;)
 
SilentMary-37-57.jpg SilentMary-37-58.jpg
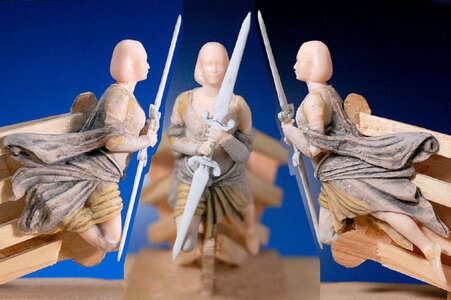
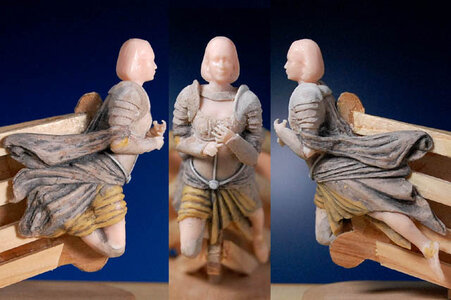
The putty on the garment hardened, so I scraped it off with a design knife and sanded it with sandpaper.
I applied Tamiya's smear paint (dark gray) to the clothing parts. Is this what it looks like?
I am not going to make it better by further modifying it, so I am satisfied with myself.
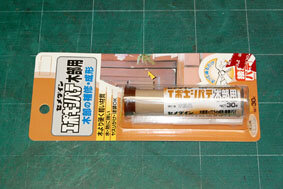
I ran out of epoxy putty for woodworking, so I went to Home Depot and bought some.

SilentMary-37-59.jpg
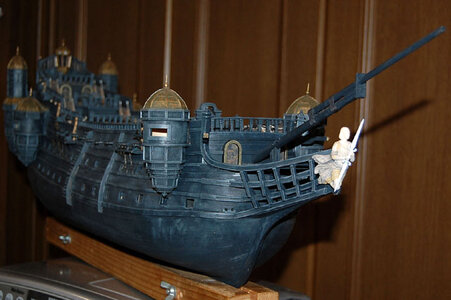
The bow statue is almost done, so I put it on the bow of the Silent Mary. It looks good.
I am very happy with it.

The work on the bow statue will continue.
 
I had no clue legendary Mellpapa was here, I found your website/blog long ago i found this forum, actually you were the one of the reason i began this hobby, my aim is making one of your design as scratch build, so far i made 3 model kit and not confident enough to start Black pearl but i already downloaded and hopefully begin soon. Thanks again and keep up the excelent work.
 
I had no clue legendary Mellpapa was here, I found your website/blog long ago i found this forum, actually you were the one of the reason i began this hobby, my aim is making one of your design as scratch build, so far i made 3 model kit and not confident enough to start Black pearl but i already downloaded and hopefully begin soon. Thanks again and keep up the excelent work.
Hello Ata.
I must have become a legendary figure. ROTF ROTF
I have made two types of the Black Pearl, 1/60 and 1/72.
The 1/60 drawing has some mistakes because I made it without understanding it.
The 1/72 Black Pearl I made later is the same size as the plastic model of the Black Pearl in Zvezda.
I also rewrote the drawings where they are incorrect.
You can copy the drawing of the 1/72 Black Pearl by going to


The following is a description of the 1/72 Black Pearl.


Please build the Black Pearl better than me.
Now, if you will excuse me.:DThumbsup
 
------------------------------------------------------------------------------------------------------------------------------------------------------------------------------

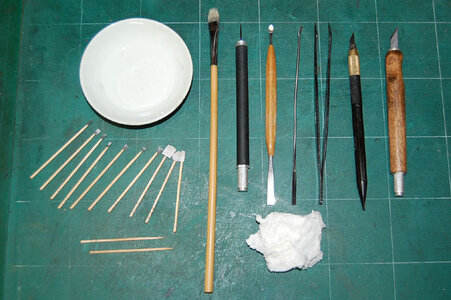
I received an email asking, "What kind of tools do you use to make your bow statues?" I would like to introduce the tools I use when I am making the bow statues.
SilentMary-37-60.jpg
From right to left, a design knife [with a large Olfa blade], an Olfa design knife [small blade], Tamiya vine-neck tweezers, two Tamiya blending sticks (one with a wooden handle to make it thicker) Below that are wet tissues and a Daiso design knife with a needle, A flat brush to dust off the powder when sharpening, water in a paint colander, sandpaper and toothpick attached to the end of a toothpick, and then a pin vise and brass wire.
Water is needed to keep your fingers moist so that the epoxy putty does not stick to them.
Tools for handling the putty should also be moistened.
You can use mentholatum or baby powder, but I am so used to water that I only use water.
That's about it.

The rest...
SilentMary-37-61-01.jpg
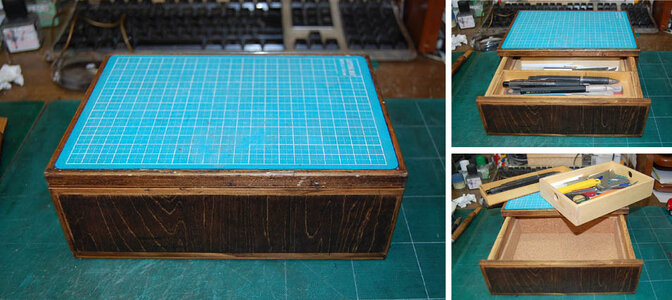
This is an A5 cutter mat-sized worktable that I made myself.
It is about 8.5 cm high, which is useful because it allows me to work close to my eyes.
This workbench has drawers, and inside the drawers are sliding trays and tool storage trays, which can be taken out.
It's easy to work with a table like this.

-------------------------------------------------------------------------------------------------------------------------------------------------------------------------------
 
This is a continuation of the bow statue fabrication.
SilentMary-37-64.jpg
SilentMary-37-65-01-01.jpg
I heaped putty on the shoulders to form shoulder armour.
I couldn't get the size of both pieces to match, so I heaped them up several times.
Do you think they look a bit like each other?
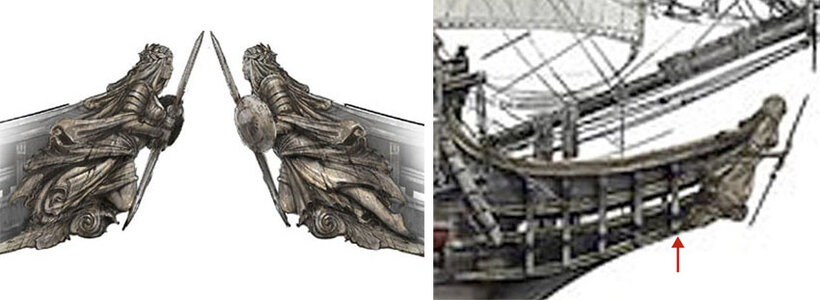
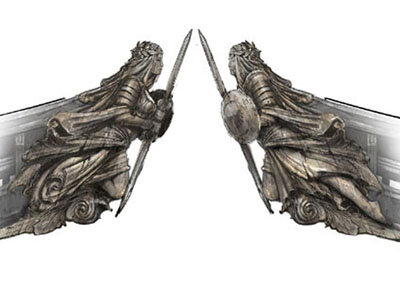
I put a concept illustration below so you can compare.
The fluttering garment on the lower body is short so that it doesn't hang over the red arrow head timbers.
I'm making it to match the illustration, but I have to match the beak head part I made first, so it won't be the same as the illustration, but I can make it look like it.
The bow statue production is still continuing.
 
Last edited:
Lavoro fantastico! Complimenti
Hello Morghy!
Thank you for the accolades.
The bow statue of the Silent Mary is not yet complete.
I want to finish it to my satisfaction.
I'm still working on the bow statue! Thumbsup ;)
 
SilentMary-37-67.jpg
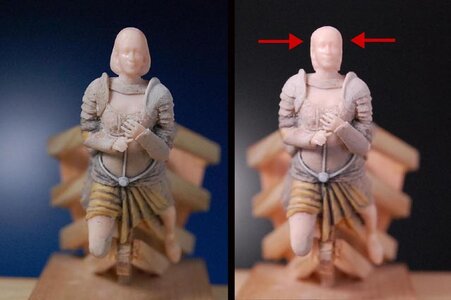
Note the red arrows.
Hair scraped away.
It gets in the way of making a face veil or hair.

SilentMary-37-68.jpg
Is that a helmet on her head? I heaped it up with putty and cut 0.3 mm-thick plastic sheets for the decorations on the sides and pasted them on.
I also puttyed up the face veil to make it look like that.
I didn't know what the hair on the back was supposed to look like, so I made it up as I went along.
The illustration of the bow statue is not clear about the boundary between the helmet, face veil and hair.
I used Tamiya's epoxy putty [fast curing type] for the hair and face veil.
Tamiya's epoxy putty [fast curing type] takes about six hours to cure completely, so I left it like this overnight.
 
SilentMary-37-69.jpg
I shaved the face veil area thinner and deepened the eye hollow area a bit, so it looks a bit better.
I added about six small round berries to the leaf decorations on either side of the helmet.
I applied sandpaper to the parts that bothered me and applied Tamiya surfacer all over the body.
The rough areas are yippee.
When the surfacer is completely dry, sandpaper is applied.
I'm not good at figurines, I haven't improved at all, but I'm satisfied with myself because I've made it this far.ROTFROTF

I'm still working on the bow statue. :D
 
SilentMary-37-70.jpgSilentMary-37-65.jpg
I've sandpapered and scraped, but it doesn't get any better.
That's good enough.
I'm a badass, but I'm amazed I made it this far.ROTF
It kind of looks like the concept illustration, so now I'm like, 'OK! '. Thumbsup

I'm very satisfied.:D
 
Back
Top