Lovely work, Mak!! Thanks for the Father's day wishes!!
-

Win a Free Custom Engraved Brass Coin!!!
As a way to introduce our brass coins to the community, we will raffle off a free coin during the month of August. Follow link ABOVE for instructions for entering.
-

PRE-ORDER SHIPS IN SCALE TODAY!
The beloved Ships in Scale Magazine is back and charting a new course for 2026!
Discover new skills, new techniques, and new inspirations in every issue.
NOTE THAT OUR FIRST ISSUE WILL BE JAN/FEB 2026
You are using an out of date browser. It may not display this or other websites correctly.
You should upgrade or use an alternative browser.
You should upgrade or use an alternative browser.
Soleil Royal by Heller - an Extensive Modification and Partial Scratch-Build by Hubac’s Historian
- Thread starter Hubac’s Historian
- Start date
- Watchers 81
-
- Tags
- 1689 heller hubac refit soleil royal
Hi Marc
I am a little late with this reply,sorry.I have been busy with work all week.In it's most simplistic form,you have a binding strake either side of the hatches(what you refer to as a king plank).You then have another binding strake between these and the waterway.You determine the position of the middle binding strake.These are untapered.The four sections you have left,two each side of the deck,are then divided up into equal widths to get the taper.This is in the most simplistic form.In reality at the bow end,some of the deck planks are "hooded".By that I mean they do not run right to the front of the deck and are notched into another plank.You are right,nobody has actually posted a topic on this.
Kind Regards
Nigel
Thank you for the explanation, Nigel. It seems I managed to get where I needed to, layout-wise. I pretty much just followed Lemineur’s layout for the St. Philippe.
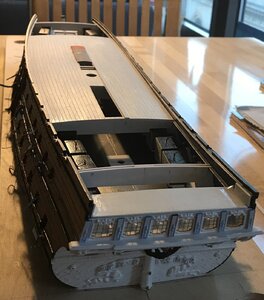
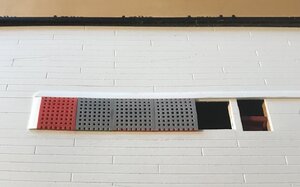
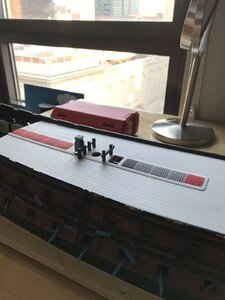
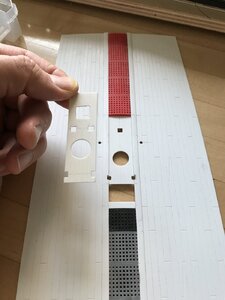
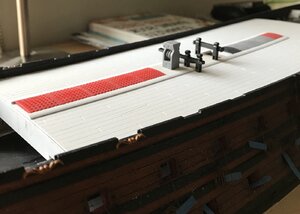
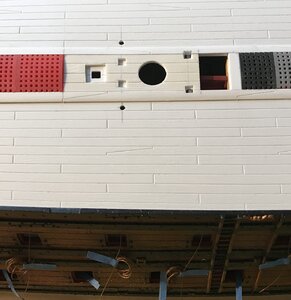
Work on the main deck continues:
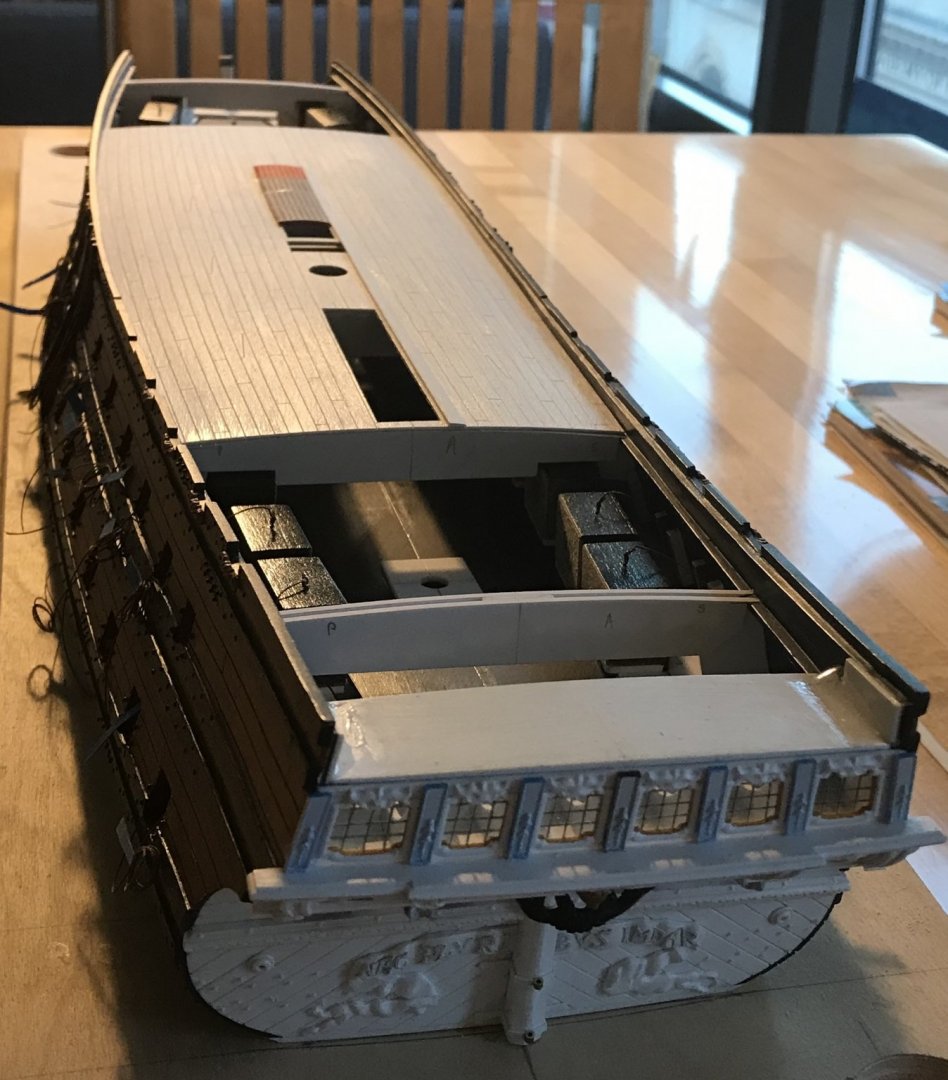
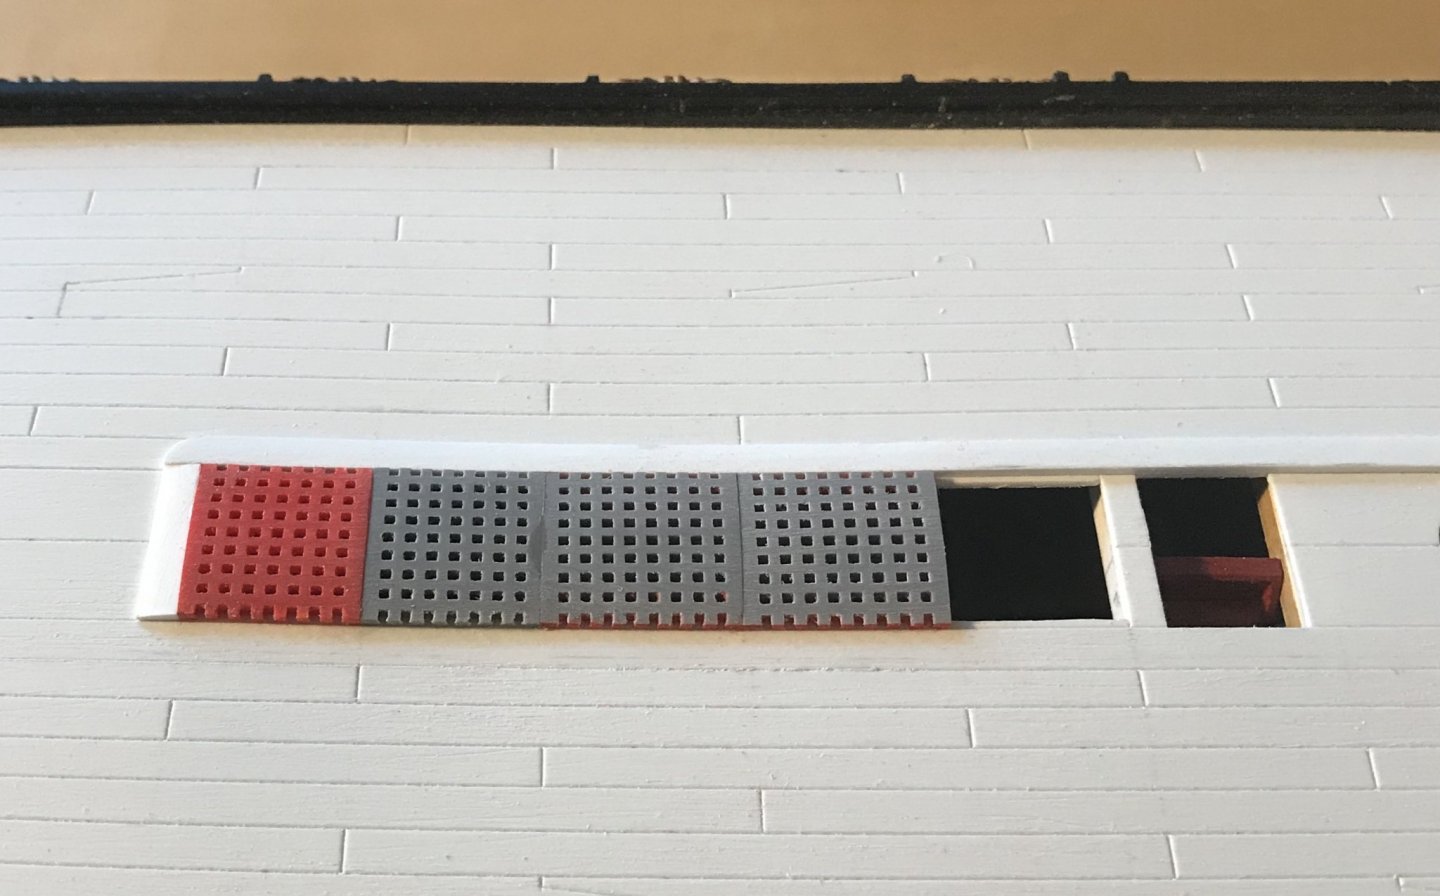
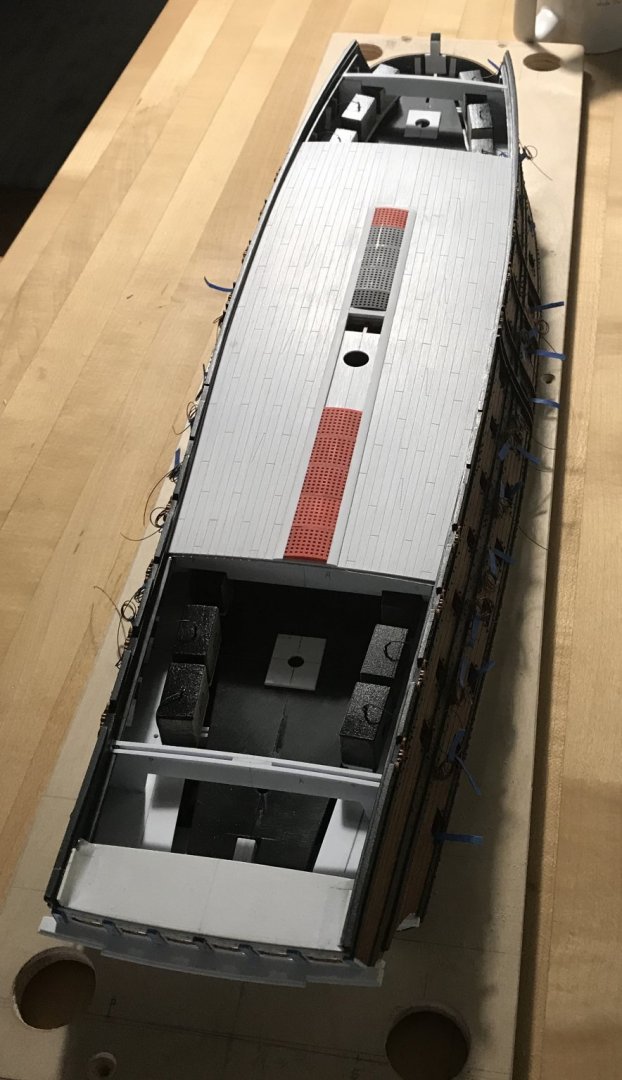
The gratings required a little extra attention to get them to lay in an even plane.
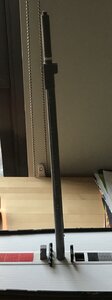
The main mast plate finally secured the mast, perpendicular to the keel, but the extra thickness of the plate and coamings necessitated a little inletting of the deck furniture:
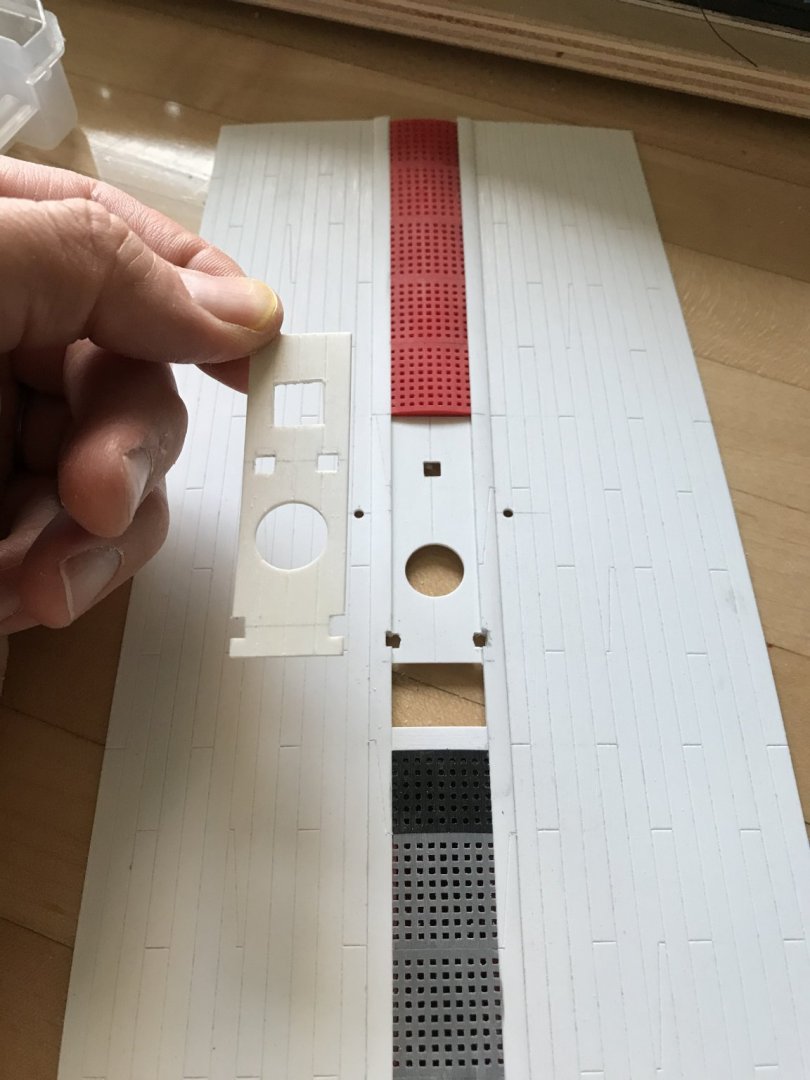
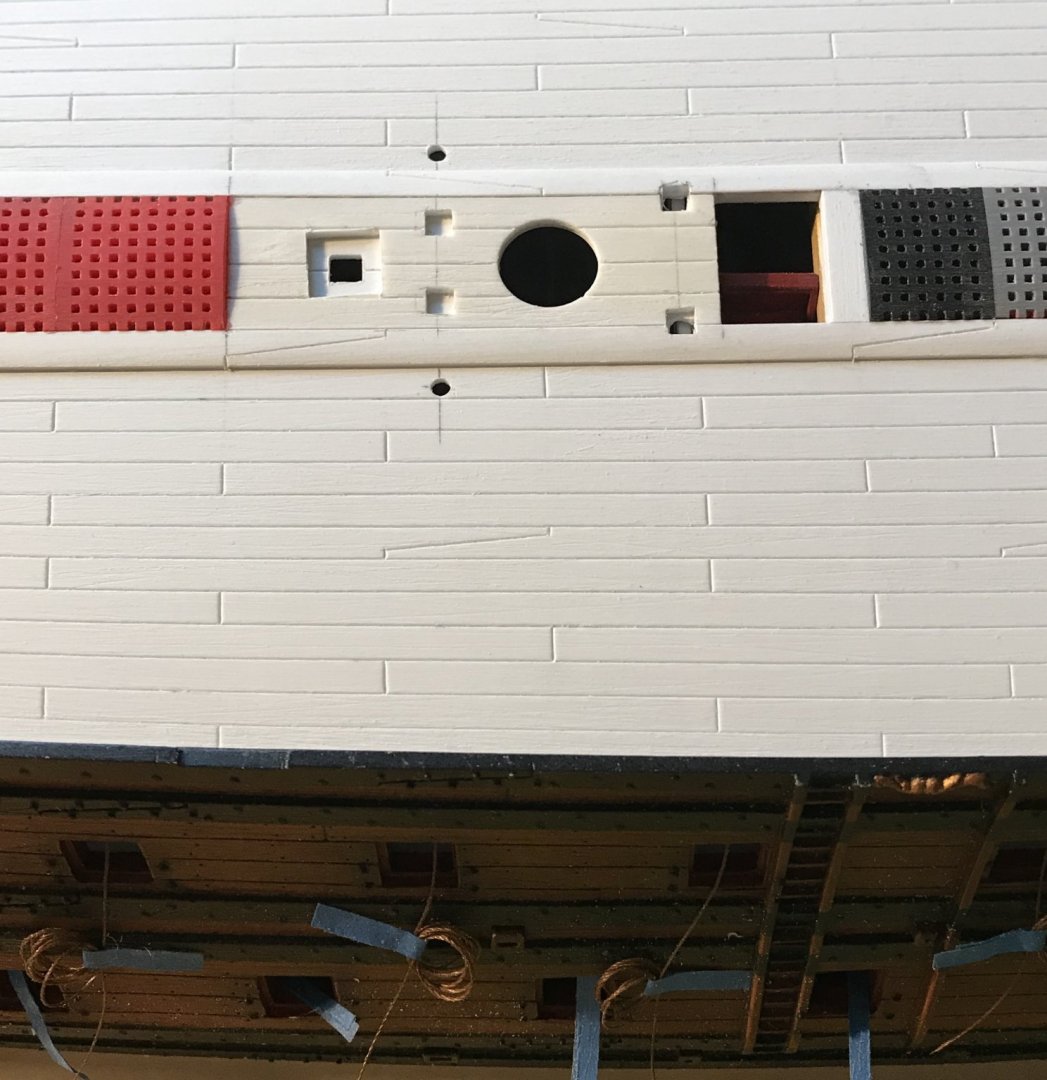
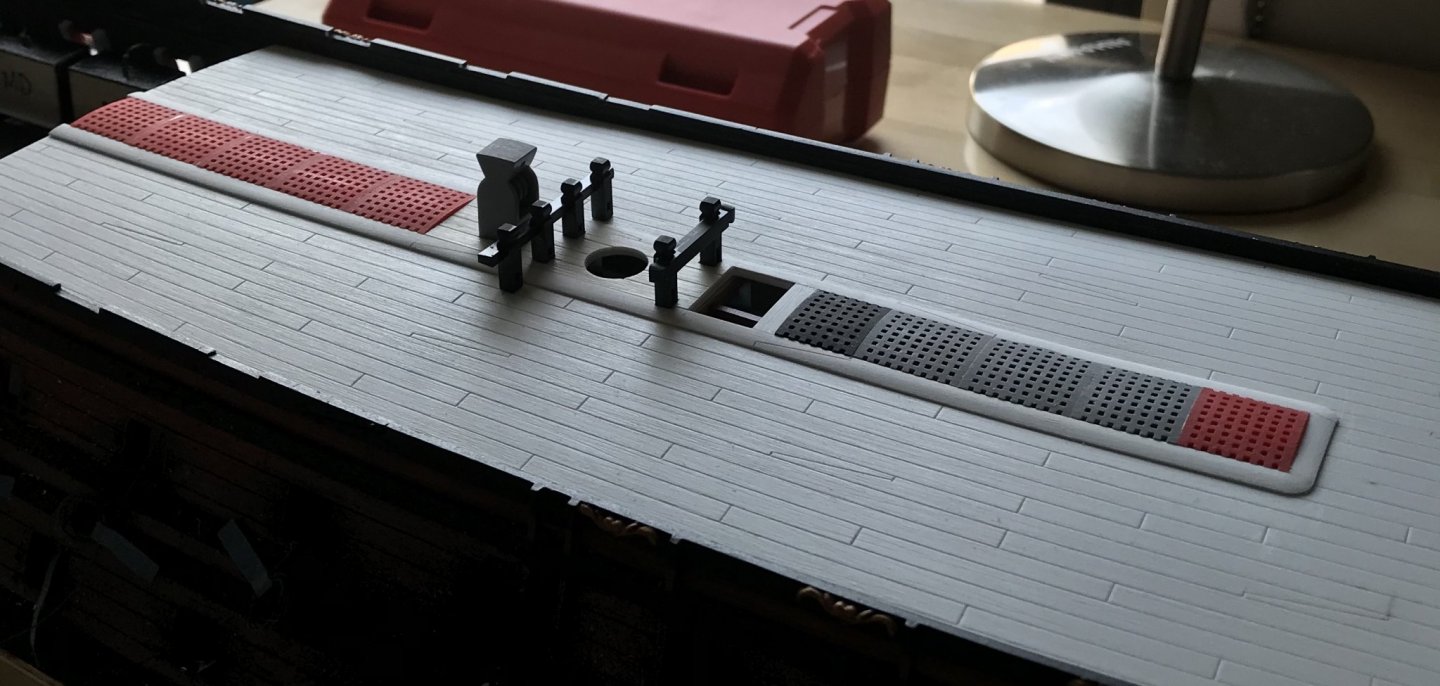
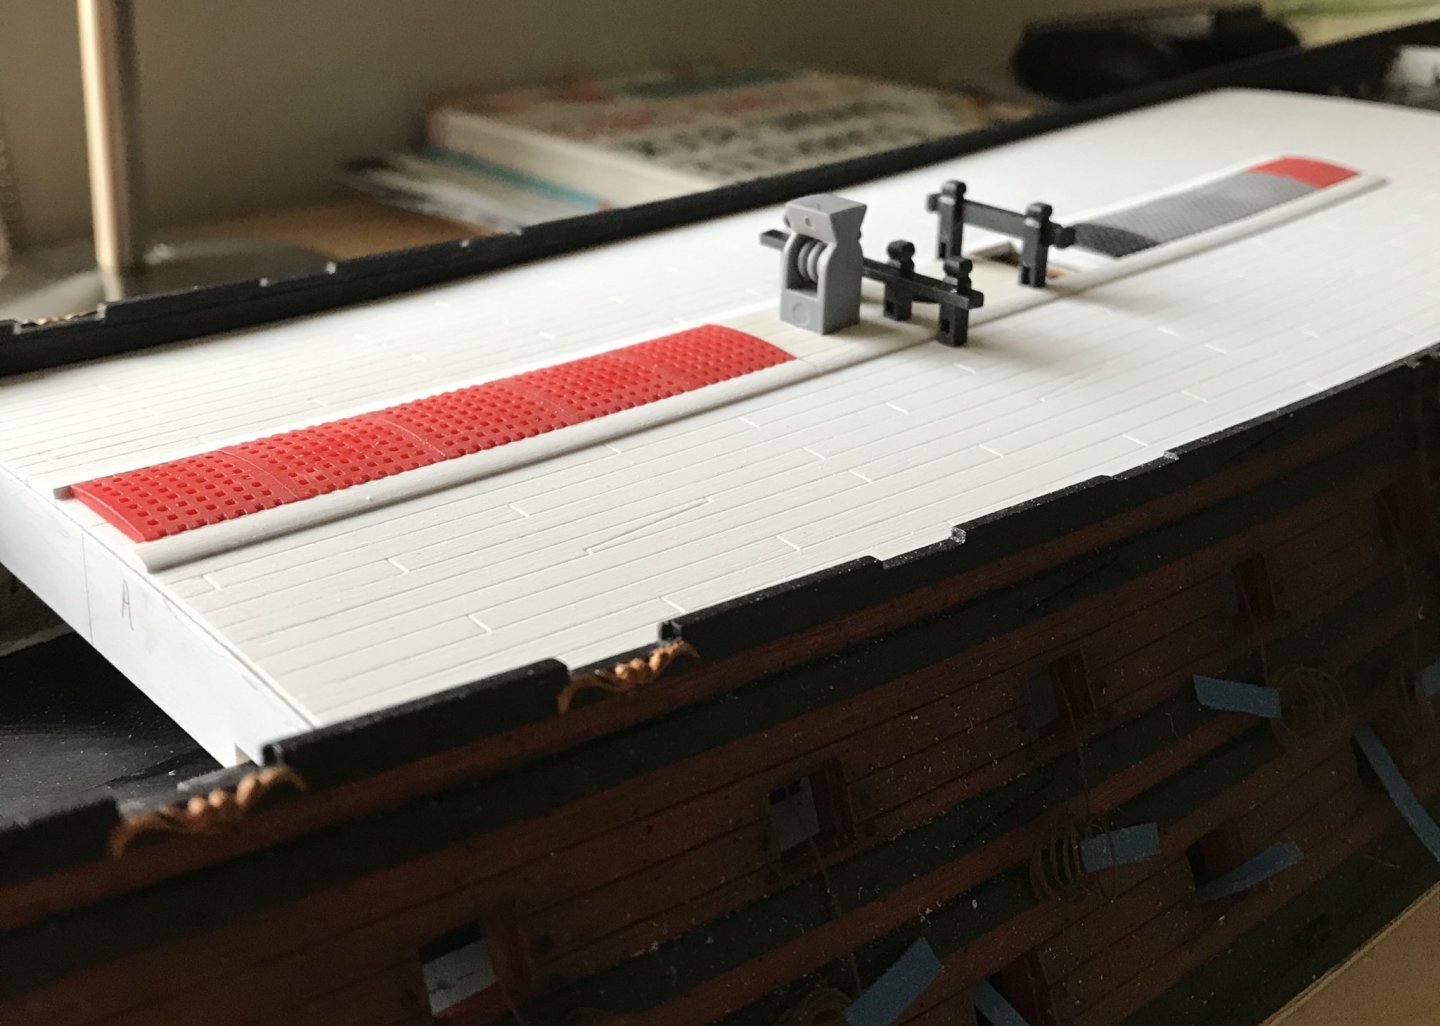
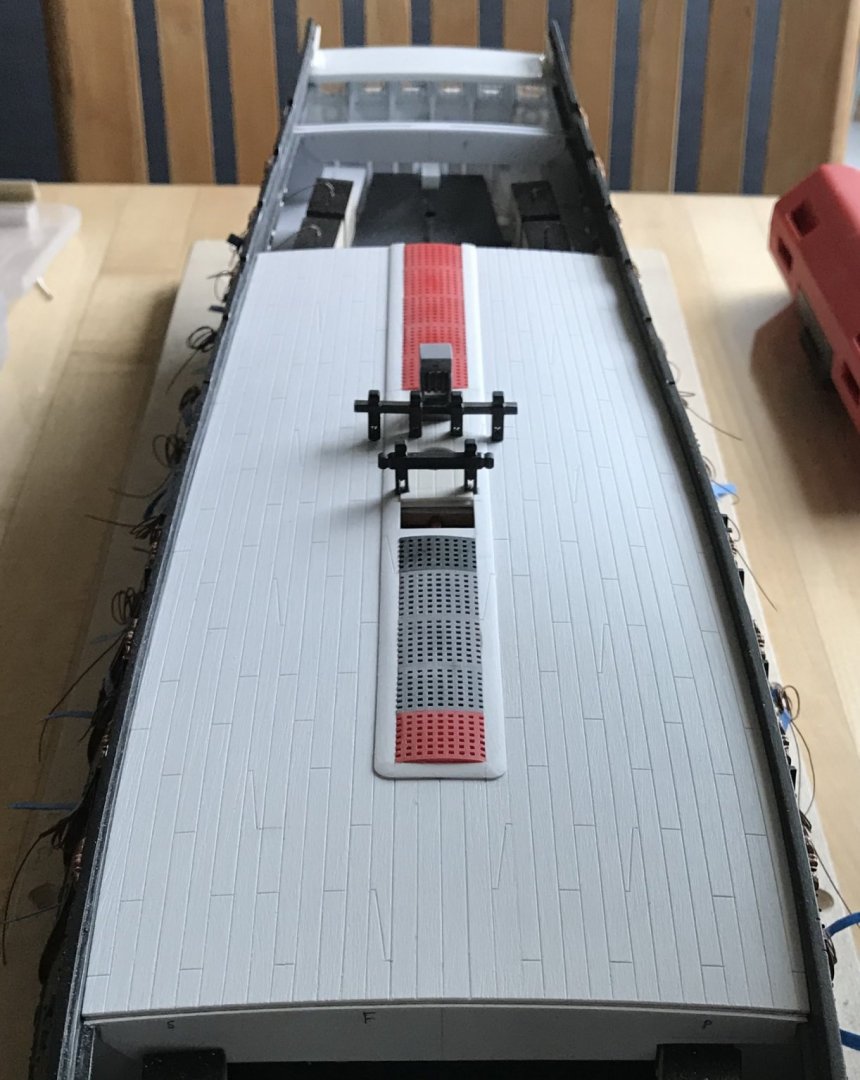
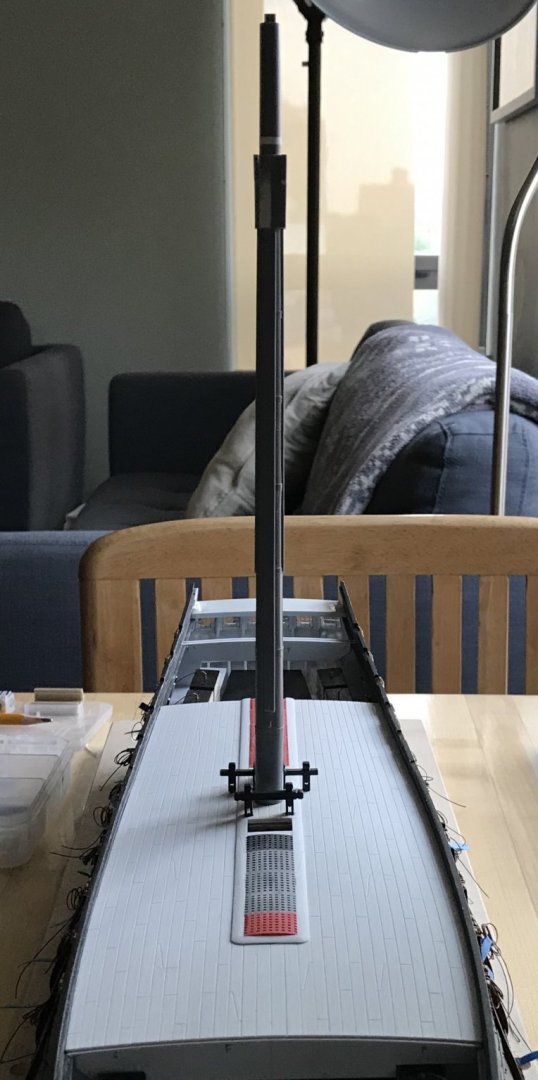
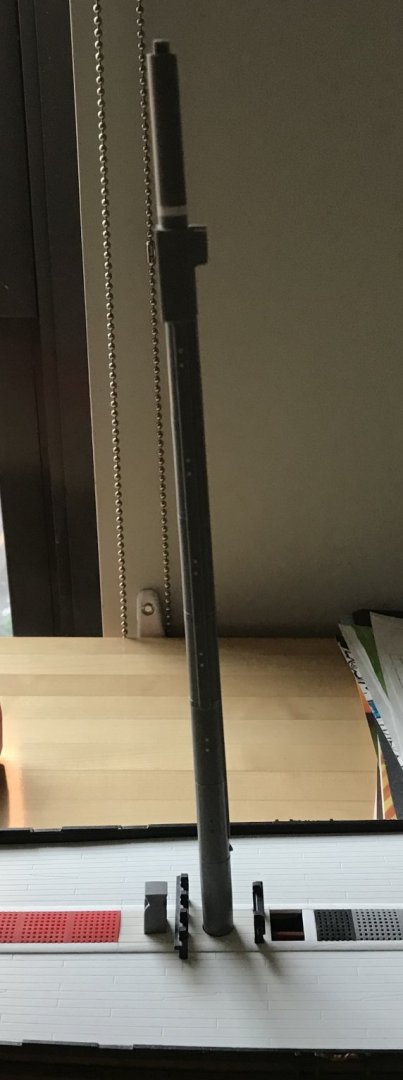
Next, I will drill all of the nailing impressions, and then I will paint the deck.
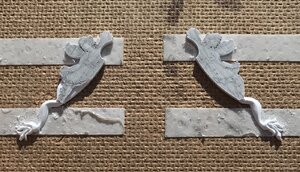
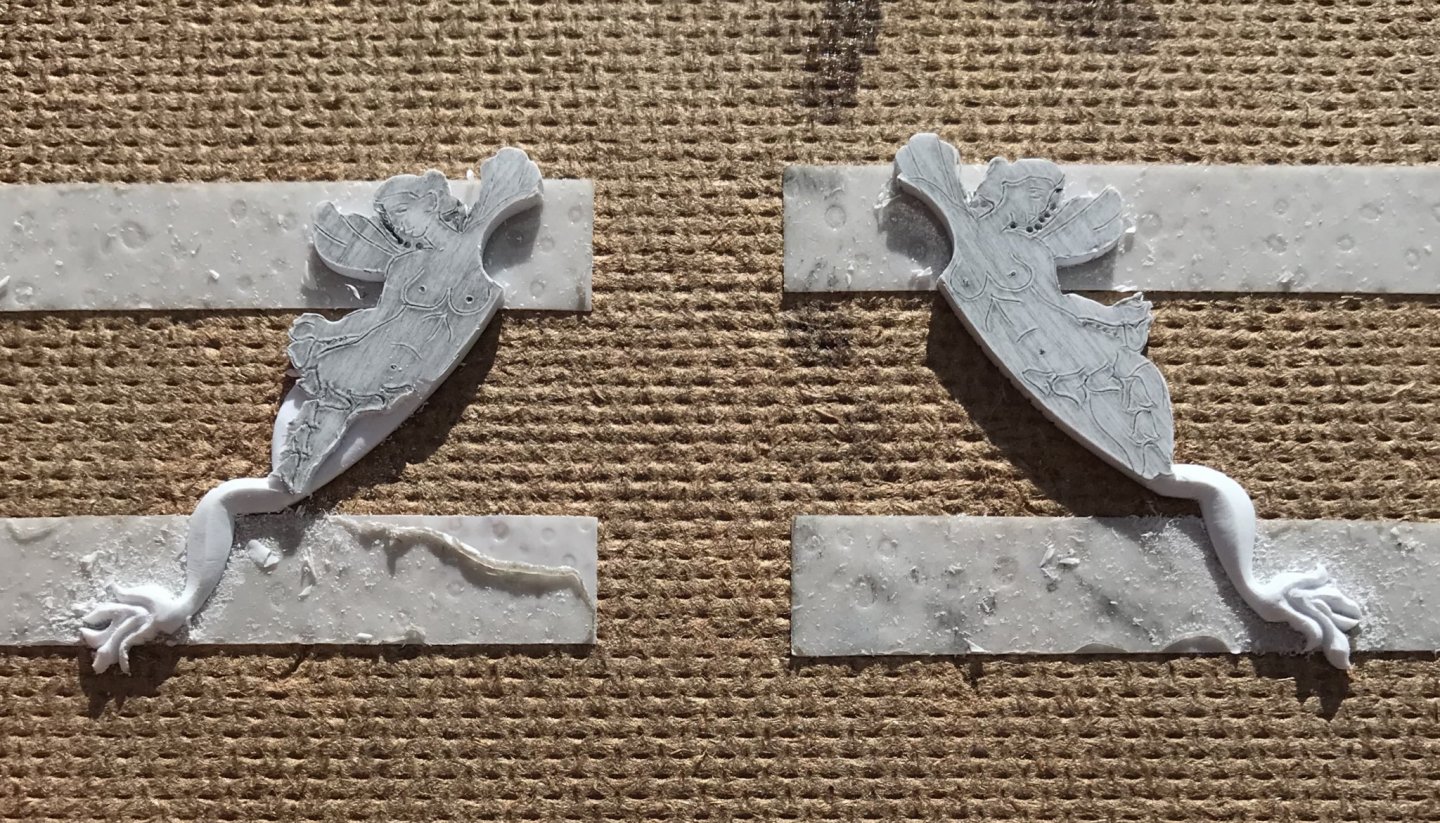
Work on the forward MerAngels is proceeding nicely:
Thank you to everyone for your likes, your comments and for looking in.
Work on the main deck continues:


The gratings required a little extra attention to get them to lay in an even plane.
The main mast plate finally secured the mast, perpendicular to the keel, but the extra thickness of the plate and coamings necessitated a little inletting of the deck furniture:


Next, I will drill all of the nailing impressions, and then I will paint the deck.
Work on the forward MerAngels is proceeding nicely:

Thank you to everyone for your likes, your comments and for looking in.
Splendid work Marc,that deck will look fabulous once painted
Kind Regards
Nigel

Kind Regards
Nigel
Hi Marc,
Looking fantastic.
I hope I am not out of line here, but you are going to take care of those ejection pin marks on what looks like a large deck mounted pulley shown clearly in the 7th photo down in this latest post, I am quite sure you would be taking care of it, sorry it was getting to me.
Cheers,
Stephen.
Hi Stephen, yes you are right about the injection pin marks. I will fill them. I was about to when I realized that what was left of my squadron white putty had ossified in the tube. I am thinking of switching to Bondo, anyway. I just have to go get some.
I also have to order a bunch of #79 drill bits from MicroMark, as I snapped my last one drilling out the deck last night. I didn’t get too far with that.
I also have to order a bunch of #79 drill bits from MicroMark, as I snapped my last one drilling out the deck last night. I didn’t get too far with that.
Last edited:
Hi Marc,
Yes I have had the same problem with Tamiya putty, eventualy it dries up in the tube.
#79 brill bits are quite easy to break.
Cheers,
Stephen.
Yes I have had the same problem with Tamiya putty, eventualy it dries up in the tube.
#79 brill bits are quite easy to break.
Cheers,
Stephen.
Kurt Konrath
Kurt Konrath
To help with drill bit life, chuck them up very short sticking out of end of bit, less length to bend and snap that way.
Jay, that is really a very nice thing to say, and I am honored that you feel that way ☺ Welcome aboard!
Steady progress:
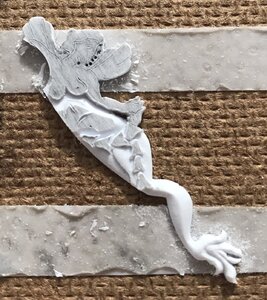
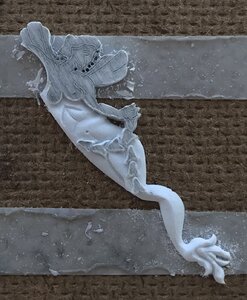
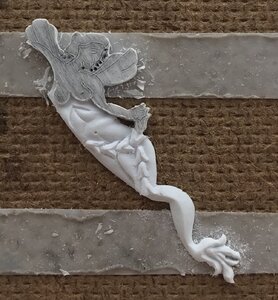
One of the things that anatomy forces you to learn are ways in which to introduce the soft hollows of a body, with whatever tool can get into tight spaces. In the area of the belly and hips, I don’t have a gouge that’s small enough to get in, close to the side of the body, without the arm getting in the way.
What I use is the hooked knife to scrape hollows on a bias, according to the same principle of cutting a cove moulding on a table saw, by running a fence at an angle to the blade. The scraping motion, at an angle, gently introduces a hollow that, in this case, defines a fleshy love handle. Each scrape removes just a little material at a time, and eventually you arrive at where you want to be.
One other thing I’d like to mention is the undercutting of the upper thigh. I could simply define the lap line, where one thigh rests against the other. This would look okay. However, the pose of the figure suggests that the outer thigh overhangs the other leg.
What I like to do here, to suggest this, is that after I have first defined that meeting line - the line that delineates the shape and proportion of each thigh - I come back with sharply angled scrapes that undercut the outer thigh. I use the sharply beveled tip of the EXACTO to do this. The accentuated shadow line creates a false sense of depth in what is a very shallow carving.
While I wait for my #80 drill bits to arrive, I have made and fit the fore and aft sections of the main deck. Unlike the middle deck, where I had to make mast plates to fix the plumb and rake of each mast - I now had a reliable reference to measure the exact centerline of the fore and mizzen masts; I could measure directly from the fore and aft edges of the main deck center section to the center of each mast. The masts are all in alignment, now, and the slight bow of the mizzen will eventually be corrected by the stays and shrouds.
I have also decided to re-enforce the main deck hatch openings with carlings that are scribed to the longitudinal curvature of the deck. The styrene I’m using for the decks is a bit thinner than what the stock kit provides, and is not as rigid. It is my pathology to overbuild the whole thing, so, here you go:
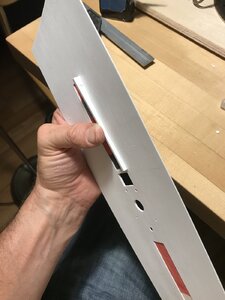
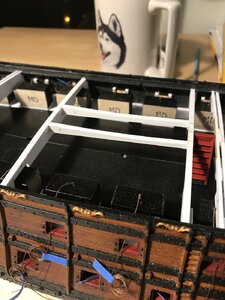
I enjoy the exercise of scribing and fitting these curved parts because it is good practice for when I eventually transition to wooden builds.
Thank you for looking in. More to follow...
Steady progress:


One of the things that anatomy forces you to learn are ways in which to introduce the soft hollows of a body, with whatever tool can get into tight spaces. In the area of the belly and hips, I don’t have a gouge that’s small enough to get in, close to the side of the body, without the arm getting in the way.
What I use is the hooked knife to scrape hollows on a bias, according to the same principle of cutting a cove moulding on a table saw, by running a fence at an angle to the blade. The scraping motion, at an angle, gently introduces a hollow that, in this case, defines a fleshy love handle. Each scrape removes just a little material at a time, and eventually you arrive at where you want to be.
One other thing I’d like to mention is the undercutting of the upper thigh. I could simply define the lap line, where one thigh rests against the other. This would look okay. However, the pose of the figure suggests that the outer thigh overhangs the other leg.
What I like to do here, to suggest this, is that after I have first defined that meeting line - the line that delineates the shape and proportion of each thigh - I come back with sharply angled scrapes that undercut the outer thigh. I use the sharply beveled tip of the EXACTO to do this. The accentuated shadow line creates a false sense of depth in what is a very shallow carving.
While I wait for my #80 drill bits to arrive, I have made and fit the fore and aft sections of the main deck. Unlike the middle deck, where I had to make mast plates to fix the plumb and rake of each mast - I now had a reliable reference to measure the exact centerline of the fore and mizzen masts; I could measure directly from the fore and aft edges of the main deck center section to the center of each mast. The masts are all in alignment, now, and the slight bow of the mizzen will eventually be corrected by the stays and shrouds.
I have also decided to re-enforce the main deck hatch openings with carlings that are scribed to the longitudinal curvature of the deck. The styrene I’m using for the decks is a bit thinner than what the stock kit provides, and is not as rigid. It is my pathology to overbuild the whole thing, so, here you go:


I enjoy the exercise of scribing and fitting these curved parts because it is good practice for when I eventually transition to wooden builds.
Thank you for looking in. More to follow...
Last edited:
With the proper motivation, you might surprise yourself, Mr. Shanks. The ability to carve figures begins with the ability to draw them, which really begins with the ability to see the relationships among line, form and volume.
Even people who can’t imagine themselves drawing ANYTHING can become pretty proficient at it with the help of this book:

 www.bing.com
While it is true that I always, personally, had some innate ability to draw, for whatever reason (girls), it was a talent that I stopped developing around the dawn of my teen years. It wasn’t until much later in life, when I read this book, that I really began to SEE what is in front of me. Once you can truly see it in your mind, you can transfer it to paper, and you can eventually translate it into three dimensions.
While I was carving things out of wood four years ago, I would not have imagined, then, that I would be carving in such a small scale now.
Like anything else, it is mostly a matter of time and practice and determination that you can learn and improve.
Even people who can’t imagine themselves drawing ANYTHING can become pretty proficient at it with the help of this book:

drawing on the right side of the brain - Bing
Intelligent search from Bing makes it easier to quickly find what you’re looking for and rewards you.
While it is true that I always, personally, had some innate ability to draw, for whatever reason (girls), it was a talent that I stopped developing around the dawn of my teen years. It wasn’t until much later in life, when I read this book, that I really began to SEE what is in front of me. Once you can truly see it in your mind, you can transfer it to paper, and you can eventually translate it into three dimensions.
While I was carving things out of wood four years ago, I would not have imagined, then, that I would be carving in such a small scale now.
Like anything else, it is mostly a matter of time and practice and determination that you can learn and improve.
The really strange thing about all this... For decades I have built models, been a draftsman, did engineering work, design, mechanical drawings, blueprints, CAD/CAM, etc.... All of this by using measurements, angles, mathematics, etc. But when it comes to drawing "forms found in nature".... I struggle!!Once you can truly see it in your mind, you can transfer it to paper, and you can eventually translate it into three dimensions.
Left brain.. right brain... very weird...
Anyone else have this problem???
Just a quick update:
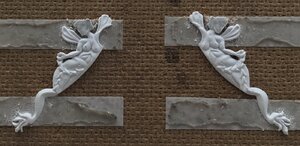
In all likelihood, I will cut away the smaller, inside wings because they interfere with my aft octagonal ports. However, until the amortisement is made and I can see the actual relationships of all these parts, I wanted to keep all options open.
Tomorrow I will start the heads, but my own head is growing weary and my neck is getting sore, after sitting hunched over these gals all day. I tend to start making mistakes when I push through.
A few of those mistakes, I’ll be filling-in with BONDO, this evening, as I prepare the main deck for painting and priming; some of my nail impressions were poorly placed, and/or ill-conceived.
I’m excited to get back to a little painting, though. In addition to the Windsor and Newton Van Dyke Brown, I will experiment with a lightish grey Windsor and Newton oil shade, that will be applied and wiped streakily before a blanket application of the brown.
The deck is coarsely sanded, so it should pick up these colors nicely.
Kurt Konrath
Kurt Konrath
Great artwork on the skinny ladies.
Last night, I distress washed my main deck. The Windsor and Newton grey does a fabulous job of getting into all of the engraving, while silvering the random tan, acrylic base-coat. Then, the Van Dyke Brown works its magic and the whole thing looks appropriately weathered.
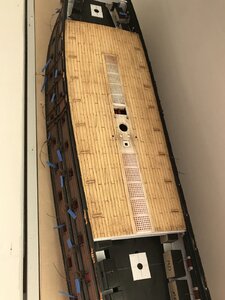
I’ll give the oil a few days to cure before I paint the hatches and coamings red ocher. As I have done, elsewhere, I’ll use the walnut ink to wash the red.
Now, speaking of missing details, I am trying to work out the details of the stove. Unfortunately, the St. Philippe monograph isn’t much use for me, in this area, because the main hearth and bread oven are two separate structures that are placed between the guns, on the middle deck; one to port, and one to starboard. I want to centralize these two things on the main deck, beneath the forecastle deck, with one chimney.
While I have a good idea what the timber cladding and iron strapping would look like on the outside of the brickwork, I can’t find any reliable references to what the brickwork should be for a combined cauldron stove/bread oven. Would they even have been combined? For all practical purposes, very little beyond the timber clad bulkhead will even be visible, but I would like to know what should be, for SR 1670.
Your likes comments and input are all greatly appreciated.
Just stunning artistic sculpting work. Could you give us an idea of about how many hours you have in those two sculptures so far?Just a quick update:


