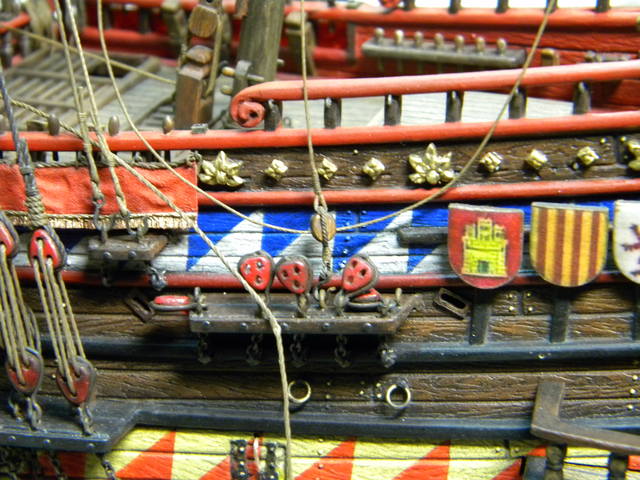
Soleil Royal - Heller 1/100 Back to work!

Trying to come up with some kind of rigging jig that could help with the various complicated and very small rigging works. This was the result, still trying to improve, so any other ideas are very much welcome…

View attachment 254345
View attachment 254346View attachment 254347View attachment 254348 View attachment 254349


Hi Dfolgado

I bought one of these inexpensive rigging jigs for the deadeyes, widely available on a certain online website and have used it on 3 kits now, definitely a must and a lot better and easier than he system I see you using which is also on YouTube.

Just a suggestion my friend but works for me.

Btw this is my Improvised Royal Louis kit by Heller 1/200 which I am working on just now.

20210910_090119.jpg20210719_155207.jpg/ATTACH]20210719_155207.jpg20210629_081320.jpg
 
Last edited:
the tool is looking interesting.
Could you show us with an example how it works? Maybe in a small topic here:
Hi Uwek

It's just a simple device that holds the 2 deadeyes adjacent to each other without the need for tweezers etc..
Then it's just a a case of threading the deadeyes and tying them up, thus you have one pair of rigged deadeyes.
The v shaped channels make sure your deadeyes are secured in place like a vice and obviously the wider the channel at the top caters for different sizes of deadeyes but once you push the deadeye down it becomes secure, it's just a case of aligning the deadeye holes before threading them, and with them secured you can rig deadeyes tightly without fear of them coming loose or differently sized in length to other ones as the space between them remains the same.

Hope this helps folks

20210512_165804.jpg
 
Looks good!
Nice details! And Good You paid attention on it!
And there must be scrolls added to the stem, in the kit they complitely missed them!
*
For ropes painting I used acrylic artistic paints mixed in random with matt acrylic varnish and some thinner for acrylic paints, to make suitable colors...kind of light ochre/hemp - for running, and something dark/ like a tarred ropes- for standing rigging...
But better to use artistic oil paints of suitable colors, like row umbra and gold ochre deluted in teack oil and white spirit... same colors- bright for running rigging and dark - for standing...
This Mixture of Oil paints for the rope, after polimerisation became much more stable and well sticked to the thread than acrylic paints... later could be easily apart from the thread if You need to move it intensively trough the blocks or somewhere else...
This stuff of oil paints, teack oil and white spirit need to be mixed in jar...1-2 litres...and rope need to be soaked in this mixture, than excessive wett removed by pulling it trough cotton gloves or rags and than suspended somewhere for drying for couple of days...
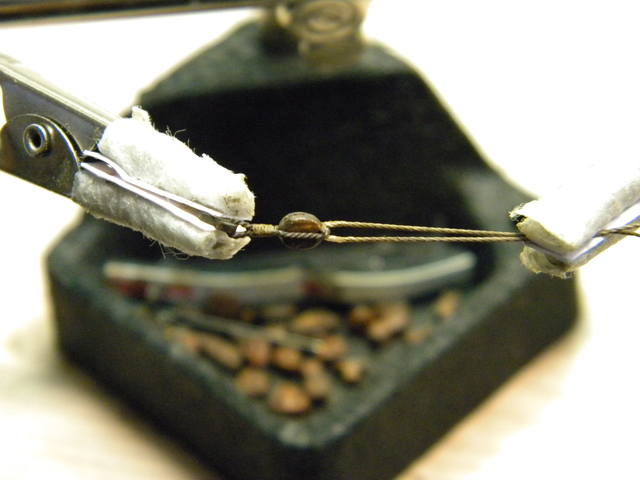
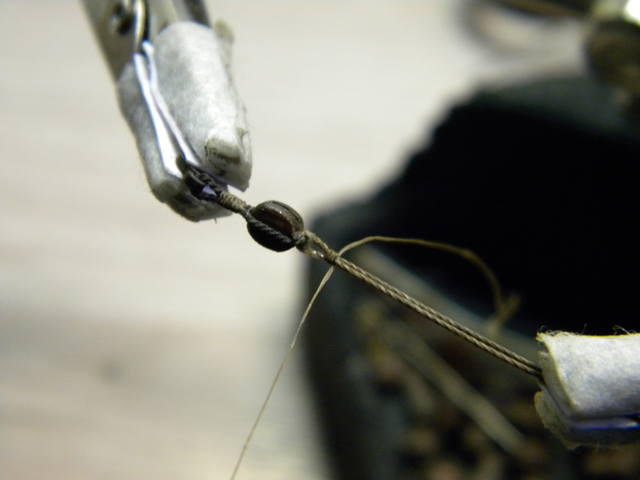
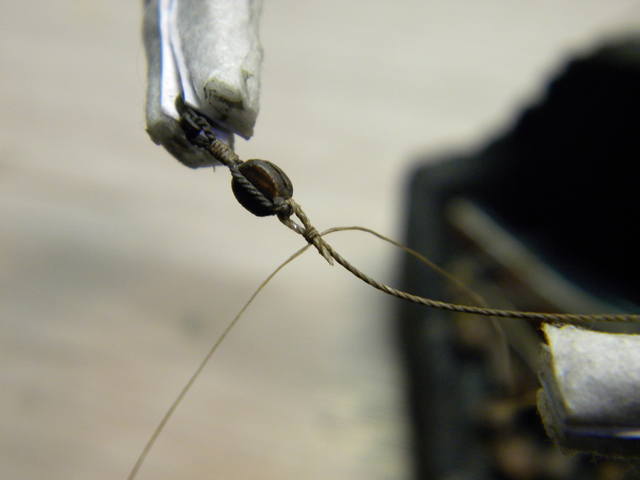
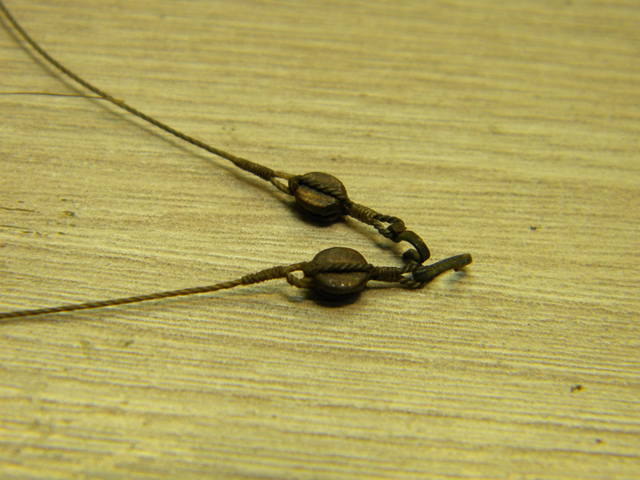
View attachment 252281View attachment 252282
Hello kirill, what is the the purpose of the teak oil in the painted ropes?
 
Want to replicate this bow “net” according to Saint-Philippe monograph:

View attachment 255670

The result for my Soleil Royal:

View attachment 255671

View attachment 255672
View attachment 255673
View attachment 255674

Now, I need to take a deep breath for the next one…
Depending on where you live you can find netting like this in fabric department of store, often used as bridal vial. I have used it to make fences in my model railroading hobby.

I do like the small jig you made to get the web you made the bow net from. Keep it going, as it looks very good.
 
Hello kirill, what is the the purpose of the teak oil in the painted ropes?
Good day Dfolgado!
Sorry for delay with answer, I' m travelling now, and often don't have access to internet...
I think teak oil need for polimerization purposes, and better adhesing/ penetration oil paint trough the rope...and when mixed with artistic oil paint ,aplied on the rope and dried, it gave necessary effect of flexibility and will make thread as soft copper wire...which is very handy for model rigging...
I didn't try this way of coloring ropes, I used artistic acrylic paint of suitable colors mixed with matt varnish and water/ spirit... application this mix on the rope is the same as recommended for application of mix of oil paint and teak oil...
apply some quantity of oil paint mix on some piece of cloth and pull thread trough this wetted cloth a few times till all thread will be evenly colored, and excessive oil mix will be removed, than let it dry...
Advantage of using acrylic paint mix - it dry very fast, and thread could be used in an hour... disadvantage - it doesn't stick good to the rope...and if you will pull ropes a few time trough the blocks or whatever, some paint will fall apart, and rope will look not nice at all... and than need time to repaint damaged area...
But using mix of oil paint deluted in teak oil will allow to avoid such difficulties as I understood... it will dry longer, but stays much stronger on the thread...
 
Saw your rigging works, with net - looks very nice and accurate, however I would like to advice to use one string from your thinest thread for imitation of rope splicing...
for small scale it could be aceptable as imitation of splicing I think, and will look more accurate compare to using just whole thinest thread as You did For the same purposes....
run thread over block, secure running end to standing part by drop of CA Gel if need, cut necessary length of running end on right angle, made angle cut, not straight, and than using one strand separated from your thinest thread and to make series of simple knots tightly placed one after another till all area of "splicing" will be covered in this way...secure again woth CA gel to and cut unused parts...
All used thread should be preliminary painted...
 
Last edited:
Saw your rigging works, with net - looks very nice and accurate, however I would like to advice to use one string from your thinest thread for imitation of rope splicing...
for small scale it could be aceptable as imitation of splicing I think, and will look more accurate compare to using just whole thinest thread as You did For the same purposes....
run thread over block, secure running end to standing part by drop of CA Gel if need, cut necessary length of running end on right angle, made angle cut, not straight, and than using one strand separated from your thinest thread and to make series of simple knots tightly placed one after another till all area of "splicing" will be covered in this way...secure again woth CA gel to and cut unused parts...
All used thread should be preliminary painted...
That really looks great! I think I understood the angle cut to look like splicing, great idea!

But I didn’t understand one thing: for example in your first photo and regarding the block thread, where is thread cut? inside the “splicing” or in the outer end of the block? In my case the thread cut is inside the “splicing”, and this looks a bit awkward… I still have a long way to go!
 
Ah, forgot to say... this will work when You use already prepainted threads...
by acrylic paint mixed with matt varnish and water or better special thiner for acrylic paints, or painted by mix of artistic oil paint and teack oil and white spirit...
We need thread became like as a very soft wire, even when it cutted it should remains as a whole unit ... :)
 
Last edited:
Back
Top