-

Win a Free Custom Engraved Brass Coin!!!
As a way to introduce our brass coins to the community, we will raffle off a free coin during the month of August. Follow link ABOVE for instructions for entering.
-

PRE-ORDER SHIPS IN SCALE TODAY!
The beloved Ships in Scale Magazine is back and charting a new course for 2026!
Discover new skills, new techniques, and new inspirations in every issue.
NOTE THAT OUR FIRST ISSUE WILL BE JAN/FEB 2026
You are using an out of date browser. It may not display this or other websites correctly.
You should upgrade or use an alternative browser.
You should upgrade or use an alternative browser.
Thanks H.
However, you are in China and I am in Florida and I didn't take a macro shot
However, you are in China and I am in Florida and I didn't take a macro shot
Hi Ron. It is now the third time I have had thread confusion- use my phone too muchGrant
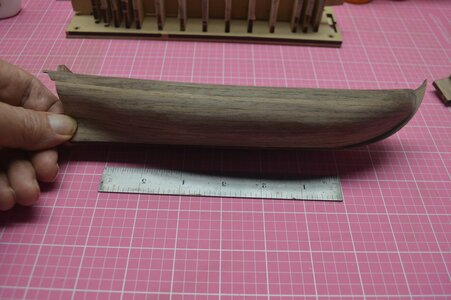
I would like to say that is my planking job however, that’s from a posting Heinrich made from Han’s G build. If mine turns out half as good as that one I’ll be ecstatic. I’ll be starting the planking soon and to this point I really like the quality of the kit
Ron
 . im sure you will be ecstatic with your outcome and yes those are super high standards to chase. Good luck and enjoy.
Grant, I feel your pain. When I go between, iPad, iPhone and desktop I often get threads mixed.Hi Ron. It is now the third time I have had thread confusion- use my phone too much. im sure you will be ecstatic with your outcome and yes those are super high standards to chase. Good luck and enjoy.
- Joined
- Jan 9, 2020
- Messages
- 10,566
- Points
- 938

Thanks H.
However, you are in China and I am in Florida and I didn't take a macro shot
Ron, now you have really made me feel nostalgic - I don't know when someone last called me "H" - my PA at VW/Audi always called me that.
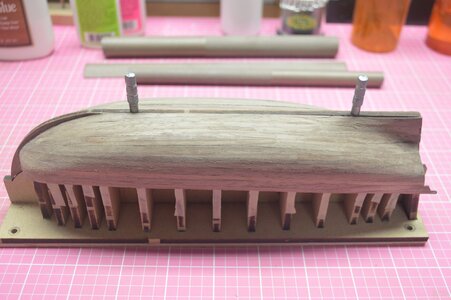
I told you at the beginning it would be a slow build. Started in November and its now December.
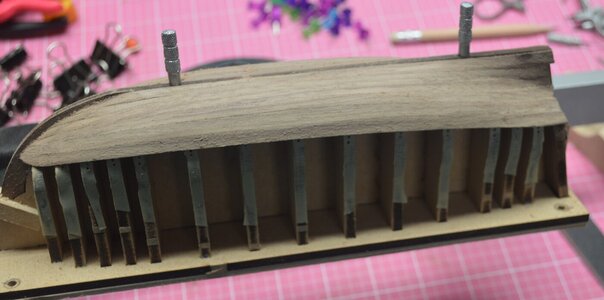
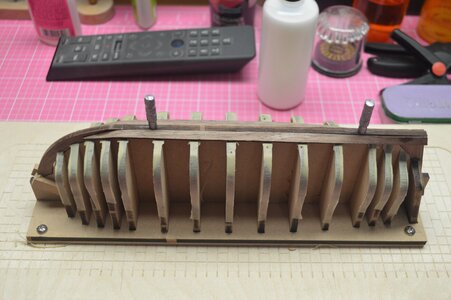
The planking is finished. Just have a few spots to fill at the bow area and then a final scraping and sanding.
This being a shell first construction technique the framework/mold is only used to form the shell of the hull which will be removed after all planks have been edge glued together. (At least that’s the plan)
I guess, technically you could call this a POB/POF as long as you didn’t glue to the framework.
1) Removed laser cut planks from sheet and lightly sanded tabs and char from planks.
2) Soaked the walnut planks for approx. (1) hour in water to “soften”.
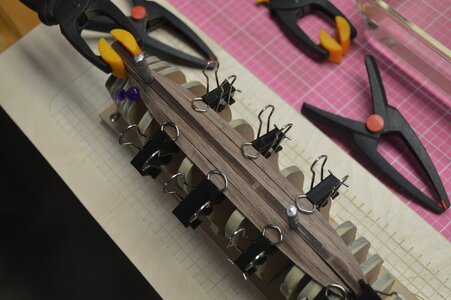
3) Formed the planks to framework by careful bending and applying heat w/plank bender. Pin/clamp in place until dry.
4)Removed from framework and make any final adjustments to fit plank prior to gluing.
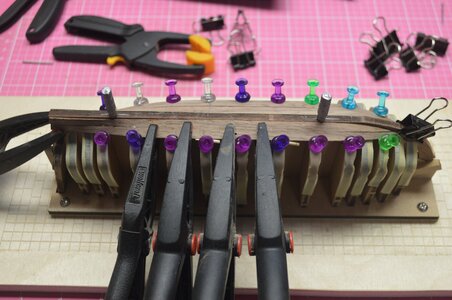
5) Applied PVA to edge of plank carefully to avoid excess glue to keep from adhering plank to framework. (I applied 3M Fineline tape to the frame members as glue doesn’t adhere to the tape) Hopefully.
6) Drilled small 1mm pilot hole in frames before inserting map pins to secure planks while glue dries.
Sure glad that I used water soluble glue as I had to “Field engineer” one of the planks as it had shifted slightly. Next step is to let the glue dry and remove the hull
from the framework.
Last edited:
- Joined
- Jan 9, 2020
- Messages
- 10,566
- Points
- 938

Your planking looks REALLY good Ron - you have absolutely nothing to be worried about. It is always an exciting next step to remove the shell from the framework, but I am positive that it will go well. The 3M Fineline tape is a very good idea.
Your planking looks REALLY good Ron - you have absolutely nothing to be worried about. It is always an exciting next step to remove the shell from the framework, but I am positive that it will go well. The 3M Fineline tape is a very good idea.
Thanks H, as you well know the hull is very fragile at this point until the internal structures get in place.
Hopefully ole thumbs Ron doesn’t crack it like a walnut. Especially since it’s made of walnut
- Joined
- Jan 9, 2020
- Messages
- 10,566
- Points
- 938

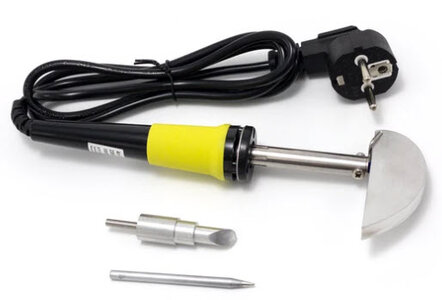
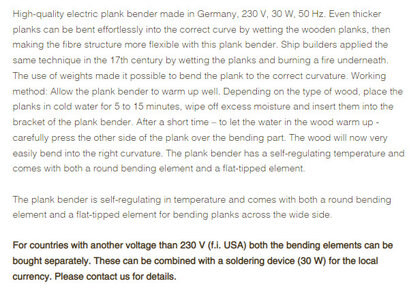
Ron you will not crack anything and as to "walnut" that wood is tough and resilient - as you experienced during the bending. For the WB build though, I would recommend that you get the Kolderstok plank bender. You don't need to get the soldering iron part of that as the EU power ratings are different to that in the USA, but you should get the different heads (fitments). @Pathfinder65 Jan will be able to tell you exactly what power (voltage and wattage) soldering iron he uses.
Ron you will not crack anything and as to "walnut" that wood is tough and resilient - as you experienced during the bending. For the WB build though, I would recommend that you get the Kolderstok plank bender. You don't need to get the soldering iron part of that as the EU power ratings are different to that in the USA, but you should get the different heads (fitments). @Pathfinder65 Jan will be able to tell you exactly what power (voltage and wattage) soldering iron he uses.
I already have them Heinrich. That’s what I used for the bending. As you know some of them required a 90 degree twist.
I use a 30 watt iron. Works great
- Joined
- Jan 9, 2020
- Messages
- 10,566
- Points
- 938

Great stuff - then you are all sorted!I already have them Heinrich. That’s what I used for the bending. As you know some of them required a 90 degree twist.
I use a 30 watt iron. Works great

Wow that is small. Very nice planking work.I feel like I'm constructing a dory
Jan
Hi Ron.Well done with your planking. That is small...View attachment 276584
Whew, removed from frame without hearing the crack of wood.
OBTW, did I mention the size (Or lack of) of this model. 28 cm completed. I feel like I'm constructing a dory.
Now to the internals to stiffen in up.
 . awesome job.
I always knew I couldn’t walk and chew gum at the same time. Along with my Speeljacht I’m (kinda) working on parts to another (unnamed) model and couldn’t find enough 1x4 strips. Duh, I was looking at the wrong kit.
Yup, been there, done thatI always knew I couldn’t walk and chew gum at the same time. Along with my Speeljacht I’m (kinda) working on parts to another (unnamed) model and couldn’t find enough 1x4 strips. Duh, I was looking at the wrong kit.


