I have this 3" boiler made by Australian company Miniature Steam Models: https://miniaturesteammodels.com/co...ts/copy-of-4059-3-inch-vertical-marine-boiler
-

Win a Free Custom Engraved Brass Coin!!!
As a way to introduce our brass coins to the community, we will raffle off a free coin during the month of August. Follow link ABOVE for instructions for entering.
-

PRE-ORDER SHIPS IN SCALE TODAY!
The beloved Ships in Scale Magazine is back and charting a new course for 2026!
Discover new skills, new techniques, and new inspirations in every issue.
NOTE THAT OUR FIRST ISSUE WILL BE JAN/FEB 2026
You are using an out of date browser. It may not display this or other websites correctly.
You should upgrade or use an alternative browser.
You should upgrade or use an alternative browser.
Steam pinnace Janet
- Thread starter badras-khan
- Start date
- Watchers 31
- Joined
- Apr 10, 2020
- Messages
- 654
- Points
- 353

Finnaly I got to work a bit for my model again!
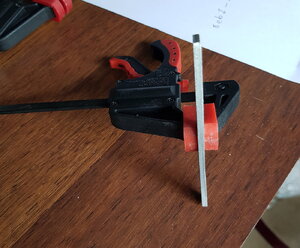
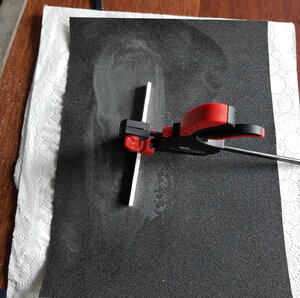
Last visit at my father workshop I saw one hard aluminium piece and with my father consent I took it
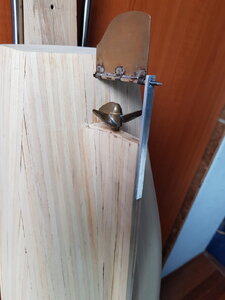
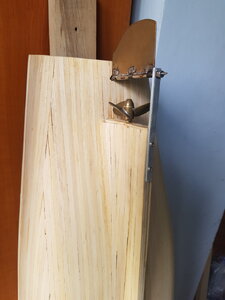
Now I have the tiller arm 2.0 and much stiffer than the copper one. I filled the superior part of the rudder too.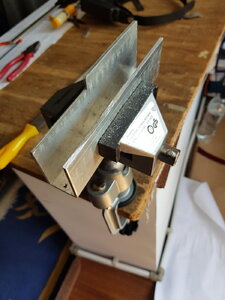
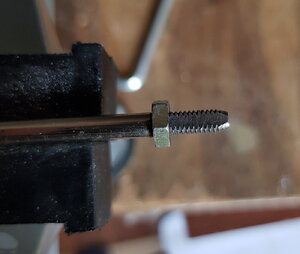
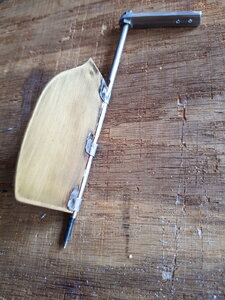
Working now at metal spine who fix the rudder from hard aluminium too
Kind Regards,Daniel
Last visit at my father workshop I saw one hard aluminium piece and with my father consent I took it
Now I have the tiller arm 2.0 and much stiffer than the copper one. I filled the superior part of the rudder too.


Working now at metal spine who fix the rudder from hard aluminium too
Kind Regards,Daniel
Thanks Nigel for clear instructions! One more question: Which grid sandpaper you use for final sanding before applying varnish? I think it must be quite fine.
And Daniel: Yes, I think 0,3 mm thick brass plate is fine for hand tools. Easy to cut and not too thin for filing or sanding edges.
Hi Moxis
Sorry for the late reply I am now on my second laptop battery and that is playing up.Shops reopen next week so time for new PC me thinks
P240 grade followed by wet and dry used with a little water and washing up liquid if possible.I try to go as fine a grade as possible dry sanding but you can get excessive clogging on the paper if you go to fine.
I am a bit of a convert to the nylon pads for car bodyshop work.I have a big box of superfine sheets(about 250mm by 150mm)left over from when I messed with cars.these are great and you can cut them into whatever size piece you want using scissors.They are similar to scotchbrite.They are better for polishing wood than steel wool as well.You get fine metal dust from steel wool that goes rusty if not removed.No residue other than wood dust with these.
Kind Regards
Nigel
- Joined
- Apr 10, 2020
- Messages
- 654
- Points
- 353

- Joined
- Apr 10, 2020
- Messages
- 654
- Points
- 353

- Joined
- Apr 10, 2020
- Messages
- 654
- Points
- 353

founded this on on internet:
Mahogany in Scale: Matthews, Patrick: 9780615166957: Amazon.com: Books
Mahogany in Scale [Matthews, Patrick] on Amazon.com. *FREE* shipping on qualifying offers. Mahogany in Scale
www.amazon.com
- Joined
- Apr 10, 2020
- Messages
- 654
- Points
- 353

And in this just images:
 www.rcgroups.com
Dumas 19' Chris Craft Racing Runabout - RC Groups
News Dumas 19' Chris Craft Racing Runabout Scale Boats
- Joined
- Apr 10, 2020
- Messages
- 654
- Points
- 353

founded this on on internet:
Mahogany in Scale: Matthews, Patrick: 9780615166957: Amazon.com: Books
Mahogany in Scale [Matthews, Patrick] on Amazon.com. *FREE* shipping on qualifying offers. Mahogany in Scalewww.amazon.com
This book looks good Daniel and will give you a much better insight into using resins than I could explain on here.Only way to really explain it is to physically illustrate the process and I do not have a model to glass as this present time.In the absence of Pat's log this maybe the only solution.Have you tried searching youtube?
Kind Regards
Nigel
G'day badras-khan, I have just had an enjoyable read through your build log, a lovely model, I built the Borkum steam launch, but I only run with an electric motor, actually there are two motors, one turns the steam engine and the other turns the propeller, I look forward to seeing the rest of your build,
Best regards John,
PS here is a link to my build,
https://shipsofscale.com/sosforums/...eam-engine-built-from-stuart-turner-cas.1568/
Best regards John,
PS here is a link to my build,
https://shipsofscale.com/sosforums/...eam-engine-built-from-stuart-turner-cas.1568/
- Joined
- Apr 10, 2020
- Messages
- 654
- Points
- 353

Hello All ,
Nigel ,I got some videos on youtube but they are limited in info about some critical aspects ,I will see if I can buy the book.
Anyway the resin will arrive in a week time.
Also I have to get the beauty wood for the second layer
When resin arrives I will get a internal impregnation with one layer of cloth and one exterior just to soak in the wood
After that a filler and sanding for best surface,
After I will put the beauty wood
For gluing purposes You can use pva over filler and epoxy or you have to use Cianoacrilat?
Kind Regards,Daniel
- Joined
- Apr 10, 2020
- Messages
- 654
- Points
- 353

Hello Neptune,
Great build ! will be an inspiration for some details I just become aware.
Still lot of things I dont know but this is the joy of building no?
I think I got a propeller problem, In this waterline I have some mm out of the water.
I could rise the bow up with some stern weights .
What do you think?
Or just get a little propeler?
Kind regards,Daniel
- Joined
- Apr 10, 2020
- Messages
- 654
- Points
- 353

Hello Neptune,
Great build ! will be an inspiration for some details I just become aware.
Still lot of things I dont know but this is the joy of building no?
I think I got a propeller problem, In this waterline I have some mm out of the water.
I could rise the bow up with some stern weights .
What do you think?
Or just get a little propeler?
Kind regards,Daniel
I put mine in the bath to work out the ballast, you seem to have enough depth at the transom, I would put it in the bath and see what it looks like with a bit of weight, hope this helps you,
Best Buy John,
- Joined
- Apr 10, 2020
- Messages
- 654
- Points
- 353

Hello John ,
I was tempted to put in water but have to wait for Z-poxy to reach me
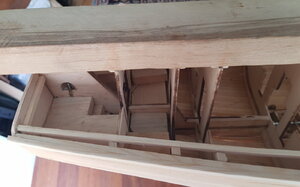
Also have to cut the supports of bulkheads , but now is helping me with sanding ,the wood base is longer than model so I can put on this near a wall with no damage to model
Kind regards,Daniel
I was tempted to put in water but have to wait for Z-poxy to reach me
Also have to cut the supports of bulkheads , but now is helping me with sanding ,the wood base is longer than model so I can put on this near a wall with no damage to model
Kind regards,Daniel
- Joined
- Apr 10, 2020
- Messages
- 654
- Points
- 353

Hello All ,
I have a question.
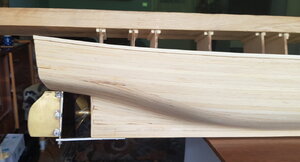
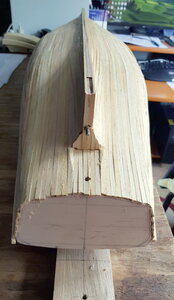
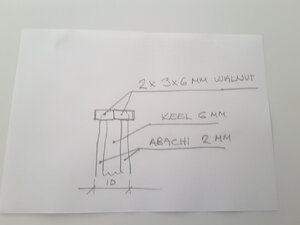
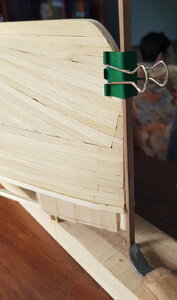
For my build I want to put a strip of walnut 3x6x100 mm as visible keel
In front is ok as seen in photo but on the bottom of the ship the keel is 6 mm with 2 mm obechi strips on each side
Now is a little thick for my taste but sanding is always an option.
The beauty layer is 1 mm thick .
Any advice?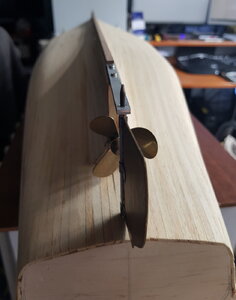


Last edited:
- Joined
- Apr 10, 2020
- Messages
- 654
- Points
- 353

- Joined
- Apr 10, 2020
- Messages
- 654
- Points
- 353

Hello Moxis
Thanks for your swift Idea.
I want to ask you the keel at 10 m is not a little thick for a 1 meter long model?
And in front is 6 mm +1+1 =8mm
Wanted to go with beauty layer from the keel forward.
Kind Regards ,Daniel
Thanks for your swift Idea.
I want to ask you the keel at 10 m is not a little thick for a 1 meter long model?
And in front is 6 mm +1+1 =8mm
Wanted to go with beauty layer from the keel forward.
Kind Regards ,Daniel
Hello Moxis
Thanks for your swift Idea.
I want to ask you the keel at 10 m is not a little thick for a 1 meter long model?
And in front is 6 mm +1+1 =8mm
Wanted to go with beauty layer from the keel forward.
Kind Regards ,Daniel
10 mm thick keel might be a little on the thick side but not too thick according to my opinion. I think you could very well keep that as is.


