Swan Class – ¼” Scale - Stuglo [COMPLETED BUILD]

Almost a week without a blog but very eventful.(as you can see by end of saga)
Reread opening chapters of B.Frohlich’s “Art of ship modelling” with a bit more understanding.
He mentions the change of weather opening gap of 5mm over 100cm model because of change in weather.
Well, we had the first rain after 6 months.Its a humid area anyway (coastal) but this cannot explain the accumulated error after fitting the first 6 cants. I hadn’t forgotten the foot bevel. I think the main culprit was an overly tight hawse filling piece.I also think I should have made a couple of the cants better.
Unstuck cant and filler pieces ans while waiting to dry,gave thought to alternative ways of aligning and holding the cant pieces while glue dries.
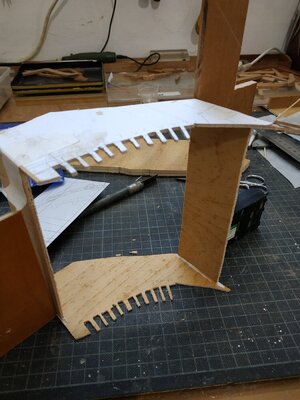
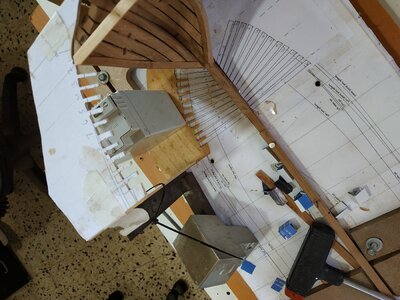
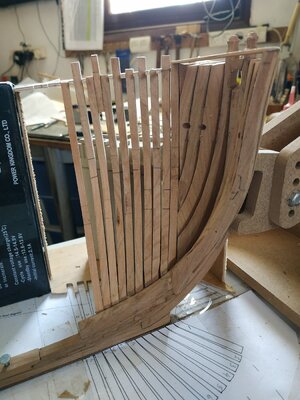
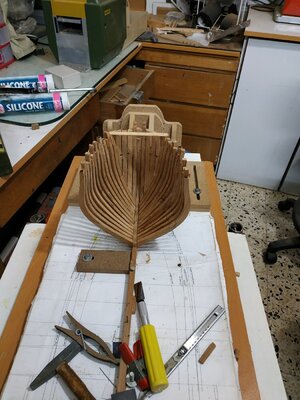
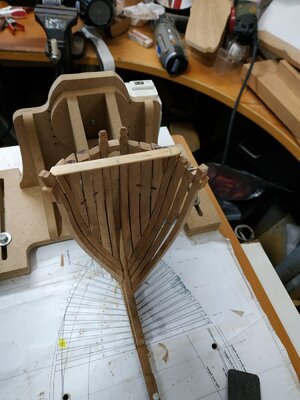
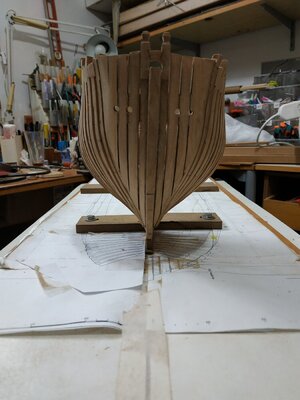
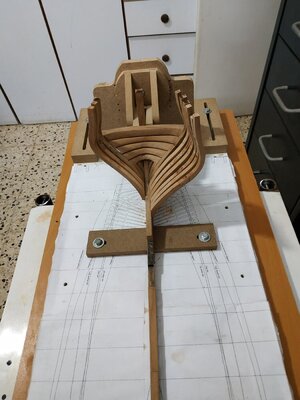
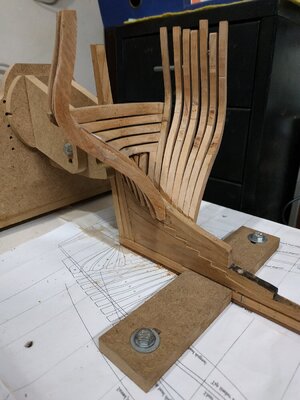
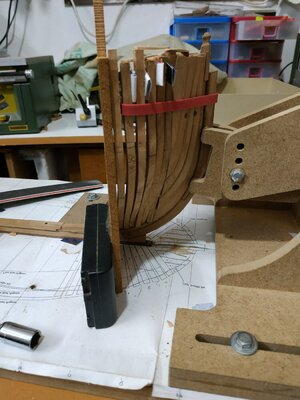
I’ve used building jigs but here, the alignment is by the timberline which is sloping.So I took heights from plans for the sides, cut both floor and “roof” together so as to set on board plans, and will be able to turn over and use for other side. Held in place by weight,removable for visualization and access.
Shaved down filler piece, remade some cants and cleaned up others and started to place them. Seems better and jig works
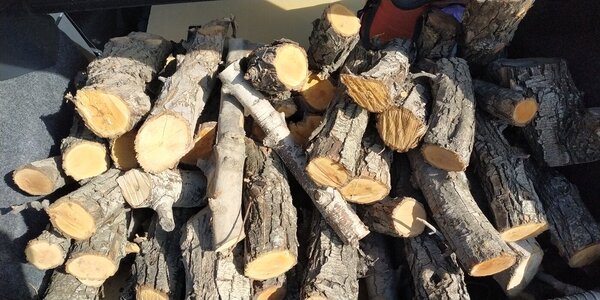
A friend sourced a supply of PEAR trees that a fruit farmer was selling as kindling!!
So with a patient and long-suffering wife for company, drove to the north of the country -couple of hours each way.
The trees had been cut to logs and branches last year, to lengths suitable for wood stoves i.e. about 40cms. The thicker logs were mainly split from drying out.
Selected half a boot load (it was free) and drove home.(Had said to wife maybe see some local sites or have a meal out, but still semi lockdown precluded this).
Drove home and while my wife was making supper, thought I’d see if and how much of the wood was usable.
Prepared a couple of pieces with my 10in table saw and with last pass, lost concentration for a second and felt a bag to my thumb. HIT by the saw teeth. A bloody mess, that I couldn’t treat by myself with superglue. Off to local casualty(emergency room) some stitches where possible and bandaging.Declined overnight stay.
Will be ok but feeling terribly stupid. Every instruction, Utube etc emphasises safety. I did for most part use sticks, But familiarity and tiredness caused that stupid lapse.
I said, in my first blog, that you could learn from my mistakes- this accident is the most important of lessons.
PLEASE BE SAFE
1311b.jpg

1311d.jpg

1311c.jpg

1311a.jpg

1311.jpg

1311e.jpeg
 
Last edited by a moderator:
Sorry to read about your accident - sh... happens sometimes, but I know very well how you feel "How this could happen?" "I am so stupid"
Last year I was falling down the stairs with breaking my knee, it was only one millisecond, but it happened.
I wish you a fast recovery - and keep care and safe
 
Sorry to read about your accident - sh... happens sometimes, but I know very well how you feel "How this could happen?" "I am so stupid"
Last year I was falling down the stairs with breaking my knee, it was only one millisecond, but it happened.
I wish you a fast recovery - and keep care and safe
thank you
 
My dear friend I was sorry to hear about the sawing accident, hope it does not hurt too much and that you get back to creating and building the model soon.
 
No longer a daily blog.
Of course only having one and a half functioning hands doesn’t improve efficiency. My wife says this isn’t a race-and she is,of course correct,but I like to get things done.
There is an English expression “all fingers and thumbs” meaning clumsiness, but a non-participating thumb is worse!
Can’t help reflecting and comparing the time it takes building a scratch, framed model (and the tools and wood required) against a bulkhead kit. After 20+ models, I thought I could estimate build times. I planned the swan at 12 or 18 months (with or without masting and rigging). I must now double this , and certainly not contemplate a parallel build.
I think I mentioned that I will leave the lower (foot) bevels to later fairing. The first few I did seem to remove too much.
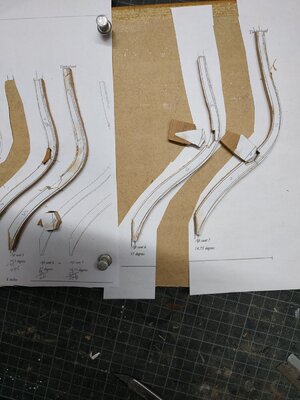
The jig seems to work well.Even though TFFM says the cants 8 to 12 are aligned to the half breadth line,they will also (it seems to me)follow the top timberline -but note this is “inside” the “ends”of the cants as shown on the plans.
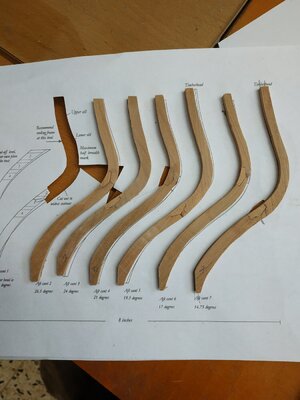
Cant #8 has bevel 12deg.
There is a long wedge type piece between #7and #8, extending about 22mm from the top and a max. width of 4.24mm.This is made when #8 is spot glued in place, and when suitably sized, glued to #8 “off-model.
As will be seen from picture, only after this was done, did I notice that it should have extended above the upper timberline as does cants #2,#4,#6.
Another piece to remake.
This “top” is thinner-don’t know as yet how this will be resolved.
Cants #9 (10deg) and #10 (7deg) as before.
Cant #11- TFFM suggests that it is possible to make mortises now rather than later, but accuracy is critical. Given my efforts so far, I don’t think I’m up to it.
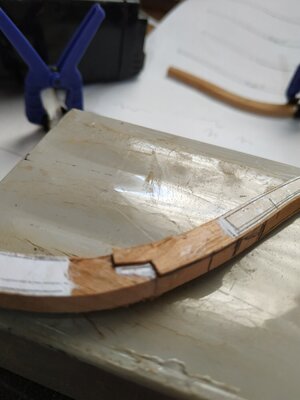
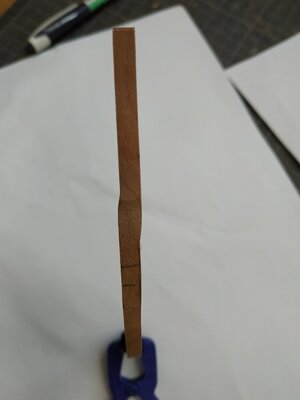
This #11 cant is made from 3 timbers, the upper one contains a “shift” or dogleg. TFFM gives alternative ways of doing this- I opted to what seems the easier “cast” method.
The lower two pieces are 4.77mm wide as before, but the upper widens to 5.83mm. The “extra” is aftwards of the cant.The deviation or transition seems to occur over a 10mm section, finishing BELOW the port. I therefore determined the bend will finish 40mm below top of piece.
To make life easier, I also used a scarf joint.
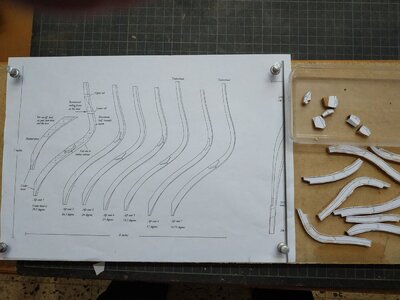
I marked out the areas to be removed roughly, as my attempt to trace a template from the shear plan was unsuccessful as mine is pretty indistinct.
I intend to mill the straight lengths and finish the bends by hand-tomorrow we will see.1811b.jpg1811c.jpg1811a.jpg1811.jpg
 
Finishing # 11:
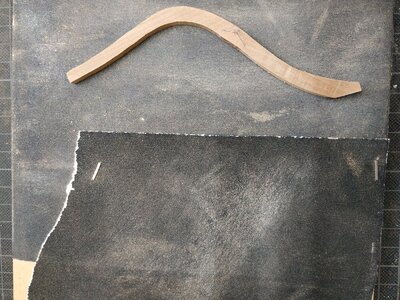
The milling (remove 1mm from each side) and transition (about 10mm) by hand -seems to work OK.
Final port cant #12, 2deg bevel
The jig is not rigid, therefore can be turned over and used on starboard side(with support at 90deg. and a weighted base.The “tooth”between #7and #8 needs removing and the gap for#11 needs widening (for shift).
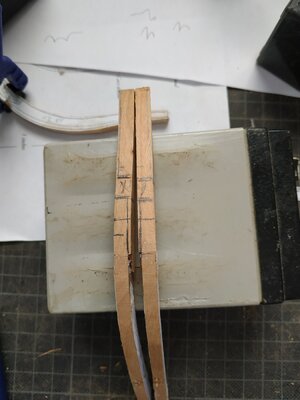
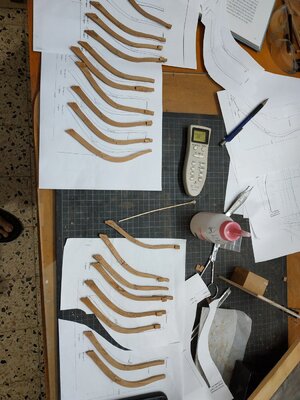
? Did I mention that I made the cants as pairs, port and starboard, together .
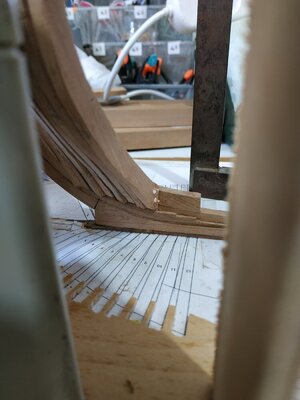
Also reminder to trunnel the “feet” of the cants. One into keel and other into neighbour.
You’ll note that the final effort looks rough, with plenty of work for “fairing”.But this cherry is soft and I hope that the final effect will be acceptable.
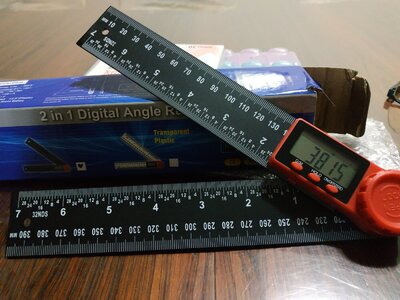
.The last picture is my new digital angle measure. Accurate angles are essential and my old plastic protractor has its problems.1911.jpg1911a.jpg1911b.jpg1911c.jpg
 
Finishing # 11:
.....
? Did I mention that I made the cants as pairs, port and starboard, together .
........
You’ll note that the final effort looks rough, with plenty of work for “fairing”.But this cherry is soft and I hope that the final effect will be acceptable..
......The last picture is my new digital angle measure. Accurate angles are essential and my old plastic protractor has its problems.
How you made the two cant frames "together"?
...
The final fairing is for me often a small highlight, when you can see and realize, that most of the ideas and construction methods are producing a nice hull.
You are on a very good way, that it will look very good at the end
.....
such tools are often very helpful - and accuracy is the non plus ultra
 
Place some crude spaces at level of timberline. Intention to remove them later, but give stability for fairing etc
Not having use of thumb is somewhat restricting.
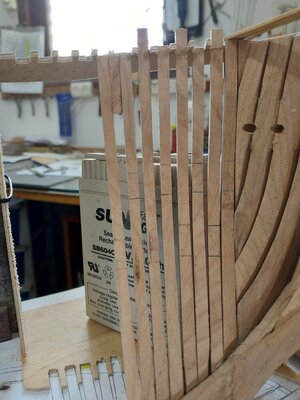
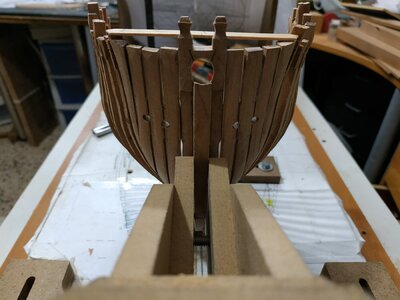
The jig reused upside down for the starboard side seemed to work ok when reset (what was the straight floor, now is sloping at timberline level) with some weights.
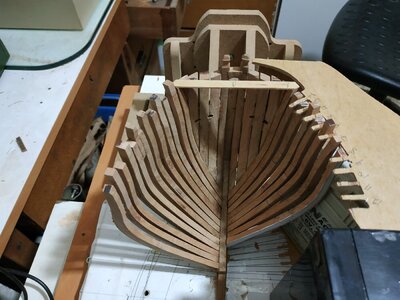
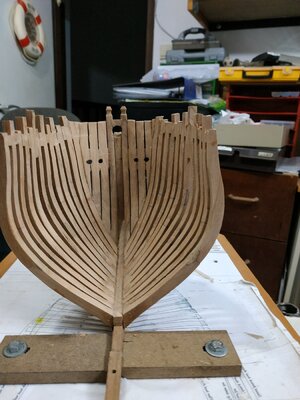
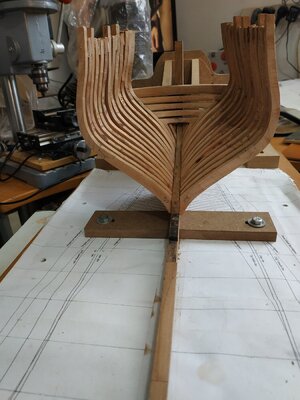
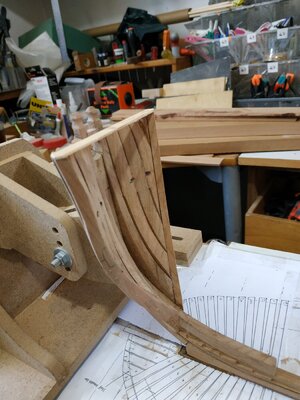
When the full set of cants fitted, jig removed and the result is not as good as expected.
The main problem seems to be the angle where the timber parts are glued.
I removed a couple of the worst offenders and checked them against the printed outlines-not so easy as they obscure the plan, and the cut outs can be distorted. Opening them and re gluing made some improvement, but “gradient” between the cants, seemed excessively uneven.
Decided to remove all cants #2to#12 and check and realign joints between timbers as required.Extending lines on the plans help this alignment.
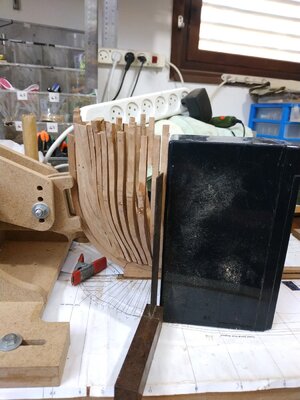
Placed each cant in turn,checked alignment at timberline and “step” to previous(neighbouring) cant, and if still too uneven, modified the angle at the join slightly.
(the black square object is one of many old batteries I’ve collected over the years-stable,heavy and reliable rt. angle.)
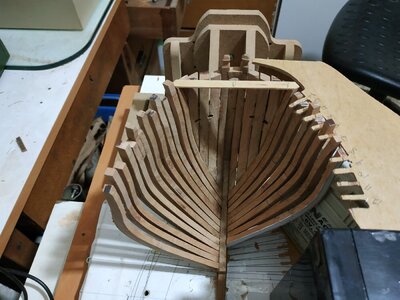
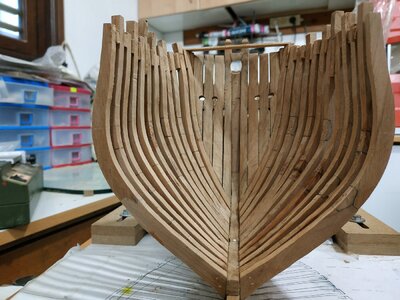
This time the result is much better.
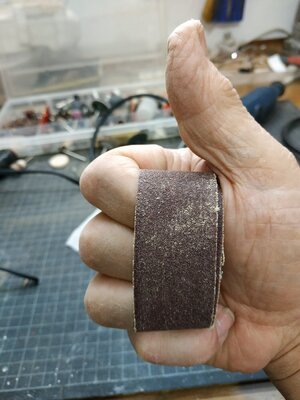
Fairing by hand. Wands and literally by hand on inner aspect ( a broken belt sander-stiff). Much to remove but this cherry is relatively soft compared to the Pau Marfim that I used for Oneida.
Left final smoothing until rest of framing complete with some internal “stiffening”
Some of the small fillers separated and it would have been better to stable with a trunnel.
Returned to working in clinic and less time to browse the internet, so only now caught up with Kevin’s video no. 12 and see he run into similar problems. Considering the high quality of his work, I feel less inadequate. Thank you.
PS last week or two, temperatures here fluctuate . 2 days ago on the beach, today cold and torrential rain. Not good for wood or glue.
PPS Happy Thanksgiving to our American friends.2611h.jpg2511a.jpg2611f.jpg2611g.jpg2511.jpg2611i.jpg2611e.jpg2611d.jpg2611c.jpg2611b.jpg2611a.jpg2411.jpg2611h.jpg2511a.jpg2611f.jpg2611g.jpg2511.jpg2611i.jpg2611e.jpg2611d.jpg2611c.jpg2611b.jpg2611a.jpg2411.jpg
 
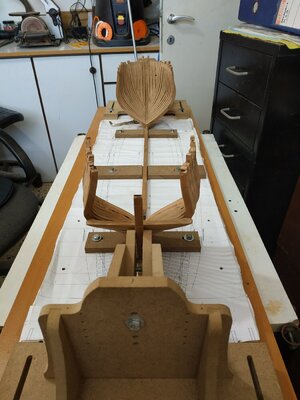
Back to building cants-this time the aft sets.
Similar principles i.e. 4.77mm wide.
This time I want to try some new ways.
My experience with the chisel was not too successful. Now with a defective digit (injured thumb) I would think nearer to impossible.
Nevertheless, I’ll try the chocks using cut out plans, jig saw and 5in disc sander.
Cutting out the timber plan separately with the chock section cut on the lines.The upper and lower timbers attached by rubber glue to another complete copy of plans.The narrowing lips of the 2 pieces have a drop of PVA and the the pieces are stable to fit the chock. A chisel blade is used to create the slight angle if the plan requires it. The is made slightly oversize, the slope of side if required and the final fit are made by removing the thinnest of slivers to size required.
Although initially against it, I tried using the 5min epoxy and it seems to work well, but it is pretty irreversible and leaves a slight stain.I don’t think it will be too noticeable when finished.
I also decided to make and fit one side at a time.
I also have left of the fairing bevels as I found that a close adherence to them when making the fore 412.jpg412a.jpg412b.jpg415a.jpg412d.jpg412e.jpg412f.jpgcants, created some problems with alignment.
After a try out with the 2ns and 3rd cants, it seems as if the upper timber of both 1st cants are incorrectly placed. I had broken the starboard one, twice already so made a new one. The port side was separated and adjusted-the tips of the wing transom protrude but I checked it with a plan cut out and it is ok. This may have a function which I’ve forgotten- I will have to wait and see. Greg mentions this is like a chess game in terms of planning ahead, but I did not expect such an innovative opponent !
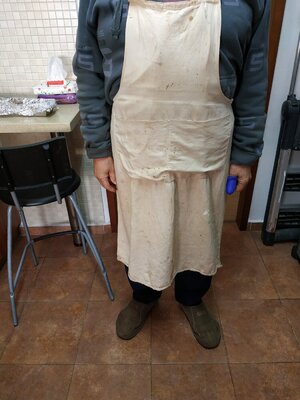
PS In my first year of secondary school (age 11) we had a weekly woodwork lesson. Our parents had to buy an appropriate work apron. My dear mother kept mine for the next 40 years and returned it to me so I can now use it for its intended purpose.
 
Aft cants #2-13 cont.
Finishing making of the aft cants. More adept and less removals and repositioning . ( ? is this called RECANTING-ha! ha!)
Regular except for #10 which as a “shift” similar to the #11 fore cant. Note the shift is directed amidships in both cases.
Also note #12 has a scarf joint instead of chock.
Also note that when trying to minimise wood waste, I layed out some templates across grain- not very clever but doesn;t appear noticeable as yet.Will replace if required when seen after initial fairing.
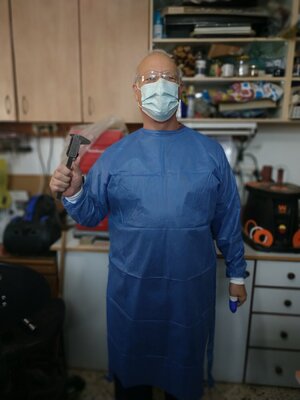
You may have noticed the horror picture of me wearing my schoolboy apron. It left my upper jumper unprotected therefor still half covered in sawdust.
The new picture is more practical and to misquote Gabriel Garcia Marquez-
“Woodworking in the age of Corona”
(ppe 2020)
Keep well and safe everyone.1112g.jpg1112h.jpg1112.jpg
 
Back
Top