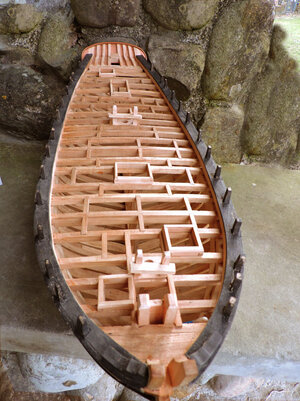
Tecumseth 1815

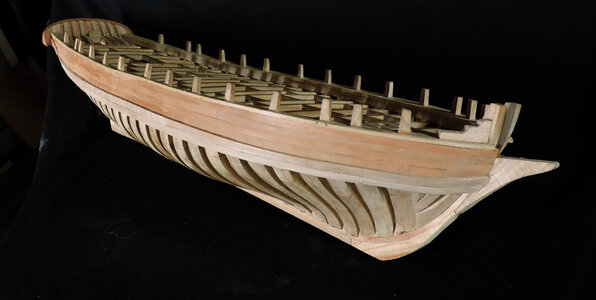
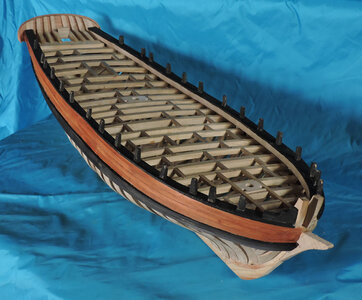
i selected steamed pearwood and finished the planking.
The British painted this section yellow the Americans painted it white.
Building from scratch you can select whatever you want. Holly for white and Satinwood, Boxwood or Osage Orange for the yellow.
not much to report on the planking job, it went well. All the planks bent nice around the bow without having to soak them of use heat. One possible reason might be with the larger scale the planks do not have to take an extreme bend.

next i will paint the wales and cover board black

planking1.jpgplanking2.jpg
 
Last edited:
this is the finish of the hull

finish hull1.jpgfinish hull2.jpgfinish hull3.jpgfinish hull4.jpg

i used black Higgins drafting ink for the wales and cap board. It looks black in the pictures but actually it looks like this.
I painted on the ink then took a damp cloth and buffed the wales and cover board. Ink sinks into the wood and it is waterproof so there is no need for any further finish.
I like the finish because you still see a wood texture and grain through the black. In some areas it looks weathered and worn.

wales closeup.jpg

Coming up

it is all hands on deck for the construction of hatch coamings a companion way and sky light, adding some decking, mounting cannons and the final adding the railing.
 
I know how long that story was :)! I am impressed by what you have achieved and I am sure that it will be a beautiful model when you are done.
 
What i am going to do is the coamings for one hatch step by step. There is no reason to include all the coamings because that can get a tad boring. After this one i will go ahead and do them all and show you the results.

First to consider is how the corners are done. I have seen on models the sides were joined with a 45-degree angle like a picture frame. I do not think such a corner joint would hold up, ships are dynamic they are creaky and the timbers and joinery move.
Now I am not saying all ships coamings are done this way, for all i know some may have a 45-degree corner.
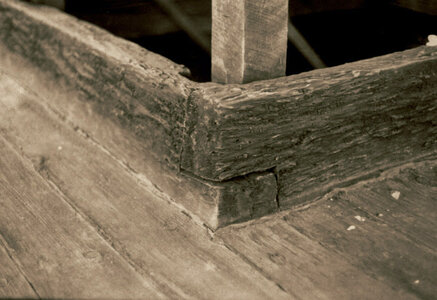
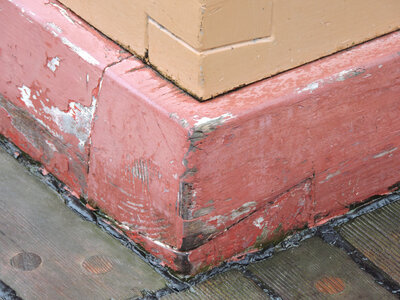
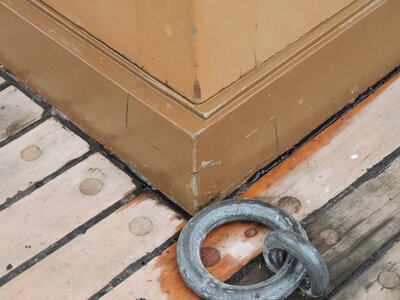
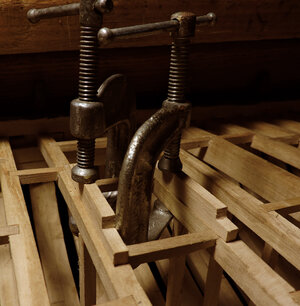
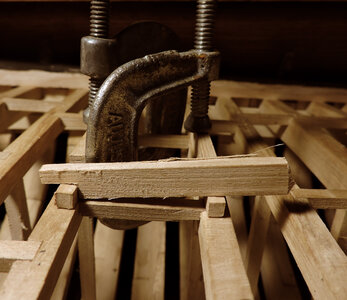
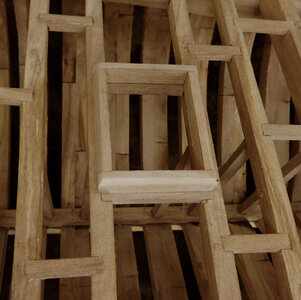
Lets take a look at a few real coamings before we begin. Looks like the sides overlap and a rod is run from the top down through both sides and into the beam below. If you look close you can see the head of the rod in the first photo. I can not imagine such a corner coming apart. Also there is an angle to the overlap so it is like a hook.

hatch 3.jpgjoin1.jpgjoin2.jpg

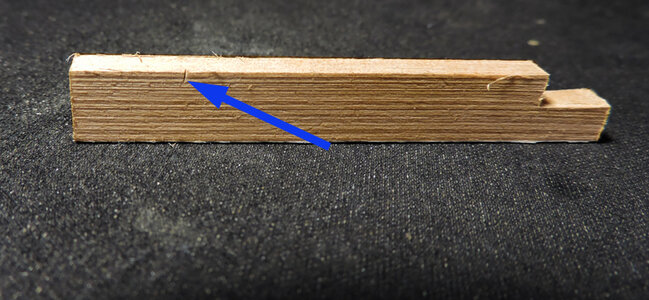
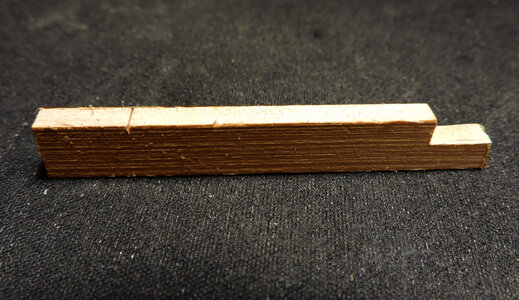
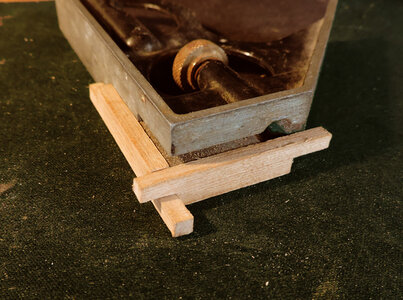
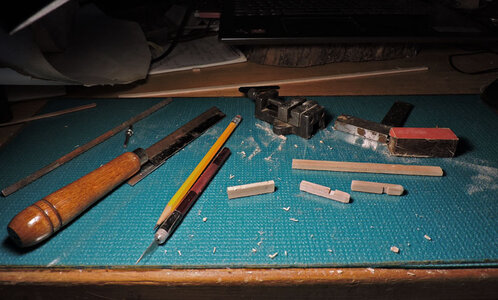
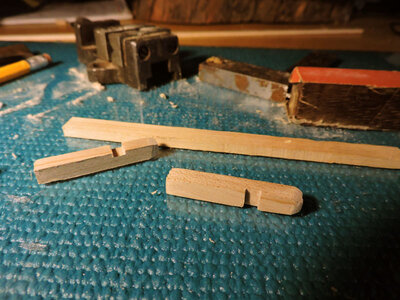
I milled out some stock for the coamings, the height is exactly double the width, i did that on purpose so i can lay a piece flat and against the side of the coaming to get the depth of the notches. I cut a notch in one end to the correct depth but the length does not matter.

coaming1.jpg

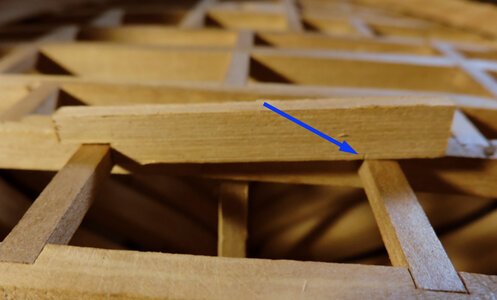
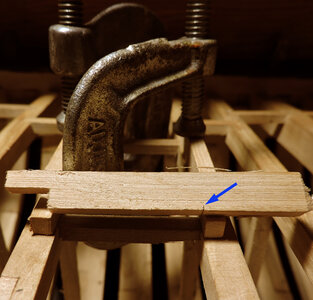
I placed the notch on the deck beam and made a cut which is by the blue arrows.

coaming2.jpg

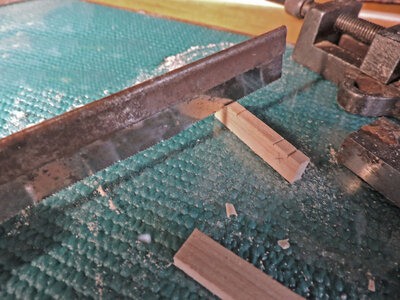
Using the notch as a guild i use a single edge razor blade and made a cut. This is done to guide the razor saw.

coaming3.jpg

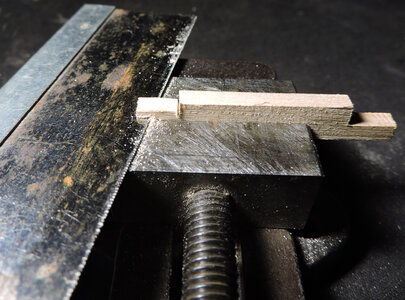
Line up the cut along the side of the vice

coaming4.jpg

and you will get a perfect straight cut exactly were you want it. I cut down to the score line.

coaming5.jpg

Some builders will spend big bucks on a mill or hobby table saw. Nothing wrong with going that route. Rather than spend 100s on a mill i spent 30 bucks on a razor saw and vice.
 
Last edited:
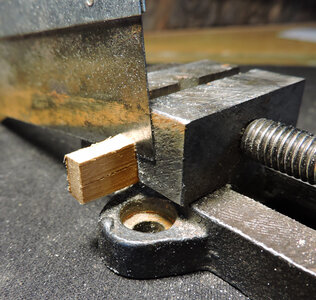
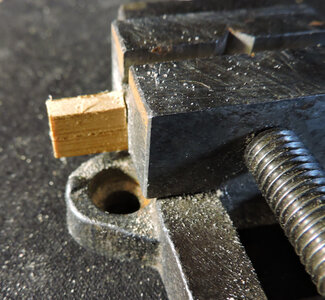
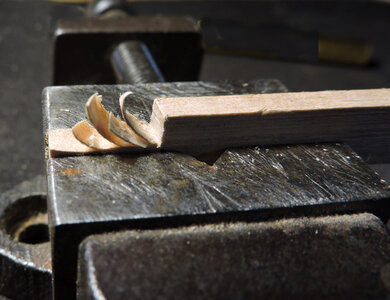
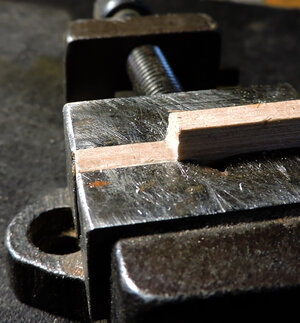
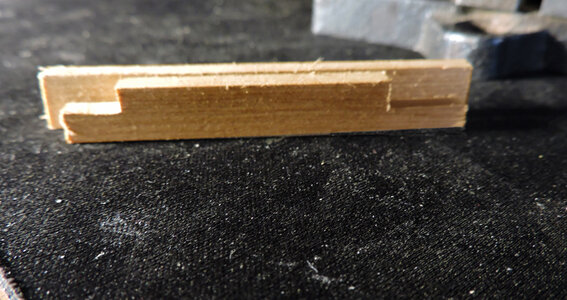
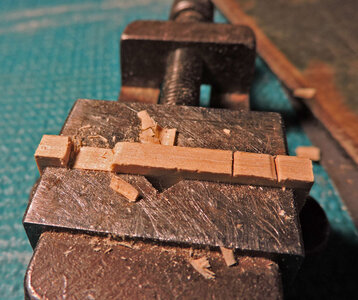
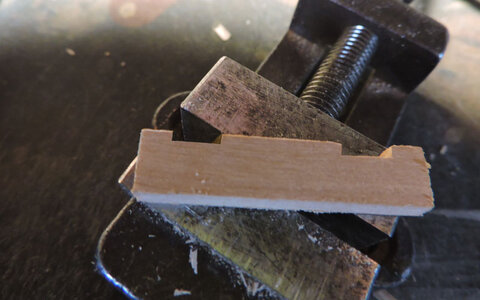
With the vertical cuts done i clamp the end in the vice right on the depth score line and with a new sharp Exacto blade shave the end down to the top of the vice. You will get a perfect depth and flat cut every time, because you can't cut below the top of the vice!

coaming6.jpgcoaming7.jpg

or use a fine-tooth razor saw can cut along the top of the vice. Either way you get a smooth flat cut and that is the trick in getting tight filling joinery.

coaming8.jpg

Once i get one done with notches at both ends i use the finished one and copy it and make a second one. When you do the second one make sure it is exactly the same as the first one, because this insures the coaming will be square.

coaming9.jpg
 
Last edited:
So far so good now we need two more sides.

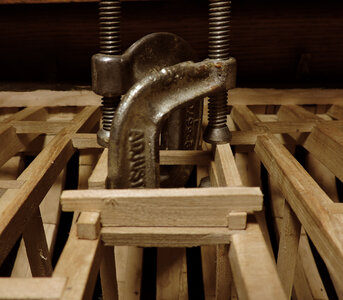
line up the inside of the sides with the edge of the beams and clamp them down so they don't move.

coaming10.jpg

Cut a notch in one end of another piece just like you did before. Length does not matter but the depth does so score a line at the correct depth. Now put the notch in the notch of the side piece.

coaming11.jpg

make a cut for the length between the sides.

coaming12.jpg

Once again with a razor saw, Exacto blade and vice cut another notch and you piece will drop right in place nice and tight.

I will be doing the notch thing 24 times on the model.

the trick is keeping the pieces square in the vice and making all your cut surfaces flat.

coaming13.jpg
 
Last edited:
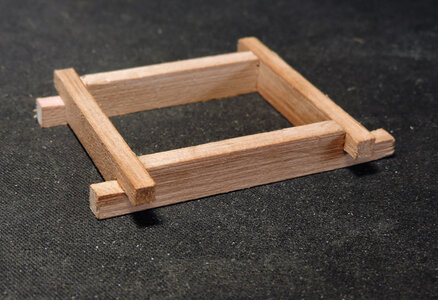
all right then, if your still with me we are almost done with one coaming. Square up one corner and glue it up. If your using a Super glue you will be ready to move on in 30 seconds if not wait until the joint is secure.

coaming14.jpg

When you have one square corner just fit the other sides they will line up perfectly square IF you cut everything accurate.

coaming15.jpg

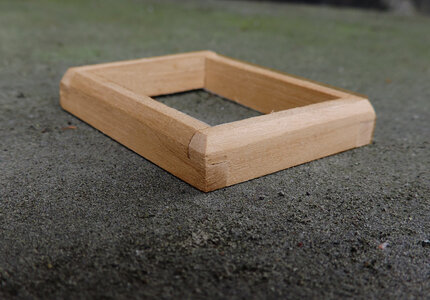
there is a bevel that runs along the upper outer edge. Some coamings have this bevel and some don't so it must be a ship carpenters thing to do or not to do. I did

coaming16.jpg
 
Last edited:
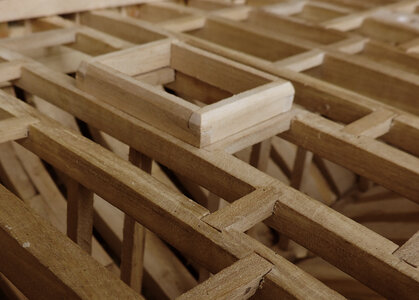
Place the coaming on deck it should fit just right.

That was easy and just 5 more to do. It took less than 1 hour from start to finish.

Keep in mind to get sharp tight-fitting joinery it is all in making the cuts square and joining surface have to be flat. Either cut with a mill or using the surface of a vice as a guild for the razor saw and knife

coaming19.jpg
coaming18.jpgcoaming17.jpg

ok then it is off to the shop and get the rest of the coamings done.
 
A very proper coaming! Thumbsup

45 degree corners on a boat always open up. I think it is because the outer edges swell and shrink more than the inner edges. When Asian built yachts started coming into this country in the '70s they came with lots of golden teak woodwork. It looked great when new but too often the corners were simple 45's and within a year or two the corners had all opened up, the varnish was peeling and there was little one could do about it.

Fair winds.. Ed
 
Dear Dave
wonderful work, well done

thank you Shota70

this so far has been a great project for me, the larger scale allows for accurate joinery and a good build for doing hand work.
 
A very proper coaming! Thumbsup

45 degree corners on a boat always open up. I think it is because the outer edges swell and shrink more than the inner edges. When Asian built yachts started coming into this country in the '70s they came with lots of golden teak woodwork. It looked great when new but too often the corners were simple 45's and within a year or two the corners had all opened up, the varnish was peeling and there was little one could do about it.

Fair winds.. Ed

it just did not seem logical for 45's on corners as you said they will pull apart the overlap would make a strong corner.

as i do the coamings i might leave the hatches open because i do not know for sure if gratings or planks covered the hatches. I wonder if gratings were used were they some how covered in bad weather or was everything prone to get wet below?
 
back on the job with just a few basic tools. Not to be misleading saying the model is built with just basic hand tools. The hand work comes in after the proper size material has been machined to size out in the shop using big power tools.

car1.jpg

How do i know exactly how deep to make the side cuts and make each cut exactly the same depth?

car2.jpg

answer: simple start your cut at the back of the blade at the handle end and pull the saw until the end pulls out of the cut.
whatever your depth is controlled by the number of passes. 6 strokes of the saws full length = the same depth every time.

car3.jpg

Back in the vice and with a knife shave down the notch.

car4.jpg

consistent square and flat joinery requires a consistent system of doing the job.

car5.jpg

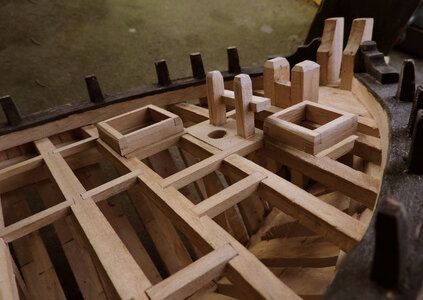
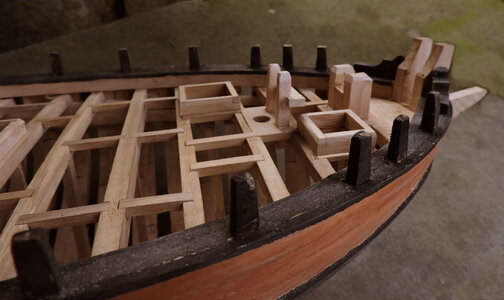
What do we have here? 2 hatchways, samson posts for the bow sprit to rest in and a couple posts and cross piece.
Looks a little crowded up at the bow.
car6.jpgcar7.jpg

making a turn around and looking toward the stern
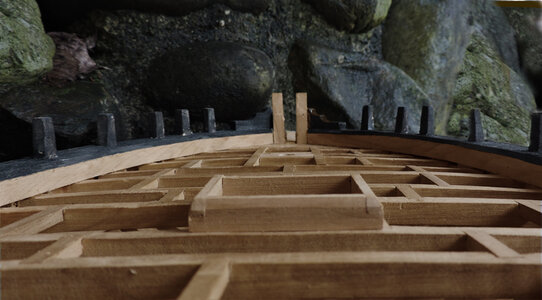
post and cross pieces two hatchways and the coamings for the companionway are done.

car8.jpg

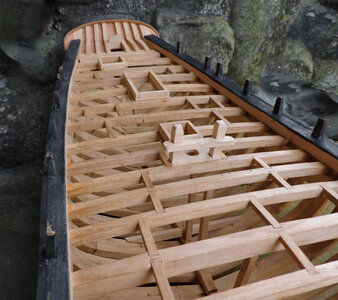
overall birds eye view looks like a lot of open space on deck. The shape of the hull from the bow to a wide flare and a gentle arc to the stern. That was done on purpose because still to come are two massive 24 pound guns sitting on iron circles.

car9.jpg

coming up next is the building of a companionway, the most delicate work so far, i think i will do it step by step because there is only one.
 
Last edited:
Back
Top