-

Win a Free Custom Engraved Brass Coin!!!
As a way to introduce our brass coins to the community, we will raffle off a free coin during the month of August. Follow link ABOVE for instructions for entering.
-

PRE-ORDER SHIPS IN SCALE TODAY!
The beloved Ships in Scale Magazine is back and charting a new course for 2026!
Discover new skills, new techniques, and new inspirations in every issue.
NOTE THAT OUR FIRST ISSUE WILL BE JAN/FEB 2026
You are using an out of date browser. It may not display this or other websites correctly.
You should upgrade or use an alternative browser.
You should upgrade or use an alternative browser.
Tecumseth 1815
- Thread starter Dave Stevens (Lumberyard)
- Start date
- Watchers 17
-
- Tags
- tecumseth
- Joined
- Dec 1, 2016
- Messages
- 6,383
- Points
- 728

thank Ed i am going to try that
i am already on the second fail of trying to cut accurate notches.
hey i got the message no worry about the flow of text.
you have to click on where you want the image then hit insert the image goes where the curser is
if the idea works, and i see no reason why it shouldn't that takes a load off the tedious part of the build.
model ship building should be a relaxing, take your mind off everything and just focus like a moment of zen. But tedious is not relaxing, and to be honest if this were a layback project with no hurry it would not bother my brain, but i am in a hurry because there are so many projects i have lined up.
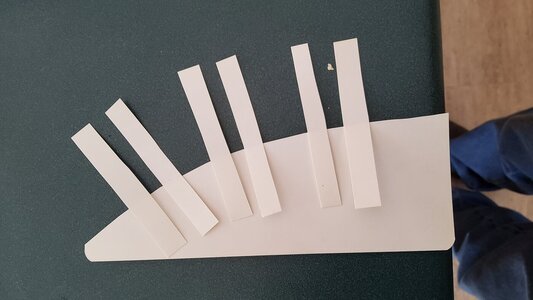
This is how they made patterns when replacing planks in the first boatyard I lived in. Wood boats were still a "thing"
- Joined
- Dec 1, 2016
- Messages
- 6,383
- Points
- 728

running with Ed's idea i first made a pattern for the inside edge of the stanchions and started to glue on the tabs for the sides. It did not take long to realize i did not have a glue that would hold on to the plastic, besides the glue problem the plastic was slippery and hard to hold everything in place.
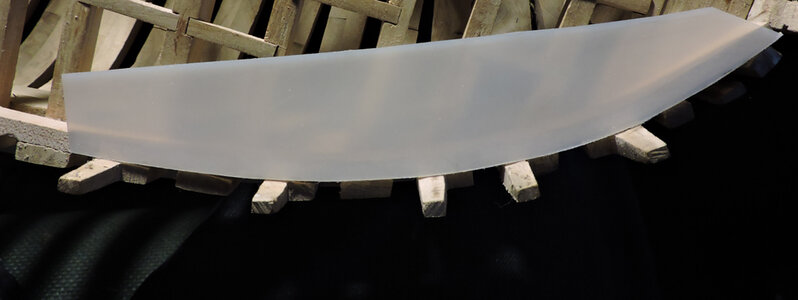
I scrapped the plastic and went with cardboard. A dab of super glue is all it took.
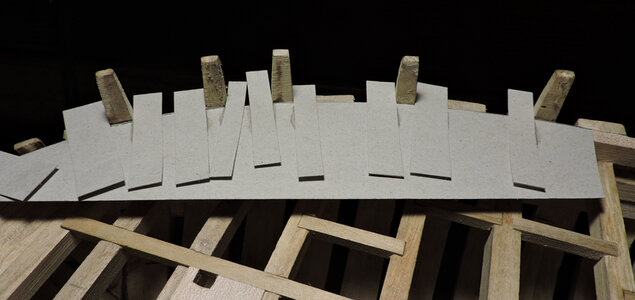
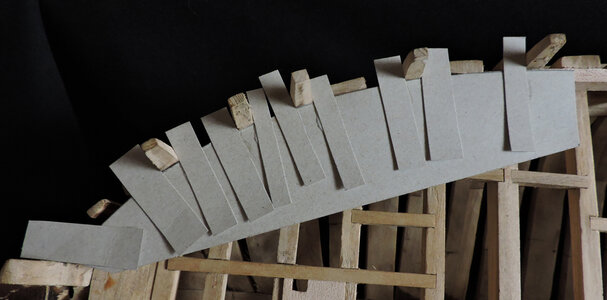
now i have an accurate pattern to go around the stanchions.
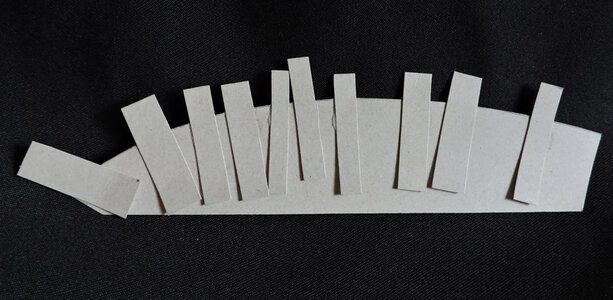
the outer edge does not matter because i can sand the cover board to match up with the outer face of the stanchions. The inner edge of the cover board may be a little tricky to slightly lap over the waterway.
First i need to mill some 3/32 sheet stock and see if i can fabricate this section.
thanks ED
sometimes i over think something and the simple answer works

I scrapped the plastic and went with cardboard. A dab of super glue is all it took.


now i have an accurate pattern to go around the stanchions.

the outer edge does not matter because i can sand the cover board to match up with the outer face of the stanchions. The inner edge of the cover board may be a little tricky to slightly lap over the waterway.
First i need to mill some 3/32 sheet stock and see if i can fabricate this section.
thanks ED
sometimes i over think something and the simple answer works
- Joined
- Dec 1, 2016
- Messages
- 6,383
- Points
- 728

i milled out some 3/32 sheet stock and used electrical tape to cover the sheet. I like using this tape because i can cut it and leave a sharp clean line to cut to.
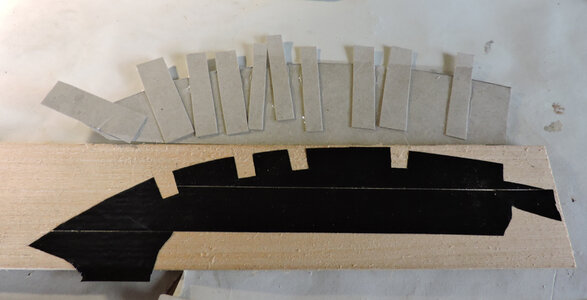
cutting the notches was easy i just used a razor saw and cut close to the tape edge and just a couple passed with a wood rasp i finished the notches to the tape line.
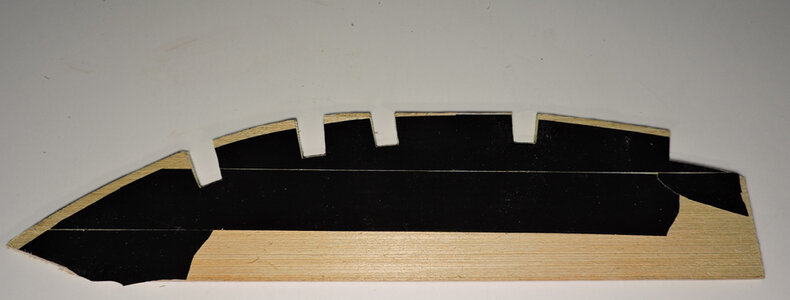
my first try fitting the piece came out exact.
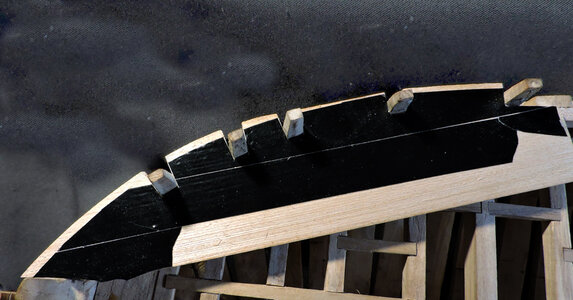
the outer edge needs to be sanded to match the outer surface if the frames which will be no problem.
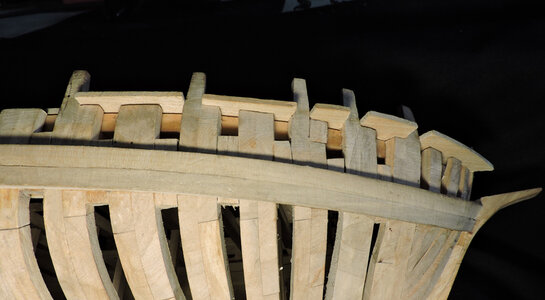
a problem will be accurately cutting the inner edge along the waterway. Using plastic as a template i can see the edge but i ended up using cardboard and i could not see through it to mark the edge.
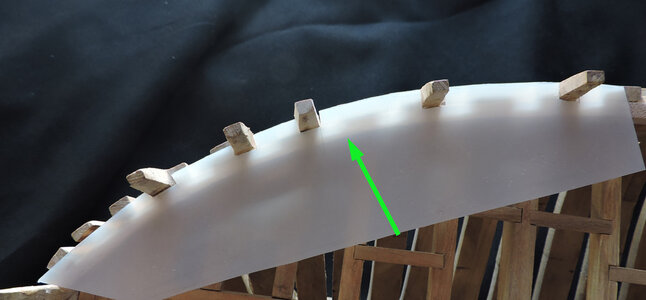
the idea is working to make a template and cut notches in the sheet stock so now i only have to do this 5 more times and 23 more notches.

cutting the notches was easy i just used a razor saw and cut close to the tape edge and just a couple passed with a wood rasp i finished the notches to the tape line.

my first try fitting the piece came out exact.

the outer edge needs to be sanded to match the outer surface if the frames which will be no problem.

a problem will be accurately cutting the inner edge along the waterway. Using plastic as a template i can see the edge but i ended up using cardboard and i could not see through it to mark the edge.

the idea is working to make a template and cut notches in the sheet stock so now i only have to do this 5 more times and 23 more notches.
Wouldn't a width measurement plus a bit get you close enough to be able to see to trim the final amount?
Or one of these with one leg pressed against the shelf underneath the template and the other leg on top to show you where to mark. Depth of the legs has to clear the width of the template, of course. Hope I explained it ok.
Fair winds.. Ed
;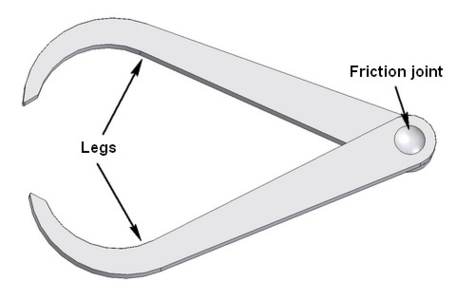
Or one of these with one leg pressed against the shelf underneath the template and the other leg on top to show you where to mark. Depth of the legs has to clear the width of the template, of course. Hope I explained it ok.
Fair winds.. Ed
;

- Joined
- Dec 1, 2016
- Messages
- 6,383
- Points
- 728

i took the easy way and set my plastic template against the stanchions and scribbled a rough tracing of the edge of the waterway.
traced along the edge i cut the cover board to a rough shape.
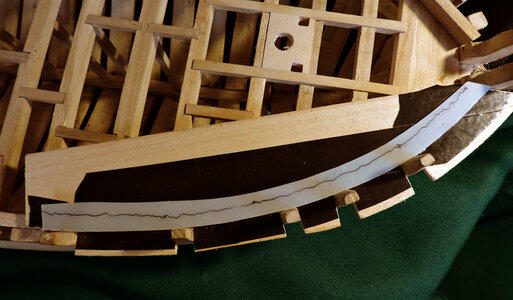
then i glued and clamped it down. I was going to leave an overhang along the inside of the waterway, but changed my plan.
i an going to trim the cover board flush with the waterway. now it's a simple job with a drum sander on a Dremel.
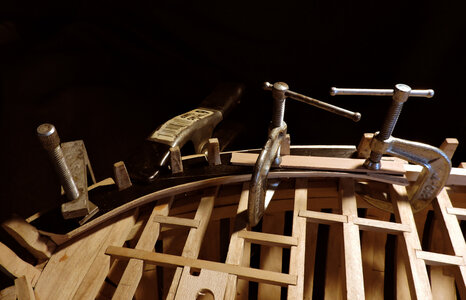
while the first section is clamped i set up the second section same as the first section.
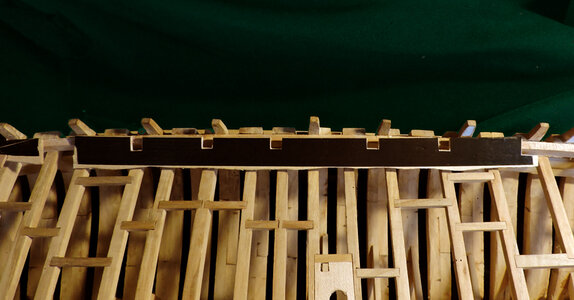
clamped it down
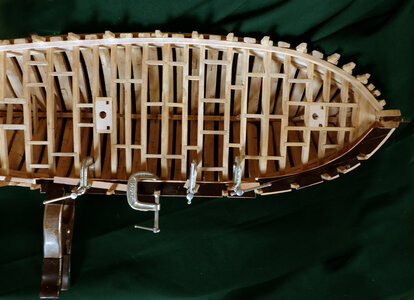
there is a tiny bit of play in the wood so if you get a gap between the stanchion and the notch you can give it a gentile squeeze.
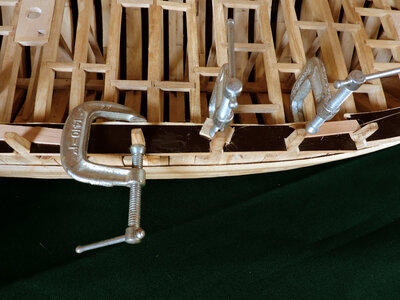
traced along the edge i cut the cover board to a rough shape.

then i glued and clamped it down. I was going to leave an overhang along the inside of the waterway, but changed my plan.
i an going to trim the cover board flush with the waterway. now it's a simple job with a drum sander on a Dremel.

while the first section is clamped i set up the second section same as the first section.

clamped it down

there is a tiny bit of play in the wood so if you get a gap between the stanchion and the notch you can give it a gentile squeeze.

- Joined
- Dec 1, 2016
- Messages
- 6,383
- Points
- 728

jumping forward i finished all 6 sections of the covering board. It looks clunky and misshapen and begs the question really! what have you done?
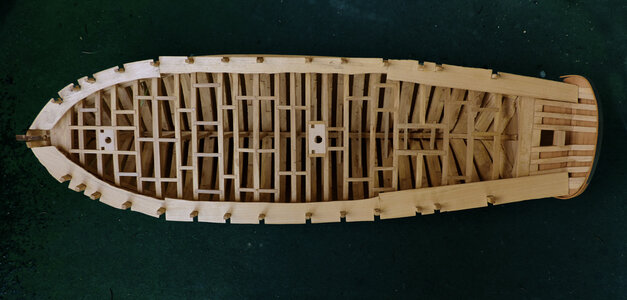
well, what i did was give myself enough material to be able to focus on the fit around the stanchions and not worry about missing the edge of the waterway or the side of the hull.
Some model builders i know will fit and finish each piece then add the final piece to the model. The way i work is like a clay sculptor and add unfinished material to the model and mold the piece to fit.
I have seen in some build logs the builder will cut a long scarf to join the sections of the cover board, I do not know if the cover board sections were joined that way or not. I was thinking like a ship builder and what the cover boards purposes was. First it is not a structural timber so there is no need for fancy joinery. Second why create a long 3 foot joint between section all the more chance of it leaking water. The cover board sits on top of closely spaced frames, so it has more than enough support. The joinery i used was a simple butt against a stanchion as you can see in the photo. This creates a very short joint between boards.
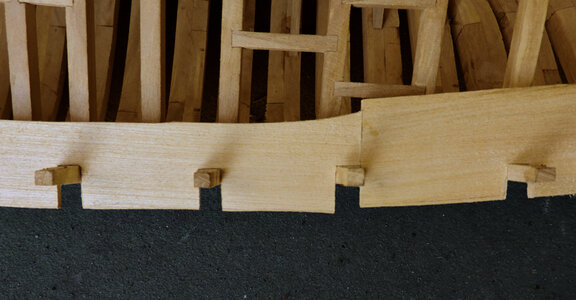
This took some time as each notch was rough cut and then using a rasp i creeped closer and closer to the tape edge. A few swipes with the rasp and check the fit doing this over and over with each notch. rasp, check fit, rasp, check fit over and over.
next step is to create a lot of sanding dust as i give the boards their final shape.

well, what i did was give myself enough material to be able to focus on the fit around the stanchions and not worry about missing the edge of the waterway or the side of the hull.
Some model builders i know will fit and finish each piece then add the final piece to the model. The way i work is like a clay sculptor and add unfinished material to the model and mold the piece to fit.
I have seen in some build logs the builder will cut a long scarf to join the sections of the cover board, I do not know if the cover board sections were joined that way or not. I was thinking like a ship builder and what the cover boards purposes was. First it is not a structural timber so there is no need for fancy joinery. Second why create a long 3 foot joint between section all the more chance of it leaking water. The cover board sits on top of closely spaced frames, so it has more than enough support. The joinery i used was a simple butt against a stanchion as you can see in the photo. This creates a very short joint between boards.

This took some time as each notch was rough cut and then using a rasp i creeped closer and closer to the tape edge. A few swipes with the rasp and check the fit doing this over and over with each notch. rasp, check fit, rasp, check fit over and over.
next step is to create a lot of sanding dust as i give the boards their final shape.
Without going back though this thread, what's the timber you used on the frames Dave ? Looks good.
- Joined
- Dec 1, 2016
- Messages
- 6,383
- Points
- 728

Without going back though this thread, what's the timber you used on the frames Dave ? Looks good.
Maple
Looks like a very nice fit around the stanchions. 
Fair winds.. Ed

Fair winds.. Ed
- Joined
- Dec 1, 2016
- Messages
- 6,383
- Points
- 728

Looks like a very nice fit around the stanchions.
Fair winds.. Ed
What really helps is that clean, sharp tape line it gave me the exact edge of the stanchions. Also the slow and careful use of the rasp and sandpaper glued to a stick. Taking an ever so small amount off at a time. Those notches took 10 days 2 to 3 hours a day.
i was going to widen the gap a tiny bit and fill the gap with glue, not really sure but i think a caulk was used around the stanchions.
i scrapped that idea because i am going to stain the cover board with black ink and the caulking idea will not be seen.
it might be true in real ship building the faces of joinery were coated with tar or some sort of resin. end grain of wood rots must faster.
in model building i have seen builders darken the face of joinery to make it stand out. If you use a light-colored wood joinery stands out much more than if you use a dark colored wood.
In the case of the Tecumseth using Maple all the joinery stands out so this build is not only how the ship was built but a practice in joinery
Last edited:
I hope they appreciate your dedication!. Those notches took 10 days 2 to 3 hours a day.

- Joined
- Dec 1, 2016
- Messages
- 6,383
- Points
- 728

I hope they appreciate your dedication!

well?
my wife is active in the local theater she builds props and works behind the stage so there are evenings i am alone just me, my music and the "build"
appreciation is a cherry on top the sunday i do it because i am in my own little world, and i like it.
- Joined
- Dec 1, 2016
- Messages
- 6,383
- Points
- 728

i took the hull out in the shop and did some sanding
now you can see the difference between what i glued to the hull and what it looks like after a little sanding
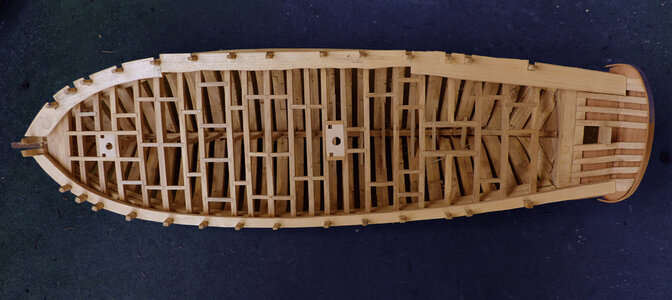
Rather than trying to get a tight fit around the stanchions and making sure i get that nice clean sweeping curve of the cover board in one go. First i worked the cover board to fit the stanchions then i shaped the curve of the cover board.
The cover board sets the shape of the hull and it is important you get it right. Like i said earlier everything that is being done at this point in the build does not get covered up it is the final shape and fitting.
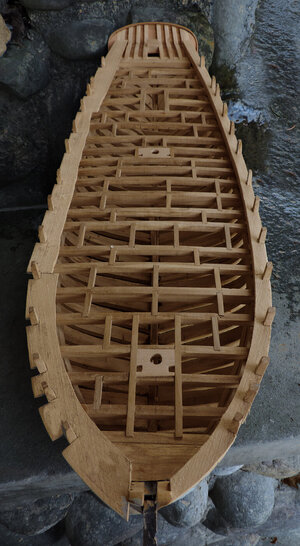
getting that curve of the cover board was no problem, all i did was follow the inside face of the waterway
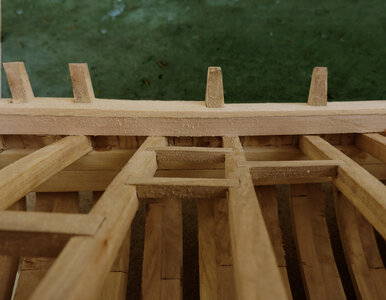
and the shape of the hull on the outer edge
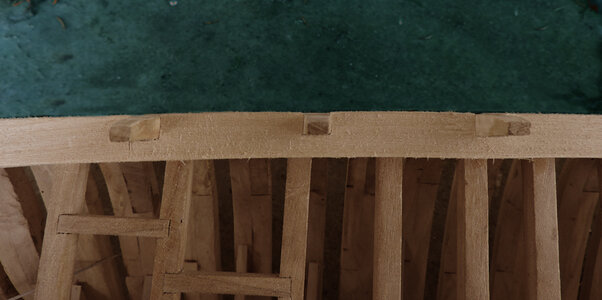
general notes
The cover board would have been painted black so a builder could "paint with wood" and use Ebony or African Blackwood if Ebony is used i would of used Macassar Ebony it is not the jet black it has subtle tones of deep brown streaks which gives it a wood tone and not a stark black solid look. These woods are extremely hard, dense and brittle so it would be much harder to cut and fit them.
Another thing in this build is the larger scale which makes joinery easier than at a smaller scale. I was able to sand and check the fit around the stanchions by taking small amounts off the notches at a time. At a small scale there is very little room for error, one swipe with a rasp or sanding stick and you can take too much off or make a nick in the joinery. If you planned on painting or staining the cover boards, you could not be so critical about the fit and just fill in around the stanchions with filler then paint over it.
next i need to run the molding along the outer edge
now you can see the difference between what i glued to the hull and what it looks like after a little sanding

Rather than trying to get a tight fit around the stanchions and making sure i get that nice clean sweeping curve of the cover board in one go. First i worked the cover board to fit the stanchions then i shaped the curve of the cover board.
The cover board sets the shape of the hull and it is important you get it right. Like i said earlier everything that is being done at this point in the build does not get covered up it is the final shape and fitting.

getting that curve of the cover board was no problem, all i did was follow the inside face of the waterway

and the shape of the hull on the outer edge

general notes
The cover board would have been painted black so a builder could "paint with wood" and use Ebony or African Blackwood if Ebony is used i would of used Macassar Ebony it is not the jet black it has subtle tones of deep brown streaks which gives it a wood tone and not a stark black solid look. These woods are extremely hard, dense and brittle so it would be much harder to cut and fit them.
Another thing in this build is the larger scale which makes joinery easier than at a smaller scale. I was able to sand and check the fit around the stanchions by taking small amounts off the notches at a time. At a small scale there is very little room for error, one swipe with a rasp or sanding stick and you can take too much off or make a nick in the joinery. If you planned on painting or staining the cover boards, you could not be so critical about the fit and just fill in around the stanchions with filler then paint over it.
next i need to run the molding along the outer edge
- Joined
- Dec 1, 2016
- Messages
- 6,383
- Points
- 728

All the extra wood you show here is a lifesaver on your kits. Giving a builder like me enough room to adjust things down to where then finally rest is a big plus.
Your model here is coming along very nicely.
Thank you MavRick
i do like the extra wood to work pieces down to the final size and shape
- Joined
- Dec 1, 2016
- Messages
- 6,383
- Points
- 728

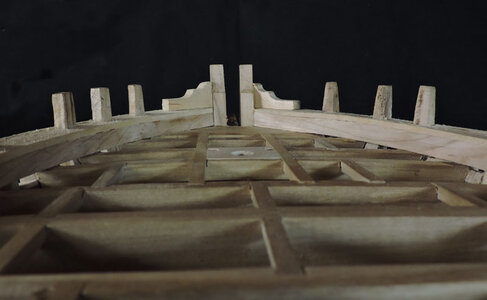
When the cover board has been worked down to size i added the molding strip along the outer edge. This was a simple job of using a 1/8 square piece which bent dry around the bow with no problem. With the notch in the cover board and the outer molding the stanchions fit nice and tight.
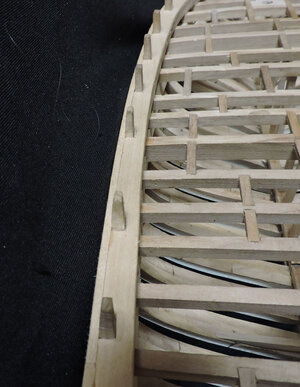
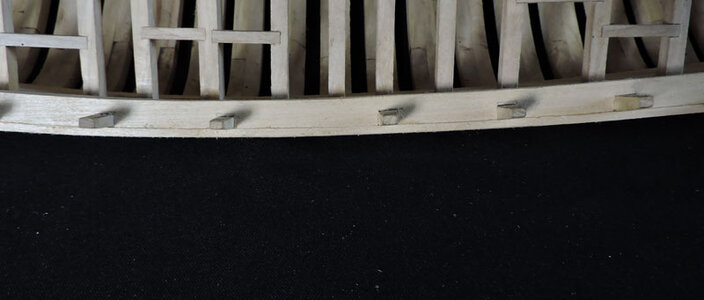
i added the braces at the sides of the knightheads which will also support the ends of the railing.
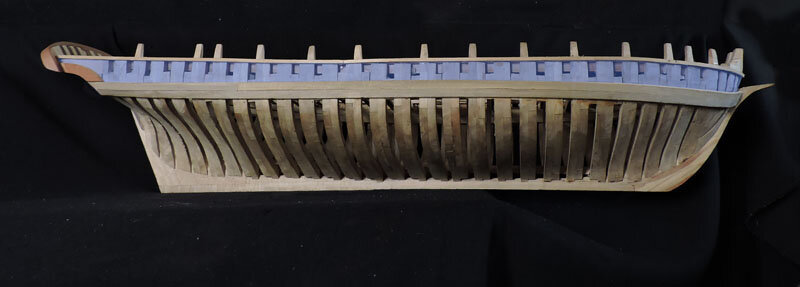
At this stage of the build, it is time to plank up the sides of the hull above the wales (tinted blue). There is no taper to the planks, so the job is straight forward and nothing special about the planks. With this in mind it would be boring to go through the process plank by plank. Below the wales the hull will be left open.
I will plank up the hull and get back to the build log as a finished job.


i added the braces at the sides of the knightheads which will also support the ends of the railing.

At this stage of the build, it is time to plank up the sides of the hull above the wales (tinted blue). There is no taper to the planks, so the job is straight forward and nothing special about the planks. With this in mind it would be boring to go through the process plank by plank. Below the wales the hull will be left open.
I will plank up the hull and get back to the build log as a finished job.

- Joined
- Dec 1, 2016
- Messages
- 6,383
- Points
- 728

thanks Mike


