The "Chinese" Harvey

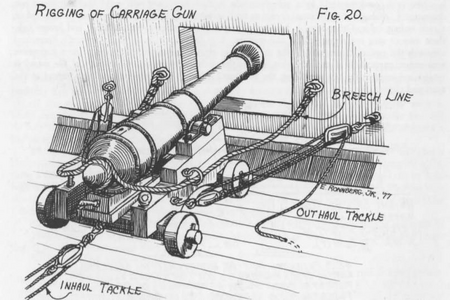
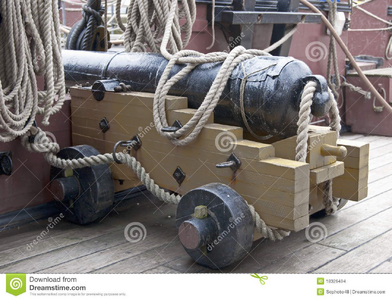
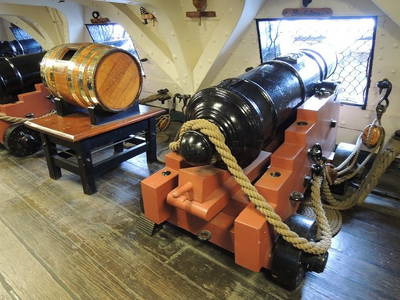
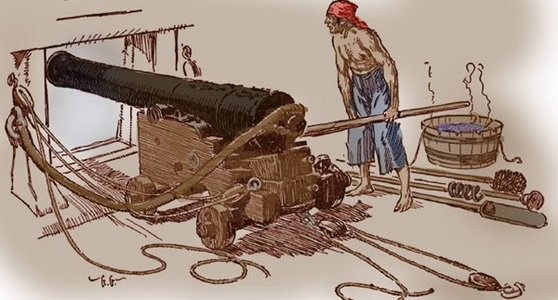
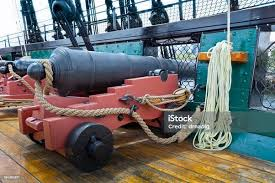
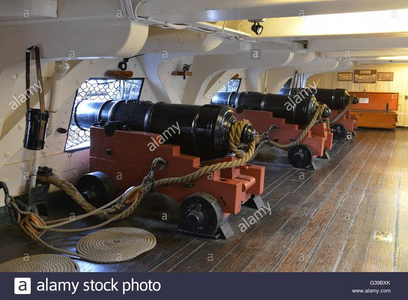
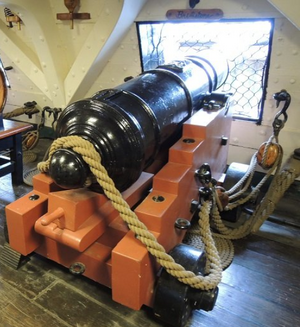
Make the breeching ropes long enough such that when the carriage is rolled back, the end of the muzzle is barely inside the bulwark. This allows the cannon crew to be able to swab and reload the cannon.

Example:
View attachment 424154
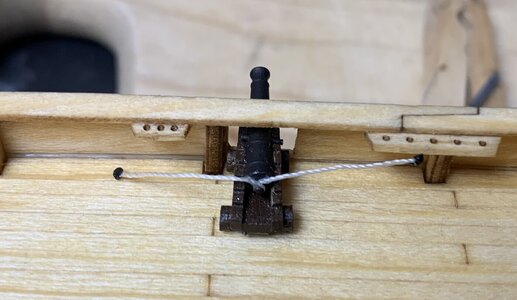
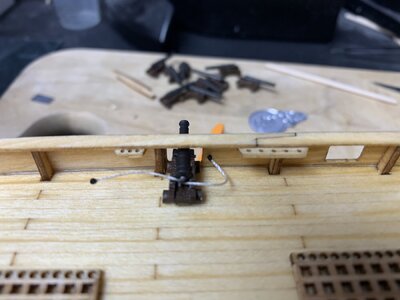
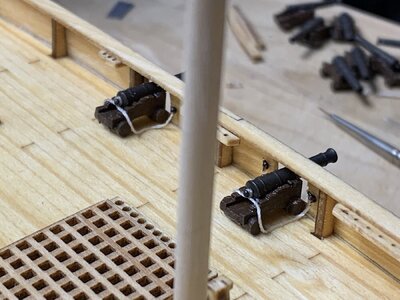
And here is the first pass (40mm of breech length overall)

cannon.jpg

It looks like I need to invert the loop around the cannon?

And for all of you animal lovers!?! This is Tephra (look it up! And yes, it is a magma thing named by my daughter) who was one of four dumped into a local park. The Mrs. spent a couple of days trapping this one. Two of the others were also "rescued" from what she learned. All were obviously house cats that were STARVING in the wild. Teph-teph is a young female that has an appointment to be fixed as soon as her quarantine period is over. Since she had pinworms upon arrival, she has been living alone in the basement WC with me for the past month. But the is GOURGEOUSE! A long hair muted calico!?!?
Tephra.jpg
 
Last edited:
And here is the first pass (40mm of breech length overall)

View attachment 424191

It looks like I need to invert the loop around the cannon?

And for all of you animal lovers!?! This is Tephra (look it up! And yes, it is a magma thing named by my daughter) who was one of four dumped into a local park. The Mrs. spent a couple of days trapping this one. Two of the others were also "rescued" from what she learned. All were obviously house cats that were STARVING in the wild. Teph-teph is a young female that has an appointment to be fixed as soon as her quarantine period is over. Since she had pinworms upon arrival, she has been living alone in the basement WC with me for the past month. But the is GOURSEOUSE! A long hair muted calico!?!?
View attachment 424195
Nice kitty! The loop around the cascable is done both ways as far as I know, depending on nationality and time period. You will need to do some internet research or ask one of the other members who knows about how the cascable is typically rigged for certain vessels. Here are a couple examples.

1706399007496.png

1706399043719.png

1706399079090.png

1706399116929.png

1706399258798.png

1706399340754.png
 
Well, since I have already inverted the loop, I will stick with that. Another hour and a half of my life gone on that...

I would think the loop from the deck below to over the top of the knob would have been easiest/most convenient/expedient/practical? What say you?

M.
 
Well, since I have already inverted the loop, I will stick with that. Another hour and a half of my life gone on that...

I would think the loop from the deck below to over the top of the knob would have been easiest/most convenient/expedient/practical? What say you?

M.
The rope actually fastens to inside of the bulwark, not the deck.
 
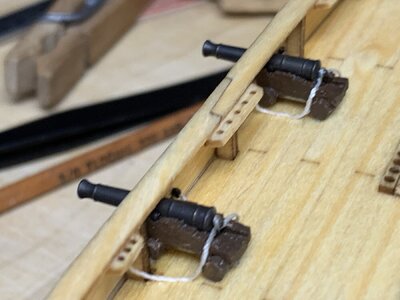
After a few adjustments, one side of the breech is fastened (19 more to go???).

And the basement cat (she is in heat!) needs attention. So I might prepare clothing that can be exchanged outside her quarentine area and let her show me how fluffy her belly is. Again. 17 more days and counting down to the release I believe...

M.

Breech.jpeg
 
Ha. And so less talking about ship topics and instead about animals (please skip to another thread if this does not interest you) ...

I work for a Japanese based company (I lived in Japan for a few years {30 years ago} unrelated to my current employment). And once stationed back in the US I once hosted a team of Japanese techs who were commissioning some production systems out in Modesta, CA. When we would go outside for lunch, dinner, or anything, they would be amazed by the squirrels! Yep, yard rats. Fluffy tailed rodents. That do not exist in Japan.

How cool was that for them?

M.
 
Last edited:
Ha. And so less talking about ship topics and instead about animals (please skip to another thread if this does not interest you) ...

I work for a Japanese based company (I lived in Japan for a few years {30 years ago} unrelated to my current employment). And once stationed back in the US I once hosted a team of Japanese techs who were commissioning some production systems out in Modesta, CA. When we would go outside for lunch, dinner, or anything, they would be amazed by the squirrels! Yep, yard rats. Fluffy tailed rodents. That do not exist in Japan.

How cool was that for them?

M.
I once owned a chinchilla back in the day before I turneD him into a coat. Have that japs!
 
I once owned a chinchilla back in the day before I turneD him into a coat. Have that japs!
Chinchilla's are cool as can be! But you cannot pick them up, right (because they do not have a rib cage to protect their lungs)? And they are difficult to keep as a pet since they need dust to "bathe" in? Or so I've heard from friends. I've never had one myself. Ferrets on the other hand., OMG! WHAT A RIOT! But so sad when they pass. Only live about four or five years...
 
After a few adjustments, one side of the breech is fastened (19 more to go???).

And the basement cat (she is in heat!) needs attention. So I might prepare clothing that can be exchanged outside her quarentine area and let her show me how fluffy her belly is. Again. 17 more days and counting down to the release I believe...

M.

View attachment 424214
One realism tip: Use a very small dab of CA glue to glue the breeching rope to the deck so it looks like it is draping properly. Ropes don't usually levitate. Use a toothpick or small piece of wood to press the line to the deck until the glue takes hold, never use your finger! It will always stick to you instead of what it should stick to. The stiffness of line used in models has always been an issue when trying to simulate how lines hang in catenary curves. For long lines that hang in free space like brace lines, modelers often stiffen the line by applying watered down PVA glue, then drying it with a hair dryer so the line holds the correct shape. These details make an average model into a spectacular model.

Example:

Model vs. Real
1706456485261.png1706456783505.png
 
One realism tip: Use a very small dab of CA glue to glue the breeching rope to the deck so it looks like it is draping properly. Ropes don't usually levitate. Use a toothpick or small piece of wood to press the line to the deck until the glue takes hold, never use your finger! It will always stick to you instead of what it should stick to. The stiffness of line used in models has always been an issue when trying to simulate how lines hang in catenary curves. For long lines that hang in free space like brace lines, modelers often stiffen the line by applying watered down PVA glue, then drying it with a hair dryer so the line holds the correct shape. These details make an average model into a spectacular model.

Example:

Model vs. Real
View attachment 424269View attachment 424270
Great tip. And luckily I only have the breech glued to the wale on one cannon so far. And it is with PVA so I should be able to reposition.

Of course, on the salty side, I would have NEVER noticed that before SOMEONE brought it up! And now I cannot NOT see it! And this is why I will probably NEVER complete this build!?! Too much advise from the "going on month four speed builder?!?!"

Thanks!

M.
Sorry... PVA is PolyVinylAcrylate glue. In simple words, yellow carpenter's glue like Titebond II or Elmer's White Glue like the stuff we used in grade school. Most modelers on the forum use the term PVA to refere to this family of glues. I prefer Titebond II glue for modeling. Great stuff. As for the speed build thing, I only have 1-2 hours for 3 days each week to work on my boat, so if you take that into account, it's fast for me. :D In truth, I was going to build it as the instructions call for it, but hey... you've seen the instructions. Plus, I got mired into super detailing and scratch-rigging the model, and of course things slowed way down. What can I do? It's in my nature...
 
Sorry... PVA is PolyVinylAcrylate glue. In simple words, yellow carpenter's glue like Titebond II or Elmer's White Glue like the stuff we used in grade school. Most modelers on the forum use the term PVA to refere to this family of glues. I prefer Titebond II glue for modeling. Great stuff. As for the speed build thing, I only have 1-2 hours for 3 days each week to work on my boat, so if you take that into account, it's fast for me. :D In truth, I was going to build it as the instructions call for it, but hey... you've seen the instructions. Plus, I got mired into super detailing and scratch-rigging the model, and of course things slowed way down. What can I do? It's in my nature...
You do you, sir. I find it very informative and inspirational so far.
 
Also, I've used Elmers's glue for years (mostly on card models) and then only recently learned about the different formulations of PVA. I'm kinda happy with the Fevicol that I found (due to someone on this forum). But I am open to suggestions. I mean, something that tacks up a bit quicker would be great. But then again, I might need to work more on the piece being glued?!? And so I don't know which is better? Sticky Tak, or slow Elmer's? Either way, both are delish (If you are 5 years old)!
 
Also, I've used Elmers's glue for years (mostly on card models) and then only recently learned about the different formulations of PVA. I'm kinda happy with the Fevicol that I found (due to someone on this forum). But I am open to suggestions. I mean, something that tacks up a bit quicker would be great. But then again, I might need to work more on the piece being glued?!? And so I don't know which is better? Sticky Tak, or slow Elmer's? Either way, both are delish (If you are 5 years old)!
Titebond II sets up pretty fast. It's a relatively thick yellow carpenter's glue. Titebond II has sawdust in it and fills better, but it also dries with some color so it is noticeable against lighter wood and lines. You have to try a couple glues and find the one you like.
 
One realism tip: Use a very small dab of CA glue to glue the breeching rope to the deck so it looks like it is draping properly. Ropes don't usually levitate. Use a toothpick or small piece of wood to press the line to the deck until the glue takes hold, never use your finger! It will always stick to you instead of what it should stick to. The stiffness of line used in models has always been an issue when trying to simulate how lines hang in catenary curves. For long lines that hang in free space like brace lines, modelers often stiffen the line by applying watered down PVA glue, then drying it with a hair dryer so the line holds the correct shape. These details make an average model into a spectacular model.

Example:

Model vs. Real
View attachment 424269View attachment 424270
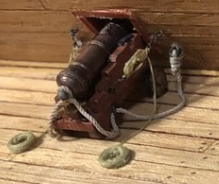
Ans so several hour of my life (that I am not getting back) later I think two of the cannon breech ropes are as good as needs to be for this scale. My latest issue is with the hue of the "ropes" themselves. Seems much too pale. But I'm still not going to quibble or bash more for this first build. I just want to move on to a larger scale...
IMG_0314.jpeg
IMG_0315.jpeg
 
Ans so several hour of my life (that I am not getting back) later I think two of the cannon breech ropes are as good as needs to be for this scale. My latest issue is with the hue of the "ropes" themselves. Seems much too pale. But I'm still not going to quibble or bash more for this first build. I just want to move on to a larger scale...
View attachment 424857
View attachment 424858
Get some light brown paint, dilute it, then wash the ropes with it carefully using a small paint brush, without spilling any color onto the deck. A dark wash enhances the twists and darkens the line. Try in on some scrap line first, and change color of the paint until the wash gives you the effect that you want. I had to do this once when I ran out of line for a particular maker for a specific color.
 
Get some light brown paint, dilute it, then wash the ropes with it carefully using a small paint brush, without spilling any color onto the deck. A dark wash enhances the twists and darkens the line. Try in on some scrap line first, and change color of the paint until the wash gives you the effect that you want. I had to do this once when I ran out of line for a particular maker for a specific color.
Well, if I have to go for the correct color, what was it? Were the lines made out of hemp?
 
Well, if I have to go for the correct color, what was it? Were the lines made out of hemp?
The lines were made from hemp. As for the color, that varies according to how worn the line is, whether it was coated with pine tar and how long that coating has been exposed to the weather. It comes down to personal preference. Check out several photos of cannon carriages on the internet and choose the color that appeals to your ship's overall appearance on a scale of like-new to heavily weathered.
 
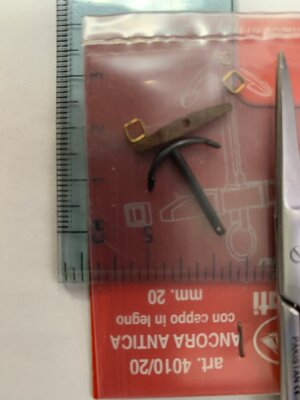
So the anchors arrived today. They are made by Amati :https://www.amatimodel.com/en/ And so they went from Italy to Australia and then to me in the US (through customs in LA, CA). My wife had to sign for them when they finally arrived two weeks after I ordered them. There has GOT to be a better way. But , whatever, I will look at options for the next time that Amati has the items I would like to try. But the little anchors do look SWEEET! And so I hope they are closer to scale than the wood ones that came in this kit.

IMG_0322.jpeg

Also received some caramel color paint to try on the breech ropes. I have some brown to mix it with and have some rope pieces drying to test upon.

And so, the weekend begins!

M.
 
Back
Top