post deleted.
Last edited:
 |
As a way to introduce our brass coins to the community, we will raffle off a free coin during the month of August. Follow link ABOVE for instructions for entering. |
 |
 |
The beloved Ships in Scale Magazine is back and charting a new course for 2026! Discover new skills, new techniques, and new inspirations in every issue. NOTE THAT OUR FIRST ISSUE WILL BE JAN/FEB 2026 |
 |
Soaking it in a cup of hot water, like that is exactly what I had to do on my model. Once wet, the planks tend to be quite pliable. Don’t break too many because you only have one extra plank to finish the model!I hope this is more funny than sad... I've arrived at the first planks that are supposed to transition from the hull to the keel by twisting about 80 degrees. I was dry fitting an end where the twist happens, and the plank snapped right along the grain that was inconveniently aligned with the stresses caused by the twisting. I CA'd the broken plank pieces back together. And now have it soaking overnight to hopefully make that portion of the plank more pliable in the morning?!? It was just an idea to try, but I find it very amusing to look at!View attachment 406155
Not on mine. I started it before I was a member of these forums. There is a picture of it here though. I'm roughly at the same place you are in your build but I've not been able to work on it due to my move that I just made and my shop not being set up yet.Do you have a thread on your Halcon build? Or is it pending?
Yeah, it bent like rubber rather than wood this morning. I clamped to dry in shape and it appeared to have held that twist about 80% once released maybe two and a half hours later. It is glued and clamped up very neatly now. I'll definitely soak any parts needing more than slight bends and clamp them up sans glue to form a bit from now on. Time consuming, but less than going through the broken plank repair cycle! It sounds like a bender would be a good investment if I wanted to speed things up.Soaking it in a cup of hot water, like that is exactly what I had to do on my model. Once wet, the planks tend to be quite pliable. Don’t break too many because you only have one extra plank to finish the model!
Very similar indeed. Same number of cannon ports. Your stern blends into the keel smoothly while mine overhangs a bit. And your planks run so the rear of the hull bows more smoothly to the waterline. Mine is flat under the deck until the planking reaches the keel where it then requires the ~80 degree plank twist. I have no knowledge of the actual ships these models may (or may not) be representing. But I am now kinda curious if the two models represent different types of ships altogether or if they are different "revisions" of the same basic design produced over time, or from different shipyards, or what?Not on mine. I started it before I was a member of these forums. There is a picture of it here though. I'm roughly at the same place you are in your build but I've not been able to work on it due to my move that I just made and my shop not being set up yet.
Link
Unlike lime wood, whatever soft wood they use in this kit will spring a good deal of the way back to the original shape after drying, instead of staying at the new bend or twist you put into it. I have only two planks left over after planking the hull, so try not to break them often.Yeah, it bent like rubber rather than wood this morning. I clamped to dry in shape and it appeared to have held that twist about 80% once released maybe two and a half hours later. It is glued and clamped up very neatly now. I'll definitely soak any parts needing more than slight bends and clamp them up sans glue to form a bit from now on. Time consuming, but less than going through the broken plank repair cycle! It sounds like a bender would be a good investment if I wanted to speed things up.
For guidance as to what the hull shape should be on a Baltimore schooner, look at the Artesania Latina model of the Harvey. That's what I'm going to use as a guide for masting and rigging:Very similar indeed. Same number of cannon ports. Your stern blends into the keel smoothly while mine overhangs a bit. And your planks run so the rear of the hull bows more smoothly to the waterline. Mine is flat under the deck until the planking reaches the keel where it then requires the ~80 degree plank twist. I have no knowledge of the actual ships these models may (or may not) be representing. But I am now kinda curious if the two models represent different types of ships altogether or if they are different "revisions" of the same basic design produced over time, or from different shipyards, or what?
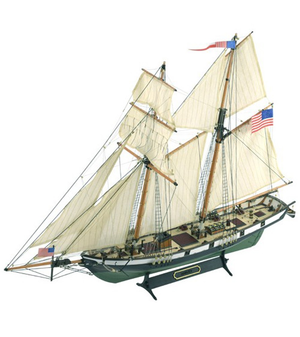
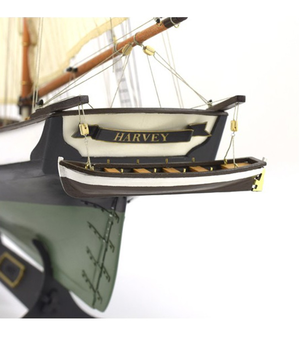
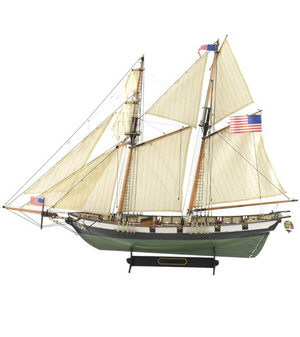
I am pretty sure they are both of the "Baltimore Clipper" designVery similar indeed. Same number of cannon ports. Your stern blends into the keel smoothly while mine overhangs a bit. And your planks run so the rear of the hull bows more smoothly to the waterline. Mine is flat under the deck until the planking reaches the keel where it then requires the ~80 degree plank twist. I have no knowledge of the actual ships these models may (or may not) be representing. But I am now kinda curious if the two models represent different types of ships altogether or if they are different "revisions" of the same basic design produced over time, or from different shipyards, or what?
Or you can get pictures of the real "Pride of Baltimore II" when they pull it out of the water to replace some planks here very shortly.For guidance as to what the hull shape should be on a Baltimore schooner, look at the Artesania Latina model of the Harvey. That's what I'm going to use as a guide for masting and rigging:
View attachment 406255
View attachment 406256
View attachment 406257
Yeah, DON'T do this. Those mini bar clamps are great in many applications. But I placed them to hold planks and the pressure was between the ribs. The wood in this kit deformed to the shape of the pressure! And so now I have two, flat, clamp shaped depressions in that plank. I've tried repeatedly to wet it hoping that would alleviate the stresses in the wood caused by the clamps. But it did not. The only way I can think to un-do the bends would be to apply a Force in the opposite direction. And I have no mini jackscrew type of solutions! And so I think I have to sadly sand the adjacent planks down to the depressions caused by those clamps.
Try to wet it and hit it with an iron. Sometimes the steam will pull the fibers out. Even a soldering iron should work. Just don't leave it in one place or it will scortch.Yeah, DON'T do this. Those mini bar clamps are great in many applications. But I placed them to hold planks and the pressure was between the ribs. The wood in this kit deformed to the shape of the pressure! And so now I have two, flat, clamp shaped depressions in that plank. I've tried repeatedly to wet it hoping that would alleviate the stresses in the wood caused by the clamps. But it did not. The only way I can think to un-do the bends would be to apply a Force in the opposite direction. And I have no mini jackscrew type of solutions! And so I think I have to sadly sand the adjacent planks down to the depressions caused by those clamps.
Those clamps are very cool otherwise. Use with caution!
If someone has a better option, I am very anxious to hear it!
M.
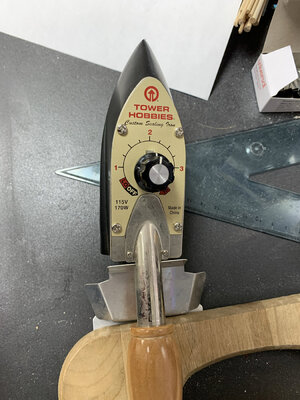

I have one of those!So this iron has got to be at least 30 years old. But it was still in the box of crap that has moved with me over two continents and at least five locations! It stunk up the house enough for my wife to call down to me in the basement to ask if I was burning something! And yet still worked like a charm.
Thanks, Corsair! Steaming the wet wood by applying heat from the outside helped tremendously. Not perfect, but a HUGE improvement. Much less sanding will be needed now.
Thanks again!
M.
View attachment 406416
So you use small screws to hold the first layer planks in place on the bulkheads while the glue sets up? Or does "planking screws" refer to some other tool I have not heard of? And if they are just regular screws, what type/size do you use?@mondrasek , FWIW, if your model used two layers of planking, consider using planking screws when doing the first layer. Kind of hard on the thumbs from all the screwing and unscrewing, but I've had great luck with them on kits that have sections thick enough to use them. I've had better luck with them than using clamps, and I can usually get them fitted into tighter spaces where clamps wouldn't be able to grab or fit.
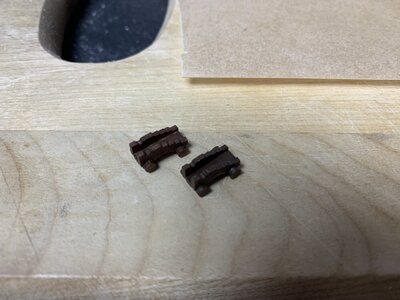
Just a touch too small. I measure the wood ones in the kit at 22mm for the small ones and one at 29mm.
Hopefully good enough for the Harvey, but I think they might have been made for the Halcon?
M.
That made me go look again. Mine are all about 20~21mm. But you have one bigger cannon as well? Is it one of the 10 or an 11th unit? I've seen illustrations that may have indicated that Cutties (sometimes?) had a larger cannon on deck to roll up when the situation called for it?Just a touch too small. I measure the wood ones in the kit at 22mm for the small ones and one at 29mm.
Just the same, I'm going to order them. Thank you for the info !
