-

Win a Free Custom Engraved Brass Coin!!!
As a way to introduce our brass coins to the community, we will raffle off a free coin during the month of August. Follow link ABOVE for instructions for entering.
-

PRE-ORDER SHIPS IN SCALE TODAY!
The beloved Ships in Scale Magazine is back and charting a new course for 2026!
Discover new skills, new techniques, and new inspirations in every issue.
NOTE THAT OUR FIRST ISSUE WILL BE JAN/FEB 2026
You are using an out of date browser. It may not display this or other websites correctly.
You should upgrade or use an alternative browser.
You should upgrade or use an alternative browser.
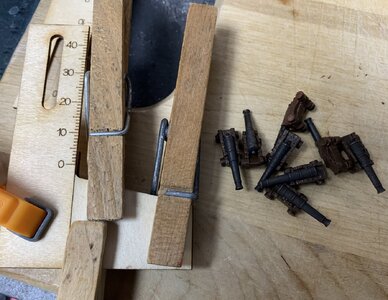
I've been working on the cannon. The brass barrels make them a bit front heavy which is difficult to work with IMHO. They will tip forward if not presented with an alternative. I tried weighting the undersides of the carriages with copper magnet wire that I had handy. But it was not enough. And so I have some lead strips that should be arriving tomorrow. I hope that some correctly sized pieces of lead will keep them stable (even though I know they will eventually be glues to the deck!).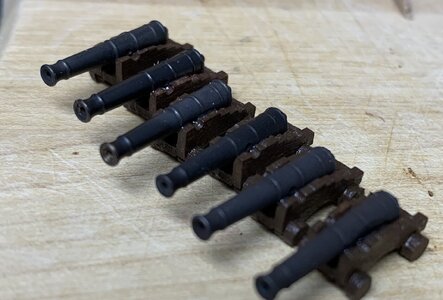

I was pondering this issue and thought that drilling a hole on the underside of the rear wheels, inserting some brass rod or wire and then drilling a corresponding hole in the deck might do the trick?I've been working on the cannon. The brass barrels make them a bit front heavy which is difficult to work with IMHO. They will tip forward if not presented with an alternative. I tried weighting the undersides of the carriages with copper magnet wire that I had handy. But it was not enough. And so I have some lead strips that should be arriving tomorrow. I hope that some correctly sized pieces of lead will keep them stable (even though I know they will eventually be glues to the deck!).View attachment 417742
Phew! Finally finished planking the hull and while an improvement over my previous effort it still leaves much to be desired. I thought I was oh so clever pre staining the wood first but after sanding, fettling etc no stained wood! So I applied stain again, 3 coats, and much to my surprise..... it looked crap. Then tried some dark oak wood polish and...even more naff.
Help! Am thinking of giving up on this turkey...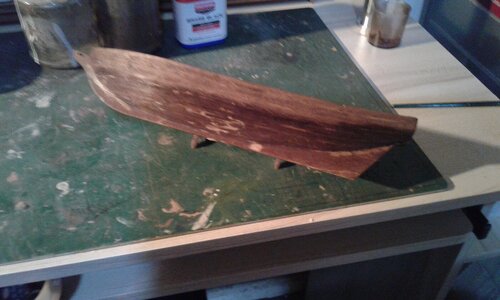
Help! Am thinking of giving up on this turkey...

Stain depends on penetrating the wood. Where you have glue on the wood, the stain will not penetrate and will just wipe off.
I am building the small cheap kit of the Halcon from China and my plan is to paint it. You may want to consider that for this one.
Jeff
I am building the small cheap kit of the Halcon from China and my plan is to paint it. You may want to consider that for this one.
Jeff
I think it's nature of the wood. It stains poorly. I'm not happy with the results of the stain on my hull either. Even after lots of touch up, it still looks bad.Phew! Finally finished planking the hull and while an improvement over my previous effort it still leaves much to be desired. I thought I was oh so clever pre staining the wood first but after sanding, fettling etc no stained wood! So I applied stain again, 3 coats, and much to my surprise..... it looked crap. Then tried some dark oak wood polish and...even more naff.
Help! Am thinking of giving up on this turkey...View attachment 417852
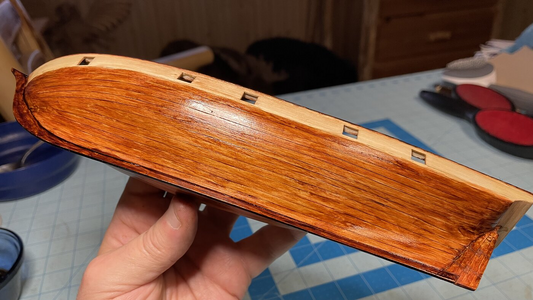
I also believe the wood plays a big part in how any finish may looks with these. For example, the gunwale pieces were on two different sheets than the planks. Mine is just linseed oiled to darken the grain and you can see that it did a uniform coloration change of the planking that was all from the same sheets of ply. The front section of the gunwale oiled in much darker. And the back section turned out so light that I thought I must have missed it when oiling the first time! And so I oiled it again. And while it darkened a tad more, it still shows very little grain and is still very pale in comparison with the fore section. 


I believe that would work fine! Yet I'm still wanting to weight them (so they don't tip over) so I can move them around while trying out where I want to ultimately place them. And then I guess they will get PVAed to the deck in their final positions. At least that is my idea atm. Things are always subject to change! Especially as advice is received and absorbed!I was pondering this issue and thought that drilling a hole on the underside of the rear wheels, inserting some brass rod or wire and then drilling a corresponding hole in the deck might do the trick?
Cheers,
M.
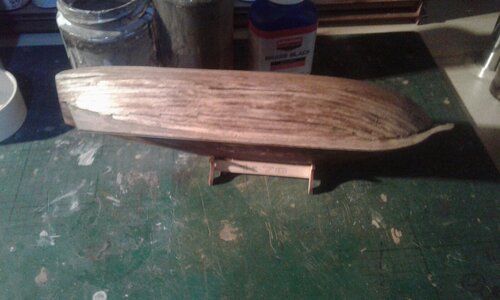
I think painting is a good idea however I applied a wax finish but on my next Harvey I think I will as have found some beautiful pics of the Artesinea Latina kit. However, never say die! I decided to scrape and wirewool the dickens out of this bugger and while not perfect was good enough to encourage me to carry on if only for the badly needed experience!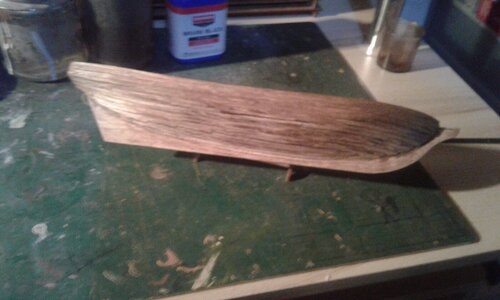 a
a
 a
a
Haha! Wouldn't you like to know! Yes will leave this as is and concentrate on gunports, rails and all the nicknacks on the deck. Am still studying masts and rigging but seem to have overloaded my brain cell with all the info!That hull is looking very nice, IMHO. So, what are you thinking? Gonna leave it with that finish or do you have other ideas planned? (or still planning?)
I'm very glad to hear you are going to continue with it since you have only done a small part of the kit. There is still quite a bit of work to do that will provide lots of experience.  if you look online for pictures of "Pride of Baltimore II", you can see that her hull is painted. She is currently in dry dock getting some hull planks replaced for maintenance.
I'm not sold on duplicating the coloration of the "Pride of Baltimore" so much. I'd rather like to see how these boats were colored when originally put out to sea. I'm not 100% sure they had marine grade paint in that era. But I am willing to learn! And so, I am leaning towards the oils that they would have had at the time.I'm very glad to hear you are going to continue with it since you have only done a small part of the kit. There is still quite a bit of work to do that will provide lots of experience.if you look online for pictures of "Pride of Baltimore II", you can see that her hull is painted. She is currently in dry dock getting some hull planks replaced for maintenance.

I really wish they had color photography when these where launched.
M.
Damn right it is! Thanks for the encouragement and will keep updates coming. Wishing you and your family a prosperous and peaceful new year.Yeah, it can be kinda overwhelming, eh? But fun as S**T! Again, IMHO. I wish you the best and hope you post more pics of your work going forward!
M.
Yes have downloaded some pics of her, lovely craft but still considering various paint schemes. I would have preferred more wood on display but recent experiences have made me a little gun shy!I'm very glad to hear you are going to continue with it since you have only done a small part of the kit. There is still quite a bit of work to do that will provide lots of experience.if you look online for pictures of "Pride of Baltimore II", you can see that her hull is painted. She is currently in dry dock getting some hull planks replaced for maintenance.

Ah, the three R's, research, research and more research! And paracetamol.I'm not sold on duplicating the coloration of the "Pride of Baltimore" so much. I'd rather like to see how these boats were colored when originally put out to sea. I'm not 100% sure they had marine grade paint in that era. But I am willing to learn! And so, I am leaning towards the oils that they would have had at the time.
I really wish they had color photography when these where launched.
M.
Ah, the three R's, research, research and more research! And paracetamol.
Well said. And to you and yours. And everyone who may be lurking. PEACE.Damn right it is! Thanks for the encouragement and will keep updates coming. Wishing you and your family a prosperous and peaceful new year.
M.
A definite improvement. The wood in this kit is pretty poor.I think painting is a good idea however I applied a wax finish but on my next Harvey I think I will as have found some beautiful pics of the Artesinea Latina kit. However, never say die! I decided to scrape and wirewool the dickens out of this bugger and while not perfect was good enough to encourage me to carry on if only for the badly needed experience!View attachment 417959a
View attachment 417960
There are two less cannon to complete now. But unfortunately, Amazon changed the delivery of the lead sheets from "today" to Wednesday. No big deal, I guess. Though I was kinda excited about weighting those cannon carriages! Instead, I have been working on this deadeye jig. I hope it comes in handy with the completely INTIMIDATING first attempts at rigging.
