Good point, I'll buy that.Red may be for emphasize as I doubt the masts and spars were also red.
-

Win a Free Custom Engraved Brass Coin!!!
As a way to introduce our brass coins to the community, we will raffle off a free coin during the month of August. Follow link ABOVE for instructions for entering.
-

PRE-ORDER SHIPS IN SCALE TODAY!
The beloved Ships in Scale Magazine is back and charting a new course for 2026!
Discover new skills, new techniques, and new inspirations in every issue.
NOTE THAT OUR FIRST ISSUE WILL BE JAN/FEB 2026
You are using an out of date browser. It may not display this or other websites correctly.
You should upgrade or use an alternative browser.
You should upgrade or use an alternative browser.
The Mary Rose
- Thread starter Graham
- Start date
- Watchers 53
-
- Tags
- caldercraft mary rose
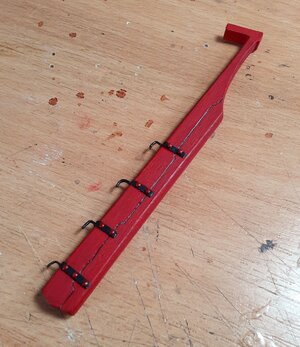
The rudder. First thing was to blacken all brass parts - the rudder fittings, and while I was at it the gun port fittings and the parral bead brackets. For this I use a jar of ammonia to which is added two heaped spoons of copper carbonate -
The actual rudder was built from two oak timbers scarfed together. I have tried to replicate this with a score line as per the archaeological drawings, highlighted with pencil -
Fitting the straps, the toothpicks represent where the pintles will go -
Gudgeons held on with bluetack and used to mark the drill holes on the sternpost -
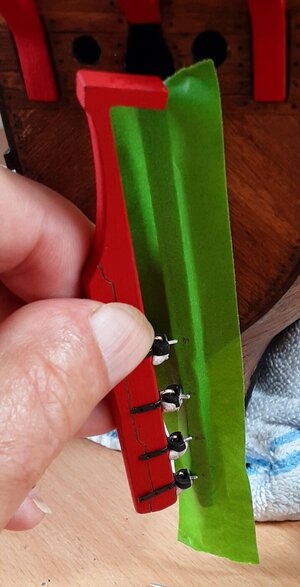
Rudder finished. Pins are dressmaking pins (painted) as my round-headed pins were too large and didn't look right scale-wise -
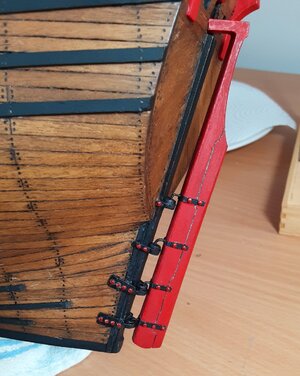
Hull fittings in place and the rudder mounted -
The remains of a tiller have been found in the wreck which attached to the rudder with three treenails. However, I won't bother with that as it will not be seen.

The actual rudder was built from two oak timbers scarfed together. I have tried to replicate this with a score line as per the archaeological drawings, highlighted with pencil -

Fitting the straps, the toothpicks represent where the pintles will go -

Gudgeons held on with bluetack and used to mark the drill holes on the sternpost -

Rudder finished. Pins are dressmaking pins (painted) as my round-headed pins were too large and didn't look right scale-wise -

Hull fittings in place and the rudder mounted -

The remains of a tiller have been found in the wreck which attached to the rudder with three treenails. However, I won't bother with that as it will not be seen.
On to the spars. I don't have a lathe and have tried various methods over the years, but what works best for me is patience, several grades of sandpaper, some good music on the Bose and a few cups of tea.
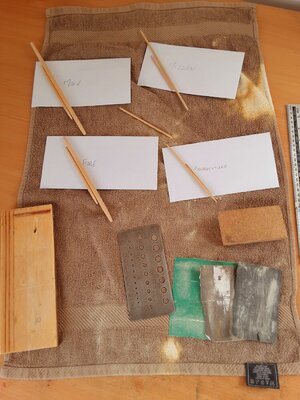
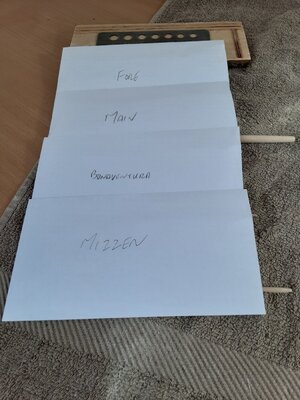
The build instructions suggest that the spars are not too heavily tapered. Next will be cleats, then staining/finishing and finally rigging blocks. I will now keep them separate in sealed envelopes with the ends cut off - that sounds a bit OCD but it saves me the continual puzzle of matching them against the drawing to determine which one I am working on as things progress.
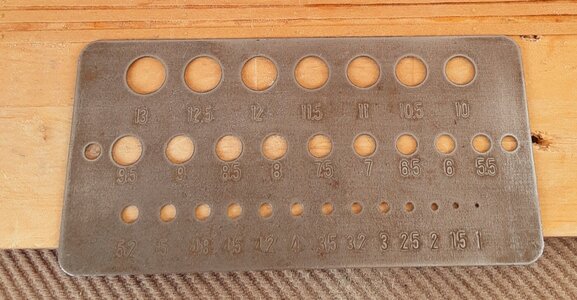
A useful tool is my drill gauge which I use to check that the tapers are the same at several points on both ends of the spar -

The build instructions suggest that the spars are not too heavily tapered. Next will be cleats, then staining/finishing and finally rigging blocks. I will now keep them separate in sealed envelopes with the ends cut off - that sounds a bit OCD but it saves me the continual puzzle of matching them against the drawing to determine which one I am working on as things progress.

A useful tool is my drill gauge which I use to check that the tapers are the same at several points on both ends of the spar -

Kurt Konrath
Kurt Konrath
Very good info on the method of gauging spar size during the construction phase.
Thank you, I find it a lot quicker and easier than using Vernier for this particular task..Very good info on the method of gauging spar size during the construction phase.
Last edited:
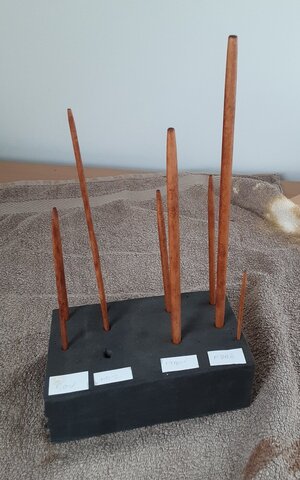
Spars stained using a spirit stain - Rustins mid teak. I have tried water based stains in furniture making in the past and it sometimes let's me down, so I only use Rustins on all projects-
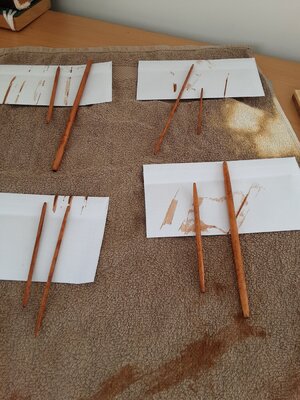
and a coat of lacquer -
While the lacquer was drying I sorted out the remaining cannon. These are white metal, but the castings are pretty good, so minimal cleanup for a change -
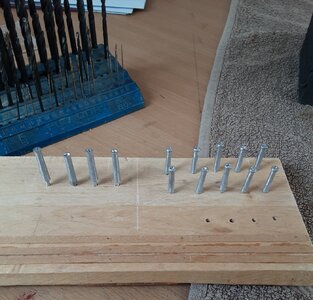
Nothing too clever, just a coat of matt black -
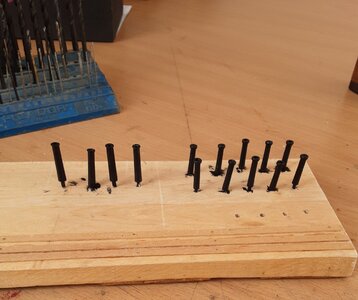
As with a number of other things these cannon will be last fit so that I don't catch them and knock them off when handling the hull, but it's always nice to put something in the 'finished' box.

and a coat of lacquer -

While the lacquer was drying I sorted out the remaining cannon. These are white metal, but the castings are pretty good, so minimal cleanup for a change -

Nothing too clever, just a coat of matt black -

As with a number of other things these cannon will be last fit so that I don't catch them and knock them off when handling the hull, but it's always nice to put something in the 'finished' box.
Spars and stop cleats. A coat of enamel lacquer has been applied to seal the stain as CA does not stick well on oil stain. I made the cleats from triangular pieces of the leftover teak planking, fixed with CA and then ground them back. The photo below shows the ground-back cleats (lower) and those just attached (upper) -
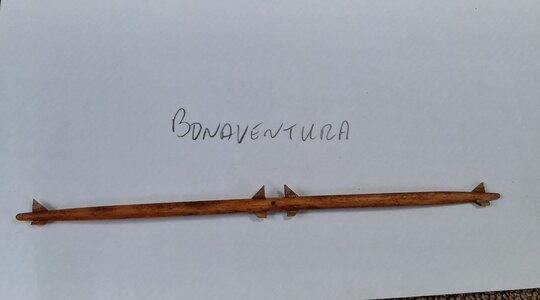
The hole at the centre point will house a blind pin which will help when I come to mounting the spars. A final coat of lacquer and they are done -
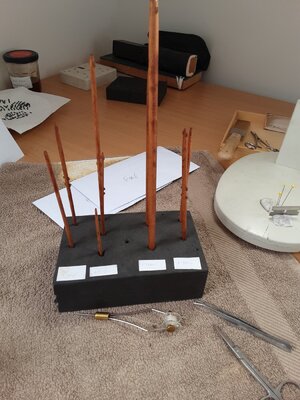
I'm now off to whip quiet a few blocks for a while. Thanks for following.

The hole at the centre point will house a blind pin which will help when I come to mounting the spars. A final coat of lacquer and they are done -

I'm now off to whip quiet a few blocks for a while. Thanks for following.
I am looking to put sails on her and and using the book Your Noblest Shippe as a reference; the book also comes with a set of plans, one of which shows the suggested sail configuration.
1. The book plan shows a main topgallant.
2. When I squint hard at it, the Anthony Roll illustration shows a main topgallant.
3. The actual kit plans do not show a main topgallant.
Having just finished the rigging for the spars it looks like I need to make another spar. Oh well, I guess the kit design is quite old and could do with an update at some time in the future. A bit like me, really.
I have now cut out the patterns for the sails. The kit doesn't cater for sails, so I am in new territory -
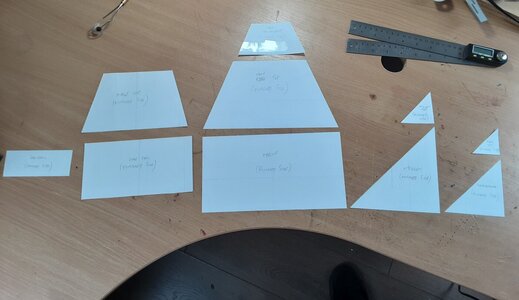
I will now hand these over to The Boss. There is no way I can do it as her sewing machine looks like something NASA built and I will never figure it out. I did start to explain about seams etc., but she gave me a long knowing look, so I shut up and made us a cup of tea. You need to know when you are beaten.
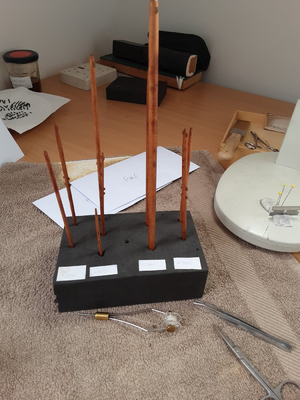
I want to rig the spars as far as possible before mounting them, so I have started with the lateen sails. This rigging type is a sort of latticework. Here is the sequence I went through to put it together -
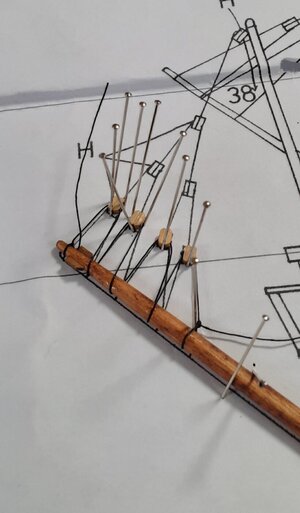
As you can see, I am pinning on the plan. A foam block is underneath which makes things a lot easier. On we go -
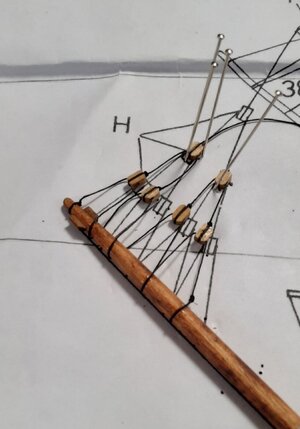
You will see bright spots on the spar from the CA, but I will go over with a light coat of lacquer to calm it all down. And finally -
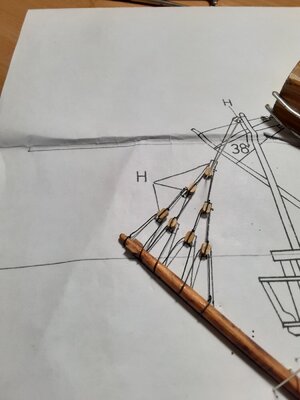
This is all a bit fiddly. In order to stop the blocks moving about as I work on them I push a pin into a rigged hole; it also gives me something to get hold of. It also works when tensioning lines like deadeyes -
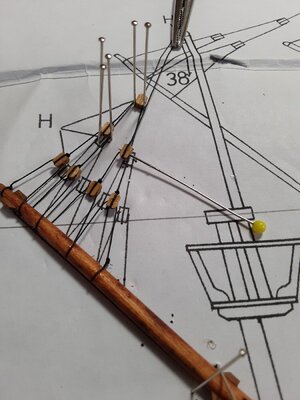
Several more of these to do and I am quite enjoying it. I need to get out more.

I will now hand these over to The Boss. There is no way I can do it as her sewing machine looks like something NASA built and I will never figure it out. I did start to explain about seams etc., but she gave me a long knowing look, so I shut up and made us a cup of tea. You need to know when you are beaten.
I want to rig the spars as far as possible before mounting them, so I have started with the lateen sails. This rigging type is a sort of latticework. Here is the sequence I went through to put it together -

As you can see, I am pinning on the plan. A foam block is underneath which makes things a lot easier. On we go -

You will see bright spots on the spar from the CA, but I will go over with a light coat of lacquer to calm it all down. And finally -

This is all a bit fiddly. In order to stop the blocks moving about as I work on them I push a pin into a rigged hole; it also gives me something to get hold of. It also works when tensioning lines like deadeyes -

Several more of these to do and I am quite enjoying it. I need to get out more.
Thank you, Heinrich. Fitting the sails to the spars will be the next task, so I am doing a bit of research on the associated rigging. I think I have got it figured out - but these may prove to be my famous last words! Anyway, you will all be along for the ride and since I have never done this before any pointers will be welcome.Great work Graham. Spars are exactly the items that are awaiting me next on the Willem Barentsz. Yours came out beautifully and serve as great motivation for me to get going.
Last edited:
Further to good advice received to my question on which sail cloth to buy (thanks to all) I got some cotton lawn. I coloured it by soaking it in tea to get the shade I wanted (20 minutes), then rinsed it and handed it to The Boss along with the templates (post #249).
This is what she did and I am very pleased with them -
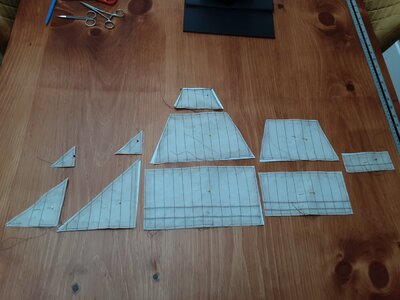
I hope you will agree that she did a great job. You will note that the main, fore and spritsail have horizontal lines on them. When more sail area was needed the spar was lowered and another width of sail was attached, probably by a running loop and she has represented this with a zig-zag stitch.
These additional strips of sail are called Bonnets. Next job is to thread the sail around the outside edge and create the rigging loops at the top corners (cringles) and bottom corners (clews). The seam on the bottom edge of the sail can then be closed up.
Rigging the sails brings to light a whole range of terminology which is new to me. If you already know all this I apologise; if not I hope you find it interesting.
This is what she did and I am very pleased with them -

I hope you will agree that she did a great job. You will note that the main, fore and spritsail have horizontal lines on them. When more sail area was needed the spar was lowered and another width of sail was attached, probably by a running loop and she has represented this with a zig-zag stitch.
These additional strips of sail are called Bonnets. Next job is to thread the sail around the outside edge and create the rigging loops at the top corners (cringles) and bottom corners (clews). The seam on the bottom edge of the sail can then be closed up.
Rigging the sails brings to light a whole range of terminology which is new to me. If you already know all this I apologise; if not I hope you find it interesting.
It is clear from the Anthony Roll illustration that the ship was highly decorated -
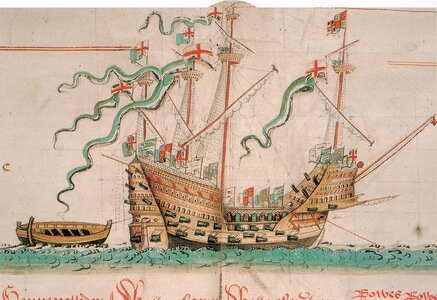
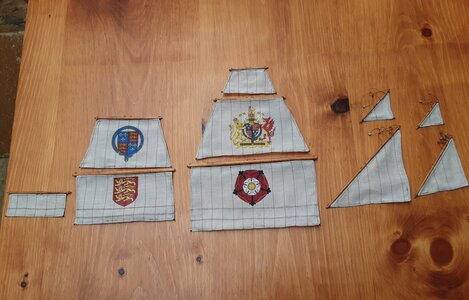
The idea was to project wealth and power, and to 'out bling' the enemy Sadly, the sails are furled and so we have no idea if they were decorated, but I find it hard to believe that they would ignore the opportunity to decorate these huge areas. So, I spent some time looking for heraldry appropriate to the period, printed it onto iron-on transfer paper and here we are -
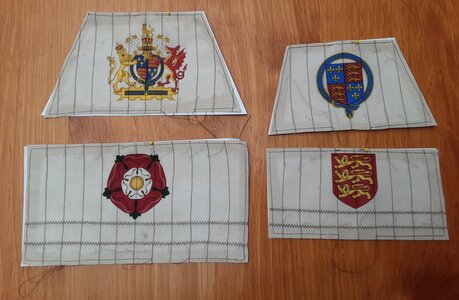
Clockwise from bottom left these are the Tudor rose (of course), Henry's coat of arms, emblem of the Knights of the Garter and the shield of England. Fun to do, but the coat of arms took an awful lot of quite fine blade work to cut out. I think Henry would approve.

The idea was to project wealth and power, and to 'out bling' the enemy Sadly, the sails are furled and so we have no idea if they were decorated, but I find it hard to believe that they would ignore the opportunity to decorate these huge areas. So, I spent some time looking for heraldry appropriate to the period, printed it onto iron-on transfer paper and here we are -

Clockwise from bottom left these are the Tudor rose (of course), Henry's coat of arms, emblem of the Knights of the Garter and the shield of England. Fun to do, but the coat of arms took an awful lot of quite fine blade work to cut out. I think Henry would approve.
Kurt Konrath
Kurt Konrath
Still working on the sails and nothing much to show you yet, but I took a break for a fun little project having seen a display at Harry Potter World.
A quick frame to build on, the web is fishing line and the big spider used to be my son's when he was little. Making the web took far longer than I anticipated in CA'ing each crossover point, but worth it if it scares the grandkids. I am sure some of you have even bigger spiders in the countries where you live - but if mine were actually real I would be moving house! Back to the ship, now.
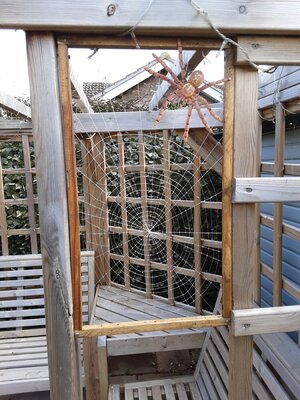
A quick frame to build on, the web is fishing line and the big spider used to be my son's when he was little. Making the web took far longer than I anticipated in CA'ing each crossover point, but worth it if it scares the grandkids. I am sure some of you have even bigger spiders in the countries where you live - but if mine were actually real I would be moving house! Back to the ship, now.

Great idea with the spiders web 
Thank you Uwek and Heinrich. The web was one of those things where your brain ticks over on how to build it, and then natters at you relentlessly until you do.Great idea with the spiders web
The sails are now threaded and it is time to tie them to the spars at the end cleats. Again, a foam block comes in handy to hold things in place -
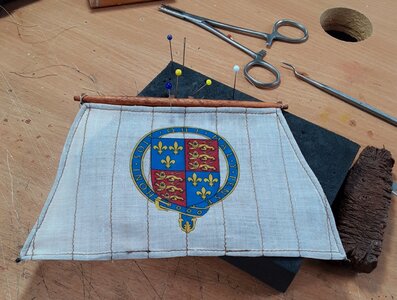
... and finished -
Next job is to sew the sails to the spar using a running loop stitch. Better get some advice from The Boss on that one.


