Clever thinking. A great well lit shipyard and super neatIt's a grey winter here in the UK and poor light is a problem I need to address. I had a couple of strip lights spare in the garage, so a little time on the saws and I made this from pallet strips -
View attachment 420502
View attachment 420503
Also handy for hanging things on which are regularly used and makes them easy to hand. Furthermore, the Boss just got a huge new sewing table, so I inherited her desk -
View attachment 420504
Christmas gift projects finished, time to crack on. A belated Happy New Year to you all.
-

Win a Free Custom Engraved Brass Coin!!!
As a way to introduce our brass coins to the community, we will raffle off a free coin during the month of August. Follow link ABOVE for instructions for entering.
-

PRE-ORDER SHIPS IN SCALE TODAY!
The beloved Ships in Scale Magazine is back and charting a new course for 2026!
Discover new skills, new techniques, and new inspirations in every issue.
NOTE THAT OUR FIRST ISSUE WILL BE JAN/FEB 2026
You are using an out of date browser. It may not display this or other websites correctly.
You should upgrade or use an alternative browser.
You should upgrade or use an alternative browser.
The Mary Rose
- Thread starter Graham
- Start date
- Watchers 53
-
- Tags
- caldercraft mary rose
Hi. I don't find shadows to be a problem with this setup and can move the frame towards me if necessary - it is not fixed to the desk top. I only had the two lights and it seems to be enough. Cheers.The room looks great and the light frame could be just the ticket for me or maybe something like it. I'm always having problems with getting enough light on my work and having some of the tools right there to grab would be nice too. How about shadows on the work with the two lights? Maybe a third light at the left would help. good idea and nice ship model there too.
I am thinking of maybe adding some figures to this build; not too many and just to give a sense of scale and add a bit of interest. A friend with a 3D printer came up with these -
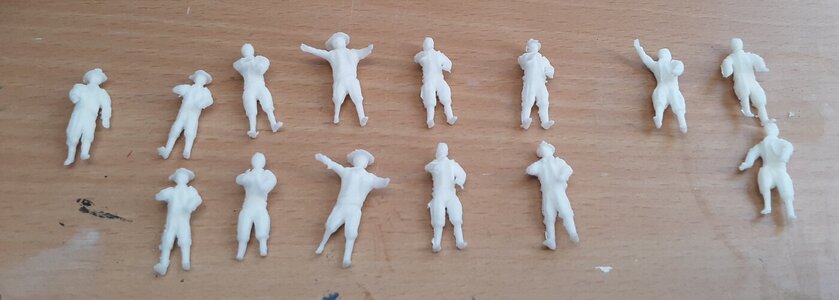
The first batch (upper figure, below) is too small. The second figure is about right at 1:60 scale -
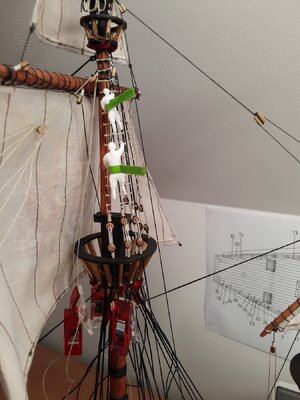
I think with a bit of fettling and filing (e.g the hats are wrong) and rejigging some of the limbs to get a variety of poses I can work with these.
However, I am a way off doing this just yet and need to get on with the rigging.

The first batch (upper figure, below) is too small. The second figure is about right at 1:60 scale -

I think with a bit of fettling and filing (e.g the hats are wrong) and rejigging some of the limbs to get a variety of poses I can work with these.
However, I am a way off doing this just yet and need to get on with the rigging.
Last edited:
good idea to bring some life on the main mastI am thinking of maybe adding some figures to this build; not too many and just to give a sense of scale and add a bit of interest. A friend with a 3D printer came up with these -
View attachment 421931
The first batch (upper figure) is too small. The second figure is about right at 1:60 scale -
View attachment 421932
I think with a bit of fettling and filing (e.g the hats are wrong) and rejigging some of the limbs to get a variety of poses I can work with these.
However, I am a way off doing this just yet and need to get on with the rigging.
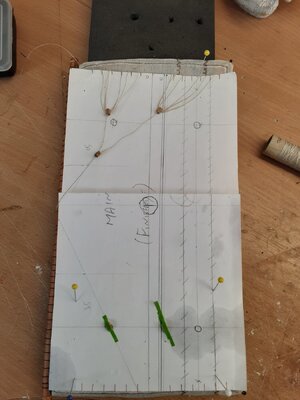
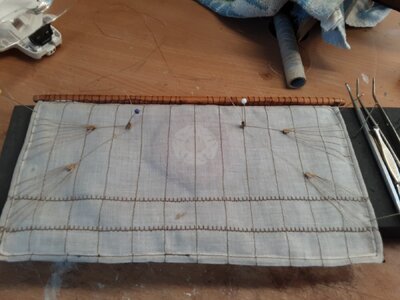
Brails and bowline tackle added to the front of the main sail. You can also see my dodgy plan of how all the lines will be tied off; sometimes I get a bit of brain freeze with the numbers of lines on the ship at the moment and need to draw it out.
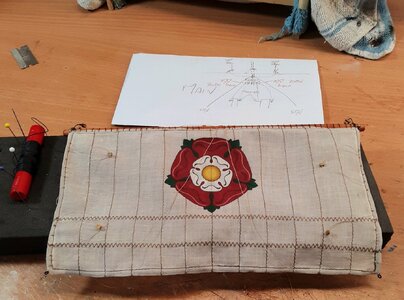
and up she goes -
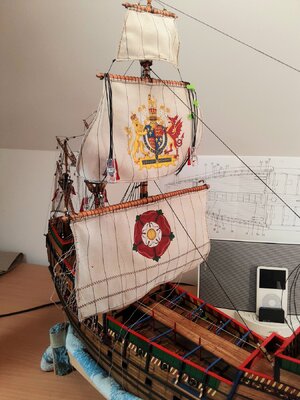
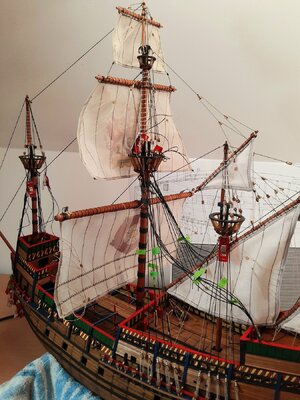
Next job is to shape and tension the top sail and tie off the associated lines now that the main is in place.

and up she goes -


Next job is to shape and tension the top sail and tie off the associated lines now that the main is in place.
That's the main mast done, brails, martnets and spar risers tied off. The line from the main sail clew to the chains is temporary in order to tension the aforementioned lines. I will leave the sheets and bowlines until later, otherwise I won't be able to work on the shrouds and ratlines very easily. Really looking forward to tying those ratlines (not).
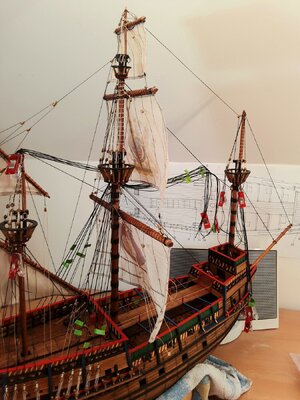
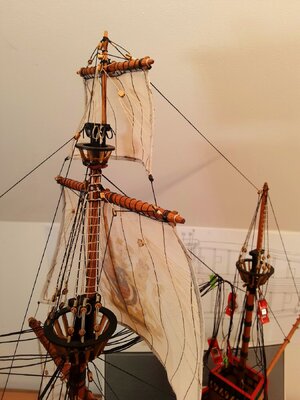
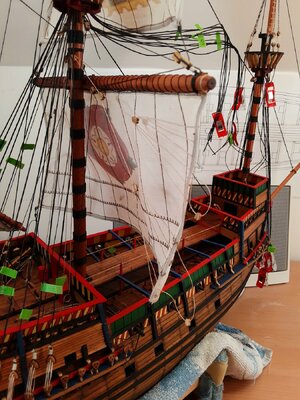
On to the foremast.


On to the foremast.
Good morning Graham. Wonderful. Those sails are making her come to life. Cheers GrantThat's the main mast done, brails, martnets and spar risers tied off. The line from the main sail clew to the chains is temporary in order to tension the aforementioned lines. I will leave the sheets and bowlines until later, otherwise I won't be able to work on the shrouds and ratlines very easily. Really looking forward to tying those ratlines (not).
View attachment 424487
View attachment 424488
View attachment 424489
On to the foremast.
- Joined
- Jan 9, 2020
- Messages
- 10,566
- Points
- 938

Hi Graham. You did an amazing job with this ship. The colors are simply beautiful and really show the lines of the ship to their best effect. I can only imagine that the rigging is no walk in the park, but yours look so cleanly executed - I'm sure you must be happy. I've always liked the look of this ship (I also found English history of this era fascinating) and yours is among the best I have seen.
Hi Grant, thank you for your kind words. Cheers.Good morning Graham. Wonderful. Those sails are making her come to life. Cheers Grant
Last edited:
Thank you Heinrich, that means a lot to me. Regards.Hi Graham. You did an amazing job with this ship. The colors are simply beautiful and really show the lines of the ship to their best effect. I can only imagine that the rigging is no walk in the park, but yours look so cleanly executed - I'm sure you must be happy. I've always liked the look of this ship (I also found English history of this era fascinating) and yours is among the best I have seen.
A visit to the Hull Streetlife Museum (England) to see the gun which archaeologists unearthed during excavations of the blockhouse built by Henry VIII as part of the Hull City walls.
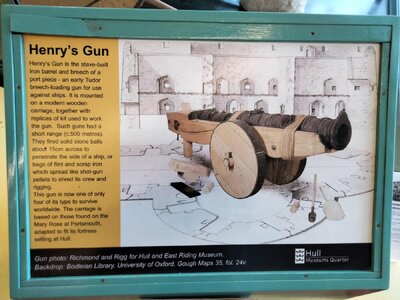
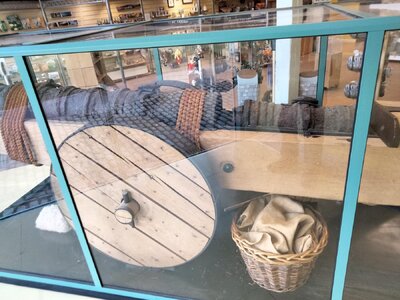
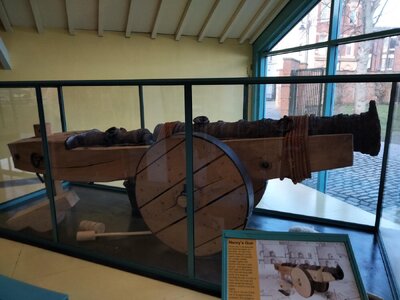
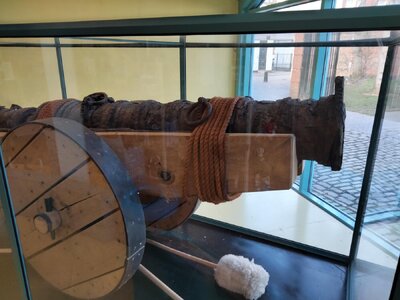
Here you see the breech block which was loaded separately, lifted into place (a couple of the lifting rings are missing), pushed forward and then held in place with a wedge -
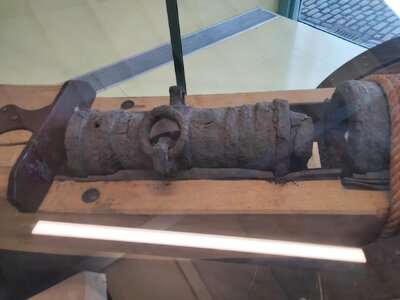
This breech would be very heavy and lifting it into place in the cramped conditions is believed to account for the back problems (fused vertebrate) on some of the skeletons found.
The museum is well worth a visit if you get the opportunity.


Here you see the breech block which was loaded separately, lifted into place (a couple of the lifting rings are missing), pushed forward and then held in place with a wedge -

This breech would be very heavy and lifting it into place in the cramped conditions is believed to account for the back problems (fused vertebrate) on some of the skeletons found.
The museum is well worth a visit if you get the opportunity.
Yes, that is right. The wheels on the ship-based version were much smaller.Most interesting. What I also find noteworthy is that it SEEMS as if the carriage wheels are iron-clad. I wonder if that can be explained by virtue of the fact that this one was a "land" gun.
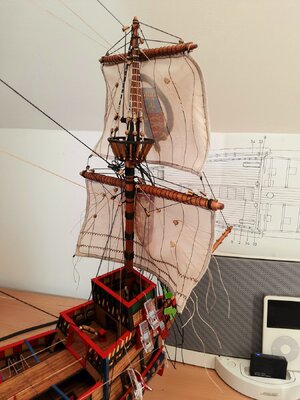
Sails now added to the foremast and all lines run, but not yet fully tightened -
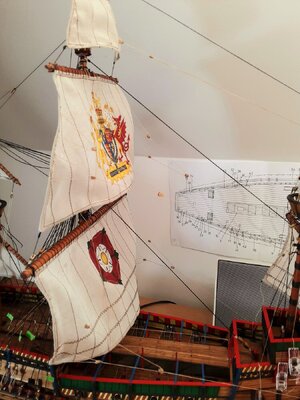
I have also run the bowlines from the sails on the main mast-
This has had the positive effect (as I hoped it would) of adding just a little more tension to the martnets on the rear of the sails -
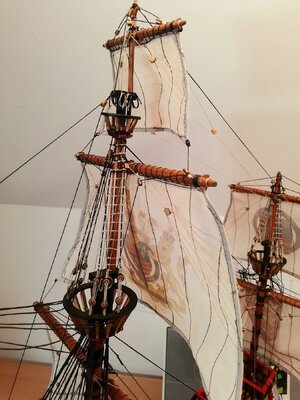
I must admit that of all the rigging I have done on these sails the martnets have been the most vexing and getting the tensions right has been difficult, with several instances involving cutting the whole lot off and starting again. Some swearing was involved. Spritsail next.

I have also run the bowlines from the sails on the main mast-

This has had the positive effect (as I hoped it would) of adding just a little more tension to the martnets on the rear of the sails -

I must admit that of all the rigging I have done on these sails the martnets have been the most vexing and getting the tensions right has been difficult, with several instances involving cutting the whole lot off and starting again. Some swearing was involved. Spritsail next.
Hello Graham - this is just looking marvelous! Congratulations!
Hi Paul. Thank you for your kind words, much appreciated.Hello Graham - this is just looking marvelous! Congratulations!
First job of the day is to fix my magnifiers. I have had these two years. They are quite a tight fit (which is good), but the constant on and off has fractured one of the arms -
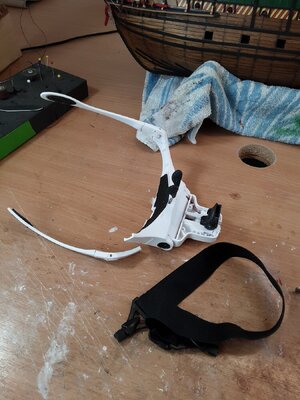
I like these glasses and the various lenses are good. They came with an elastic headband, so it's worth a go at fixing them and after a bit of fettling and a couple of very small bolts -
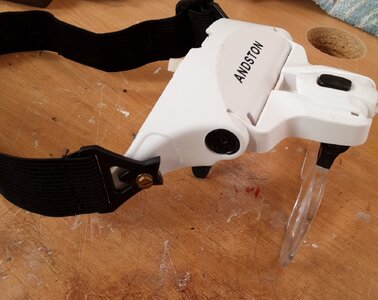
Improvise, adapt and overcome. Plus, I am too tight to buy new ones without attempting a fix.
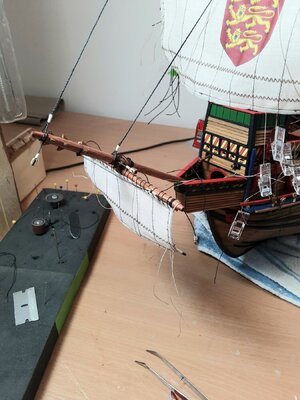
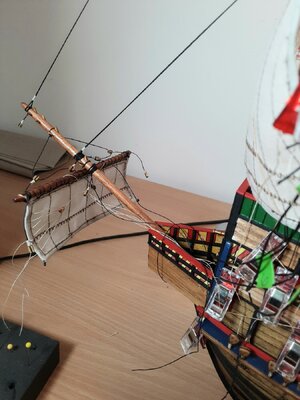
So, we're back in the game and rigging at the front end of the ship on the spritsail and bowlines -
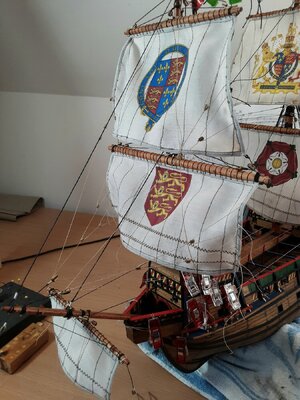
A couple more lines to run and it's quite tight tweezer work in the forepeak and forward castle deck. When I finish this I can tie off the foresail lines and finish tensioning the martnet lines.

I like these glasses and the various lenses are good. They came with an elastic headband, so it's worth a go at fixing them and after a bit of fettling and a couple of very small bolts -

Improvise, adapt and overcome. Plus, I am too tight to buy new ones without attempting a fix.
So, we're back in the game and rigging at the front end of the ship on the spritsail and bowlines -

A couple more lines to run and it's quite tight tweezer work in the forepeak and forward castle deck. When I finish this I can tie off the foresail lines and finish tensioning the martnet lines.
- Joined
- Jan 9, 2020
- Messages
- 10,566
- Points
- 938

I can only marvel at the beauty that you are building, Graham. Looking at all the modifications which you have incorporated and at the extremely detailed build, makes my imagination run wild on what it must have been to actually sail on her (sans the sinking of course).


