No worries @ all!!! I like shmoozing...Sorry for the OT Jimsky
-

Win a Free Custom Engraved Brass Coin!!!
As a way to introduce our brass coins to the community, we will raffle off a free coin during the month of August. Follow link ABOVE for instructions for entering.
-

PRE-ORDER SHIPS IN SCALE TODAY!
The beloved Ships in Scale Magazine is back and charting a new course for 2026!
Discover new skills, new techniques, and new inspirations in every issue.
NOTE THAT OUR FIRST ISSUE WILL BE JAN/FEB 2026
- Home
- Forums
- Ships of Scale Group Builds and Projects
- HMS Alert 1777 1:48 PoF Group Build
- HMS Alert 1777 1:48 Group Build Logs
You are using an out of date browser. It may not display this or other websites correctly.
You should upgrade or use an alternative browser.
You should upgrade or use an alternative browser.
Many thanks for the attention and comments to my build log, Kurt. Here you go. just browse her store, and you will find what you are looking for.Maybe you can share the stores info on small bag of bricks, so we don't have to come to your town and look!

Franco's Corner | eBay Stores
We Offer a Large Selection of Hand painted Nativity Figurines, Animals, and Accessories Made in Italy. The Pieces are Manufactured by Landi, Pellegrini, and Euromarchi with Extreme Care and Passion. We Also Carry a Large Selection of Fine Jewelry, Pottery, and Collectibles from Around the World.
www.ebay.com
Great video, many thanks for sharing, Poul!! It is doable and the stash bricks will last for many models...unless you will make a decision to build villages like Ekis @EkisAlternatively you can go a little bit further down the scratch build road and make the bricks yourself with air-drying terracotta clay. It's cheap, it's easy, it's available everywhere and you can make them in a size fitting exactly to your needs
Many thanks, my friend!!! The turkey was delicious, Admiral served it with yam (sweet potatoes) and cranberry sauce. I wish I can share it with all of you...Maybe one day, who knows??!!! life is full of surprisesHallo my friend,
how was the turkey? - I hope you all (in the states) had enjoyed it
Very good work - the brickwall for the oven is looking very good - and many thanks for showing your method in detail
Fantastic stones Jim, see you are applying to be a free mason  .
.
You definately set the benchmark here.
You definately set the benchmark here.
Last edited:
Many thanks, my friend! I will have to learn and practice before setting the benchmarks. Hence, setting the benchmarks doesn't include for this buildFantastic stones Jim, se you are applying to be a free mason.
You definately set the benchmark here.
... a freemason? LOL
Well...I was looking at this brick plinth and couldn't resist putting the iron firehearth and stove on it. Most of the day I spend assembling it. The parts are of very good quality and made the entire process a joy. Some of the parts like lifting eye and ring so tiny you must be very caution holding them. They tend to jump 
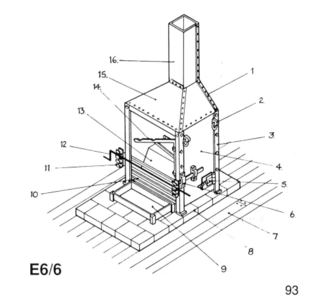
Here is the diagram from the AOTS book, I use it as the reference.
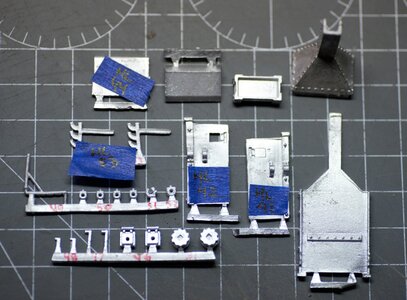
Below are the parts from the kit. They are cast white metal (but not pewter) flexible enough without breaking. Highest quality with lots of detail. I label them so easy to identify.
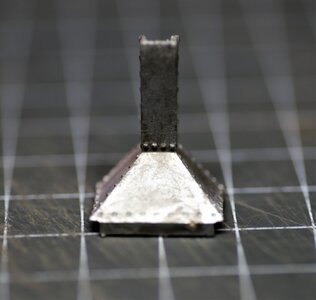
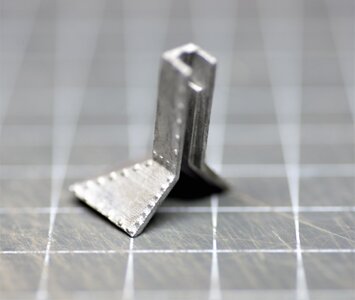
some macro details
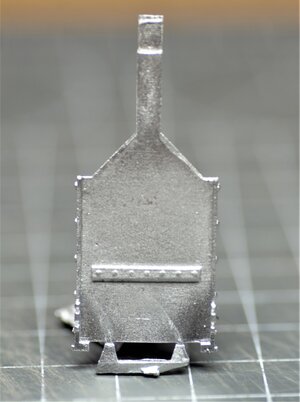
The instruction manual explained the assembly sequence very well, as the assembly process is well defined and showed in 7 steps only using isometric images. Great job Triden Models @Trident Model.
Here, I started the assembly as instruction depict
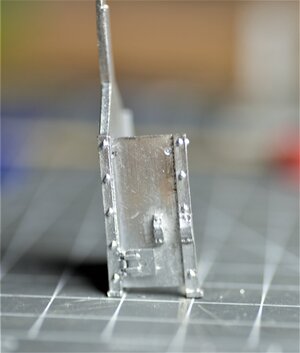
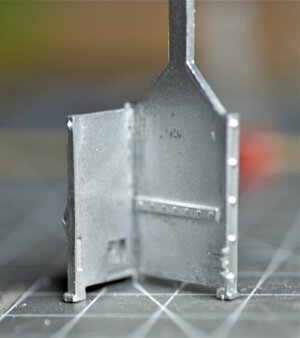
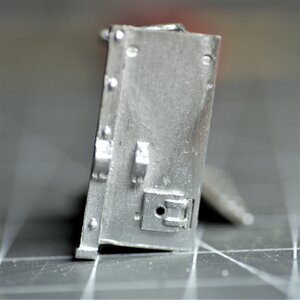
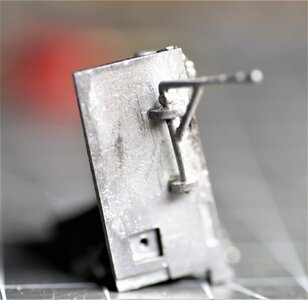
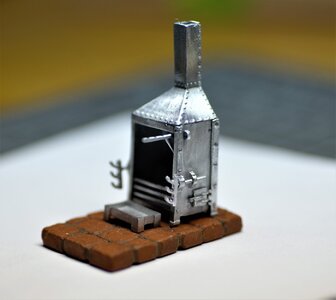
And the final product
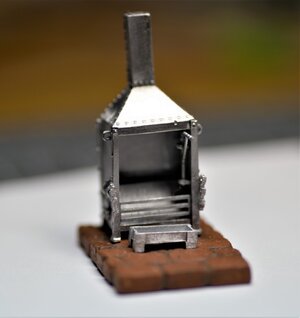
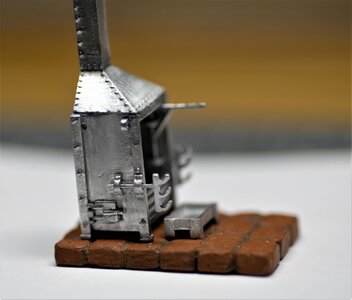
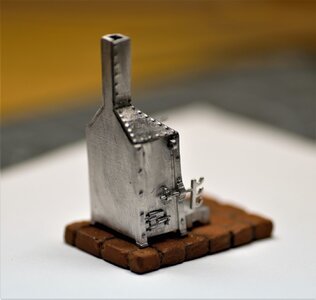
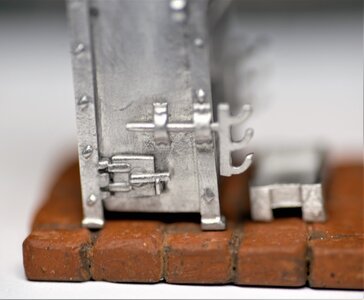
As always, some details
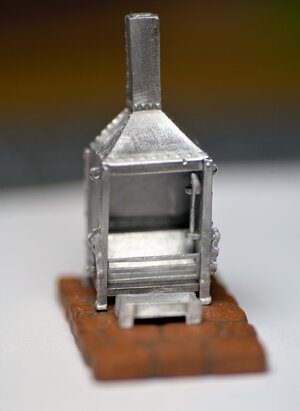
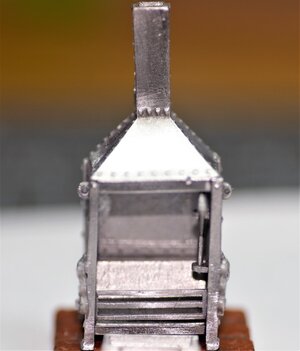
I have to finish it by adding a few more details and will be blackened it before final installation on the deck. Now, it is time to build frames... Until then stay tuned for the updates. Many thanks for your interest!!!
Here is the diagram from the AOTS book, I use it as the reference.

Below are the parts from the kit. They are cast white metal (but not pewter) flexible enough without breaking. Highest quality with lots of detail. I label them so easy to identify.

some macro details


The instruction manual explained the assembly sequence very well, as the assembly process is well defined and showed in 7 steps only using isometric images. Great job Triden Models @Trident Model.
Here, I started the assembly as instruction depict


And the final product


As always, some details


I have to finish it by adding a few more details and will be blackened it before final installation on the deck. Now, it is time to build frames... Until then stay tuned for the updates. Many thanks for your interest!!!
Kurt Konrath
Kurt Konrath
Your cook stove work is smoking hot!
Now to see you come up with scale fish to fry on the grill!
Now to see you come up with scale fish to fry on the grill!
That is a great looking stove/oven. When will the mess call ring? Rich (PT-2)Well...I was looking at this brick plinth and couldn't resist putting the iron firehearth and stove on it. Most of the day I spend assembling it. The parts are of very good quality and made the entire process a joy. Some of the parts like lifting eye and ring so tiny you must be very caution holding them. They tend to jump
Here is the diagram from the AOTS book, I use it as the reference.
View attachment 195681
Below are the parts from the kit. They are cast white metal (but not pewter) flexible enough without breaking. Highest quality with lots of detail. I label them so easy to identify.
View attachment 195682
some macro details
View attachment 195683
View attachment 195684
View attachment 195685
The instruction manual explained the assembly sequence very well, as the assembly process is well defined and showed in 7 steps only using isometric images. Great job Triden Models @Trident Model.
Here, I started the assembly as instruction depict
View attachment 195686
View attachment 195687
View attachment 195689View attachment 195688
And the final product
View attachment 195690
View attachment 195691
View attachment 195692
View attachment 195693
As always, some details
View attachment 195694
View attachment 195695
View attachment 195696
I have to finish it by adding a few more details and will be blackened it before final installation on the deck. Now, it is time to build frames... Until then stay tuned for the updates. Many thanks for your interest!!!
Where is the turkey?
nice!
Thank you all for the comments and likes!!! They are much appreciated. 
The stove is not approved for use by the fire and food administration departments. We have requested an inspector but...he cannot come until the stove will be permanently placed\fixed on the Alert. Until then the food ordered on-line
The stove is not approved for use by the fire and food administration departments. We have requested an inspector but...he cannot come until the stove will be permanently placed\fixed on the Alert. Until then the food ordered on-line
...in my stomachWhere is the turkey?

Is that a Health Alert!
Very nice.
I received my kit from Trident Model and had a good look- I am very impressed with the quality.
I opened the cooker/kitchen parts and thought that I may be able to draw it up on Cad software using AOTS book's clear drawings, and then print on my 3D resin printer to get an idea of the quality of each (kit version vs the resin printed version)- since it will be painted anyway it doesn't really matter which one I use.
...and yes, I will do a build log.
Thank you, John!! While it is a choice of yours, I must confirm, that the Trident kit stove is almost identical to the one from the AOTS book, and excellent quality casting. All parts are fit well with minimum adjustments. Yes, you will need to paint or blackened it....and yes, I will do a build log.
Agree, the kit parts are tiny yet very well detailed.
It's more me trying to find excuses to play with my new 3D resin printer.
It's more me trying to find excuses to play with my new 3D resin printer.
I cannot wait to see the results...gree, the kit parts are tiny yet very well detailed.
It's more me trying to find excuses to play with my new 3D resin printer
It is an alert for Alert, Paul!!Is that a Health Alert!

What is for supper?Well...I was looking at this brick plinth and couldn't resist putting the iron firehearth and stove on it. Most of the day I spend assembling it. The parts are of very good quality and made the entire process a joy. Some of the parts like lifting eye and ring so tiny you must be very caution holding them. They tend to jump
Here is the diagram from the AOTS book, I use it as the reference.
View attachment 195681
Below are the parts from the kit. They are cast white metal (but not pewter) flexible enough without breaking. Highest quality with lots of detail. I label them so easy to identify.
View attachment 195682
some macro details
View attachment 195683
View attachment 195684
View attachment 195685
The instruction manual explained the assembly sequence very well, as the assembly process is well defined and showed in 7 steps only using isometric images. Great job Triden Models @Trident Model.
Here, I started the assembly as instruction depict
View attachment 195686
View attachment 195687
View attachment 195689View attachment 195688
And the final product
View attachment 195690
View attachment 195691
View attachment 195692
View attachment 195693
As always, some details
View attachment 195694
View attachment 195695
View attachment 195696
I have to finish it by adding a few more details and will be blackened it before final installation on the deck. Now, it is time to build frames... Until then stay tuned for the updates. Many thanks for your interest!!!


