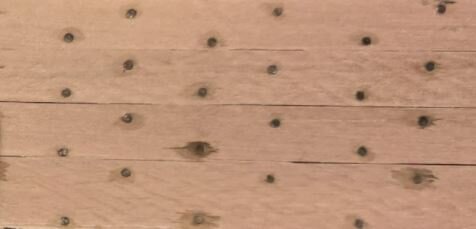
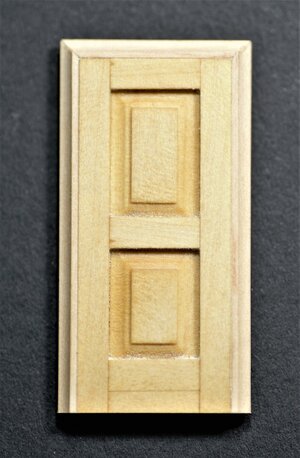
Many thanks to all for your comments. Those sewing pins come in many different sizes and head forms. The one, I had fitter perfectly for my scale, when I ordered more, the heads were a bigger size. I guess you have to find the proper one...to suit your needs. 
-

Win a Free Custom Engraved Brass Coin!!!
As a way to introduce our brass coins to the community, we will raffle off a free coin during the month of August. Follow link ABOVE for instructions for entering.
-

PRE-ORDER SHIPS IN SCALE TODAY!
The beloved Ships in Scale Magazine is back and charting a new course for 2026!
Discover new skills, new techniques, and new inspirations in every issue.
NOTE THAT OUR FIRST ISSUE WILL BE JAN/FEB 2026
- Home
- Forums
- Ships of Scale Group Builds and Projects
- HMS Alert 1777 1:48 PoF Group Build
- HMS Alert 1777 1:48 Group Build Logs
You are using an out of date browser. It may not display this or other websites correctly.
You should upgrade or use an alternative browser.
You should upgrade or use an alternative browser.
An other trick to add to my collection on pinning the keelson to the keel. Traffic!
Hello, Uwe.
Totally understand your concern; nothing can be worth ruining your work in the end with such blemishes. I did the preliminary test on the timber I use. I this case it is Cherry. The results come OK. At least for a given (immediate) time. I don't know how it will react over years, but the past few weeks, I have not seen any signs of a reaction. Below are my tests with few coats of Linseed oil.
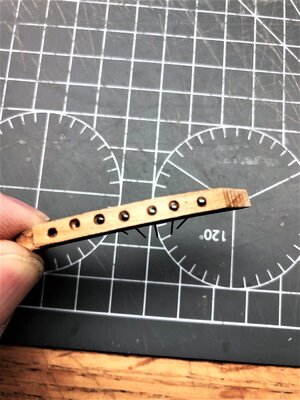
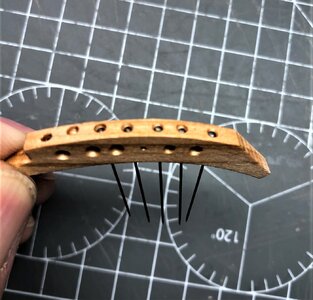
I am suspecting those pins are stainless steel (they don't stick to magnets). Also, I do not blacken them with chemical solutions only anil the head for 'blue steel' effects, and I will not use stain for this build, only Linseed oil. Also, I don't use glue for pins, I push them like nails. Maybe the glue is the one causing trouble? Technically, stainless steel shouldn't be oxidized and react to any chemicals. Time will tell...I guess.
Totally understand your concern; nothing can be worth ruining your work in the end with such blemishes. I did the preliminary test on the timber I use. I this case it is Cherry. The results come OK. At least for a given (immediate) time. I don't know how it will react over years, but the past few weeks, I have not seen any signs of a reaction. Below are my tests with few coats of Linseed oil.


I am suspecting those pins are stainless steel (they don't stick to magnets). Also, I do not blacken them with chemical solutions only anil the head for 'blue steel' effects, and I will not use stain for this build, only Linseed oil. Also, I don't use glue for pins, I push them like nails. Maybe the glue is the one causing trouble? Technically, stainless steel shouldn't be oxidized and react to any chemicals. Time will tell...I guess.
- Joined
- Oct 26, 2020
- Messages
- 38
- Points
- 78

Hello Jim, hello Uwe,
I watch with great interest and profit the various building reports in this forum and have found a lot of very good ideas and hints. The question of bolts and nails is handled differently, but always helpful.
The idea of stainless steel pins or wire and a "burr" are very good so I don't have to experiment myself. Thank you very much!
I'm glad every time there is another new message from the "Alert" report!
Many greetings
Fritz
P.S.: Since I'm pretty much at the end of the Alert interest list, it will probably be quite some time before I can start with my build report.
Thank you so much for the comments, Fritz. We all shared the knowledge so everyone can find what they most like to use in current or future builds! We are SOS!Hello Jim, hello Uwe,
I watch with great interest and profit the various building reports in this forum and have found a lot of very good ideas and hints. The question of bolts and nails is handled differently, but always helpful.
The idea of stainless steel pins or wire and a "burr" are very good so I don't have to experiment myself. Thank you very much!
I'm glad every time there is another new message from the "Alert" report!
Many greetings
Fritz
P.S.: Since I'm pretty much at the end of the Alert interest list, it will probably be quite some time before I can start with my build report.
Hi Jim,
Getting caught up on your build, wow have I missed a lot. Alert looks great, fantastic workmanship and your teaching is much appreciated.
Getting caught up on your build, wow have I missed a lot. Alert looks great, fantastic workmanship and your teaching is much appreciated.
Thanks, Mike, you can quickly catch up, but check other's Alert build logs. Everyone's log is something special and unique 
Uwe's concern that the pins may eventually stain the wood over several years are merited.
I'm not sure what the humidity levels are where you live but here in Australia's east coast that is something to consider.
I like your idea of bolt head imitation through sewing pins- I will borrow that idea for my build if you don't mind
To avoid any future wood staining I will need to first spray the pins with matt varnish then cut them much shorter so that the varnish is not removed while pushing them into the slightly smaller holes.
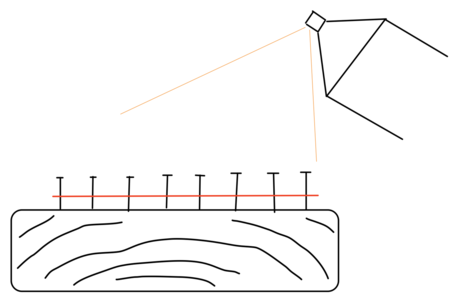
Sorry for the terrible image.
This should prevent any chance of the bolts staining the wood at least for my kid's kids lifetimes.
I'm not sure what the humidity levels are where you live but here in Australia's east coast that is something to consider.
I like your idea of bolt head imitation through sewing pins- I will borrow that idea for my build if you don't mind
To avoid any future wood staining I will need to first spray the pins with matt varnish then cut them much shorter so that the varnish is not removed while pushing them into the slightly smaller holes.

Sorry for the terrible image.
This should prevent any chance of the bolts staining the wood at least for my kid's kids lifetimes.
Hello Jim,
After catching up in the BN Group Build, I found some time to look in the other Group Builds. In the Alert-Group I found a lot of interesting build-log’s. Also yours, Uwe’s, Maarten’s with interesting items such as the trennels. I’ll see what I further use in my BN.
Regards, Peter
After catching up in the BN Group Build, I found some time to look in the other Group Builds. In the Alert-Group I found a lot of interesting build-log’s. Also yours, Uwe’s, Maarten’s with interesting items such as the trennels. I’ll see what I further use in my BN.
Regards, Peter
Last edited:
Point taking into consideration, John. Please feel free to use any of my ideas as well as all techniques. Anything on this build log is free of copyright and may be used\copyed without asking my permission, except the images from the AOTS book, they are for education only. Share and exchange the knowledge - this is the SOS idea!Uwe's concern that the pins may eventually stain the wood over several years are merited.
Greetings everyone. Many thanks for your valuable comments and 'likes'. Internal structure will require many entry doors, so I took a break from main construction and thought for a moment about doors. There are many different styles of doors but they are all made the same way. I took the door style sample from the AOTS book, and modify to suit my taste.
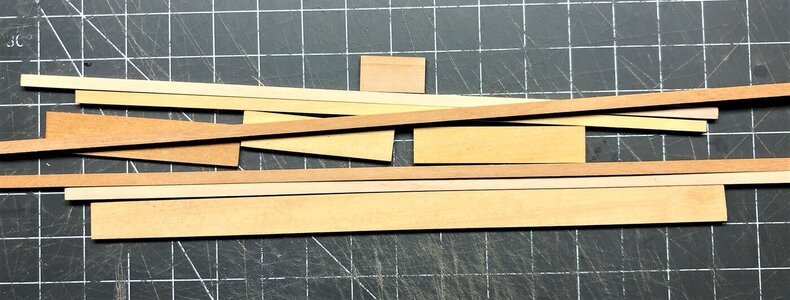
So let's begin. Doors in the kit provided with panels laser etched, and looks a bit small to the scale. We will be using Pear and boxwood as the main material and will make them a bit bigger to fit the scale. This is not the final design, and it may need more modifications down the road, But I will most likely use the same techniques and material. First, I cut all necessary strips of various dimensions.
Started with panels as they require some 'fancy' work. Here is comes handy my ProxxyMill, very happy to have one, it is a great tool. To make those panels 'fancy,' I made a simple jig.
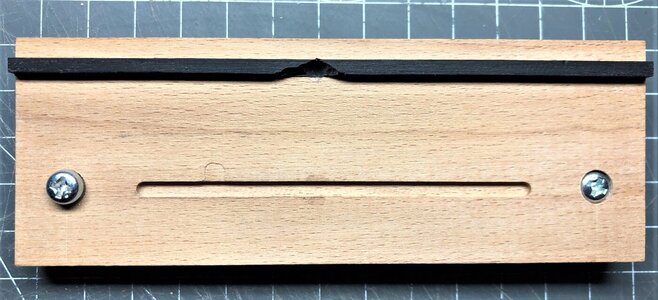
The round bur is used as the router bit, Stock of wood slides against the jigs border while the bur removes the wood. Start with a touch of the edge of the wood and slide until fully complete. Before lowering the burr, switch to another side and complete it. Now lower the burr, but don't lower too much, it is better to remove a small amount in one pass. Choose alternative sides until you are happy with a result.
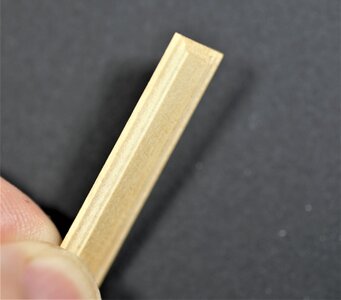


Pretty cool, right? The stock panels already 'fancy', but I made a further decision to make it even fancier. I found a very small star endmill, and use it to make a small grove on top. The process of removing wood is the same as for the round bur.
Here you go...now the panel looks real 'fancy' and the actual door is ready to be assembled. The door frame consists of the top rail, bottom rail, lock rail, hinge stile, and lock stile. All parts were cut by size and assembled using a flat surface (ceramic tile in my case) and machinist square.

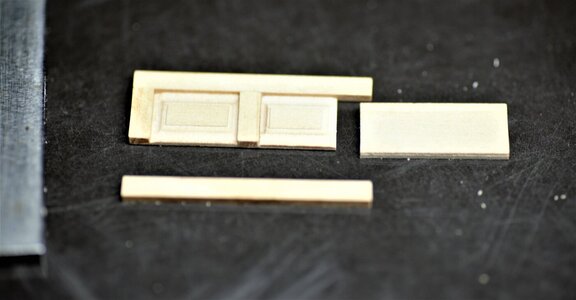
First, all rails glued to the hinge stile. Once the glue is set, the lock stile is glued. Use machinist square to control squareness across the board. Once all dried, the door\s ready to sand. 320 grit paper was used follow the 400 grit.
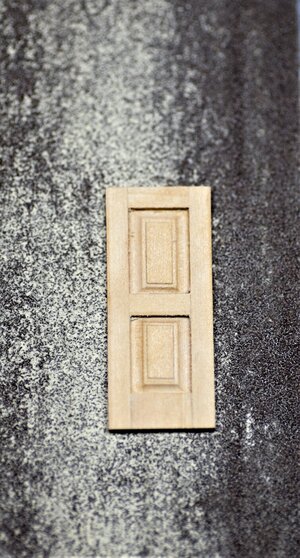
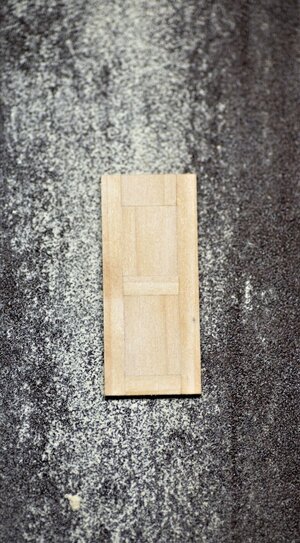
...and here are the doors
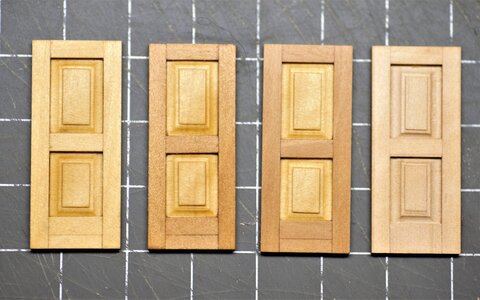
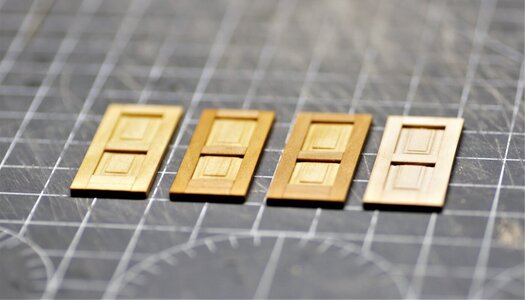
The left one made out of boxwood, both the middle doors made with boxwood panels and Pear rails and stiles. The right one was made out of Pear. The supervisor made inspections.
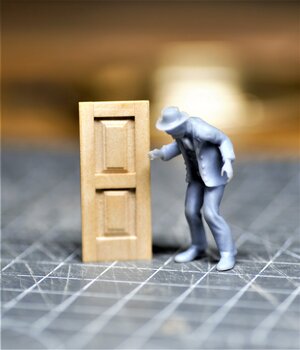
I think he is happy with the result...thus far.
Thank you all, to be continued...
So let's begin. Doors in the kit provided with panels laser etched, and looks a bit small to the scale. We will be using Pear and boxwood as the main material and will make them a bit bigger to fit the scale. This is not the final design, and it may need more modifications down the road, But I will most likely use the same techniques and material. First, I cut all necessary strips of various dimensions.

Started with panels as they require some 'fancy' work. Here is comes handy my ProxxyMill, very happy to have one, it is a great tool.

The round bur is used as the router bit, Stock of wood slides against the jigs border while the bur removes the wood. Start with a touch of the edge of the wood and slide until fully complete. Before lowering the burr, switch to another side and complete it. Now lower the burr, but don't lower too much, it is better to remove a small amount in one pass. Choose alternative sides until you are happy with a result.


Pretty cool, right? The stock panels already 'fancy', but I made a further decision to make it even fancier. I found a very small star endmill, and use it to make a small grove on top. The process of removing wood is the same as for the round bur.

Here you go...now the panel looks real 'fancy' and the actual door is ready to be assembled. The door frame consists of the top rail, bottom rail, lock rail, hinge stile, and lock stile. All parts were cut by size and assembled using a flat surface (ceramic tile in my case) and machinist square.


First, all rails glued to the hinge stile. Once the glue is set, the lock stile is glued. Use machinist square to control squareness across the board. Once all dried, the door\s ready to sand. 320 grit paper was used follow the 400 grit.


...and here are the doors


The left one made out of boxwood, both the middle doors made with boxwood panels and Pear rails and stiles. The right one was made out of Pear. The supervisor made inspections.

I think he is happy with the result...thus far.
Thank you all, to be continued...
Very nice, thanks for the tutorial.
I really need to get one of those Proxxon mills.
I really need to get one of those Proxxon mills.
And we continue...
Now is time to make what they say saddle or jamb. On top of the frame goes 'casing', it usually hides all the gaps between the saddle and the wall. Here is the deal, I cheat and make the door architrave (saddle) and casing as one piece. The round bur comes in handy again.
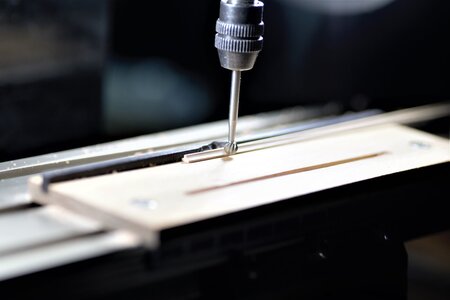
Two-flute endmill use for the chamber on the opposite side.
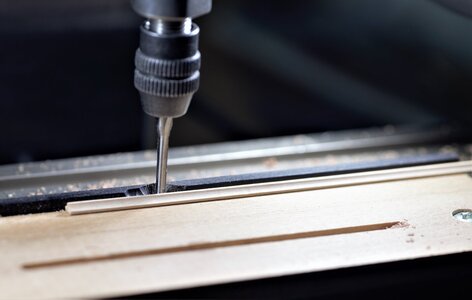
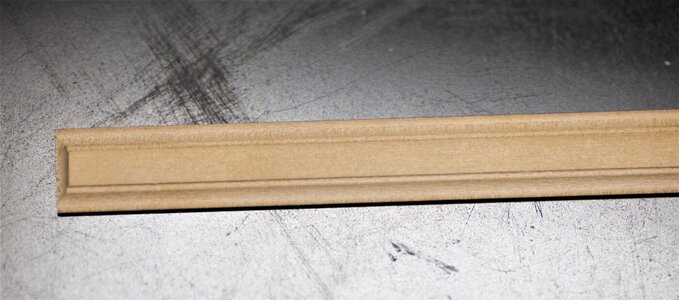
The same milling method was used as we made the panels. Below is the ready stock for the combined part of the saddle and casing.
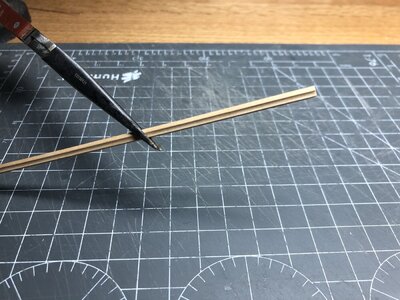
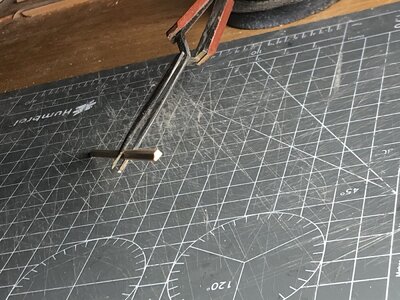
Now, we will cut to the size and glue
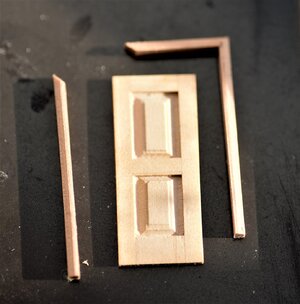
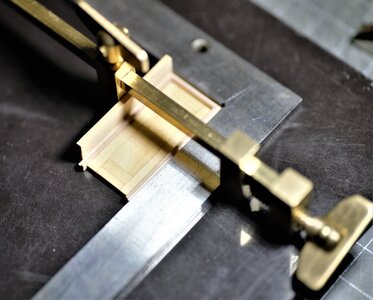
All three parts glued at the same time using the door and machinist square as the guide. The brass clamp holds until the glue completely dry.
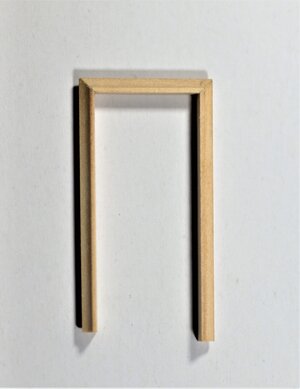
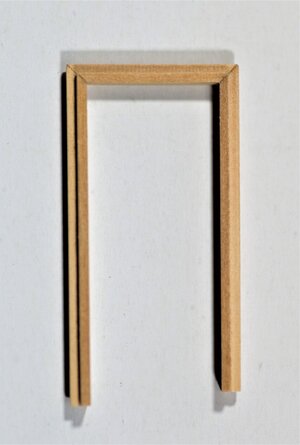
This part is ready. Let's call it - architrave. Here are both sides: front and back.
Now moving to the chamber for hinges. They will be made using the ProxxyMill and 2mm endmill. In this particular variant, the door will be always 'close'. I glued the door to the architrave to make the whole part assembly sturdy against the end mill, using the part chamber positioned in the vise.
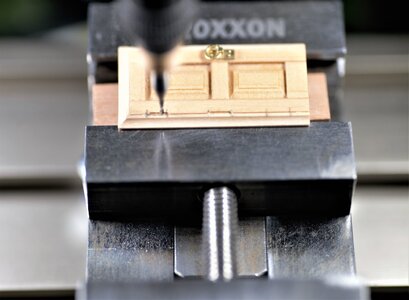
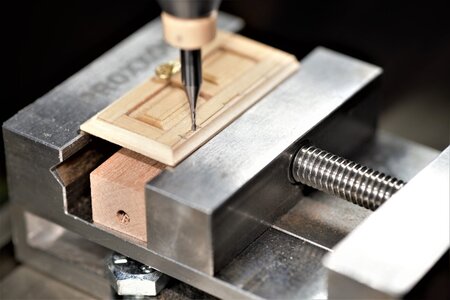
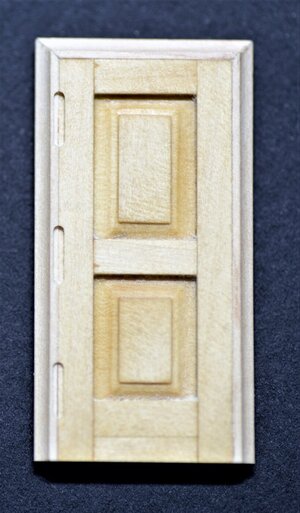
Once all the grooves are made we are ready for some hardware\metalsmith work which will include hinges and the door handle.
To be continued...tomorrow, thank you all!
Now is time to make what they say saddle or jamb. On top of the frame goes 'casing', it usually hides all the gaps between the saddle and the wall. Here is the deal, I cheat and make the door architrave (saddle) and casing as one piece. The round bur comes in handy again.

Two-flute endmill use for the chamber on the opposite side.

The same milling method was used as we made the panels. Below is the ready stock for the combined part of the saddle and casing.


Now, we will cut to the size and glue

All three parts glued at the same time using the door and machinist square as the guide. The brass clamp holds until the glue completely dry.

This part is ready. Let's call it - architrave. Here are both sides: front and back.


Now moving to the chamber for hinges. They will be made using the ProxxyMill and 2mm endmill. In this particular variant, the door will be always 'close'. I glued the door to the architrave to make the whole part assembly sturdy against the end mill, using the part chamber positioned in the vise.


Once all the grooves are made we are ready for some hardware\metalsmith work which will include hinges and the door handle.
To be continued...tomorrow, thank you all!
This is high school, pure art. The layman is amazed and the expert is astonished. But you show us how you can do something so beautiful.
- Joined
- Oct 26, 2020
- Messages
- 38
- Points
- 78

..."da wundert sich der Laie, und der Fachmann staunt!" In fact, a good idea implemented in the best way.The auxiliary device used really tempts to replicate. Chapeau!This is high school, pure art. The layman is amazed and the expert is astonished. But you show us how you can do something so beautiful.
WOW - WOW - Very good job my friend - Chapeau also from my side 

Fantastic Jim! Your imagination and skill always surprise and inspire. Thanks for showing us what can be accomplished.


