This is a great suggestion Henk, thank you!Gray is possible, I would use the color Steel
View attachment 389513
Available in bottles (71.065)
Covers in 1x, so can only be done 1x, also with a brush, dries very quickly, this makes the rope stiffer and better to bend in one direction, one of my favourites, I also applied this to my bowsprit
-

Win a Free Custom Engraved Brass Coin!!!
As a way to introduce our brass coins to the community, we will raffle off a free coin during the month of August. Follow link ABOVE for instructions for entering.
-

PRE-ORDER SHIPS IN SCALE TODAY!
The beloved Ships in Scale Magazine is back and charting a new course for 2026!
Discover new skills, new techniques, and new inspirations in every issue.
NOTE THAT OUR FIRST ISSUE WILL BE JAN/FEB 2026
- Home
- Forums
- Ships of Scale Group Builds and Projects
- Bluenose PoF Group Build
- Bluenose Group Build Logs
You are using an out of date browser. It may not display this or other websites correctly.
You should upgrade or use an alternative browser.
You should upgrade or use an alternative browser.
The Schooner Bluenose 1921, POF Yuanqing Models 1:72 [COMPLETED BUILD]
- Joined
- Sep 3, 2021
- Messages
- 5,198
- Points
- 738

Shoot, wish I knew this before starting my rigging. Ah well, there's always another build.Gray is possible, I would use the color Steel
View attachment 389513
Available in bottles (71.065)
Covers in 1x, so can only be done 1x, also with a brush, dries very quickly, this makes the rope stiffer and better to bend in one direction, one of my favourites, I also applied this to my bowsprit
Thanks for sharing!
- Joined
- Sep 3, 2021
- Messages
- 5,198
- Points
- 738

You're just too kind, Dan, thanks for your compliments. Actually, I'm kind of struggling through the build and sometimes it looks like I knew what I was doing...@RDN1954 Johan, you are building one of the premier Bluenose ships within this forum. One which I look to often for direction, this gray shroud line endeavor is experimental, you and I may end up not liking it.
Applying colors is a fickle art. I experienced this when applying color to the port side of my BN.
It should be black, but I found painting it in dark blue hues gave it a much more dramatic effect.
I look forward to your experiences with the grey shrouds.
Last edited:
The windlass and anchor installation are now complete. For now, the anchors hang down I may end up with them stowed I need to see if the look grows on me, all my previous ships have stowed away anchors.
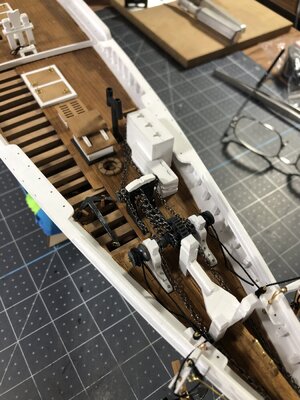
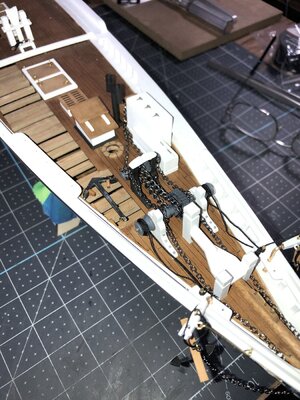
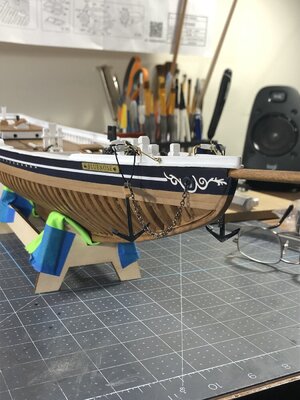
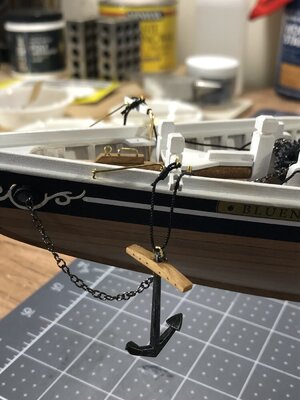
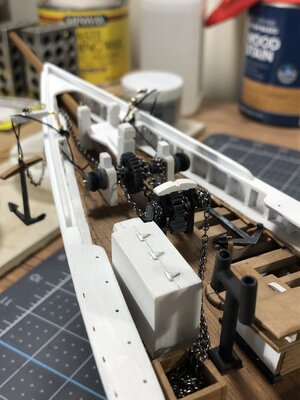
You can see there is a lot of unpainted brass most of which will stay that way, and some will receive either black or white coatings, still deciding what to do.
Next phase will be lower dead eye installation.
Thanks for looking in and happy modeling.


You can see there is a lot of unpainted brass most of which will stay that way, and some will receive either black or white coatings, still deciding what to do.
Next phase will be lower dead eye installation.
Thanks for looking in and happy modeling.
- Joined
- Jan 9, 2020
- Messages
- 10,566
- Points
- 938

Dear Daniel. The windlass and anchor installation look VERY good. At best this is a crowded assembly and whilst you have no choice otherwise, your execution of these parts is extremely clean and neat. As to the anchors, it is obviously a question of personal taste. I would keep them in a stowed position so as to maintain the sleek hull lines of the Bluenose, but that's just me ...Whichever option you are happy with, is the option I am happy with.
It certainly is coming along nicely Daniel!
Thanks Paul, I just noticed I have the stock of both anchors backwards. Will have it corrected on next posting.It certainly is coming along nicely Daniel!
Again a lot of work on the limited space of the foredeck. It's gonna look neat, Daniel.The windlass and anchor installation are now complete. For now, the anchors hang down I may end up with them stowed I need to see if the look grows on me, all my previous ships have stowed away anchors.
View attachment 389824View attachment 389825View attachment 389826View attachment 389827View attachment 389828
You can see there is a lot of unpainted brass most of which will stay that way, and some will receive either black or white coatings, still deciding what to do.
Next phase will be lower dead eye installation.
Thanks for looking in and happy modeling.
If you are still going to adjust the stocks of the anchors, maybe also chamfer them a bit at the front and back. They look now a bit massive and that doesn't quite match the beautiful lines of the BN.
Regards, Peter
Great suggestion Peter, thanks.Again a lot of work on the limited space of the foredeck. It's gonna look neat, Daniel.
If you are still going to adjust the stocks of the anchors, maybe also chamfer them a bit at the front and back. They look now a bit massive and that doesn't quite match the beautiful lines of the BN.
Regards, Peter
- Joined
- Sep 3, 2021
- Messages
- 5,198
- Points
- 738

Good catch.Thanks Paul, I just noticed I have the stock of both anchors backwards. Will have it corrected on next posting.
Its Saturday! Good morning, everyone.
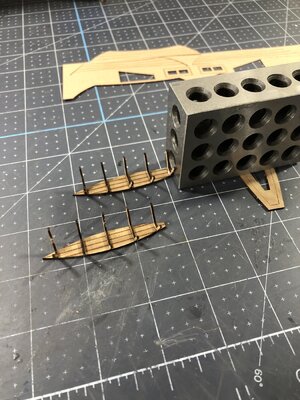
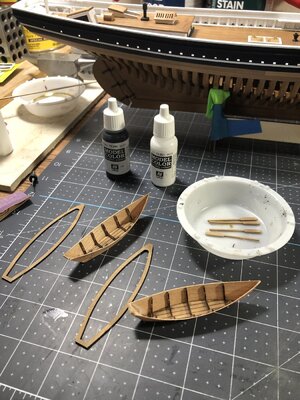
I have a nice little update starting with the dories. This set of photos shows my construction technique and several shots of various angles and distances.
The paint theme ties into the theme I used on the main ship.
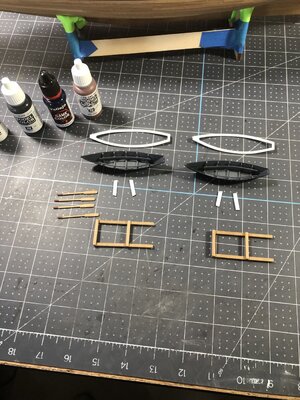
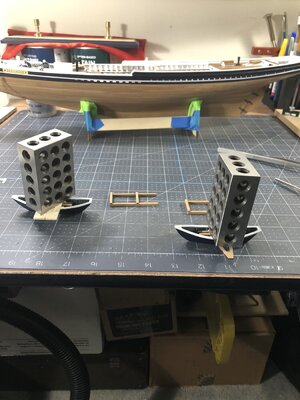
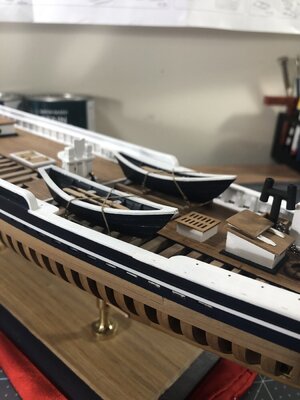
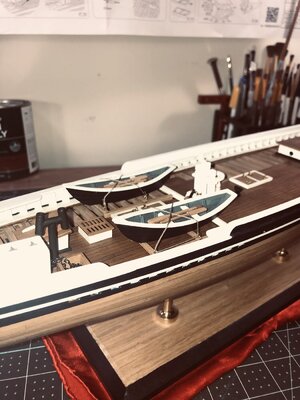
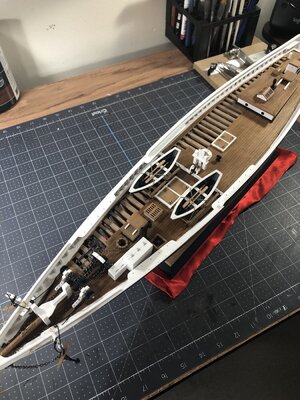
Next are the various angles and I did a little photo editing with some of the shots using a flash to highligt the gray interior of the dories, the gray looks much darker without flash in the photos than it does in person.
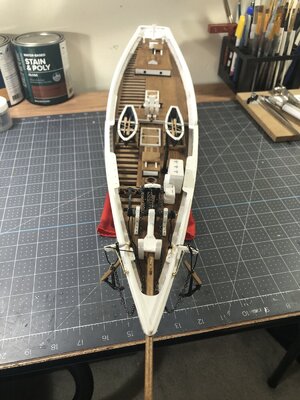
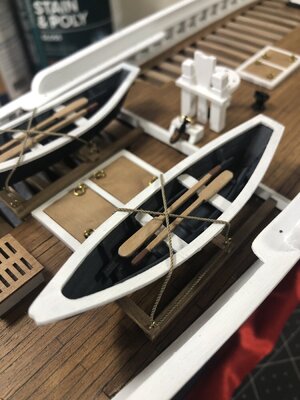
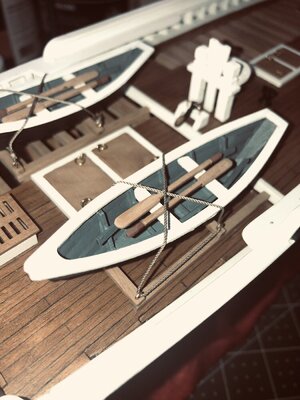
Last up today I have the redo on the anchors correcting the direction of the stocks and applying Peters @Peter Voogt excellent suggestion to hone the stock in a more realistic shape. Check it out.
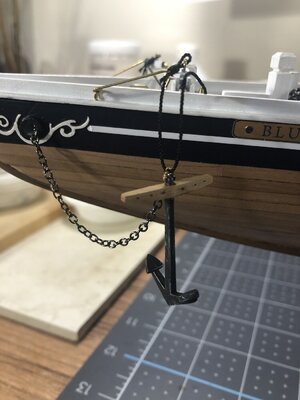
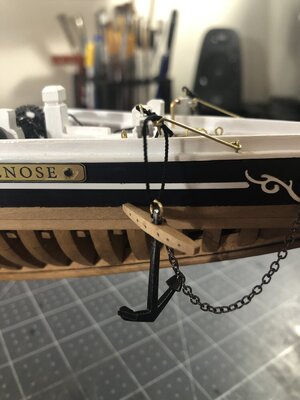
Have a great weekend and thanks for checking in.
I have a nice little update starting with the dories. This set of photos shows my construction technique and several shots of various angles and distances.
The paint theme ties into the theme I used on the main ship.


Next are the various angles and I did a little photo editing with some of the shots using a flash to highligt the gray interior of the dories, the gray looks much darker without flash in the photos than it does in person.


Last up today I have the redo on the anchors correcting the direction of the stocks and applying Peters @Peter Voogt excellent suggestion to hone the stock in a more realistic shape. Check it out.


Have a great weekend and thanks for checking in.
No problem at all to paint the dories this way. A nice overall complementary color scheme.
And the anchors looks much better
The fore deck is filling more and more.
Regards, Peter
And the anchors looks much better
The fore deck is filling more and more.
Regards, Peter
- Joined
- Apr 20, 2020
- Messages
- 6,245
- Points
- 738

The pair of boats with the masthead, the anchor and the whole deck look excellent and the painting adds grace to the overall result, well doneIts Saturday! Good morning, everyone.
I have a nice little update starting with the dories. This set of photos shows my construction technique and several shots of various angles and distances.
The paint theme ties into the theme I used on the main ship.
View attachment 390353View attachment 390354View attachment 390355View attachment 390356
Next are the various angles and I did a little photo editing with some of the shots using a flash to highligt the gray interior of the dories, the gray looks much darker without flash in the photos than it does in person.
View attachment 390357View attachment 390358View attachment 390359View attachment 390360View attachment 390361View attachment 390362
Last up today I have the redo on the anchors correcting the direction of the stocks and applying Peters @Peter Voogt excellent suggestion to hone the stock in a more realistic shape. Check it out.
View attachment 390363View attachment 390364
Have a great weekend and thanks for checking in.
Now I see how you completed your Vasa so efficiently! No moss growing on this build...
Beautiful execution Daniel. Those tie in very well with your color scheme. 
Thanks Peter, I am going to experiment with the anchors in a stowed configuration at a later time.No problem at all to paint the dories this way. A nice overall complementary color scheme.
And the anchors looks much better
The fore deck is filling more and more.
Regards, Peter
Thank you, Johan, my hat is off to anyone who builds a Billling Boat product.Two completed kit dories!
You're in a league of your own; I did cheat heavily on this little project... (Billing Boats dories).
Thank you Shota.The pair of boats with the masthead, the anchor and the whole deck look excellent and the painting adds grace to the overall result, well done

