I agree Johan, my desire to give a 1:48 ship a try gets stronger all the time. However as someone on this forum once said it's just an opportunity to cram ever smaller features into the bigger spaces.1:72 Is about the minimum scale I'm more or less comfortable with.
-

Win a Free Custom Engraved Brass Coin!!!
As a way to introduce our brass coins to the community, we will raffle off a free coin during the month of August. Follow link ABOVE for instructions for entering.
-

PRE-ORDER SHIPS IN SCALE TODAY!
The beloved Ships in Scale Magazine is back and charting a new course for 2026!
Discover new skills, new techniques, and new inspirations in every issue.
NOTE THAT OUR FIRST ISSUE WILL BE JAN/FEB 2026
- Home
- Forums
- Ships of Scale Group Builds and Projects
- Bluenose PoF Group Build
- Bluenose Group Build Logs
You are using an out of date browser. It may not display this or other websites correctly.
You should upgrade or use an alternative browser.
You should upgrade or use an alternative browser.
The Schooner Bluenose 1921, POF Yuanqing Models 1:72 [COMPLETED BUILD]
Good evening, all, its Saturday afternoon and I wanted to show the finished port side dead eye straps. I have decided to paint the brass hardware above the rail white in the next few days then it's time to go upward in this next phase.
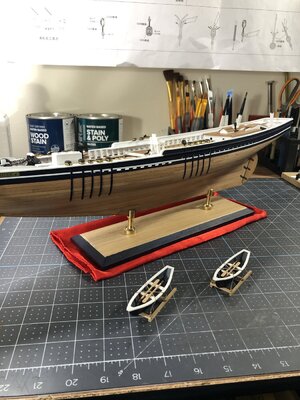
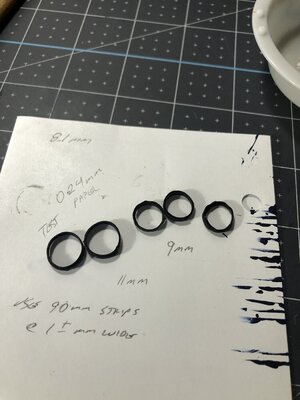
I have been experimenting with the mast hoops using @RDN1954 Johans method as guide. It works great so off to the hobby shop for some heavier 140# paper
approx. 0.42mm in white to start with.
Thanks for watching, and happy modeling!

I have been experimenting with the mast hoops using @RDN1954 Johans method as guide. It works great so off to the hobby shop for some heavier 140# paper
approx. 0.42mm in white to start with.

Thanks for watching, and happy modeling!
- Joined
- Dec 16, 2016
- Messages
- 1,181
- Points
- 493

Daniel, what a beauty, a really well crafted model. I enjoyed reading through your log and appreciate the thought and effort that you are putting into the build, thanks for taking us along with you. KenGood evening, all, its Saturday afternoon and I wanted to show the finished port side dead eye straps. I have decided to paint the brass hardware above the rail white in the next few days then it's time to go upward in this next phase.
View attachment 391556
I have been experimenting with the mast hoops using @RDN1954 Johans method as guide. It works great so off to the hobby shop for some heavier 140# paper
approx. 0.42mm in white to start with.
View attachment 391558
Thanks for watching, and happy modeling!
Hi Ken, so glad to have on board. Thank you for the complements.Daniel, what a beauty, a really well crafted model. I enjoyed reading through your log and appreciate the thought and effort that you are putting into the build, thanks for taking us along with you. Ken
- Joined
- Jan 9, 2020
- Messages
- 10,566
- Points
- 938

No fear of redo's, my friend! They came out beautifully!WOW Heinrich, you present some interesting comparisons. I appreciate your input. So far, I have stayed with all the kit supplied materials and its given dimensions, except where I messed up with the transom and bulwark placement which caused me to add about 7mm to the overall length. I am definitely going to fudge when it comes to the rope work. If the shrouds with the rat lines come out below my expectations, I will not even present them here but will banish myself to the redo locker and start again.
- Joined
- Sep 3, 2021
- Messages
- 5,198
- Points
- 738

Can't claim credits for that; I nicked @Peter Voogt 's process and modified it to match my limitations.I have been experimenting with the mast hoops using @RDN1954 Johans method as guide.
Glad it worked for you though!
Good evening, all, its Saturday afternoon and I wanted to show the finished port side dead eye straps. I have decided to paint the brass hardware above the rail white in the next few days then it's time to go upward in this next phase.
View attachment 391556
I have been experimenting with the mast hoops using @RDN1954 Johans method as guide. It works great so off to the hobby shop for some heavier 140# paper
approx. 0.42mm in white to start with.
View attachment 391558
Thanks for watching, and happy modeling!
What is useful for me, can be useful for others.Can't claim credits for that; I nicked @Peter Voogt 's process and modified it to match my limitations.
Glad it worked for you though!
Like pointing toothpicks in the back-side of a Drawplate …..
Regards, Peter
- Joined
- Sep 3, 2021
- Messages
- 5,198
- Points
- 738

Oh, no, you just had to bring it up again, treenails... I just about forgot about last week's discussion on that topic.Like pointing toothpicks in the back-side of a Drawplate …..You can choose the size you need for your treenails.

Oops, sorry for the exclusion Peter @Peter Voogt, you provided a brilliant method, thanks.Can't claim credits for that; I nicked @Peter Voogt 's process and modified it to match my limitations.
Glad it worked for you though!
Mum's the word from my shipyard!Oh, no, you just had to bring it up again, treenails...


Hello Peter, one thing that impressed me was how sturdy the rings become once the diluted glue sets up. The 11mm and 9mm are a little too big so I just have to find the right mandrel object to get 8mm and 10mm rings.What is useful for me, can be useful for others.No problems at all, no copyright, just share.
Like pointing toothpicks in the back-side of a Drawplate …..You can choose the size you need for your treenails.
Regards, Peter
No problem Daniel. I am glad that it is useful for you.Oops, sorry for the exclusion Peter @Peter Voogt, you provided a brilliant method, thanks.
That the advantage of ‘layers’. No matter how thin they are.Hello Peter, one thing that impressed me was how sturdy the rings become once the diluted glue sets up. The 11mm and 9mm are a little too big so I just have to find the right mandrel object to get 8mm and 10mm rings.
Regards, Peter
- Joined
- Sep 3, 2021
- Messages
- 5,198
- Points
- 738

While this method yields convincing masthoops, one has to thread careful when setting sails.I have been experimenting with the mast hoops using @RDN1954 Johans method as guide. It works great so off to the hobby shop for some heavier 140# paper
approx. 0.42mm in white to start with.
The trick is not to apply too much tension when attaching the luff line to the hoops. Too much tension deforms the hoops, especially a localized point load will easily distort a hoop.
Good to know Johan, something I shall try to watch for.Too much tension deforms the hoops, especially a localized point load will easily distort a hoop.
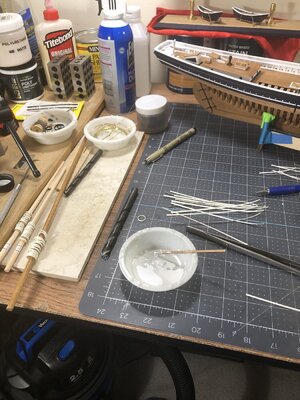
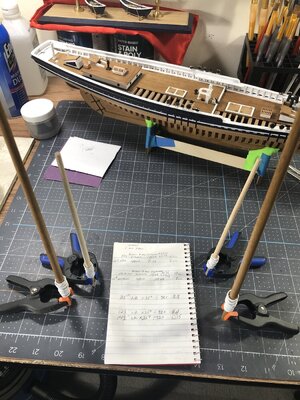
Good afternoon, everyone, in preparation of constructing the ships mast I have completed the mast hoops of which I have three sizes 8mm for the main and fore mast upper sections and 9.5 and 10.5mm for the main and foremast lower sections. The lower sections have a combination of two sizes. I used 100# white mixed media paper and cut strips as close to 1.0 to1.5mm wide as I could get. Not sure but I think the fore and main topmast are too big at scale 1:72. I say this because the correct hoop scale for the topmast (based on Jenson's book) would be 4.5 to 5.5mm dia. and I had to use 8mm hoops that would slide up and with relative ease. I made a roughly 80/20 mix of paint and water to coat the hoops by dipping and swishing around. Check it out.
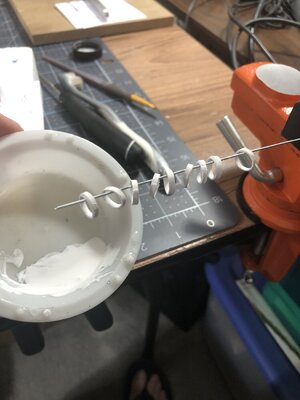
Next, I began experimenting with homemade turnbuckles for the bow sprit rigging. The last photo will be what I use, it most closely resembles the look I am after.
More than likely they are a touch too large for scale, I will know better when I get one mounted up.
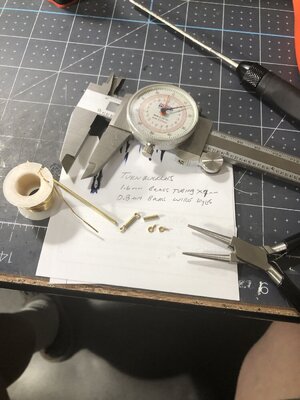
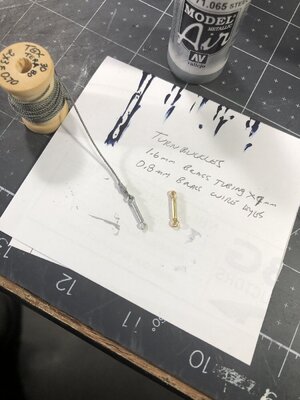
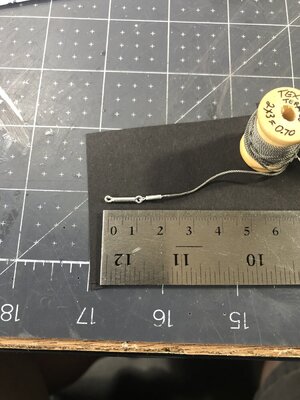
Thanks for looking in and as always happy modeling.


Next, I began experimenting with homemade turnbuckles for the bow sprit rigging. The last photo will be what I use, it most closely resembles the look I am after.
More than likely they are a touch too large for scale, I will know better when I get one mounted up.


Thanks for looking in and as always happy modeling.
Scratch build detailed small items give the most satisfaction!Good afternoon, everyone, in preparation of constructing the ships mast I have completed the mast hoops of which I have three sizes 8mm for the main and fore mast upper sections and 9.5 and 10.5mm for the main and foremast lower sections. The lower sections have a combination of two sizes. I used 100# white mixed media paper and cut strips as close to 1.0 to1.5mm wide as I could get. Not sure but I think the fore and main topmast are too big at scale 1:72. I say this because the correct hoop scale for the topmast (based on Jenson's book) would be 4.5 to 5.5mm dia. and I had to use 8mm hoops that would slide up and with relative ease. I made a roughly 80/20 mix of paint and water to coat the hoops by dipping and swishing around. Check it out.
View attachment 392311View attachment 392312View attachment 392313
Next, I began experimenting with homemade turnbuckles for the bow sprit rigging. The last photo will be what I use, it most closely resembles the look I am after.
More than likely they are a touch too large for scale, I will know better when I get one mounted up.
View attachment 392316View attachment 392317View attachment 392318
Thanks for looking in and as always happy modeling.
Perhaps fore the turnbuckles 1.0 mm tube and 0,5 wire eyes?
It’s looking promising , Daniel.
Regard, Peter
Thank you, Peter, yes, this part is very enjoyable.Scratch build detailed small items give the most satisfaction!And fine tuning is most of the time the next step …….
Perhaps fore the turnbuckles 1.0 mm tube and 0,5 wire eyes?
It’s looking promising , Daniel.
Regard, Peter
- Joined
- Sep 3, 2021
- Messages
- 5,198
- Points
- 738

A trip down memory lane...Good afternoon, everyone, in preparation of constructing the ships mast I have completed the mast hoops of which I have three sizes 8mm for the main and fore mast upper sections and 9.5 and 10.5mm for the main and foremast lower sections. The lower sections have a combination of two sizes. I used 100# white mixed media paper and cut strips as close to 1.0 to1.5mm wide as I could get. Not sure but I think the fore and main topmast are too big at scale 1:72. I say this because the correct hoop scale for the topmast (based on Jenson's book) would be 4.5 to 5.5mm dia. and I had to use 8mm hoops that would slide up and with relative ease. I made a roughly 80/20 mix of paint and water to coat the hoops by dipping and swishing around. Check it out.
View attachment 392311View attachment 392312View attachment 392313
Next, I began experimenting with homemade turnbuckles for the bow sprit rigging. The last photo will be what I use, it most closely resembles the look I am after.
More than likely they are a touch too large for scale, I will know better when I get one mounted up.
View attachment 392316View attachment 392317View attachment 392318
Thanks for looking in and as always happy modeling.
- Joined
- Sep 3, 2021
- Messages
- 5,198
- Points
- 738

Always in for raising the bar, aren't you Peter?Perhaps fore the turnbuckles 1.0 mm tube and 0,5 wire eyes?

