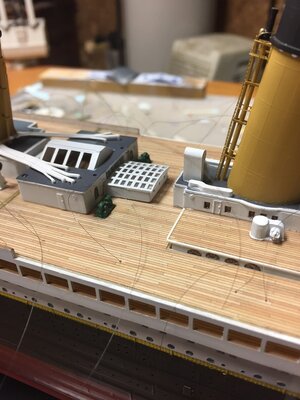
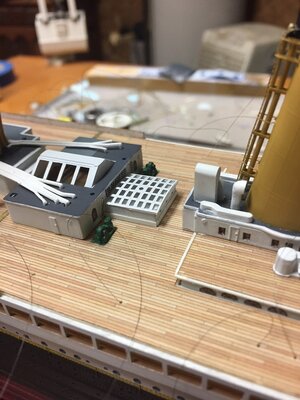
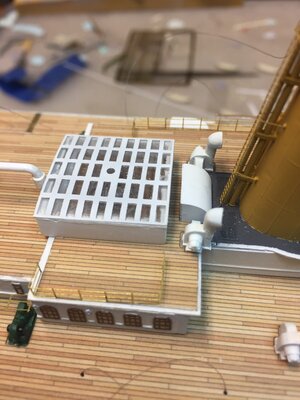
Love this deck! It really adds to the scale. Great job, Nathan.
-

Win a Free Custom Engraved Brass Coin!!!
As a way to introduce our brass coins to the community, we will raffle off a free coin during the month of August. Follow link ABOVE for instructions for entering.
-

PRE-ORDER SHIPS IN SCALE TODAY!
The beloved Ships in Scale Magazine is back and charting a new course for 2026!
Discover new skills, new techniques, and new inspirations in every issue.
NOTE THAT OUR FIRST ISSUE WILL BE JAN/FEB 2026
You are using an out of date browser. It may not display this or other websites correctly.
You should upgrade or use an alternative browser.
You should upgrade or use an alternative browser.
Titanic 1/350 MiniCraft Kit build
- Joined
- Aug 1, 2020
- Messages
- 108
- Points
- 88

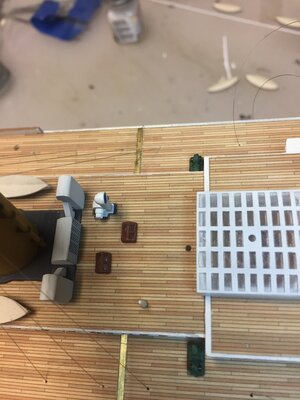
Well I thought it would be straight forward and fun to attach all the various bits 'n' bobs on the upper decks. Wrong! I don't know if the instructions were wrong or I got some of the pieces mixed up but the bases of some of the funnels didn't seem to fit into the deck outlines while maintaining the proper orientation of the funnels. The two below in red had to be cut and turned 180 and 90 degrees respectively.
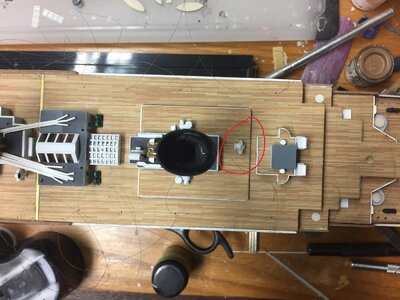
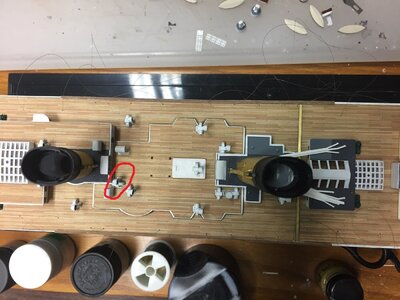
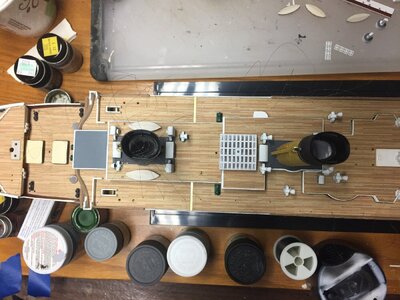
I switched the two in green below because they seemed to fit/look better. I seem to recall it not being clear which part # on the trees matched up to the correct part. That may be part of my issue. I used Art Braunschweiger build as a reference and came to the conclusion that the kit wasn't really close to being accurate. So I just put them on the way I felt made the most sense with what I had.
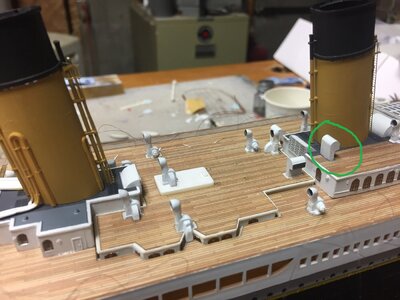
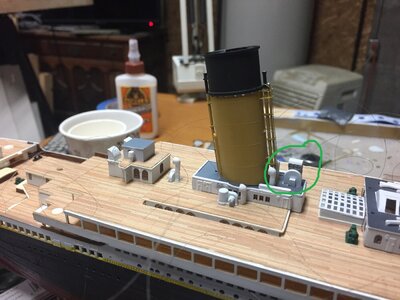


I switched the two in green below because they seemed to fit/look better. I seem to recall it not being clear which part # on the trees matched up to the correct part. That may be part of my issue. I used Art Braunschweiger build as a reference and came to the conclusion that the kit wasn't really close to being accurate. So I just put them on the way I felt made the most sense with what I had.


- Joined
- Apr 20, 2020
- Messages
- 6,239
- Points
- 738

it's looks very impressive and beautiful progress, well doneWell I thought it would be straight forward and fun to attach all the various bits 'n' bobs on the upper decks. Wrong! I don't know if the instructions were wrong or I got some of the pieces mixed up but the bases of some of the funnels didn't seem to fit into the deck outlines while maintaining the proper orientation of the funnels. The two below in red had to be cut and turned 180 and 90 degrees respectively.
View attachment 209064View attachment 209065
View attachment 209066
I switched the two in green below because they seemed to fit/look better. I seem to recall it not being clear which part # on the trees matched up to the correct part. That may be part of my issue. I used Art Braunschweiger build as a reference and came to the conclusion that the kit wasn't really close to being accurate. So I just put them on the way I felt made the most sense with what I had.
View attachment 209067View attachment 209068

- Joined
- Aug 1, 2020
- Messages
- 108
- Points
- 88

thanks for your kind words. I just hope those viewing can use this to do better and maybe avoid some of the trouble I have had.it's looks very impressive and beautiful progress, well done

That's awesome! The funnels look great.I got the funnels attached. Now I can start to add all those little detail parts to the decks.
View attachment 207630View attachment 207631
The biggest problem I have with this kit is warpage, fitting things together.
Did you leave the parts on the sprues till you were to use them?
Did you leave the parts on the sprues till you were to use them?
- Joined
- Aug 1, 2020
- Messages
- 108
- Points
- 88

The main parts that were warped for me were the promonade walls. They were warped from the get go. I did remove them way before gluing them to the deck.The biggest problem I have with this kit is warpage, fitting things together.
Did you leave the parts on the sprues till you were to use them?
All the decks are warped. I think this kit was stored near a heat source.
The promenade deck isn't flat, it's warped. Fiddling with the warped decks slowed everything down. The promenade decks were a real trial to fit. Even the boat deck is warped.
- Joined
- Aug 1, 2020
- Messages
- 108
- Points
- 88

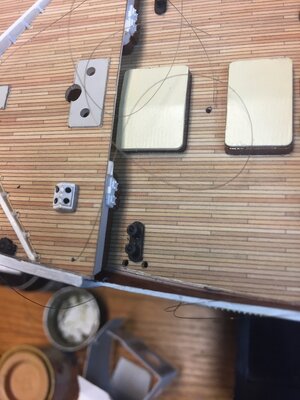
Nothing seems to come easy with this build. I tried gluing these skylights to the deck but the glue flowed up and covered the openings before I could place them on the decks. That ended up ruining my window opening on the white one. I had to remove window material and redo. I ended up making small blocks out of sheet styrene that I could attach to the deck and then, in turn attach the skylights to. I painted them dark gray so they wouldn't show thru as white.
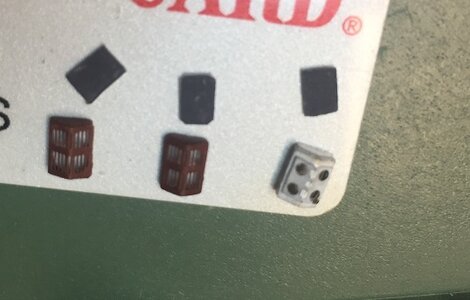
picture showing block in place and one skylight in place
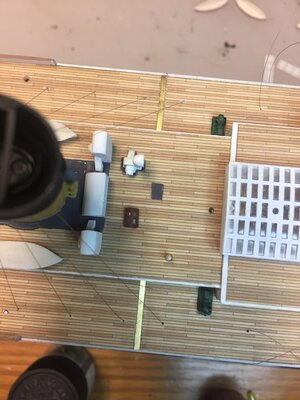
both central skylights in place
Fore deck skylight. Still need to add window maker to openings
If someone knows of a better way to do this I would be curious to know. Sometimes you just have to do it in a way that matches with your particular skills.

picture showing block in place and one skylight in place

both central skylights in place

Fore deck skylight. Still need to add window maker to openings

If someone knows of a better way to do this I would be curious to know. Sometimes you just have to do it in a way that matches with your particular skills.
This is as you indicate, a trial and error model. There are a lot of "Oops" and "Oh ohs" involved, including the directions. For instance the directions on page 54 showing the hull painting, should be on page 2, eliminating some of the hull guess work.
Hi Nathan, I found your build and this forum today while researching the Minicraft 1/350 Titanic.
Your build is looking great and I've already learned a few things from reading your posts. I can't wait to see more progress.
Your build is looking great and I've already learned a few things from reading your posts. I can't wait to see more progress.
- Joined
- Aug 1, 2020
- Messages
- 108
- Points
- 88

Thank you! I only hope viewers find it helpful. Not only what to do but just as important - what not to do!Hi Nathan, I found your build and this forum today while researching the Minicraft 1/350 Titanic.
Your build is looking great and I've already learned a few things from reading your posts. I can't wait to see more progress.
- Joined
- Aug 1, 2020
- Messages
- 108
- Points
- 88

- Joined
- Aug 1, 2020
- Messages
- 108
- Points
- 88

another rail formed according to the "pattern"
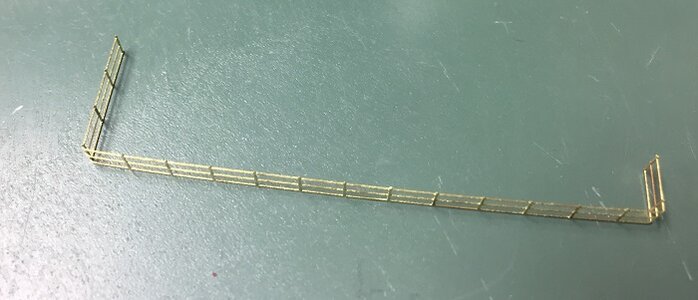
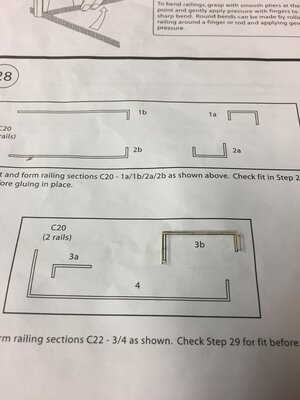
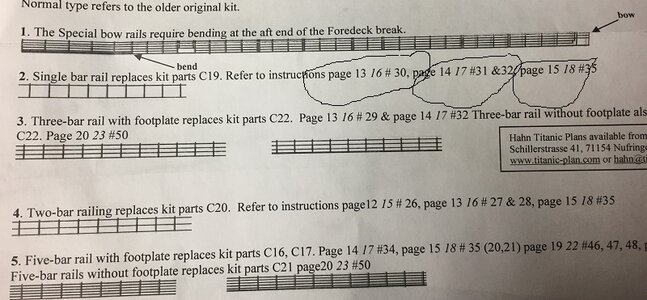
Same rail position. I bent to fit location on the ship, which after reading ( and reading and reading ) thru the instructions is what they intend for you to do. Still puzzled over those patterns on pages 26 - 28. I was fretting over doing the rails but once I got started they aren't that bad to work with.
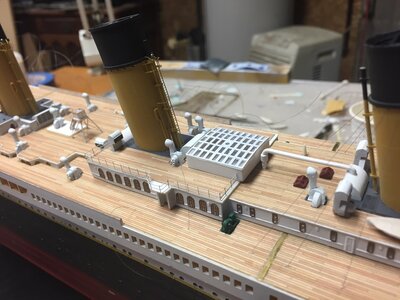

Same rail position. I bent to fit location on the ship, which after reading ( and reading and reading ) thru the instructions is what they intend for you to do. Still puzzled over those patterns on pages 26 - 28. I was fretting over doing the rails but once I got started they aren't that bad to work with.

I was looking at the kit provided railings and using them as patterns. I finished the benches too. It was a good thing I got the etching bender tool from the Small Company. There were some for less online but they were made in China so I went with the Small Company.
Not only is this kit warped badly, the directions could have been better. Those for the PE were terribly hard to read.
Not really satisfied with this kit. I do think it had to have been stored near a heat source to be so badly warped. I hope the end result is as good as yours.
Not only is this kit warped badly, the directions could have been better. Those for the PE were terribly hard to read.
Not really satisfied with this kit. I do think it had to have been stored near a heat source to be so badly warped. I hope the end result is as good as yours.
Which photo etch bending tool did you get?I was looking at the kit provided railings and using them as patterns. I finished the benches too. It was a good thing I got the etching bender tool from the Small Company. There were some for less online but they were made in China so I went with the Small Company.
Not only is this kit warped badly, the directions could have been better. Those for the PE were terribly hard to read.
Not really satisfied with this kit. I do think it had to have been stored near a heat source to be so badly warped. I hope the end result is as good as yours.
Last edited:
The railings look great.another rail formed according to the "pattern"
View attachment 211159
Same rail position. I bent to fit location on the ship, which after reading ( and reading and reading ) thru the instructions is what they intend for you to do. Still puzzled over those patterns on pages 26 - 28. I was fretting over doing the rails but once I got started they aren't that bad to work with.
View attachment 211162
- Joined
- Aug 1, 2020
- Messages
- 108
- Points
- 88

It is the Mission Models EtchMate 3C. One note about bending long railings: It is fine for making bends near the ends (1/2 inch) but when you get towards the middle you can't really use the tool (in my experience) as the parts can't be slid that far under the gripping part. I resort to a small metal flat edge and a razor blade for those. The tool came with some thin plastic shims to fold the parts but I lost them and use a stanley utility knife blade for thatWhich photo etch bending tool did you got?

