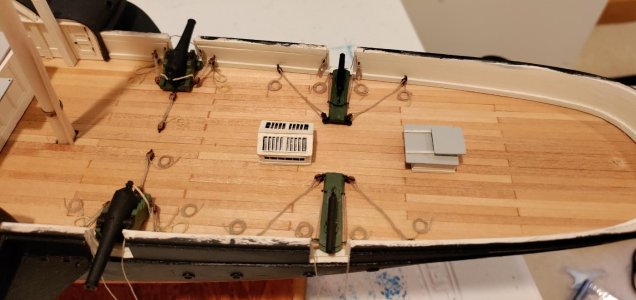
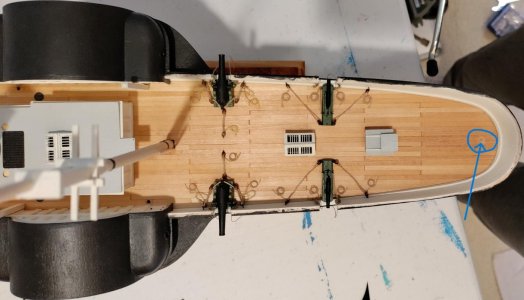
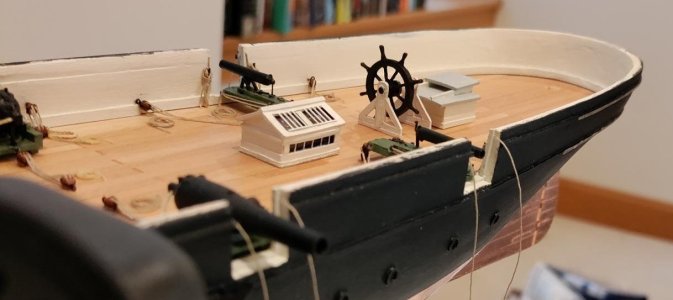
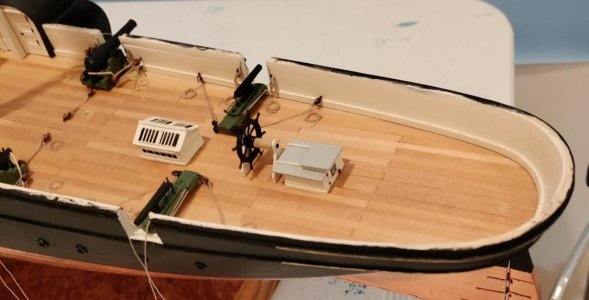
USRC Harriet Lane Model Shipways 1:96 scale circa 1863

Chuck,

This is an amazing build for several reasons:

- Your skill and attention to detail have made this a work of art

- The research you have done on the HL makes this, along with your building skills, true "museum-quality"

- The additions and revisions you have made to the kit have made me rethink the HL kit. I've seen in on ModelExpo for years and, while I've always liked the real HL a lot (probably the most heavily armed Coast Guard ship per ton in history), the catalog photos reveal such an out of the box lack of detail and out of scale parts that it always left me thinking "Meh, no thanks" but you have shown how to change a mediocre kit into a first-class model.

Keep up the awesome work!
Dear @schooner48 thank you for the extremely kind review of my work! I think she won't turn out to be a bath-tub toy ;)

I hope that you give her a try! She's building into a very nice model. Under the category "I wish I had . . ." there is a very long list of things I wish I had done. These are a few. I wish I had treated her like a more sophisticated build. from the start. I think that I would have used the kit hull planking (I'm using planking loosely) as a first planking and then done a second planking with 1/32 thick strips - the hull sanding would have been a much smother process without the need for filling. On the other hand, I'm glad I decided just to plank the deck with 1/16 thick strips. I wish I had recognized that the as built bulwarks were too short to properly accommodate the guns square in their ports so that I didn't have to go backwards and risk the finished hull. I suppose, the most important "I wish I had . . ." is that I wish I had the common sense to try to find her plans on line before I ever began the build :p!

I agree with you about the quality and scale of the parts - I've spent about 50% of the cost of the kit to get the blocks and rigging line and cleats and flags and chain that I thought were better and more in scale - but I've done that with my prior two builds. In fact, my version of the Lovey Renee nee Fair American made me a firm believer in supplementing the kit with aftermarket parts. In some ways, I knew I was going to spend extra to try to get Harriet Lane right, or at least as right as I can with my level of patience (sometimes non-existent), my level of experience (advanced novice if I'm being generous with myself), my tools and techniques (stone age).

Honestly, what you've seen on my log is a group effort. @BMT as a resource because he started before me and gave me help to see where things were going and he could help me understand why things weren't coming together on my build. @JerryTodd, the sine qua non, as far as the types of guns and the actual production of hyper-accurate scale guns - which have really boosted the model beyond anything I could have achieved on my own. Others like @dockattner and @GrantTyler, just to name two, have given great counsel, unending support and examples of audacity in their own builds. I don't think I would develop as a modeler without the glorious awe that looking at their work inspires, and they are not the only ones. @Peter Gutterman, last but not least, for the inspiration to build Harriet Lane as she was in Galveston harbor just before her capture on January 1, 1863, his wisdom, creativity and humor.

I hope you go for it!

Blessings. Peace. Gratitude.
Chuck
 
Last edited:
Yeah. Like the first time you take it to a show, an expert in Civil War Naval ordinance is going to come past do a double take and declare " Oh! My God! You forgot the rings/ locks for the breaching ropes on the nine-inch Dahlgrens!!!":eek:.
As they say: "Declare victory and move on..." :rolleyes:
She's looking GORGEOUS, by the way... Thumbsup
Victory belongs to the most persevering! I look forward to the finished product. This is outstanding standing....
 
Good evening, shipmates!

I thought I would go ahead and share what I was doing this summer when I really wanted to be working on the Harriet Lane. Knowing what I know about all of you, you might get a kick out of it.

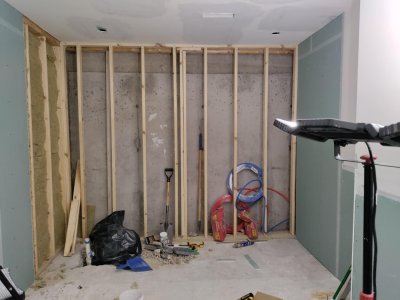
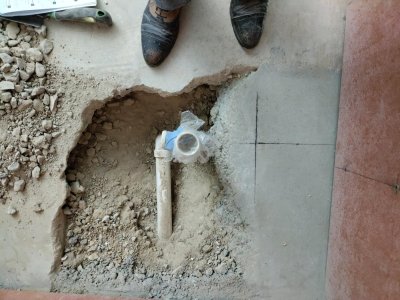
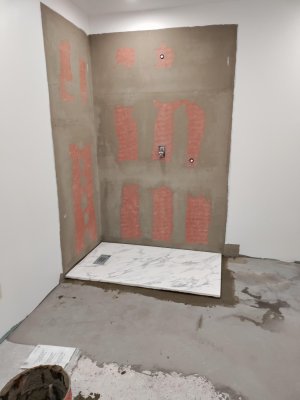
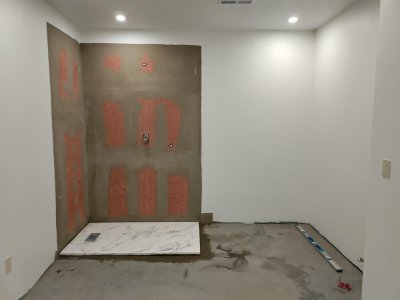
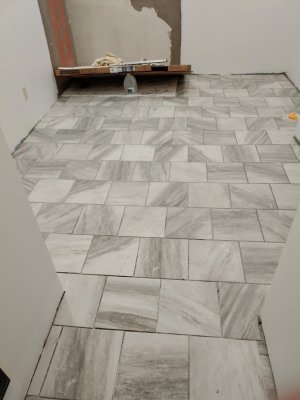
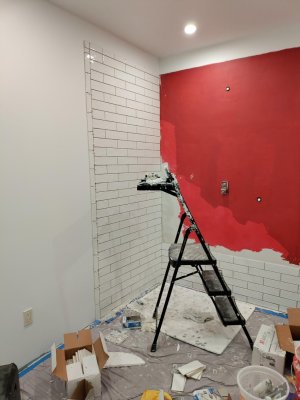
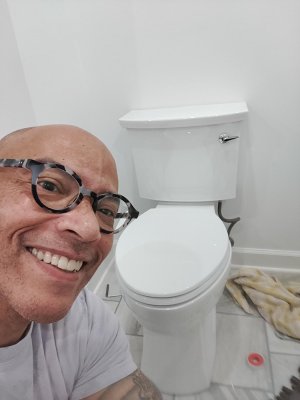
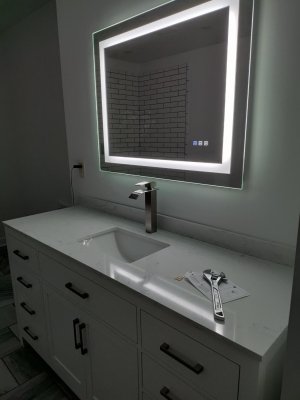
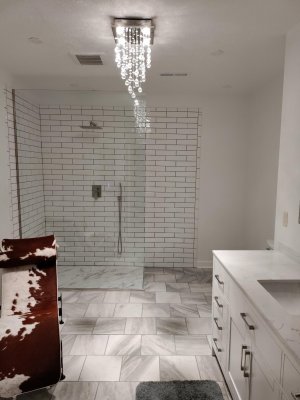
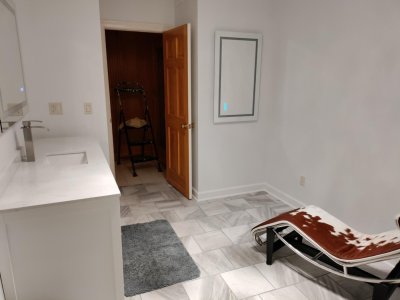
When people say "We're remodeling [fill in the blank]" they usually mean: We are paying a contractor to remodel {fill in the blank]. Not so at Shangri-la! When I say I'm remodeling the guest bathroom, I mean I'm doing all the work. As usual, I underestimate how long the project would take, and I donated time to my sister-in-law's law school graduation and baby shower, and donated time to training young assistant attorney's general how to try cases. So a project that I wanted to take a month, that in reality required six weeks, actually took two months :eek: When I got done I was spent and unhappy with the result. Things are much better now that I have digested the long list of imperfections - See! I know my audience. Here are some snaps from almost the start to the bitter end.

IMG_20240607_152422.jpgIMG_20240614_123800.jpgIMG_20240621_105848.jpgIMG_20240621_105854.jpgIMG_20240626_202632.jpgIMG_20240628_210126.jpg


Very happy - look Ma! No leaks!
IMG_20240702_122654.jpgIMG_20240702_180402.jpgIMG_20240713_115331.jpgIMG_20240713_115349.jpg
 
When I recovered from the bathroom project, I had almost forgotten where I was in my build. I remembered that it was the guns and I worked on the guns. See above. Got done with the guns and wasn't quite happy. I didn't properly rig the aft Dahlgrens. See above. And, I wasn't quite satisfied with the size of the blocks I used for rigging the guns. See above. I wish I had known about Dry Dock! Now I know.

I then stared on the masts - I don't really know why exactly. We'll come back to that. Then I started on the ship's wheel which by the grace of God I did not install. Then the discovery of the actual plans for Harriet Lane!!!!

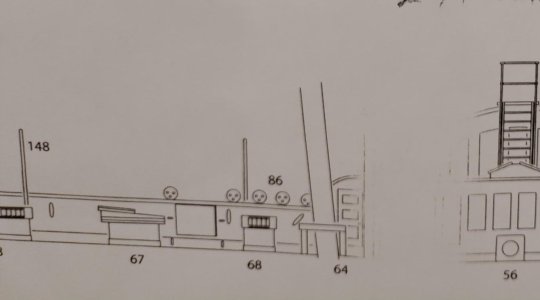
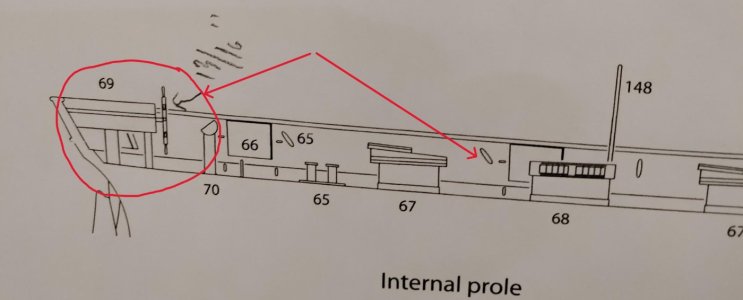
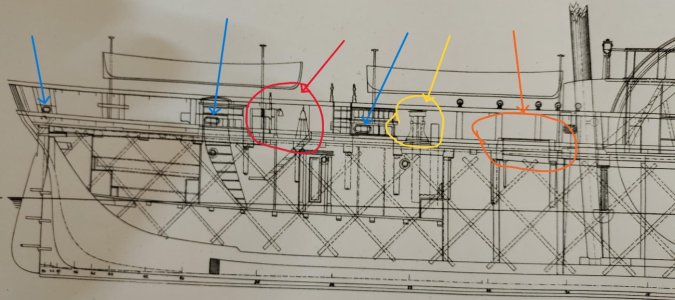
I have actually been overwhelmed with where to get back to work on her since Roger Pellett pointed me at the plans. I finally decided to work on the rest of the deck Items. Here are some snaps so you can compare the deck items aft as per the kit versus Webb's plan.

HL Plan aft 1.jpgHL PLan aft 2.jpg

These are the kit plans. They show two skylights and two companion ways and the ship's wheel practically over the rudder. The red arrow on the right shows about where the wheel should be according to Webb's plan.

HL Webb Plan Aft Marked.jpg

Webb's plan. In red the ship's wheel and the compass just forward of the aftermost companion way. Note that Webb has one companion way and one skylight. forward of the skylight marked in yellow is an aft capstan. Just aft of the mainmast is a hatch circled in orange.

I will build and place the wheel, compass, capstan and hatch in their proper locations and omit the extra skylight and companion way.

The blue arrows are pointing out what look to me like scuttles. I'd be happy to be affirmed in my conclusion about the scuttles because I'm planning to add them to my model.
 
Last edited:
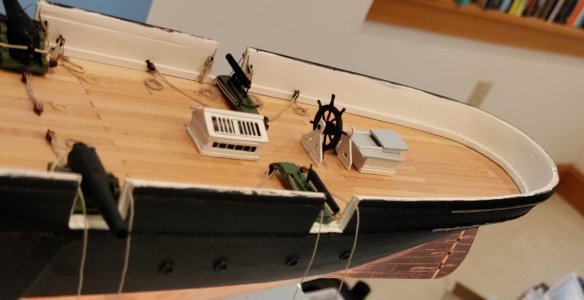
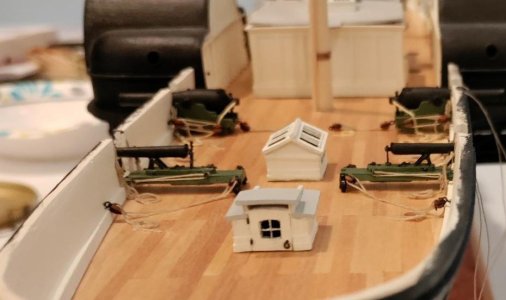
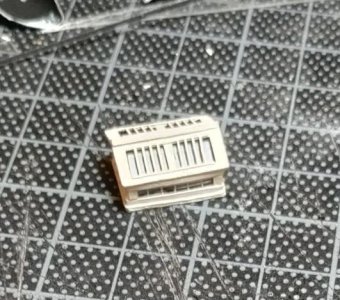
I did manage to build and detail the aft companion way and skylight in the last 24 hours. I looked in on the Staghound build and Pete's Flying Cloud and got inspired.

Aft Companion.jpgAft Skylight.jpgaft Skyligh2.jpg
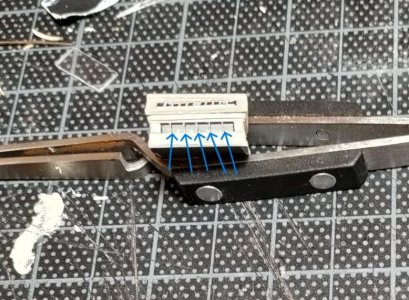
The blue arrows - I used sewing thread, the thin kind, for the window framing and glued "glass" inside. The "glass" is just some scrap plastic from a cheap picture frame.

Aft placed.jpgAft birdseye.jpg

Yes, the blue arrow is pointing to a hole which will not be covered by the ship's wheel assembly per the kit plans. I'll figure something out;)
 
What ho, Shipmates!

Got the wheel done this afternoon. I used the wheel that came with the kit. I worked on it as much as I could to slim it down and get all of the casting marks off. I feel like the wheel is a bit over scale, but it is serviceable. I was successful (this time) getting the Jax Pewter Black to work. The rest is scratch built with 1/32 thick strip and some paper details. I used the Webb plan as a reference for the design.
Wheel 1.jpgWheel 2.jpgWheel 3.jpg

I haven't put the rope on the barrel yet. It will be more than a minute before I permanently attach the wheel. Here's hoping I don't forget.

Looking at this picture- It strikes me that the companion way could use a piece of combing so the water isn't just waiting to slosh down the ladder :D

Blessings.
Chuck
 
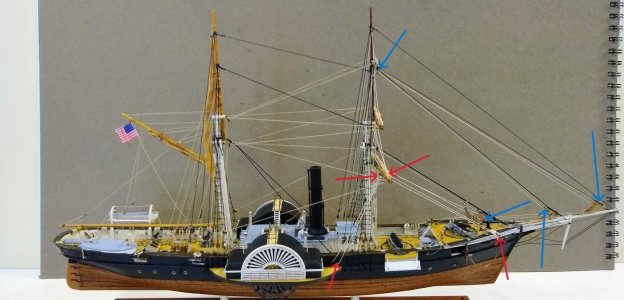
Pete, when you have a moment, I have some questions about your HL rigging. Below is a copy of your finished HL. The red arrows - what is this yard tackle please? Foretack?
The blue arrows - where did you belay the lines for the head sails? Something tells me that this wasn't part of the rigging plan that came with your kit.

Any chance you might take some close-ups of these areas? ;)

I'm contemplating adding some pin racks because the kit plan doesn't have any and it cannot be true that all of the lines were belayed to the pins on the fore and main mast bits.

Gutterman HL.jpg
 
Funny, now that you mention it, I remember doing a lot of head scratching, looking through a bunch of books, plans and plain old "Now where would I belay that?'" If I were in charge. :rolleyes: It's kind of a conglomeration of disparate sources and imagination. I have a set of the Flying Fish rigging and sail plans which is a pretty good generic guide to this era rig. Worth getting a set from Model Shipways. I'll take the case off and send some pics asap.
(I wish I'd done better with the ratlines.)
 
I did manage to build and detail the aft companion way and skylight in the last 24 hours. I looked in on the Staghound build and Pete's Flying Cloud and got inspired.

View attachment 468953View attachment 468955View attachment 468954
The blue arrows - I used sewing thread, the thin kind, for the window framing and glued "glass" inside. The "glass" is just some scrap plastic from a cheap picture frame.

View attachment 468957View attachment 468956

Yes, the blue arrow is pointing to a hole which will not be covered by the ship's wheel assembly per the kit plans. I'll figure something out;)
Good morning Chuck. Bravo your Harriet Lane is wonderful. A special congratulations for remodelling your guest bathroom, especially wearing wingtips ROTF . I have admiration for guys who self renovate as the extent of my labour would be to phone my contractor;). Cheers Grant
 
Good evening, shipmates!

I thought I would go ahead and share what I was doing this summer when I really wanted to be working on the Harriet Lane. Knowing what I know about all of you, you might get a kick out of it.

When people say "We're remodeling [fill in the blank]" they usually mean: We are paying a contractor to remodel {fill in the blank]. Not so at Shangri-la! When I say I'm remodeling the guest bathroom, I mean I'm doing all the work. As usual, I underestimate how long the project would take, and I donated time to my sister-in-law's law school graduation and baby shower, and donated time to training young assistant attorney's general how to try cases. So a project that I wanted to take a month, that in reality required six weeks, actually took two months :eek: When I got done I was spent and unhappy with the result. Things are much better now that I have digested the long list of imperfections - See! I know my audience. Here are some snaps from almost the start to the bitter end.

View attachment 468932View attachment 468933View attachment 468934View attachment 468935View attachment 468936View attachment 468937


Very happy - look Ma! No leaks!
View attachment 468938View attachment 468939View attachment 468940View attachment 468941
Nothing better when a project comes together…
 
Good evening, shipmates!

I thought I would go ahead and share what I was doing this summer when I really wanted to be working on the Harriet Lane. Knowing what I know about all of you, you might get a kick out of it.

When people say "We're remodeling [fill in the blank]" they usually mean: We are paying a contractor to remodel {fill in the blank]. Not so at Shangri-la! When I say I'm remodeling the guest bathroom, I mean I'm doing all the work. As usual, I underestimate how long the project would take, and I donated time to my sister-in-law's law school graduation and baby shower, and donated time to training young assistant attorney's general how to try cases. So a project that I wanted to take a month, that in reality required six weeks, actually took two months :eek: When I got done I was spent and unhappy with the result. Things are much better now that I have digested the long list of imperfections - See! I know my audience. Here are some snaps from almost the start to the bitter end.

View attachment 468932View attachment 468933View attachment 468934View attachment 468935View attachment 468936View attachment 468937


Very happy - look Ma! No leaks!
View attachment 468938View attachment 468939View attachment 468940View attachment 468941
Big fan of the raised panel doors!
 
I took a bunch of pics, but I'm afraid nothing is very distinct or informative. The overlap of the main rail served as the pin rail for pins and cleats.
I think you'll be better served by the Flying Fish plans, both of Lennarth Petersson's books, Darcy lever's Young Sea Officer's Sheet Anchor and Harland's seamanship.
I'll PM you the pics because I don't want to load up your build log with pictures of my model
 
Good morning Chuck. Bravo your Harriet Lane is wonderful. A special congratulations for remodelling your guest bathroom, especially wearing wingtips ROTF . I have admiration for guys who self renovate as the extent of my labour would be to phone my contractor;). Cheers Grant
Grant! Thank you for the compliment on the model! Just between you and me, that's the last time I do it all myself. I'll save my wingtips for the yard work. :cool: My time is much better spent in the Shangri-La Shipyard. That's an order from my Admiral!
 
Big fan of the raised panel doors!
Thank you, Barry! In the end, although the project got done and looks nice and is generally serviceable, It bugs me something awful that the floor isn't as level as it could have been. But most of all, I'm mad at myself for designing the shower for a print ad rather than for actual use. The shower head and valve should have been on the wall away from the opening.:eek: I want to kick myself every time I go in there.:mad: Well, almost every time.

I appreciate the appreciation!

Blessings.
Chuck
 
I took a bunch of pics, but I'm afraid nothing is very distinct or informative. The overlap of the main rail served as the pin rail for pins and cleats.
I think you'll be better served by the Flying Fish plans, both of Lennarth Petersson's books, Darcy lever's Young Sea Officer's Sheet Anchor and Harland's seamanship.
I'll PM you the pics because I don't want to load up your build log with pictures of my model
Pete!

Thank you for the pointers! I have several of these resources. I also have Underhill's Masting and Rigging The Clipper Ship and Ocean Carrier and Crothers' The Masting of American Merchant Sail in the 1850's. Underhill has some nice drawings. As suggested by the title, Crothers is particularly strong on masts and spars. I will probably get the Flying Fish plans from Model Shipways as you suggested.
 
Back
Top