USRC Harriet Lane Model Shipways 1:96 scale circa 1863

What ho, shipmates! Welcome to the second dog watch (Central Standard Time)! This evening I hope to bring us all up to the current state of my Harriet Lane build. The short story is that I have finished all of the deck structures and added the railings to the ladders, the main deck house, and to the raised fore deck for the Parrot rifle. The long story:

Again the Webb plan of Harriet Lane:
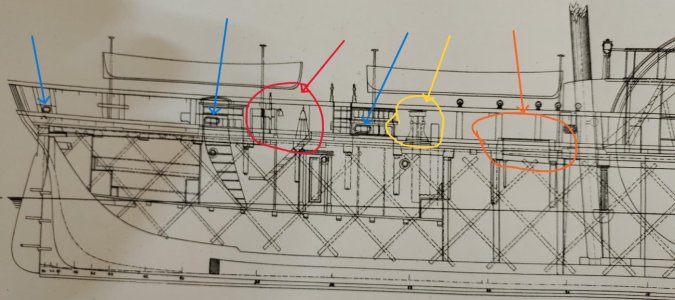
HL Webb Plan Aft Marked.jpg

So, if you look at the red circle and arrow you'll see the ships wheel and binnacle. In the kit, the wheel is dead aft directly over the rudder head. A/K/A the wrong place. Just aft of the wheel is the aftermost companion way. The yellow circle and arrow point out a capstan slightly forward of a skylight. In orange with arrow is a hatch and just forward of that are the aft bitts. In posts 387-391 I show the build of the aft companion way, the wheel and the skylight. I scratch built a capstan and ordered a mini kit capstan in 1/96 scale from @Dry-Dock Models & Parts. It's a nifty mini kit. It went together easily and was so, so much better than what I could manage with the flint knives I use to cut and shape wood. Stone age tech - get it :p. So glad I did that and at the same time ordered their scale hooks.

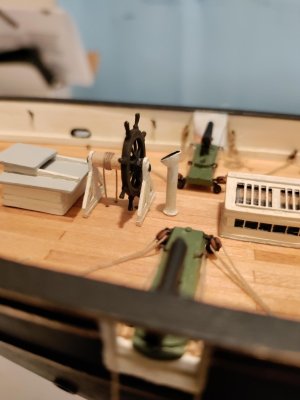
In the following pic (or pics) you'll see the installation of these parts and the final permanent attachment of the main deck house. You'll notice that I moved the capstan a bit forward. Webb original design or not, I couldn't see how the hands would be able to man the capstan bars with the skylight dead in the way.
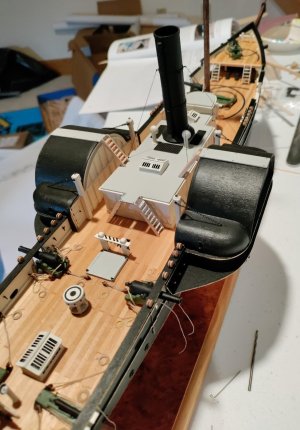
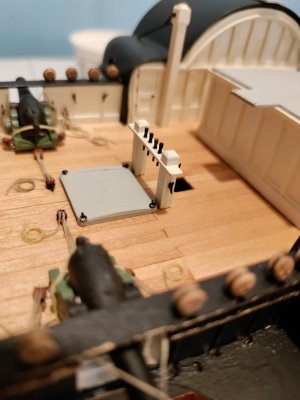
Aft deck finished 1.jpgAft hatch bitts detail.jpgWheel detail.jpg

In this last picture you'll see that I decided not to try to make the binnacle as shown in Webb's plan. I went with the kit supplied part.
 
The next thing was to deal with the ladder problem. Turns out that increasing the height of the bulwarks created a ladder problem in addition to the original ladder problem.

The original ladder problem: I added a raised fore deck and needed to make two additional ladders above those supplied in the kit. The additional ladder problem: increasing the bulwarks height made the relevant kit ladders too short :eek:!

Frankly, I had been dreading this stage of the build ever since I added the raised fore deck. Again the issue of feeling that I could not produce in scale a ladder I would be happy with. Usually, I am never wrong - unless my Admiral disagrees with me. In this case, I happily report that I was wrong. That's my story and I'm sticking to it.

The kit supplied ladders are Britannia metal. I filed and sanded them to remove the casting marks, flash, etc. I was happy with the result. I'm glad about that because I had thought I was going to have to scratch build all of the ladders. How many ladders is that, Chuck! Eight (8) ladders mate! Eight!

Here's what happened next - I thought I would only need to make the two ladders for the raised fore deck. Wrong! The kit supplied ladders were now too short to reach from the top of the deck house to the bridges atop the paddle wheel houses. Again, :eek:! But, as I am the hero of my story, those ladders were a perfect fit for the distance between the main deck and the fore deck.

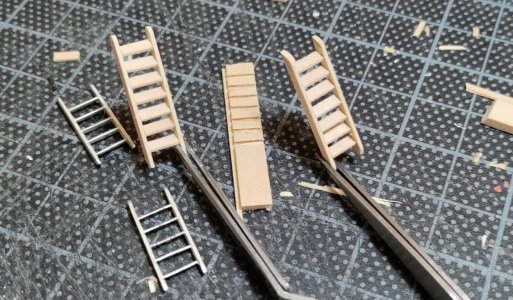
To cut a long story short, I did what we all do - measured the dimensions of the kit supplied ladders and build a ladder making jig.

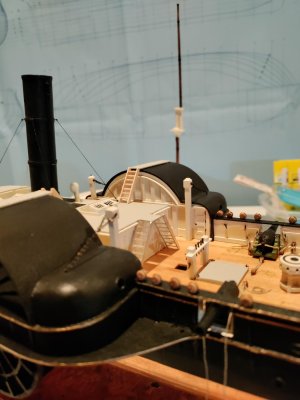
Here's the jig. I judged the angle of the treads by eye. And Here are the scratch built ladders to get from the top of the main deckhouse to the bridges.

Ladder building.jpgLadder placement 1.jpgLadder placement 3.jpg
 
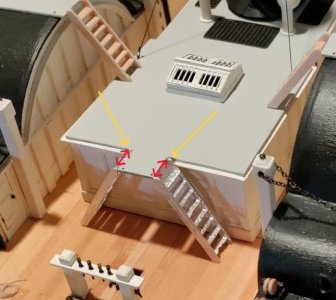
Just a bit more about the ladders - other builders of this kit have noted that the ladders aft, from the deck to the top of the main deckhouse are too wide for the platform that projects aft from the deckhouse top. Looking at you @Model Shipways - you know I love you ;). It was true in my case, although I kind of forgot about it. Moreover, I made things worse by adding the molding detail to the top of the deckhouse. In the next pick you'll see my solutionLadder placement 3a.jpg.

Well, not my whole solution. This only shows that I cut notches in the molding to accommodate the width of the ladders. The full solution required the addition of a small piece of 1/32nd thick wood to the aft end of the platform for the railings and to fill the precut holes in the platform.

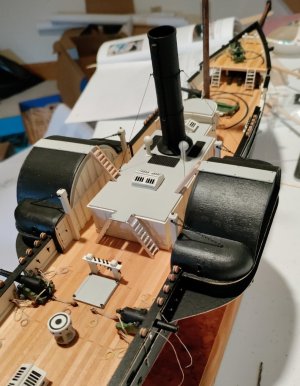
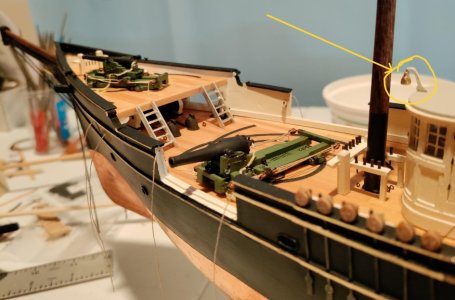
Here is a shot of the ladders to the foredeck. BTW, the kit supplied ships bell is Britannia. It was badly cast and I had to do a lot of work on it. In the process I broke the bell off the support. Again, :eek:! I made a replacement bell (about 90 minutes and several failures later) - circled in yellow. I hollowed my bell out and ran a thin piece of sewing thread out the top and attached the bell to the bracket with CA at an appropriate angle vis-a-vis gravity.

Ladder placement 2.jpg

That's as far as I'm going to get tonight, shipmates. Thank you for looking in on my build, for the likes and encouragement!

Blessings. Peace. Gratitude.
Chuck
 
Oops! I almost forgot to post something about the magnificent and magnificently tiny PE hooks I sourced from @Dry-Dock Models & Parts.

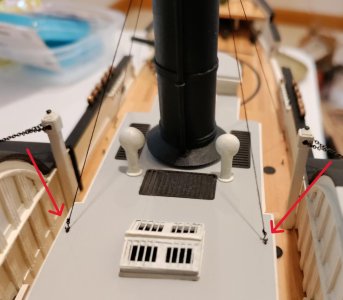
There a guys that support the funnel. The plan calls for tying off both ends. I to go with the lovely tiny hooks through the eyebolts and tie-off at the funnel. It works great! I had proper tension in each of the four guys and no over-scale knots (IMHO :cool:). Well, at least not wildly over-scale. :D

Funnel guys.jpg
 
Oops! I almost forgot to post something about the magnificent and magnificently tiny PE hooks I sourced from @Dry-Dock Models & Parts.

There a guys that support the funnel. The plan calls for tying off both ends. I to go with the lovely tiny hooks through the eyebolts and tie-off at the funnel. It works great! I had proper tension in each of the four guys and no over-scale knots (IMHO :cool:). Well, at least not wildly over-scale. :D

View attachment 482525
your detail is just wonderful!
 
I just did a capstan at 1:48. And your 1:96 capstan makes mine look like the dog's breakfast. Bravo!
Good morning, Paul! Very kind, thank you! With respect, however, hogwash, balderdash, and nonsense! All I had to do was put the parts together that Dry Dock Models made. I know you made yours and I know the pains you take to get it right - you've looked at your Kingfisher log haven't you ROTF

Blessings.
Chuck
 
Your capstan convinced me that what I have on my Flying cloud is totally unacceptable. I just ordered some from Drydock at1:96 scale like Chucks.
Yours I consider to be a little masterpiece! Thumbs-Up
Good morning, Pete! I was thinking of your Flying Cloud build when I got the kit from Dry Dock. Sorry I didn't alert you. You're going to be really happy with your decision!

Blessings.
Chuck
 
your detail is just wonderful!
Good morning, Barry! Thank you! Funny thing about adding the details, for me at least, I know I want to add as much detail as possible. On the other hand, I know adding the details slows the progress way down. Although I won't stop trying to add detail, I am conflicted about the slow progress. I thought I would be done by now and I'm truly not a patient man:p.

BTW did you have the problem I'm having with the security of the lower deadeyes in the PE chains? If so, how did you solve it?

Blessings.
Chuck
 
Just a bit more about the ladders - other builders of this kit have noted that the ladders aft, from the deck to the top of the main deckhouse are too wide for the platform that projects aft from the deckhouse top. Looking at you @Model Shipways - you know I love you ;). It was true in my case, although I kind of forgot about it. Moreover, I made things worse by adding the molding detail to the top of the deckhouse. In the next pick you'll see my solutionView attachment 482523.

Well, not my whole solution. This only shows that I cut notches in the molding to accommodate the width of the ladders. The full solution required the addition of a small piece of 1/32nd thick wood to the aft end of the platform for the railings and to fill the precut holes in the platform.

Here is a shot of the ladders to the foredeck. BTW, the kit supplied ships bell is Britannia. It was badly cast and I had to do a lot of work on it. In the process I broke the bell off the support. Again, :eek:! I made a replacement bell (about 90 minutes and several failures later) - circled in yellow. I hollowed my bell out and ran a thin piece of sewing thread out the top and attached the bell to the bracket with CA at an appropriate angle vis-a-vis gravity.

View attachment 482524

That's as far as I'm going to get tonight, shipmates. Thank you for looking in on my build, for the likes and encouragement!

Blessings. Peace. Gratitude.
Chuck
love the cannon sled detail. looks great overall too.
 
Good morning, Paul! Very kind, thank you! With respect, however, hogwash, balderdash, and nonsense! All I had to do was put the parts together that Dry Dock Models made. I know you made yours and I know the pains you take to get it right - you've looked at your Kingfisher log haven't you ROTF

Blessings.
Chuck
Well, let's not be so quick to overlook that I am building at 2x your scale...
 
Chuck,

I have a Civil War era project on my bucket list so am interested in the guns on your model. I have read that the carriages for Union Army guns were painted olive drab but didn’t realize that the Navy painted thiers this color too. Where did you dig up this interesting information?

Roger
 
Great job on the ladders! Clean and precise! Does anyone like making ladders? I sure don’t.

Roger
Dear Roger, thank you! Very kind! I can't honestly way that I like making ladders, but I don't hate it too much ROTF

Blessings.
Chuck
 
Chuck,

I have a Civil War era project on my bucket list so am interested in the guns on your model. I have read that the carriages for Union Army guns were painted olive drab but didn’t realize that the Navy painted thiers this color too. Where did you dig up this interesting information?

Roger
Dear Roger,

I just followed the lead of one of our forum shipmates, the artist currently known as @JerryTodd . Jerry is an authority on naval weaponry of the period. He painted his carriages olive drab. Ergo . . . He made the awesome guns and carriages for me! Check out his work! His life project is a working model of the Constellation in 1/36th scale.

Blessings.
Chuck
 
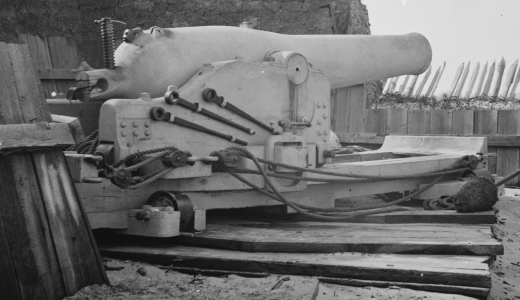
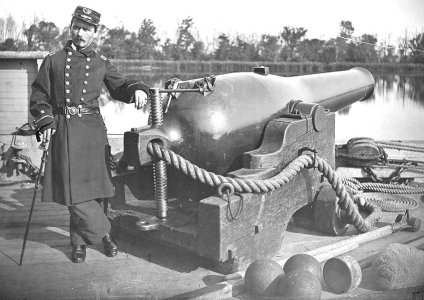
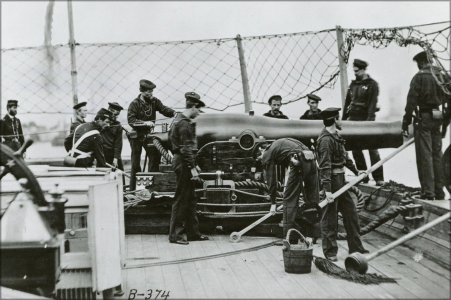
Up and into the Civil War carriages were olive, but photos show they were often painted black during the war, and sometimes light gray. Farragut had much of the fleet painted Haze Gray to make them less visible in fog and smoke of battle. Up on the Chesapeake and the James things stayed mostly the same. The blockading squadron off the Carolina's seem to mix is up a bit, probably because of ships transferring between stations. Visible guns were often painted as well.

Many carriages weren't painted at all, (paint doesn't stick to white oak very well) and iron work was polished

ix_dahlgren_pivot_gray.png ix_dahlgren_marsilly2.jpg ix_dahlgren_pivot.jpg

My model of Constellation represents the ship in 1856, hence the olive carriage per the Naval Ordinance Manual (which I'm searching my hard drive for) and I haven't found anything yet countermanding that.
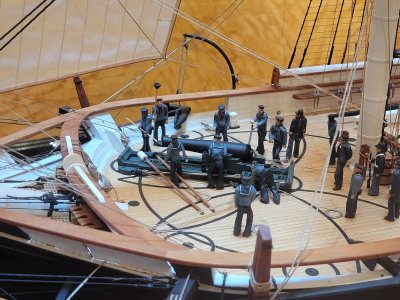
As an aside, the 1:32 scale model of the Savannah at the Ships of the Sea Museum in Savannah GA, I understand is a wartime depiction of the ship and also shows olive carriages
20240912_101807.jpg
 
Up and into the Civil War carriages were olive, but photos show they were often painted black during the war, and sometimes light gray. Farragut had much of the fleet painted Haze Gray to make them less visible in fog and smoke of battle. Up on the Chesapeake and the James things stayed mostly the same. The blockading squadron off the Carolina's seem to mix is up a bit, probably because of ships transferring between stations. Visible guns were often painted as well.

Many carriages weren't painted at all, (paint doesn't stick to white oak very well) and iron work was polished

View attachment 482745 View attachment 482746 View attachment 482747

My model of Constellation represents the ship in 1856, hence the olive carriage per the Naval Ordinance Manual (which I'm searching my hard drive for) and I haven't found anything yet countermanding that.
As an aside, the 1:32 scale model of the Savannah at the Ships of the Sea Museum in Savannah GA, I understand is a wartime depiction of the ship and also shows olive carriages
View attachment 482753
Jerry! I was hoping you'd lend your expertise. Thank you!

Blessings.
Chuck
 
Back
Top