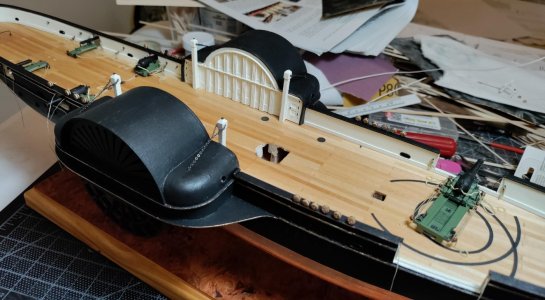
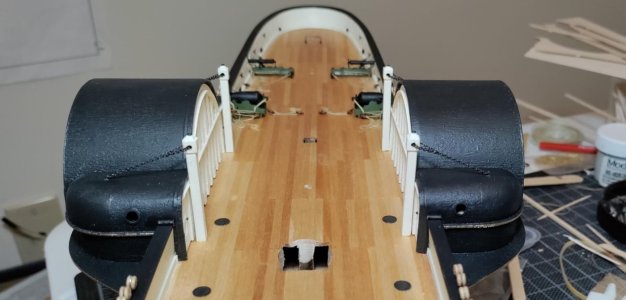
USRC Harriet Lane Model Shipways 1:96 scale circa 1863

Thank you, Barry! In the end, although the project got done and looks nice and is generally serviceable, It bugs me something awful that the floor isn't as level as it could have been. But most of all, I'm mad at myself for designing the shower for a print ad rather than for actual use. The shower head and valve should have been on the wall away from the opening.:eek: I want to kick myself every time I go in there.:mad: Well, almost every time.

I appreciate the appreciation!

Blessings.
Chuck
Be careful not to fall, kicking yourself in the shower. :rolleyes:
 
Pete!

Thank you for the pointers! I have several of these resources. I also have Underhill's Masting and Rigging The Clipper Ship and Ocean Carrier and Crothers' The Masting of American Merchant Sail in the 1850's. Underhill has some nice drawings. As suggested by the title, Crothers is particularly strong on masts and spars. I will probably get the Flying Fish plans from Model Shipways as you suggested.
Get the instruction book as well. It's full of really useful stuff! That whole set of plans is a digest of useful information. And beautiful to look at.
 
What ho, shipmates!

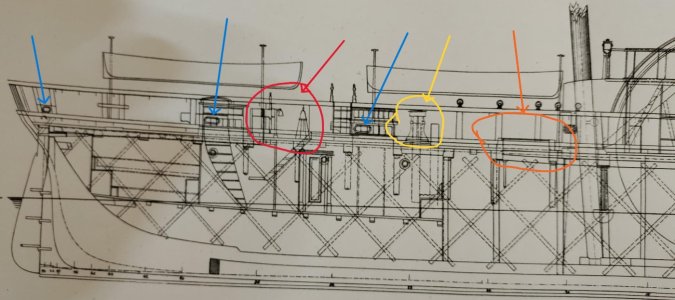
Although I haven't been posting, I have found time over the last couple of months to move my Harriet Lane build forward. When I last posted about the project I had recently "discovered" the Webb plans. They show details not present in the kit.

HL Webb Plan Aft Marked.jpg

In the following post, I'll focus on the scuppers (blue arrows).
 
First, I love the @Model Shipways kit of Harriet Lane! I wish, however, that she was designed for a more experienced model maker and that she relied more heavily on the available plans. Webb designed the ship and the plans are open source. That aside, the problem is adding details like scuppers after all of the decking, finishing and painting. If any of you are planning to build her, I hope you'll read my log to help you plan ahead for the things I had to do after I thought I was done - the horror of adding height to the ships sides after I had coppered the hull and otherwise "finished" the hull with paint :eek:. For details of the horror see posts 222-235. Well, the same thing happened when I added the scuppers.

I located the scuppers on the model mainly by eye. My printed copy of the Webb plan is not the same scale as the kit plans. It's pretty close, so I think I am also pretty close to where Webb showed the scupper placement. Because I was worried about ruining the finished work inboard, I decided to drill out the scuppers from inboard rather than risk damaging something it would be very hard for me to fix If I opened the scuppers from outboard. Best laid plans . . .
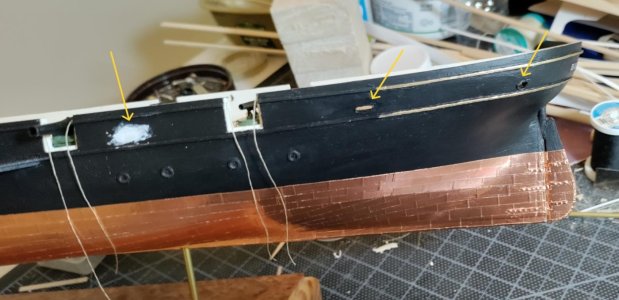
Scuppers 1.jpg

The yellow arrows point out the aft scuppers port side. I botched the first effort to open the scupper - first arrow on the left. What you see is my effort to repair the nasty hole I made. While I waited for that repair to dry, I worked on the other scuppers and you can see the finished result - second and third arrows. Because I am still using stone-age technology, the scuppers came out slightly wonky. I needed something to give them a finished look. I made a buck out of scrap wood that I sanded down until it fit snug in the scupper. Then I wrapped 28 gauge annealed wire around the buck to create a rim. I glued the rim to the outside of the scupper hole and was happy with the result.
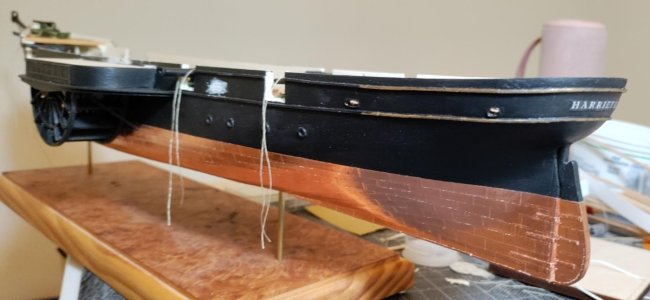
Scuppers 2.jpg

Here's what it looked like from inboard when I first opened the scuppers.

Scuppers 3.jpg

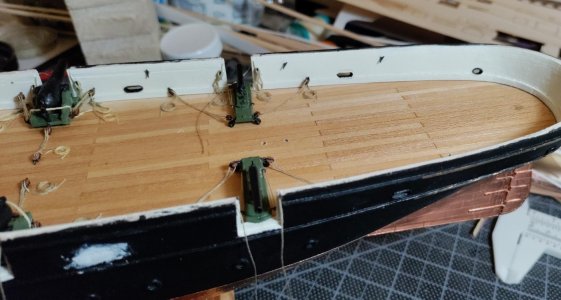
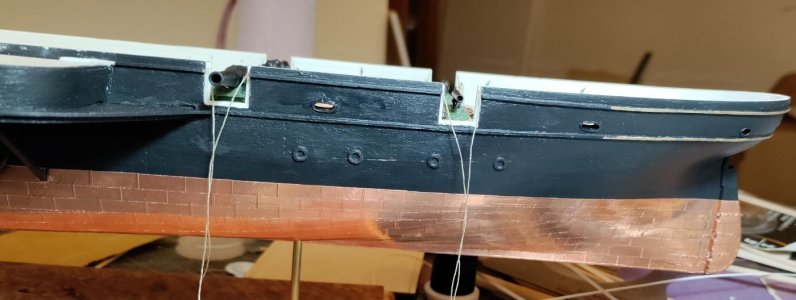
Here's the finished product of this part of the project including the one scupper forward of the paddlewheels shown on Webb's plan.
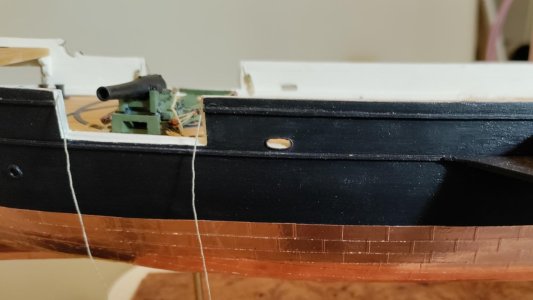
Scuppers 4.jpgScuppers 5.jpg

Yes, I also applied a rim inboard to give a finished look. The last pic shows the scupper where I had botched the job first go.
Scuppers 6.jpg

I think the addition of the scuppers was worth the effort. It brings an additional level of what I'll call reality to the model. If you're going to build Harriet Lane, I highly recommend adding the detail of the scuppers. But, for goodness sake do it while the hull is still bare wood ;)

That's all for tonight.

Blessings.
Chuck
 
What ho, shipmates!

After dealing with the scuppers, I put on the rails and set up the lower deadeyes. I didn't record this part of the journey. I will say that having to cut into the rails to set up the chains hurt my heart because I had finished painting and adding "gold leaf" to the rails. If I had to do this again, I would make my own chains instead of using the photoetch from the kit. The main problem with the PE chains is that the part that holds the deadeye cant be clamped tight enough to hold the deadeye securely while maintaining the ability to rotate the lower deadeye to follow the line of the shrouds. More on that problem when I start setting up the shrouds.

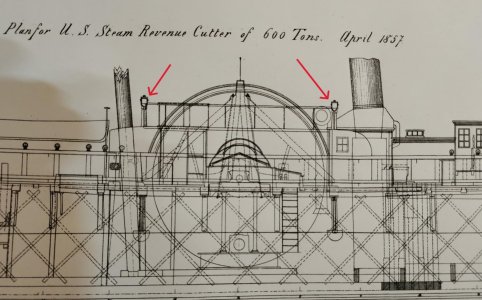
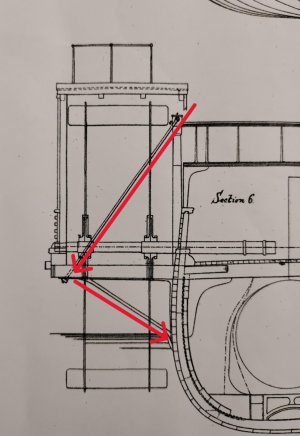
When that work was done I was ready to set the king posts. The kit calls for chain to attach to the top of the water closets, run through a king post across the deck, through the opposite king post terminating atop the opposite water closet - aft. Forward the chain begins atop the water closet and terminates atop the deckhouse. That's not how Webb designed it. Here are images from Webb's plan. Which make more sense to me given the possibility of a shell or ball hitting the aft chain and weakening the support of both sponsons simultaneously, to say nothing of the damage the chain would do to the men, rigging and structures cracking like a whip.

King Post Plan 1.jpg

King Post Plan 2.jpg

Of course it was too late in my build to set up the metal rod support. I decided follow Webb's plan and use the chain in lieu of the metal rod. I just liked the look of the chain, that's why.

King Post 1.jpg
KIng Post 2.jpg

That's all for now, shipmates! Next up - attaching deck structures, making additional ladders and setting up the railings.

Blessings. Peace. Gratitude.
Chuck
 
Nice job and a handsome model.

Re; Beginners and Entry Level modelers. Unless we build endless models to the same scale, ship, and if from a kit, the same kit mfgr, when we begin a new project we’re all beginners, as each model presents new problems to solve. When I finished a 1:32 scale RN longboat, I decided to resume construction of a 1:96 scale steel hulled Great Lakes freighter. The two projects couldn’t be more different. I’ve had to reorient myself to think in 1:96 scale and to figure out how to make those tiny brass fittings. But that’s the real fun of tackling a challenging ship model, and that’s exactly what Chuck has done here with spectacular results.

Roger
Roger! Preach brother! I couldn't agree with you more. Having spent all my modeling time in 1:48 scale before HL convinced me from the start of the build that I could not achieve the level of detail in 1:96 scale. That belief (completely mistaken) made me really hesitant to even try - it was, indeed, as if I was building my first kit ever.
 
Nice job and a handsome model.

Re; Beginners and Entry Level modelers. Unless we build endless models to the same scale, ship, and if from a kit, the same kit mfgr, when we begin a new project we’re all beginners, as each model presents new problems to solve. When I finished a 1:32 scale RN longboat, I decided to resume construction of a 1:96 scale steel hulled Great Lakes freighter. The two projects couldn’t be more different. I’ve had to reorient myself to think in 1:96 scale and to figure out how to make those tiny brass fittings. But that’s the real fun of tackling a challenging ship model, and that’s exactly what Chuck has done here with spectacular results.

Roger
Also, thank you for the lovely compliment, Roger!
 
Back
Top