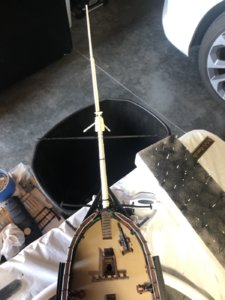
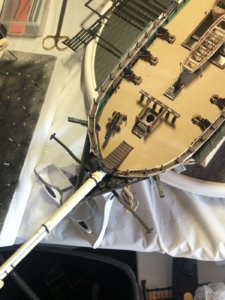
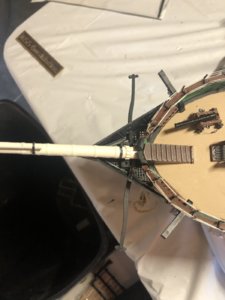
Hang in there Buddy! It takes time and patience. These sailing ship models can sometimes take years. You're doing a great job!
-

Win a Free Custom Engraved Brass Coin!!!
As a way to introduce our brass coins to the community, we will raffle off a free coin during the month of August. Follow link ABOVE for instructions for entering.
-

PRE-ORDER SHIPS IN SCALE TODAY!
The beloved Ships in Scale Magazine is back and charting a new course for 2026!
Discover new skills, new techniques, and new inspirations in every issue.
NOTE THAT OUR FIRST ISSUE WILL BE JAN/FEB 2026
You are using an out of date browser. It may not display this or other websites correctly.
You should upgrade or use an alternative browser.
You should upgrade or use an alternative browser.
USS CONSTITUTION REVELL 1/96 scale
- Thread starter pbryan
- Start date
- Watchers 32
-
- Tags
- constitution revell
Thank you for the support.Hang in there Buddy! It takes time and patience. These sailing ship models can sometimes take years. You're doing a great job!
I always used Testor's matt spray finish - called dull coat - when they made it. I don't see why the Tamiya equivalent wouldn't work just as well.
Well, there have been projects (models) I have worked on that I had problems w and did not necessarily turn out like I wanted. The main thing is to move on to the next step and I think you are trying to make the best of it of what I can tell. Besides, from the pictures, things look pretty good. So keep working on it. We are watching this one come to life.
Constitution is a very beautiful ship. It was also my very first big build when I was 15. It kept me quiet for a very long time!! I put plaster ballast in it and cloth sails and took it out sailing. Not very successfully without any sort of control but it looked good on the water.
Enjoy!!
Enjoy!!
Thanks. I gues I need to remember this kit was made in the 70’s.Well, there have been projects (models) I have worked on that I had problems w and did not necessarily turn out like I wanted. The main thing is to move on to the next step and I think you are trying to make the best of it of what I can tell. Besides, from the pictures, things look pretty good. So keep working on it. We are watching this one come to life.
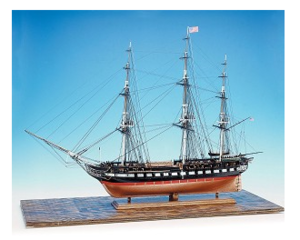
Well, maybe next time you can try out the wooden kit version by Modelexpo-online.com I understand that it is an excellent kit and has been built by many modelers. At some point, this will be my next build. This model is often on backorder and a good reason. They offer this model on sale several times throughout the year. If you buy it on sale, (and it is back ordered) you will at some point receive the kit. Hey, just a thought !!!
Instructions found here:
Parts list found here:
Instructions found here:
Parts list found here:

Yes, I’ve seen that model but was a little timid as it’s been a while since I’ve done any model builds but I just might try that one. Thanks again.Well, maybe next time you can try out the wooden kit version by Modelexpo-online.com I understand that it is an excellent kit and has been built by many modelers. At some point, this will be my next build. This model is often on backorder and a good reason. They offer this model on sale several times throughout the year. If you buy it on sale, (and it is back ordered) you will at some point receive the kit. Hey, just a thought !!!
Instructions found here:
Parts list found here:
View attachment 136950
Well, if you do happen to do this. Just keep in mind, when you open the box you will see:1) raw bundled wood, 2) laser cut wood parts, 3) metal parts and pieces (in plastic containers most likely) 4) rigging line of various sizes. I would also get their paint set for the ship unless you are good at picking out paints.
OK, so, the point I am making is that when you see all this, the first thing is being overwhelmed by the ton of stuff. But, all of this is broken down in stages and just like what you are doing now, just one phase or step at a time. The only thing you need to be very much aware of is that this kit is a long term project. If you have any questions about it, feel free. Look at build logs of planking. There are several publications on planking and all are some good and not so good. I would do this before completely diving in.

 www.micromark.com
OK, so, the point I am making is that when you see all this, the first thing is being overwhelmed by the ton of stuff. But, all of this is broken down in stages and just like what you are doing now, just one phase or step at a time. The only thing you need to be very much aware of is that this kit is a long term project. If you have any questions about it, feel free. Look at build logs of planking. There are several publications on planking and all are some good and not so good. I would do this before completely diving in.
Planking Techniques for Model Ship Builders: Dressel, Donald: 9780830628681: Amazon.com: Books
Planking Techniques for Model Ship Builders [Dressel, Donald] on Amazon.com. *FREE* shipping on qualifying offers. Planking Techniques for Model Ship Builders
www.amazon.com

Quality Tools & Supplies for Hobbys, DIY & Crafts – Micro-Mark Tools
We offer precision tools and supplies for all your hobby projects. Shop high-quality tools for model making, woodworking, painting, crafting and more!
 www.micromark.com
Well, I really messed up bad in the beginning. I grouped the studding sail yards with the studding sail booms and they are all glued together on the gundeck. I guess in my excitement, I was lacking attention to detail. Now, I am on the lookout for spare parts or a whole kit just for these. I really don’t want to see this go down the tubes. 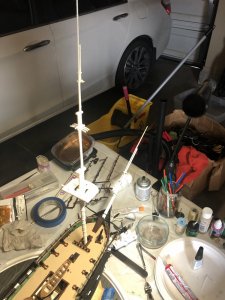

Minor point, but, you did ask for comments.......The bunks should be located in the bedrooms, not in the main cabin. The bedrooms (one on each side) are on each side of the main cabin. There are 2 locating stubs on the bottom of the bulkhead to get them in the right place. There is a bedroom for the Captain and the other would have been used by an Admiral or Commodore if on board. My instructions call for the inner bulkheads to be painted white. [I'm building the same model right now also.Well, the gundeck wasn’t too bad other than my eyesight for captains quarters. Started the cannons last night and those are a task in itself... again eyesight
View attachment 130427
View attachment 130428
View attachment 130429
My kit is the 1976 issue.
I bought the wooden decks and cloth sails.This has probably been answered already, but the slots on the quarterdeck rail are for the "U"-shaped hammock netting supports. my instructions show 17 per side.Ok fellow modelers. I am at an impasse. Can someone please explain why the instructions call out 15 cleats for the quarterdeck rails and there are 17 slots for them? I have gone through the instructions to ensure that i will not need the extra 4 for future endeavors. Cannot see anything else, and as obvious as it may seem, I want to be sure.
Yeah, this is my first attempt in many years and I will definitely pay closer attention next time. That being said, I’m more disappointed with the sail booms as I’m at an impasse.Minor point, but, you did ask for comments.......The bunks should be located in the bedrooms, not in the main cabin. The bedrooms (one on each side) are on each side of the main cabin. There are 2 locating stubs on the bottom of the bulkhead to get them in the right place. There is a bedroom for the Captain and the other would have been used by an Admiral or Commodore if on board. My instructions call for the inner bulkheads to be painted white. [I'm building the same model right now also.
My kit is the 1976 issue.
I bought the wooden decks and cloth sails.
I think we may have different kits Coastie. I double checked last night and mine calls out 15 on each side. Then I looked at the instruction manual and noticed it was printed in 2014? I thought this was a 1976 version but guess I was wrong.This has probably been answered already, but the slots on the quarterdeck rail are for the "U"-shaped hammock netting supports. my instructions show 17 per side.
If they are the same scale, 1/96. they should be the same size. Did your instructions call for the interior upper bulwarks to be painted green, or was that your decision? Just curious.I think we may have different kits Coastie. I double checked last night and mine calls out 15 on each side. Then I looked at the instruction manual and noticed it was printed in 2014? I thought this was a 1976 version but guess I was wrong.
you could probably get some bamboo skewers that they sell in the supermarket (usually in the meat section) and make some passable substitutes. They should be about the right size, and, painted black should blend right in. They would be simple to make as they are smooth so the slide out on the yards. I'm not rigging stunsails, but the stun's yards are mounted on the yards, and the booms, which support the lower ends of the stunsails are stowed on the gun deck when not in use. I'll scan my yards and take measurements and send them to you if that would help. It's a pain trying to correct text!!!! Don't sweat the mistake. Everyone makes them. And, accidents happen. I just trashed a wooden model of the Model Shipways "Willie Bennett" because water soaked it when my icemaker crapped out and the water dripped into the basement where the model was sitting. I'm ex AF and CG and lived in Portsmouth and Va Beach for over 25 years.Yeah, this is my first attempt in many years and I will definitely pay closer attention next time. That being said, I’m more disappointed with the sail booms as I’m at an impasse.
Thanks for the idea. I was trying to think of a good substitute. I was stationed at Norfolk, VA for my final tour. Lived in VA Beach for about 2 yrs.you could probably get some bamboo skewers that they sell in the supermarket (usually in the meat section) and make some passable substitutes. They should be about the right size, and, painted black should blend right in. They would be simple to make as they are smooth so the slide out on the yards. I'm not rigging stunsails, but the stun's yards are mounted on the yards, and the booms, which support the lower ends of the stunsails are stowed on the gun deck when not in use. I'll scan my yards and take measurements and send them to you if that would help. It's a pain trying to correct text!!!! Don't sweat the mistake. Everyone makes them. And, accidents happen. I just trashed a wooden model of the Model Shipways "Willie Bennett" because water soaked it when my icemaker crapped out and the water dripped into the basement where the model was sitting. I'm ex AF and CG and lived in Portsmouth and Va Beach for over 25 years.
I've been looking at your pics and you haven't progressed to the point of no return with the studsail booms and yards. IF you haven't glued the boats in position, you could cut the lines, remove the boats and use a #11 Exacto knife to cut the SS booms and yards lashings. And, IF you haven't glued the booms and yards together, you can fish them out with tweezers. Then put the boats back in place. However, if you can't retrieve them then I would suggest that you rig the yards in the "inport" or "lowered" position with the yards square and no sails. It will still look nice when you finish. Trying to rig those plastic sails is very tricky. Especially the stunsails. Trying to make the booms and yards would be very time consuming. Save the sails for the next model. Use this one to learn the terminology and the standing and running rigging techniques. That will be hard enough. Note that the booms are indicated by dotted lines.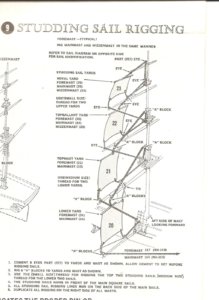

Last edited:


