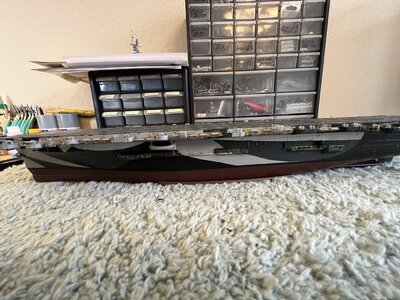
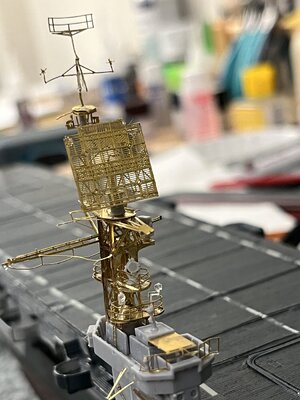
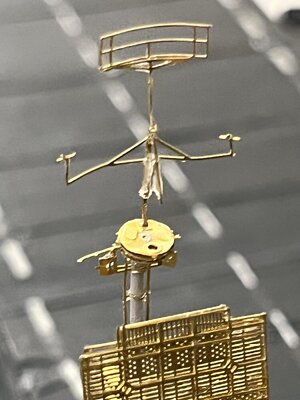
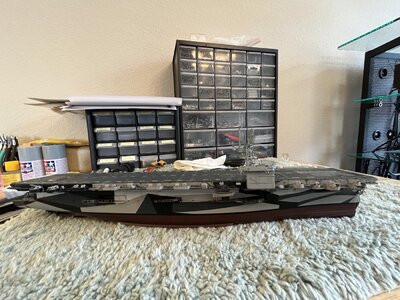
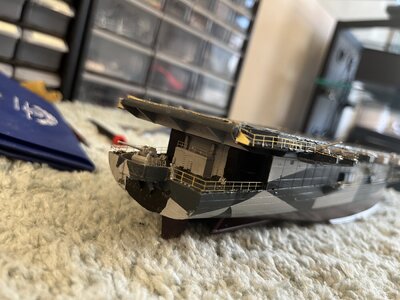
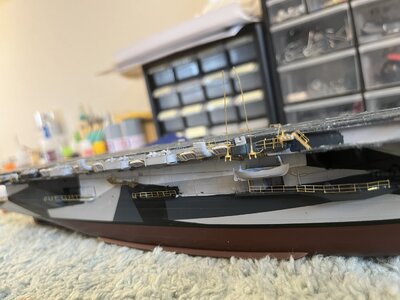
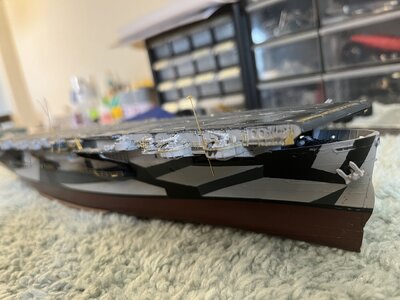
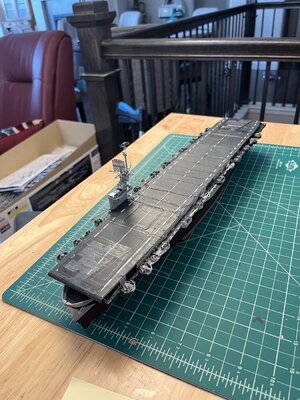
USS Gambier Bay (CVE -73) 1/350 by Hasegawa with Hasegawa photo etch [COMPLETED BUILD]

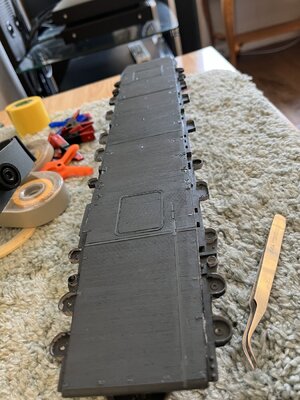
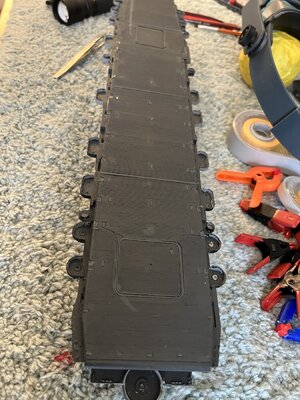
Somemore deck photo etch progress. The forward elevator went just as the aft elevator. I was sure there would be problems since the aft elevator went so smoothly, but no issues arose. Next was the catapult which consisted of three pieces. The deck was not a single line it had little tabs protruding into the channel. The photo etch fit into the channel interesting with the tabs. The last thing done was a cross piece which would have be iron deck with wood on either side.
This was made of two pieces. A short one on the portside of the catapult and a longer on the opposite.
2AAFBD6A-9A07-4898-9DF6-49E9D08D43F7.jpeg
Next all the little pieces and the deck will be finished
 
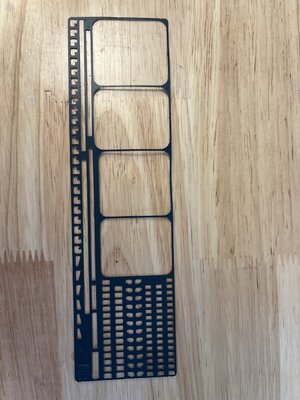
Now that the easy part has been done its time for the little pieces throughout the deck. Some of them will be part of the arresting gear and I'm not sure about all the little rectangular pieces which may be some kind of popup to secure planes. After I wrote this I went back and looked at the deck and now I'm sure they're for securing aircraft. Along the side of the deck are parts that elude their use but are comprised of two pieces of photo etch. On the starboard side are pe items #17 and #8 comprising this unknown piece of deck hardware.
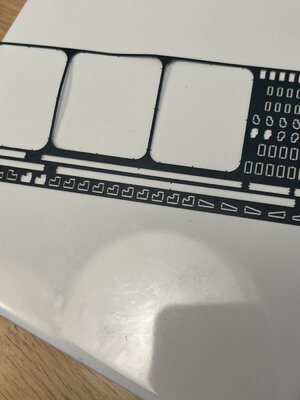
The following photo shows the photo etch with openings where I had already removed one #17 & #870DD05D3-C852-4D48-8C28-EAB1312144B8.jpeg
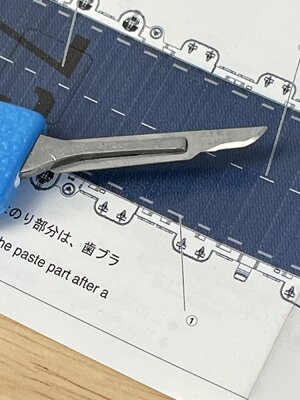
With such tiny pieces its not possible to hold them while you trim any attaching tabs left behind. You can see how the tabs were cut leaving the balance left on the sprue (i guess that's what you'd call it). I was having difficulty cleanly cutting the parts free so I tried several knife blades. The first was a straight #10 exacto using the point or a small angle to make the cut still leaving a tab one the part. Next was a curved exacto blade for a medium size handle and the blade was too thick and smashed rather that cut the tabs. Then I remembered my scalpel I used in wood modeling and it cut cleanly adjacent to the part leaving no stubs.
55027546-F91E-48A0-A00E-654FF094BAAA.jpeg
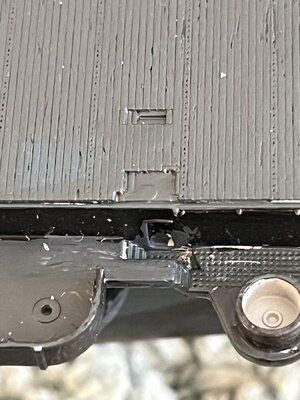
Getting the two pieces into their proper alignment proved more difficult than I had imagined as they kept trying to use the same dot of ca glue. The wooden deck openings are along each side of the deck with no support on the outside to support the tiny pieces.
04AABA2F-DF2A-4807-9A25-BCC1BA27ECFE.jpeg
Getting these to fit correctly required me to use the fast ca glue for the larger part and the slow ca for the smaller part. Setting the larger part was done using the sides of the opening as a guide. Holding the part with tweezers setting the longest side agains the opening with the corner in the corner setting the part without needing to make any alignments. Placing a drop of thick ca allowed the part to float and lightly be pushed into position before the glue set.
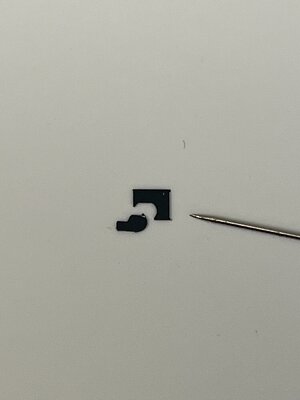
These are a pair of parts ready to be placed on the deck. With a straight pin for size reference.
082C5833-2610-4988-99FD-A04A414F5B36.jpeg
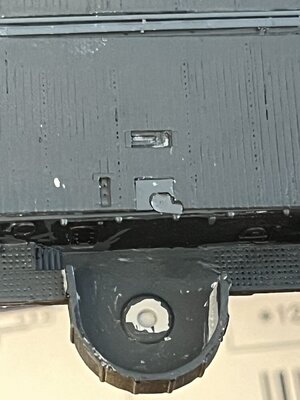
A typical installation one down and seventeen to go. I'll be busy for awhile
D1B26996-6234-4C79-90C0-35EF0F75EA79.jpeg
I just hope that all these deck photo etch parts will enhance the image adding to interest to viewers.
 
your wooden flight deck has rows of holes in it which is used to tie down the aircraft to the deck.
 
Correct I see the rows of holes and the photos of planes being tied to the deck using the holes. The holes I referenced are not it rows and numerically are insufficient for plane tie downs. I was asking about the 42 located along the perimeter of the deck.
 
do you see them on the CVE-90 USS Thetis Bay Booklet of General Plans Sheet 6 Flight Deck?
 
Viewing general plans of CVE-90 does not show the rectangular features along the perimeter as on the CVE-73 Gambier Bay. These rectangular openings are also alone the leading and trailing edges of the flight deck. I'm still not sure what the purpose is of the openings.
 
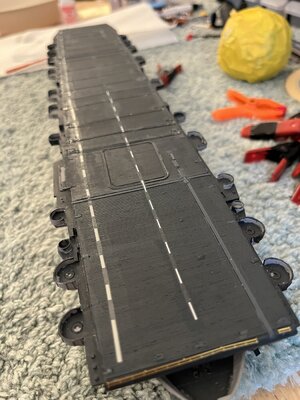
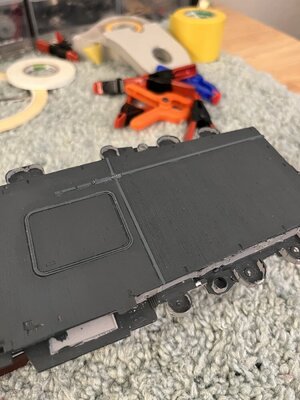
Deck complete with all the photo etch from the wooden deck kit.

7849C083-2374-42B3-B293-41E082049A18.jpeg
72FEC041-71A3-4859-8932-25B17BD9B59C.jpegha
Looking at the deck its hard to see where all these photo etch parts are positioned is what needs to be placed. When all complete a light coat of flat clear will be applied.

50DE3E59-4E4F-4387-A068-549455DB9C8E.jpeg
 
We've had a lot of rainy days to paint outside but I did manage to fit in the time for spraying flat clear on the deck to start the water slides or decals. Following the numerical sequence of the slides first were the starboard edge stripe dashes. Next the center. I've never used the decal setting fluid and it really seems to be allowing the long pieces to conform to the deck rough surface. When done I'll spray another coat of flat clear to protect the slides/decals.
Starting:
D7734B71-66EF-4FBD-9A93-C218DAE4E6C8.jpeg
 
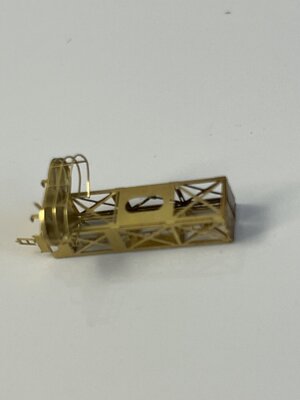
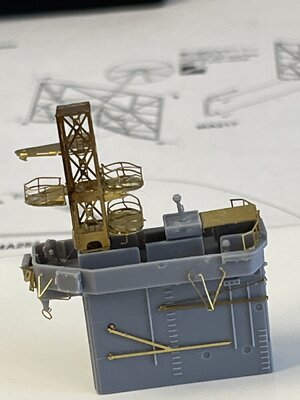
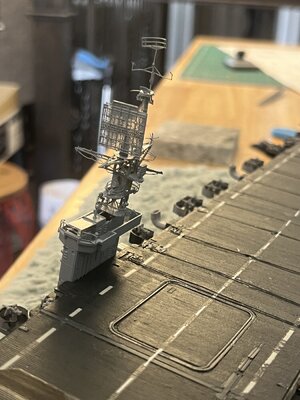
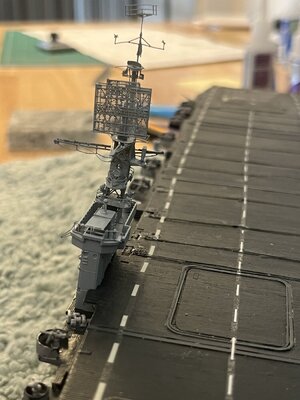
With the flight deck finished it was time to start folding up some photo etch. Studying the superstructure, or castle as the crews called it, and the photo etch for the mast I decided that I'd start with the mast. I realized the mast could only be partiality assembled before attaching the castle. I came up with an idea to use double sided tape holding the castle while assembling the mast.
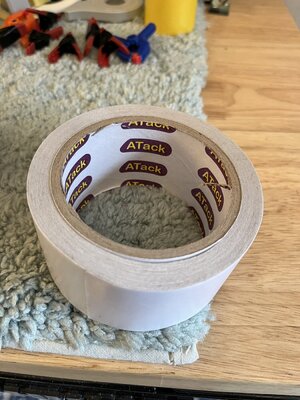
Just a note of double sided tape. I found this heavy duty double sided tape on amazon.
54E10A9B-D734-4E7A-ACAF-C7083552C5FB.jpeg
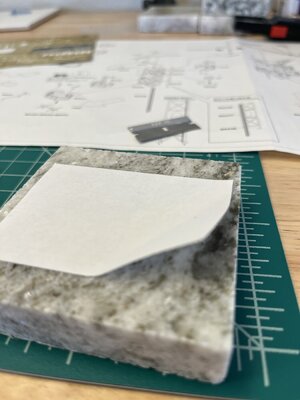
It is very sticky so I found the its best when not attached to a large surface as its very hard to remove. I've found the granite samples to be excellent to hold things while working. I just put a piece on the granite and peel off the vinyl paper.
FA874E4C-48EA-443B-A2EE-9EF8A62D6D2C.jpeg
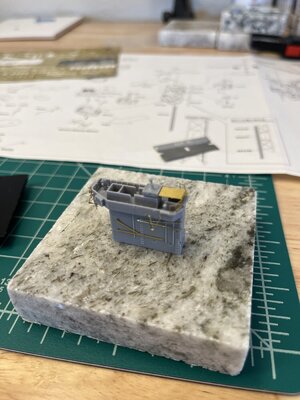
I now can place the part securely on the granite and have a stable piece to work on.
31B98242-198E-4914-8360-CEA5A0411998.jpeg
I started with the mast. Looking at the drawings and pe it was just remove from the sprue and fold up to a square. Went as I thought. I then realized that there are slots for the different platforms.
9BEA9BD4-1AA6-477C-9EA6-1C323AD60886.jpeg
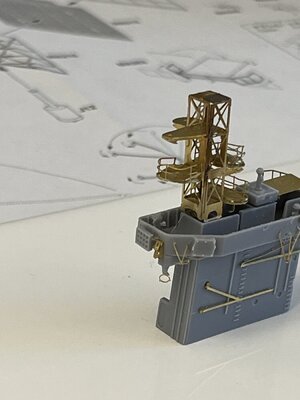
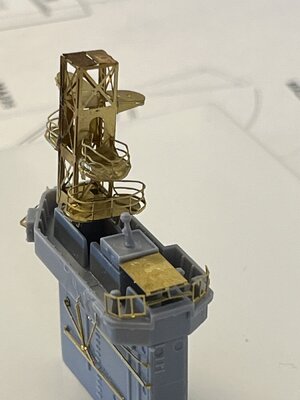
Now realizing that the slots were correct forward and aft but starboard and port sides had platform slots. The slot for the port platform was on the starboard side because I had folded the mast mirrored. I was afraid of taking the mast apart and bending the fragile pe so rather than going into a slot I bent the platform tabs 90 degrees and hooked them into the mast interior. Now with castle securely attached to the granite with the double sided tape I attached the platforms to the mast.
4AE1E4FF-EC08-4135-91E5-A92C51ECD458.jpegF440C9A9-6662-4B34-A1DC-19AC1C193B9A.jpeg0CB22D3F-BADA-4A32-9A88-B6A2D540F965.jpeg
All the handling bent some platform railings that need to be straightened and then on to building the upper parts with antennas.
 
Been awhile since my last post. Many other distractions including the photo etch. I have finished the port side photo etch and small kit parts. The photo etch still needs to be painted to match the camouflage. I know I won't be able to spray so I have to paint the features by brush. I was worried how I'd be able to keep the safety nets from being clogged with paint. That still needs to be done so I'll post later.
Some photos of the port side features
IMG_1147.jpeg

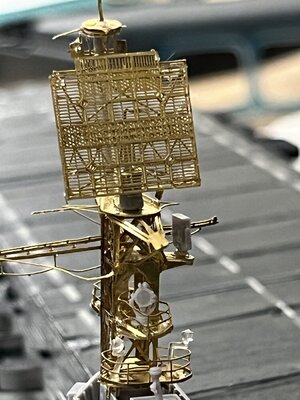
I also finished the photo etch on the castle and wanted to show its detail.
IMG_1120.jpegIMG_1122.jpeg


I know that we've all made detail parts/assemblies for our models and I'm sure I'm not alone to want to see our work installed. So here is the castle with the pe painted and ready for installation. (it is dry fit to be glued later)
IMG_1154.jpegIMG_1157.jpegIMG_1156.jpeg

Back to the starboard side

IMG_1121.jpeg
 
Finally completed the photo etch and now ready for painting. I will not but the castle on until the very last thing as it is so delicate. While painting the photo etch I'll build airplanes. I think I'll stage a Wildcat on the catapult and another staging while the balance parked on the aft deck with wings folded. I only have 9 planes in the kit so it seems a little small so I might buy another set of planes. Don't know yet. I will wait until they are all built and see how the deck looks.
Here are some photos of the starboard side photo etch completedIMG_1159.jpegIMG_1160.jpegIMG_1161.jpegIMG_1162.jpeg
On to painting
 
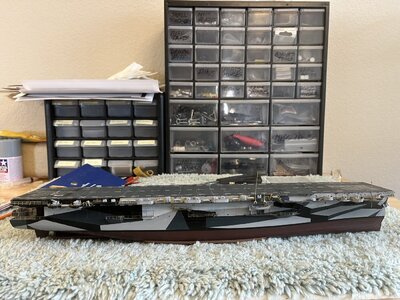
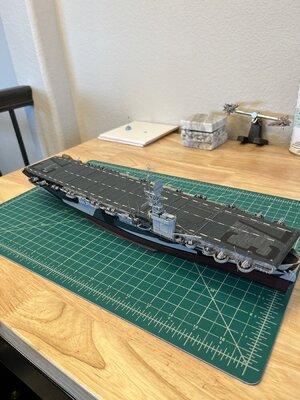
USS Gambier Bay is complete. While researching the web for Gambier Bay information I came across a post on youtube about catapults on escort carriers. The video is a Army training movie and thought someone might find it interesting.
"Catapulting off a US Navy Carrier - 1944 video was uploaded by Zenoswarbirds
Pictures of completed ship
Starboard side
IMG_1166.jpeg

Port side
IMG_1167.jpeg

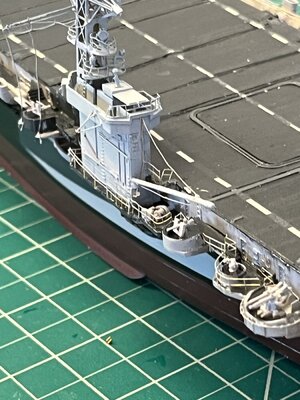
View of completed castle with railing and hoist
IMG_1168.jpeg

Now on to aircraft
 
My Congratulations for finishing this model - very well done
 
I guess you mean this video - really interesting

 
I want to thank everybody for the kind remarks and many likes. Learning how to make plastic models and so much to learn with photo etch has been a great experience. I have the Hasegawa Akagi box under my work bench wait to start.
Again thank you all
 
Back
Top