Nice dancing chorus.....
-

Win a Free Custom Engraved Brass Coin!!!
As a way to introduce our brass coins to the community, we will raffle off a free coin during the month of August. Follow link ABOVE for instructions for entering.
-

PRE-ORDER SHIPS IN SCALE TODAY!
The beloved Ships in Scale Magazine is back and charting a new course for 2026!
Discover new skills, new techniques, and new inspirations in every issue.
NOTE THAT OUR FIRST ISSUE WILL BE JAN/FEB 2026
You are using an out of date browser. It may not display this or other websites correctly.
You should upgrade or use an alternative browser.
You should upgrade or use an alternative browser.
Vasa - 1:65 DeAgostini [COMPLETED BUILD]
- Thread starter dockattner
- Start date
- Watchers 147
WOW !
I am not sure how I managed to miss this build log, but I am now glad that I did. You are certainly too modest as this is going to be a very nice fine build.
I am not sure how I managed to miss this build log, but I am now glad that I did. You are certainly too modest as this is going to be a very nice fine build.
Welcome aboard Donnie! Pretty atypical build log so far in the sense that half of it is acrylic paint on metal castings. I'll be getting back to what you are all more familiar with eventually. I've determined that the best approach for me will be to drift back and forth between woodworking and painting. That way I won't melt away when one aspect eclipses my frustration/failure threshold. If a normal ship build is half woodworking and half rigging (is that true?) - then this build will be divided into thirds with all the art pieces (yes, there are that many - 118 down and there are hundreds remaining).WOW !
I am not sure how I managed to miss this build log, but I am now glad that I did. You are certainly too modest as this is going to be a very nice fine build.
Last edited:
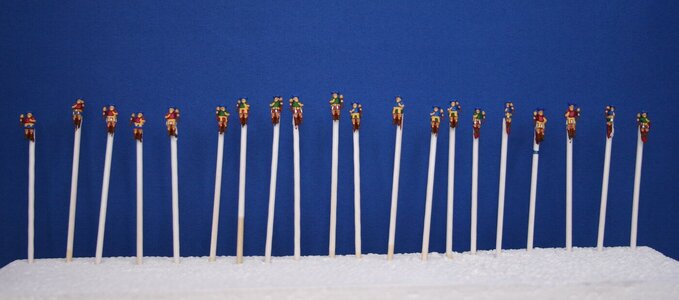
Swedish Rockettes. These are the principal dancers - the line dancers come next.Nice dancing chorus.....
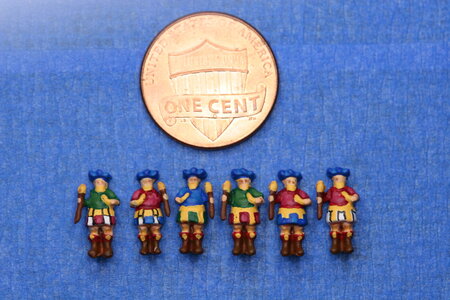
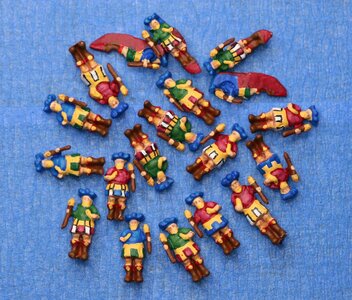
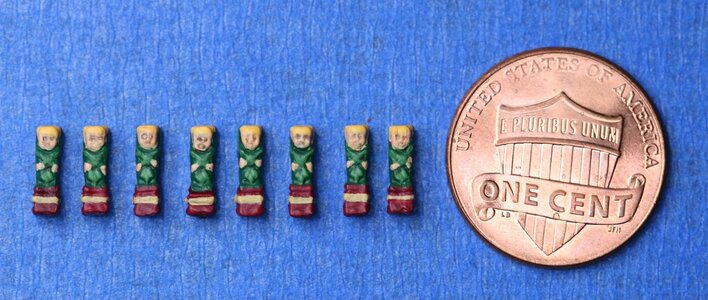
That sure is a lot of tiny pieces to paint, and you’re doing a great job! I’m looking forward to seeing them on the ship, and I can imagine you are too.And now... Introducing the Swedish Line Dancers!
View attachment 191623
View attachment 191624
View attachment 191625
Turns out they weren't any harder to paint than the principal dancers. By which I mean they were not any easier either.
Much appreciated Dean! Yes, so small that I have now switched over to manual focus on my camera. Autofocus can't 'find' the ornaments in favor of the coin or the background - and I'm using a good camera (Canon 20D).That sure is a lot of tiny pieces to paint, and you’re doing a great job! I’m looking forward to seeing them on the ship, and I can imagine you are too.
Sometimes my eyes also won't focus, but I haven't found the setting to correct that yet...
Very nice work Paul and I am sure you now know this is THE kit for Vasa if you are prepared to stump the extra cash over the others.
Kind Regards
Nigel
Kind Regards
Nigel
I used to work in dental labs and a few clinics... we used to a powder product called "alginate" as it was actually made from seaweed. Plus there are numerous other duplicating materials.Hey Everyone,
I ran into a minor problem and I thought I would share my solution with you. As I understand it these forums are useful to not only get help, but also to give help. My experience as an orthodontist provided me with an unexpected solution that might be useful to one of you some day.
One of the king/fool castings was flawed:
View attachment 188754
The surface is quite irregular and rough compared to the other castings. I could have worked with it - but this painting is challenging enough and trying to recover from a poor casting would have made a hard job even harder.
I determined to make a duplicate of one of the better castings for use as a replacement. I considered several options: I have a 3D scanner in my office that could have made a perfect/detailed digital map - but 3D printing will not reproduce the surface detail at this scale (at least the 3D printers I have available to me). Instead, I took an imprint of a better casting using the same material your dentist uses to take an impression of your teeth for a crown or a bridge.
View attachment 188747 View attachment 188746
View attachment 188748
View attachment 188749
I then poured up the mold in plaster (using a vibrating platform to remove any air bubbles in the plaster is essential here).
View attachment 188750
The finished product:
View attachment 188751
Voila! After trimming up the plaster duplicate(s) I painted them along with the metal castings...
View attachment 188752
Which one is the metal original and which one is plaster? I'm declaring this technique a WIN!
Most dentists still use material like this though it is getting less common with the introduction of 3D scanning technology. In a pinch give your local dentist a call and see if they can help you out - it took no more than 30 minutes to fabricate the duplicates.
Hope this might be useful to someone in the future - or prompt you to come up with an even better idea...
Thank you, Nigel! The cash outlay is significant - plus I find myself upgrading materials as the build proceeds. But the castings are terrific and at the end of the day (end of the years?) the extra cost will fade into the background. The ROI is "having a great time" so the joy/$ ratio is off the charts.Very nice work Paul and I am sure you now know this is THE kit for Vasa if you are prepared to stump the extra cash over the others.
Kind Regards
Nigel
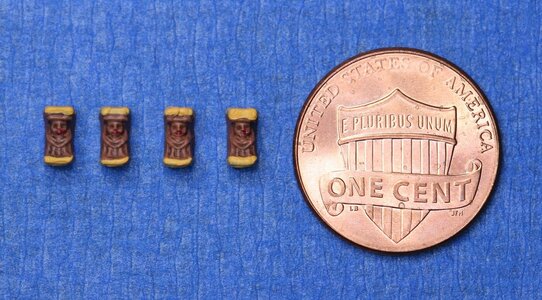
Imagine having that many pieces to CARVE for the real ship! I am always amazed by what they accomplished in the past with these big ships.View attachment 191743
View attachment 191744
Me: I wonder if everyone is getting sick of looking at tiny metal bits?
You: I wonder if he realizes we are getting sick of looking at tiny metal bits?
These little guys will show up again on façades that cover various bulkheads at the level of the upper decks.
I am an artist as well as a model builder, so personally I never get tired of looking at things people craft or paint. That’s the joy of building these ships, woodworking, painting, etc.
In the end, you will have a beautiful ship to proudly display that you built!
But you do have a ship that’s in need of a few boards here and there...lol.
Am I seeing things or are his painted parts getting smaller and smaller? The detail is getting plain crazy! Great job!
more picts please
- Joined
- Oct 15, 2017
- Messages
- 1,190
- Points
- 443

Oh my gosh!!!! If I tried to paint all those miniature figures, it would take me a week to get my vision back. Super job Doc! I'm hoping you used some type of magnification tool. If so, was it anything special? Looks like you have some great momentum on your project. Continued success mate!And now... Introducing the Swedish Line Dancers!
View attachment 191623
View attachment 191624
View attachment 191625
Turns out they weren't any harder to paint than the principal dancers. By which I mean they were not any easier either.
Cheers,
Ken
Thanks much Ken! Yes, I use a 1.5x magnifier/light combo thing. Nothing fancy - just something you would use chairside to read a book. I tried a headgear/magnifier that you sort of wear like glasses - it has interchangeable lenses with more magnification - but it made me seasick. I may try those again when I get to working directly on my ship - for now painting decorations happens benchtop so my reading lamp works nicely. The only issue I run into is sometimes the handle of my paintbrush crashes unexpectedly into the lamp.Oh my gosh!!!! If I tried to paint all those miniature figures, it would take me a week to get my vision back. Super job Doc! I'm hoping you used some type of magnification tool. If so, was it anything special? Looks like you have some great momentum on your project. Continued success mate!
Maybe others have better suggestions for us?
Paul,
It’s a good thing there is a zoom in function on my PC, that way I can see the big effort it takes to paint all those tiny pieces. What great job.
Jan
It’s a good thing there is a zoom in function on my PC, that way I can see the big effort it takes to paint all those tiny pieces. What great job.
Jan
I appreciate your kind words, Jan. It just takes time. If someone was contemplating this beautiful ship you need to really budget for painting time. And probably plan on more painting time than you think. The castings are nice but not perfect and they all need to be filed to remove flash and any creases created by the molding process. Next they need to be cleaned with a degreaser/acetone. Then they need to be primed using a priming paint for fine work (not what you would use for patio furniture). Then comes the painting. And the repainting. And shading if the piece is big enough for that. And then highlighting. And then touching up what you ruined while shading and highlighting. And...well, you get the point...Paul,
It’s a good thing there is a zoom in function on my PC, that way I can see the big effort it takes to paint all those tiny pieces. What great job.
Jan
The line dancer army was about one day's work. But rewarding when done. Mini-victories along the way for what is otherwise a seemingly endless project!
For the record, faces are the hardest, but at 1:65 some of these faces are actually too small to really see - notwithstanding what the zoom function on your PC tells you
Last edited:


